If you are looking for a way to cook the perfect Thanksgiving turkey, this post is for you! Butterball has been in the cooking products business since 1919 and their products have been used by millions of people. This manual post will go over how to use your Butterball Electric Turkey Fryer, from start to finish. It also contains the saught after cooking times chart that lists various different food items and the amount of time required to cook them in this fryer. If you are looking to deep fry a complete turkey then this guide has the information you need within it to do so.
Sections in this Manual
Manufactured by Butterball
MANUAL CODE: 9801160007 161108-GB
CSA CERTIFIED TO UL STANDARD 197
Protected under U.S. Patents and International Patents and Patent Pending
6,711,992; 6,941,857; 7,412,922; 7,981,459; D625,545; D644,475
READ ALL INSTRUCTIONS
When using electrical appliances, basic safety precautions should always be followed, including but not
limited to the following:
- The maximum turkey size is 22 lbs (9.98 kgs.).
- A short cord is provided to prevent the possibility of entanglement or tripping that may occur with the use of a longer cord.
- Never move appliances when oil or water is above 100 °F(37 °C).
- Do NOT touch hot surfaces. Use lifting hook handle.
- To protect against electric shock, do NOT immerse the cord, plugs, or any part of the control panel in water or other liquids.
- Do NOT move appliances while in use or HOT.
- This is an ATTENDED appliance. Do NOT leave this appliance unattended during use. The heated liquid inside the cooking pot remains dangerously HOT for a period of time after use.
- Unplug from outlet when not in use and before cleaning. Allow cooling before removing parts for cleaning and storing.
- Do NOT operate this appliance with a damaged cord, plug, or after appliance malfunctions, or has been damaged in any manner. Contact Masterbuilt Customer Service for assistance at 1-800-215-7204.
- Accessory attachments not supplied by Masterbuilt Manufacturing, Inc. are not recommended and may cause injury.
- Do NOT use outdoors, the appliance is for indoor use only.
- Do NOT let cord hang over the edge of table or counter, or touch hot surfaces.
- Do NOT place on or near a HOT gas or electric burner, or in a heated oven.
- ALWAYS attach breakaway cord w/plug to appliance first, then plug the cord in the outlet.
- To disconnect, dial down the temperature button Fº to the OFF setting, then remove the plug from the outlet.
- Do NOT use appliances other than intended use.
- If oil begins to smoke, IMMEDIATELY turn the appliance off.
- NEVER overfill the cooking pot. Do NOT exceed the max fill line.
- Open lid with caution to prevent being burned by escaping steam.
- Add food slowly to avoid boil over.

IMPORTANT INFORMATION: DO NOT USE AN EXTENSION CORD.
- Use of extension cord increases the risk of entanglement or tripping.
- Use of extension cord causes loss of energy and appliance may not heat properly.
- Do NOT operate the appliance with a damaged cord, plug, or after appliance malfunctions, or has been damaged in any manner. Contact Masterbuilt Customer Service for assistance at 1-800-215-7204.
DO NOT RETURN TO RETAILER For Assembly Assistance, Missing or Damaged Parts
Call: MASTERBUILT Customer Service at 1-800-215-7204. Please have Model Number and Serial Number available when calling. These numbers are located on silver label on back of unit.


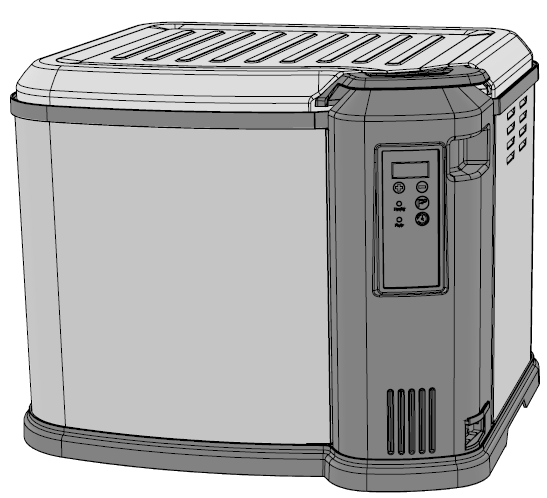
Insert hinge on lid (2) into the outer shell (1). Lid will snap into place when assembled correctly.
Note: To remove lid push tabs together on the outer shell, and pull lid up.

Insert inner pot (4) into the outer shell (1).
Insert inner pot at an angle to fit valve into the side opening of the outer shell.

Slide control panel and element (7) down onto mounting bracket (shown in Step 2) on side of the outer shell (1).
Note: The control panel is correctly attached when the heating element is positioned inside the inner pot. The Control panel must be correctly attached for the appliance to operate. A built-in safety switch on the control panel will prevent elements from heating if not mounted properly.

Place basket (3) inside the inner pot (4).

Insert breakaway cord (10) into connection on the outer shell (1). Make sure “This Side Up” is shown on top for proper connection.
