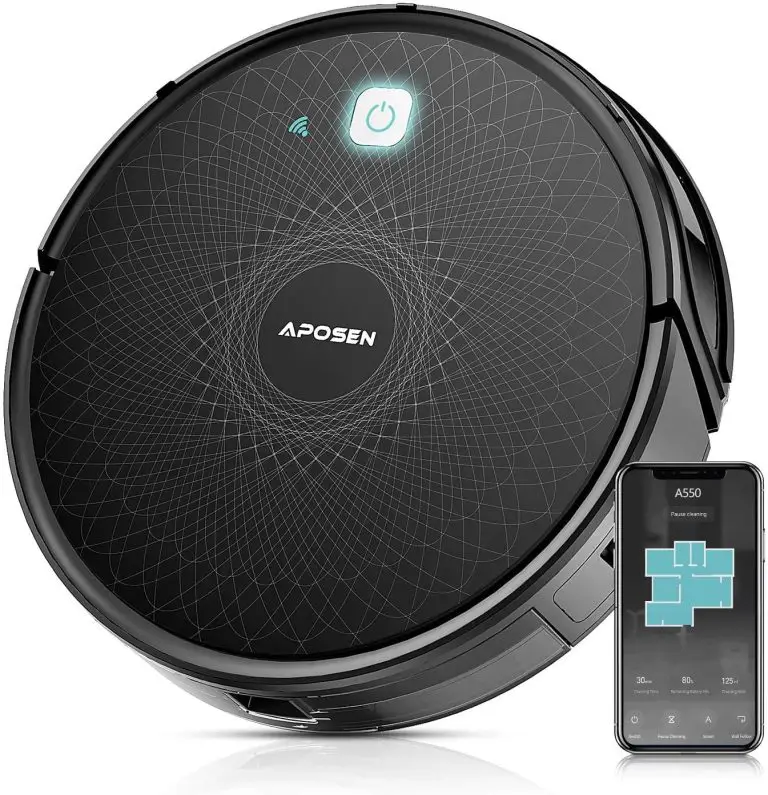
APOSEN Robot Vacuum Cleaner A550
Safety Regulations
Please read the manual carefully before using the product and keep this instruction for reference.
- Products cannot be used by children under 8 years of age or people with mental disabilities. If you need to use it, please do so under the supervision of the guardian. Please do not let children ride on the product or play the product as a toy. Do not use the product in a room where infants sleep.
- Problems that may arise in cleaning products should be eliminated as early as possible. Clean the power cords and small items on the floor to prevent the product from being blocked during the cleaning process. Fold the edge of the carpet to the underside of the carpet,and keep the hanging curtains, tablecloths, etc from touching the ground.
- If there is a suspended environment such as a staircase, test the product first to see if it can detect the edge of the suspended area without falling. Protective barriers should be installed at the edge of the suspended area to prevent falling products. Make sure that the protective equipment does not cause personal injury.
- Please follow the manual in the instructions to use the product. Use only accessories recommended or sold by the manufacturer.
- Ensure that the power supply voltage meets the voltage indicated on the cradle.
- Used only in indoor home environments. Do not use in outdoor, commercial or industrial locations.
- Use only original rechargeable batteries and charging docks that are unique to the manufacturer. Do not use non-rechargeable batteries. For battery specifications, please refer to ” Technical Data”.
- Ensure that dust boxes and filter materials are installed before using products.
- Use of the product in an environment with open flames or fragile items is prohibited. Do not use the product in extreme heat (above 104 F) or very cold (below-41 F).
- It is forbidden to close the body’s hair, clothes, fingers and other parts close to the opening and operating parts of the product.
- Do not use the product on wet or watery ground.
- It is forbidden to absorb any items such as follows:
- stones, waste paper.
- flammable materials such as toner, toner or toner for printers or copies.
- -cigarettes, matches, ash, or other items that may cause a fire.
- Do not take any product that is burning, such as Do not place items at the suction outlet. Do not use products when suction is blocked. Clean dust, cotton wool, hair, etc. at the suction port to ensure smooth air circulation at the suction port.
- Use the power cord carefully to avoid damage. Do not use the power cord to drag or pull the product and the product charging stand. Do not use the power cord as a handle. Do not clamp the power cord into the door seam.
- Do not pull the power cord at sharp corners and corners.
- Do not use the product if the power cord, power outlet or charging stand are damaged. Do not use the product when it is not working properly due to dropping, damage, outdoor use or water ingress. To avoid injury, the product should be repaired by the manufacturer or its after-sales service.
- Turn off the product switch before cleaning and maintaining the product.
- Before discard of the product, remove the product from the charging stand, turn off the product power switch, and remove the battery. Even if the product has been severely damaged, it is forbidden to incinerate the product, and the product battery may cause an explosion. Please dispose of used batteries in accordance with local laws and regulations.
- If you do not use the product for a long time, please turn off the product.
FCC Statement
This device complies with Part 15 of the FCC Rules. Operation is subject to the following:
(1) This device may not cause harmful interference.
(2) This device must accept any interference received, including interference that may cause undesired operation.
Product Instruction
What’s in the box

Assembly Name

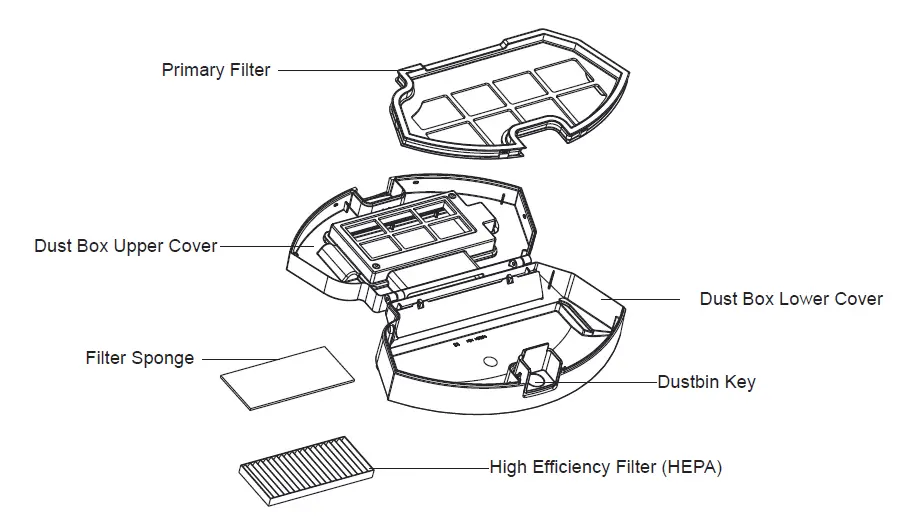
Dust box
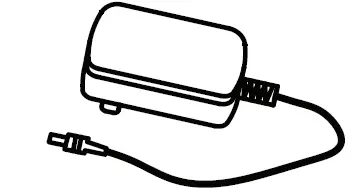
Changing Stand Assembly
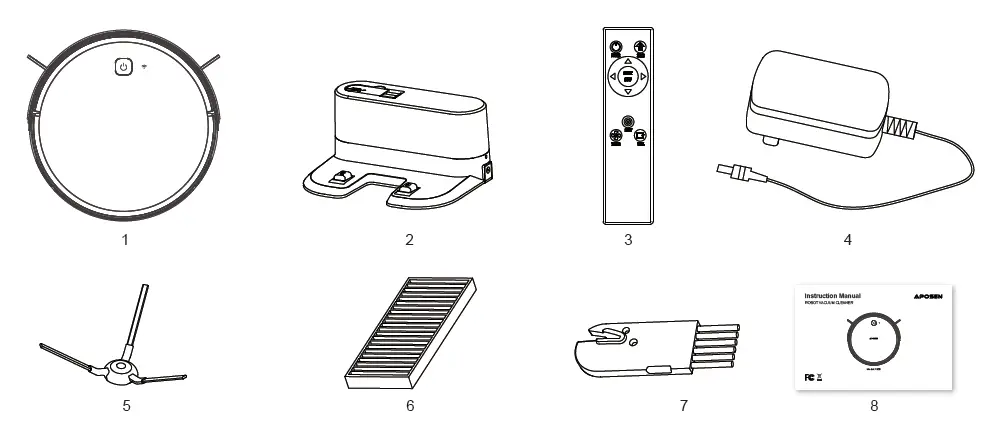
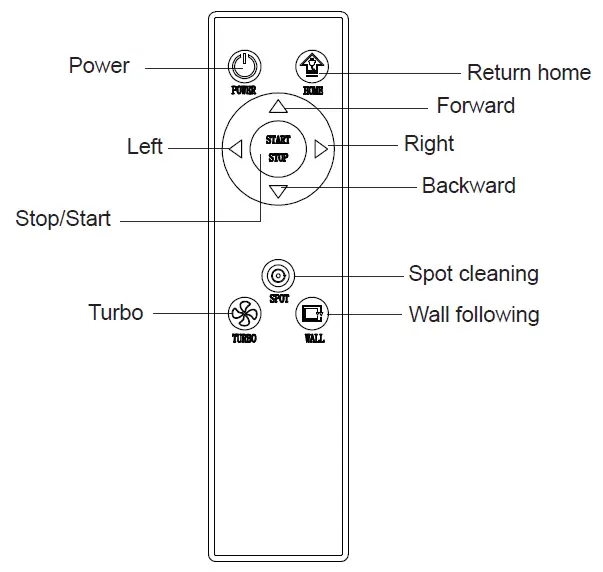
Remote Control
Parameter

|
Product Model | A550 |
| Input | 100-240V/50-60Hz | |
| Power | 30W | |
| Battery Capacity | Li-ion 2500mAh | |
| Dust Box Capacity | 0.6L | |
| Cleaning Time | 110 mins | |
| Charging Time | 5H |
| Battery | DC 3V(AAA) |
| Remote Control Method | Infrared |
| Emitting and Receiving Distance | ≤5M |
|
|
Input | 100-240V/50-60Hz |
| Output | 19V / 0.6A |
Install 2 AAA batteries before using the remote control for the first time. Make sure the positive and negative ends are facing the correct polarity direction as marked in the battery compartment.
Attention
Considerations
Please refer to the following guidelines to check the cleaning area before the cleaner works.
- Power lines and other debris scattered on the ground may trip up product must be removed.
- Please roll the carpet tassels or work on short-hair rugs.
- A gap of less than 8 cm on the bottom of the furniture may catch the product.
If you need to clean it, please remove the furniture.
- A guardrail should be placed at the edge of the duplex to ensure safe operation of the product.
Rapid Operation
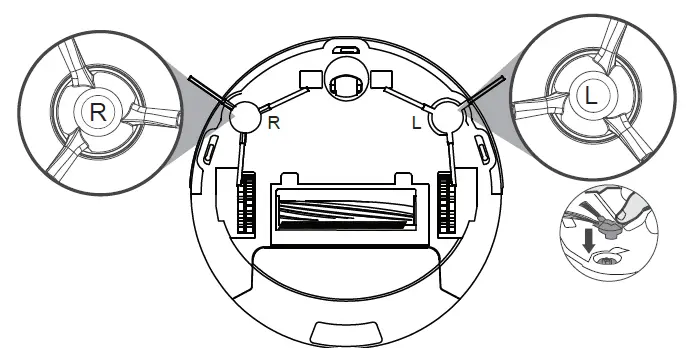
Install The Side Brushes
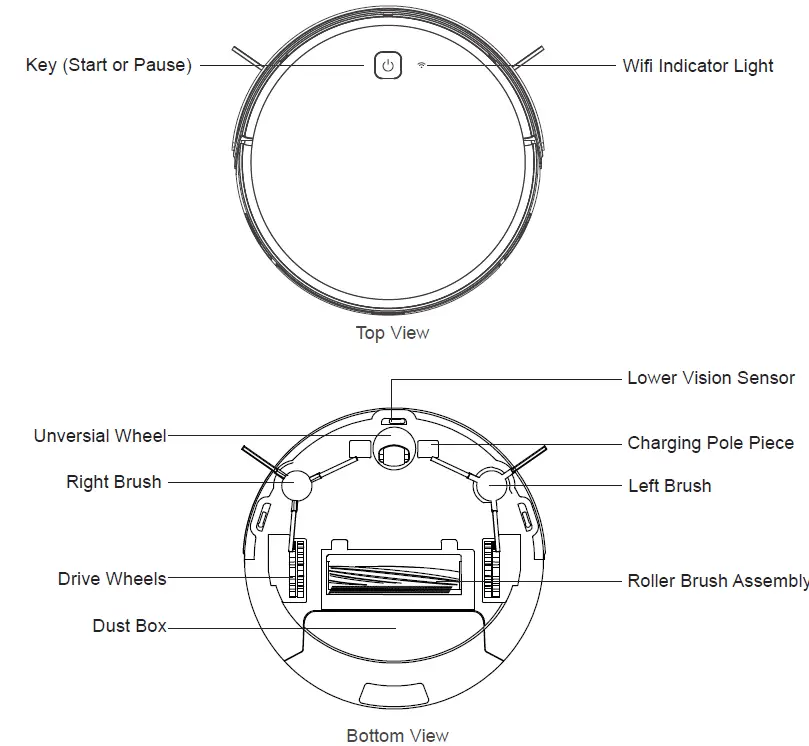
Please install the right brush into the right bottom mounting port of the machine, the left brush into the left bottom mounting port of the machine, and ensure that the two side brushes are in place.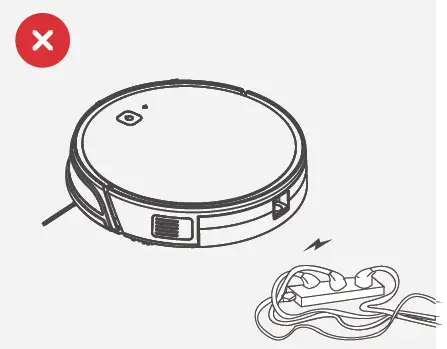
Charging Operation
- Connect the adapter to the charging stand
Place the charging stand flat against the wall. Do not place objects in the left and right 1M and the front 2M,and do not have objects with strong reflection surfaces such as mirrors.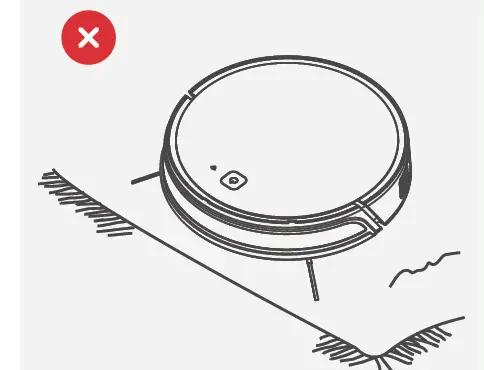
- Turn On The Master
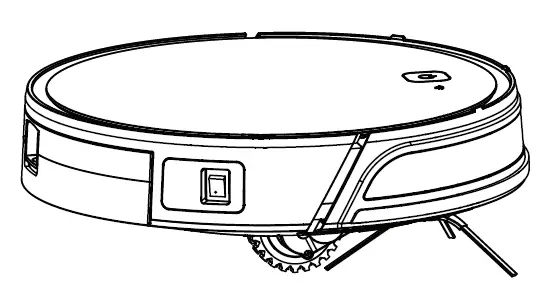
Turn on the side power switch, “I” is the turn, “O” is the turn off. After the master finishes working, it is recommended not to shut down; keep the master in a state of charge so that it can perform its next job better.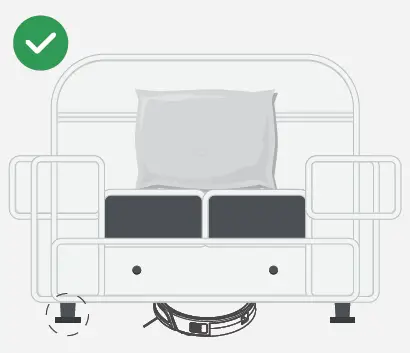
- Master Charge
Place the master in the charging stand and pay attention to the charging pole piece. Turn on the power switch, the robot will enter standby mode.
Red light flashes indicates that the battery need to be charged.
Blue light breathing light flashes indicate charging.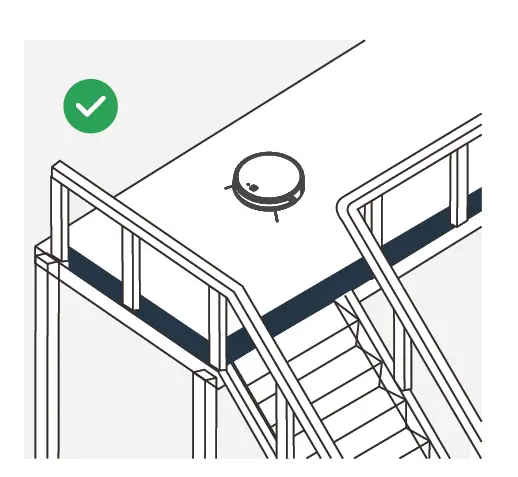
- Start/Stop Cleaning
- Start or stop by pressing the master’s key or the remote control’s key.
Note: Before starting the mode, make sure that the outer ring of the key is blue and the master is in the state of being awakened. If the master does not wake up, short press the master to wake it up.
The master enters the sleep state after 10 minutes of standby, and the key light is off. - If you need to select another mode, please refer to the(Mode Selection)section.
- Start or stop by pressing the master’s key or the remote control’s key.
- Mode Selection
In order to adapt to different ground conditions and achieve deep cleaning, this product has a variety of cleaning modes, which can be selected by remote control as needed.
The remote control can switch any mode directly.
Before starting the mode, make sure that the outer ring of the key is blue and the master is in the state of being awakened. If the master does not wake up, short press the master to wake it up.
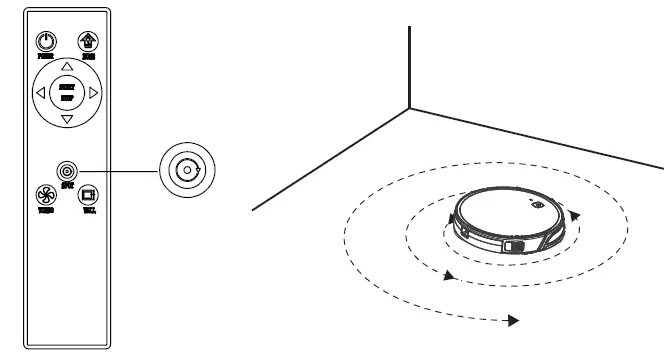
Fixed-point Mode
It is suitable for the ground environment where the garbage is concentrated. The master centralized cleaning in the designated area, and master centralized cleaning with the “spiral”route.
Edge Mode
It is suitable for cleaning at the corners of the room. The master is cleaned around the periphery of a fixed object (such as a wall) and cleaned back to the charging stand.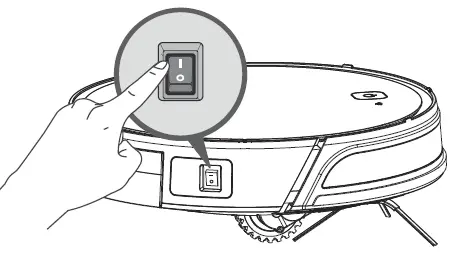
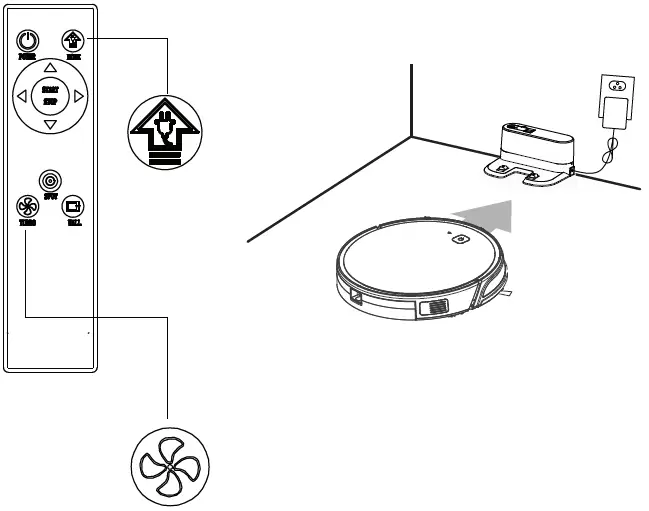
Return Charging Mode
During the cleaning process, the master can sense that its power is insufficient, and automatically find the charging stand for charging.
You can press the “home” button or press the “power” button twice to make the master return to the charging stand for charging.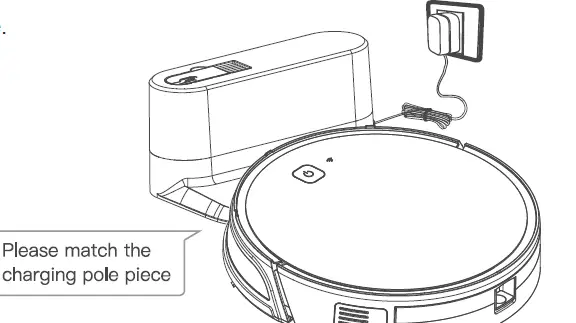
Suction Power Setting
Press the “Turbo” button on the remote control. With three modes of suction power(Max/Standard/Low). Standard mode can be used for daily cleaning while the Max mode would increase the suction and Low mode would lower the noise.
Roller Brush Assembly and Cleaning
Remove the roller brush brush cover plate, remove the roller brush, cut off the hair wound on it and then use the cleaning brush to clean it.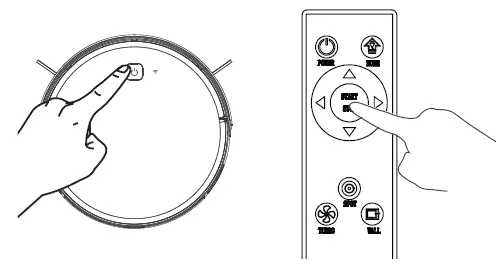
Set roller brush assembly: take out sucking assembly first, set the roller brush, cover the board and press it to lock.
Maintenance
Dust Box and Filter
When cleaning and maintaining the master and its accessories, turn off the master and unplug the charging stand.
1. Remove the dust box, open the dust box cover, and clean the garbage.
2. Remove dust filter. HEPA is not recommended for washing. Please pat and remove ash.
3. Flush the dust box and the primary filter.
4. Dry the dust box and the dust filter assembly and keep it dry to ensure its service life.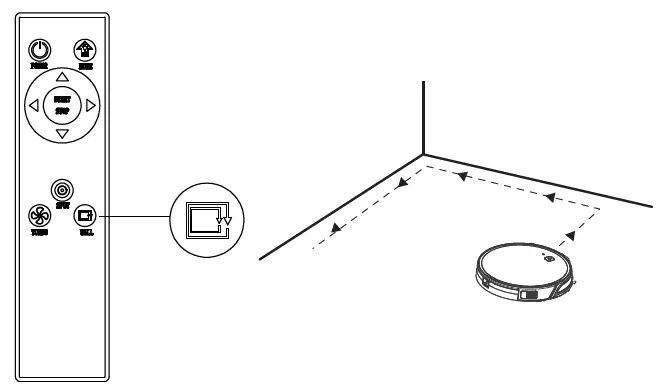

 Please let these parts dry naturally for more than 24 hours.
Side Brushes
Cleaning Side Brushes
Pull out the side brush and wipe it with a clean rag.
Other Assembly
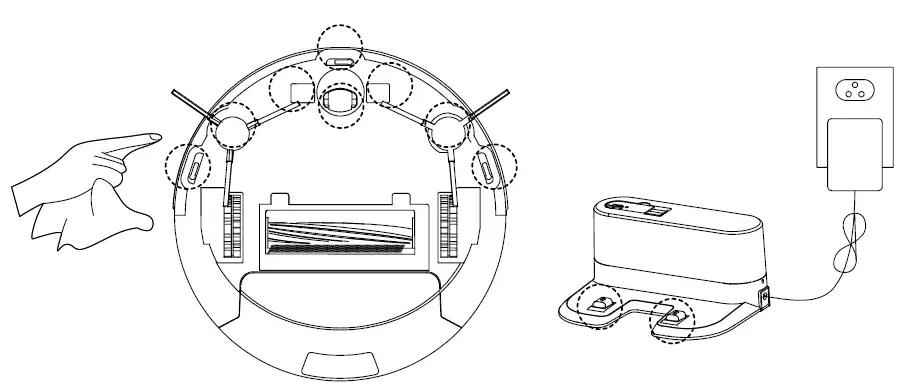
Cleaning the universal wheel to reduce hair entangle.
Clear down the sensor to ensure the sensitivity of the sensor.
To clean the charging pole pieces, use a dry rag to clean the charging poles on the bottom of the master or the charging stand.

If you will not use the product for a long time, please remove the battery and keep it in a safe place. If the battery leaks, remove the battery and wipe the battery compartment clean.
This product uses a high-life battery and does not require frequent replacement. If you need to replace, you can contact our company for after-sales service replacement.
Alarm Tips
|
Cause of Issue |
Display light |
APP content |
Solution |
|
Side brush |
Red light on |
Please check side brushes are jammed |
Clean side brush |
|
Fan abnormality |
Red light on |
Motor cooling error |
Please wait an hour before using |
|
Roller brush |
Red light on |
Please check roller brush is jammed |
Clean roller brush |
|
No dustbin inside |
Red light on |
Please check if dustbin is installed correctly |
Please check whether dustbin put in position |
|
Failure of ground detection |
Red light flush |
Please check if wheels are on the floor |
Clean the ground detector and make sure I am not picked |
|
Out of trouble |
Red light flush |
Please help me, I’m stuck |
Please take me to the open space |
|
Low battery |
Red light flush |
Battery low, please recharge me |
Manually move the cleaner back to the dock station recharging |
| Abnormality charging |
Red light flush |
Please turn on the power switch for charging |
Please turn on the power switch for charging |
|
Gyroscope fail |
Red light flush |
Navigation failure, please restart me |
Turn on the switch again |
FAQ
Please install the right brush into the right bottom mounting port of the machine, the left brush into the left bottom mounting port of the machine, and ensure that the two side brushes are in place.
Q : What should I do when it can not work on the carpet ?
A : We don’t suggest you make it clean the carpet. It’s better for you to set the barrier around the carpet on the app.
Q : What if the strength of vacuuming is weak?
A : Fist of all, check whether the dust bin is full and the robot is full charged. If it does,you can try to switch it to the higher mode. For litter which is difficult to collector, try to clean it with Spot Cleaning Mode.
Q: What if my charger has difficulties charging the robot?
A : Please make sure you turn on the charging stand before charging and check if the electrical sheet is connected to the charging stand ( Put it back manually or press the Power button when the robot is 1 meter in front of the charging stand.)
Q : What if the robot can not find the charging stand?
A : The charging stand should be placed against the wall with at least 1 meter clearance each side and 2 meters in front .Sometimes you can just put it back manually.
Q: What should I do if the remote control is out of order?
A:
1. The remote control has an effective control distance of 5 meters. Please make sure that the remote point to the master.
2. Replace the battery with a new one if the battery has run out capacity.
3. Please make sure the master power switch is turned on and has sufficient power to complete the operation.
4. Please wipe the infrared emitter of the remote control and the infrared receiver of the master with clean towel.
Q: Why does the master return to charging after cleaning?
A: The working time of the master varies depending on the complexity of the room, the amount of garbage and the cleaning mode.
Customer Service
1. The 1-Year Limited Warranty is valid for products purchased from our APOSEN only, starting from the date of original retail purchase against defects in quality and materials under normal, non-commercial use.
2. According to the requirements outlined in this instruction manual, subject to the following conditions and exclusions.
WHAT IS COVERED
- The repair or replacement of your APOSEN appliance if your APOSEN appliance is found to be defective due to faulty materials, workmanship or function within 1 years of purchase or delivery (if any part is no longer available or out of manufacture, APOSEN will replace it with a functional replacement part).
- This warranty provides, at no extra cost to you, all labor and parts necessary to ensure your machine is in proper operating condition during the warranty period.
WHAT IS NOT COVERED
- Under your APOSEN guarantee, APOSEN shall not be liable for costs of repair or replacement of a product incurred as a result of:
Accidental damage, faults caused by negligent use or care, misuse, neglect, careless operation or handling of the APOSEN appliance which is not in accordance with this APOSEN Operating Manual; - Machines purchased from an unauthorized dealer;
- Use of parts and accessories other than those produced or recommended by APOSEN;
- Repairs or alterations carried out by unauthorized parties or agents;
- Use of the machine other than for normal domestic purposes within the United States, eg. for commercial or rental purposes;
- Reduction in battery discharge time due to battery age or use.
WARRANTY SERVICE
1. If you have a query about your APOSEN appliance, please contact the APOSEN customer service email : [email protected]
2. Please inform us your model name/number, purchase date, order number, machine problem and your requirement.
3. Your model number can be found on rating plate. For information on your rating plate see the inside front cover.
4. Please keep your purchase receipt in a safe place to ensure you have this information.
5. Service under this warranty will not extend the period of this warranty.
WiFi Connection
1. Please scan the QR code or search “Smart Life” and download App .
2. After the App is installed, please follow the App instructions to register the account and login.
3. Open the APP and click 「add device」、「Small Home App」、「Robot Vacuum」

4. Please make sure that the product is on ( like the picture below shows).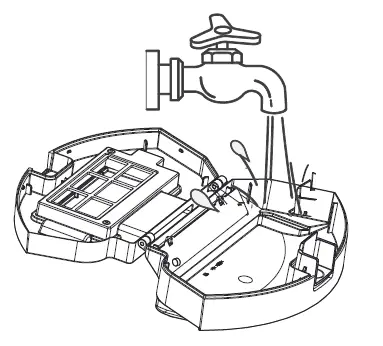
5. Push the front bumper and long press the until the flashes. When the WiFi indicator flashes, click the「Confirm indicator rapidly blink」on the APP.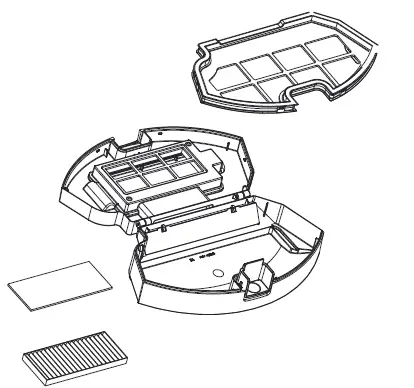
6. Input the wifi account and password.(Only supports 2.4G wifi now, 5G wifi can not be connected.)