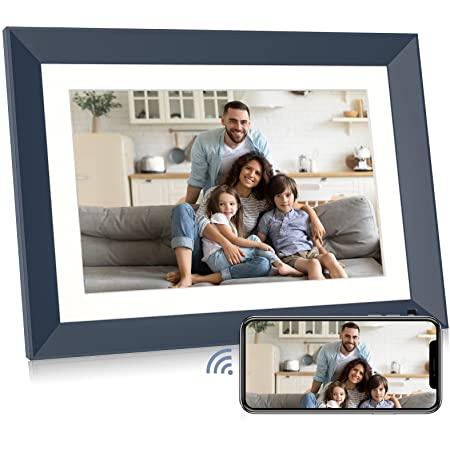
BSIMB BS-W11A 11 inch Smart Digital Picture Frame

WHAT’S IN THE BOX
1. 11” digital photo frame
2. AC/DC adapter
3. Quick Start Guide
4. User Manual
5. Micro USB Cable
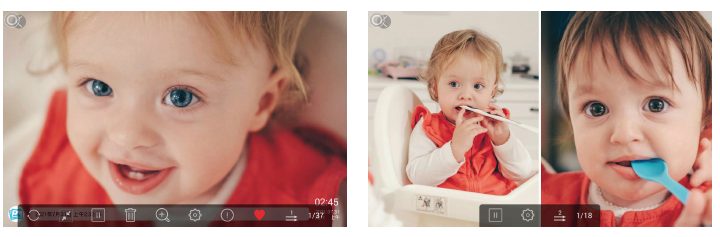
FRAME OVERVIEW
GETTING STARTED
1. Plug in your frame
Plug the socket in the back and connect the photo frame to a power source. The frame will power on in seconds. You can place the frame either in landscape or portrait mode
(we recommend you place it in landscape mode during the first setup).
2. Initial Settings
There are several initial settings ( Language, Wi-Fi, Nickname, City, Timezone etc.) when you enter the system for the first time.
3. Connect to Wi-Fi
You can connect to Wi-Fi during the initial settings or under the Wi-Fi setting. Select the Wi-Fi network you would like to connect to and enter the correct password if required. If your Wi-Fi network is not on the list, restart the router or move your frame closer to your router, wait for seconds and check it again.
Note:
- The photo frame supports 2.4GHz Wi-Fi networks only.
- A private Wi-Fi network is highly recommended.
UPLOADING PHOTOS AND VIDEOS
Upload Photos and Videos Via VPHOTO App
Download the VPhoto App
Please download and install the VPhoto app on your mobile device by searching VPhoto on the App Store or Google Play.
Create an Account
Open the VPhoto app, please set your user name and your profile photo.
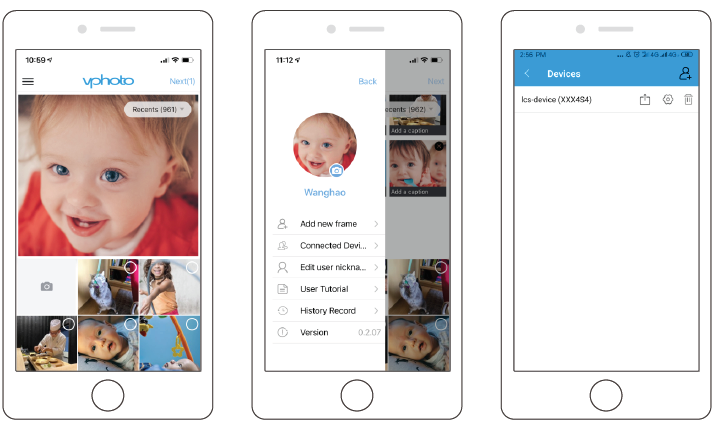
Pair Your Frame via the App
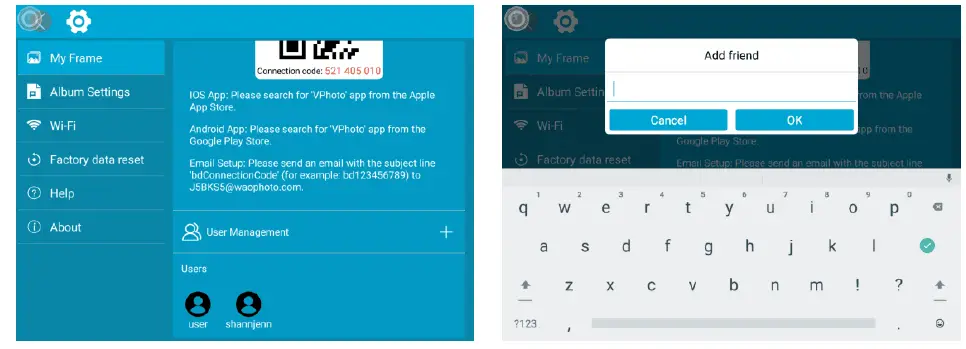
You will be required to enter the connection code or scan the QR code of your frame. It’s in [Settings→ My Frame] on your frame. Once the process is completed, you will see a pop up message [ Bind success].
Note:
- Connection Code is a 9-digit series number which can be found in your frame, device main interface→Settings →My frame.
- The Connection code and QR code will refresh every 12 hours.
- Before you view the connection code and QR code, Please make sure your frame is connected to Wi-Fi, otherwise the connection code and QR code will not load out.


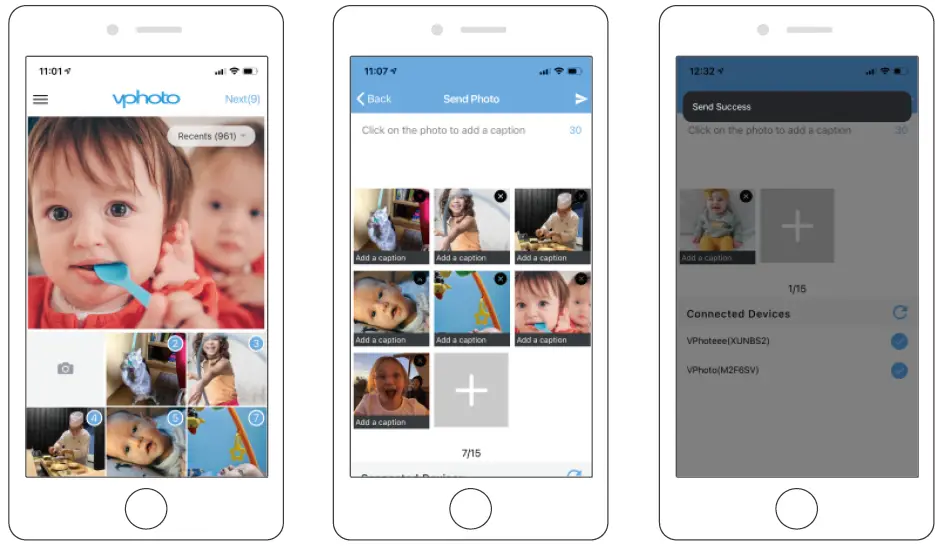
Upload Photos and Videos to Your Frame
After connecting the App to your frame, you can start adding photos and videos to your frame anywhere and anytime as below two ways:
- Select the photos or videos of your Albums of your phone to upload and choose the frame to send. Click the Next Step, you can write caption for each photo and choose the frame you want to send.Click the right arrow icon to confirm.
- Click Camera icon to take new photos or videos and choose the frame you would like to send to. Click the right arrow icon to confirm. The photo frame will receive the photos or videos in seconds, you can check the photo or video library on the frame.
Note:
- If the frame didn’t receive the photos or videos, please reboot the product or check the Wi-Fi network.
- Each video clip is limited to200MB
Invite Your Families&Friends to Connect Your Frame
Your families and friends can share their happy moments to your frame by following steps:
① Download and install the app.
② After opening App, please set user name and profile photo.
③ Get the connection code shared by you to connect to your frame.
④ Start sending the photos and videos to your frame.
Here are two ways to share you connection code:
- Take a picture of the connection code on the frame to send.
- Open your VPhoto App, click More icon on the upper left corner and choose Connected Device, select the frame you want your friend to connect, click the Share icon. You will receive a picture of QR code and Connection code. Send this to your families and friends.
Note:- Connection Code is a 9-digit series number which can be found in your frame, device main interface→Settings →My frame.
- The Connection code and QR code will refresh every 12 hours.
- Before you view the connection code and QR code, Please make sure your frame is connected to Wi-Fi, otherwise the connection code and QR code will not load out.

Upload Photos and Videos Via Email
You and your friends can also send photos and videos to the frame via your Email.
- Connect your Email address to the frame via two methods:
- By Pressing [+] in [Us er Management], then add mailboxes. You will receive an email to inform your binding request is completed and the way to send photos and videos to the frame.
- By emailing to the mailbox specified in [My Frame], with the subject: bd Connection Code ( For Example bd1234576789).
Upload Photos and Videos to Your Frame
After adding your email address to the frame, you can email photos and videos to the mailbox of the frame. Your photos and videos will be received in minutes, you can check the photo or video library on the frame. Each video clip is limited to 200MB.
Upload Photos and Videos Via USB Drive/Micro SD/SD Card
The frame can also support some external drive to add photos and videos to the frame.
1. Insert a USB drive/Micro SD/SD card into the frame, and wait for seconds, the frame will notify you when successfully connected.
2. Enter the Photo or Video library, click USB/SD card and you will see all the photos or videos stored in the USB drive/SD card.
3. Click the More icon at the upper right corner, select the photos or videos you would like to copy to the internal memory of the frame.
4. Click the Copy icon at the top then choose OK to import the photos or videos.
5. Your photos or videos will be reserved in internal storage in seconds, you can check the photo or video library on the frame.
Note:
- Max support a 64GB Micro SD/SD Card.
- Please remove all your external devices when you reset the photo frame.
- If you have too many files stored in the card, it will take more time to read.
- Not all models support external drive. Please take the actual product as the standard.
Upload Photos and Videos Via Computer
If you would like to upload large files to the frame, you can use computer to connect to your frame via USB cable simply.You can transferring photos and videos from computer in large quantities.
1. Connect your computer and frame with the USB cable.
2. Find your frame disk that named after the frame’s model number in your computer.
3. Add media files that you would like to play on your frame to exact sub-folder in your frame disk. (pictures into ‘Pictures’ folder, videos into ‘Movies’ folder, etc. )
4. In your frame, the photos, videos and music you upload from your computer will be stored in ‘Internal Storage’ in the library.
KEY FEATURES
Pictures Slideshow
Enter [Picture] in upper-left part of homepage. You will find [All], [Internal Storage], [SD Card], [USB], [Folder], [Favorites] and user list; you can check all pictures of each playlist and operate in batch.
- [All] is including pictures in internal storage and external device. The default playlist is [All], you also can choose[Internal Storage] by tapping one picture of it to start slideshow.
- [Internal Storage] is all of the pictures sending from app, email, copied from external device.
- [SD Card]/[USB], shows the pictures in external drive like USB Drive, Micro SD or SD card. To add pictures to [Internal Storage] from [SD Card]/[USB], you can click [┇] in upper-right corner, choose the pictures you want to add to [Internal Storage] then click [ ] and [OK] to confirm the process.
- [Folder], you can create folders and name them. Only pictures in [Internal Storage] can be added.
- [Favorites], you can add favorite to your photos. Only pictures in [Internal Storage] can be added favorites, you can tap [ ♡] on the bottom column while playing pict ures to add favorites to pictures.
Note:
- Only pictures in [Internal Storage] can be added into folders and to favorite.
- To delete some pictures, we highly recommend to operate in [Internal Storage] instead of [ALL]; Or please remove external device while deleting to avoid deleting files in your USB Drive/Card by mistake.
- Not all models support external drive. Please take the actual product as the standard. During the slideshow, you will have more tools to customize the slideshow just by touching the screen. You can tap [ ♡] to add the picture to you [Favorites] and set multi-display for fun.

Videos Slideshow
Choose [Video] in homepage, select the video you want to play.
Note: Video Clip shared from the app and email will show in the video library.
MULTIPLE FUNCTIONS
Music
Choose [Music] in the homepage, select the music you want to play.
Weather Forecast
Choose [Weather] in homepage, you can check the weather of three days. Both [℃] and [℉] are available, switch to the temperature format you want to use. By pressing [+] on upper-left part to add several cities, you can know the weather of the city you add.
Clock
Choose [Clock], you can choose the clock skin you like to present the time.
Alarm
Choose [Alarm] to set up alarm clock. [Add] for adding new alarm clock and [Edit] for adjusting the set time and deleting the alarm clock you choose.
GENERAL SETTINGS
[My Frame] shows your frame connection code and managing users.
• The Connection code and QR code will refresh every 12 hours. You can also refresh the code manually by .
• To nickname your frame, press the name of the frame on the right corner to edit; it willshow on the app when you connect the frame.
• For sending photos and videos to your frame via email, you can easily by press [+] at [User Management] to add the email address. Please refer to “UPLOADING PHOTOS VIA EMAIL” for details.
• At [Users], it allows you to manage the connected account of the frame. Pressing the account name, you can Views Photos/Remark Name/Delete User/Delete User&Photos.
[Album Settings]
Brightness
Adjust the brightness of the screen.
Sound
Adjust the media volume.
Touch sounds
Choose the sound on or off when touch the screen.
Assistive Touch
Turn on this button, the assistive touch will appear on the screen. It is a quick navigation key to help you easily go to the Home page and adjust the volume.
Language:
English, Deutsch, Español, Français, Italiano, русский, 日本語,简体中文 Choose the system language.
Slideshow
Set Slideshow time to make the frame automatically displays photos after a period time of inactivity.
Slideshow Mode
Choose either Sequential or Random mode to display photos.
Sort by
Choose the pictures to be sorted by time or name.
Caption
Turn on this button, the caption you write will be presented with the photo.
Date and Time
Set the date and time according to your preference.
Sleep
Set the Auto-On/Off time, as Sleep Schedule, to make the display automatically turn on and off at a specific time.
Motion sensor
Turn on this button, the frame will turn off when the room is empty for energy saving.
Notification sound
Choose to be notified new message with sound or not.
W i-Fi
Select the Wi-Fi you want you frame to connect with.
[Factory data reset]
- Click Factory data reset.
- Here are two kinds of reset:
- choose ‘Delete all users and restore the device to inactive’; device files will be reset and all bound users will be unbound.
- not choosing the option, only device files will be back to default setting. Bound users remains.
- Click OK to reset your frame.
[Help]
Simple guide for you to share your pictures.
[About]
It’s the product information about your frame like Version, Frame ID, Serial Number etc. When you contact us, sometimes our customer service may ask for frame information to better know the question. You may find it here.
TROUBLESHOOTING
1. Does the frame have to be plugged in all the time?
This frame needs to connect an DC outlet all the time.
2. Why this frame cannot connect to Wi-Fi?
It supports only 2.4GHz Wi-Fi networks, select the Wi-Fi network you would like to connect to and enter the password correctly if required. If your Wi-Fi network is not on the list, restart your router or move your frame closer to your router, wait for seconds and check it again.
3.Does this frame have to be Wi-Fi connected to work or just in the setup process?
This frame needs to connect to a Wi-Fi network for setup, receiving new photos/ videos, receiving user requests and software updates. Other than that, the frame can play photos or video without a Wi-Fi connection.
4. Why the frame does not have sound?
Please check whether the volume is correct and the player is not in Mute mode.
5. Can I share photos and videos to the frame?
Yes, you can share both photos and videos (up to 200MB) to the frame.
6. Can I cycle pictures and videos together?
You could only play photos or videos separately.
7. Can this frame automatically turn on/off at a specific time?
You can go to the Sleep setting and set the auto on/off time as you want.
8. Why there is no files after sharing video or picture to cloud server?
Please check whether the upload process is completed or not.
9. Why this frame cannot play the file?
Please confirm if the file format is compatible with the frame.
10. Can I change the image transitions and displaying speed?
Yes, the speed can be adjusted in bottom column while pictures are displaying.
CONTACTING US
For any inquiries with BSIMB products, please feel free to contact us, we will respond within 24 hours.
E-mail: [email protected]
Official website: http://www.bsimb.cc
DOWNLOAD RESOURCES
- BSIMB BS-W11A 11 inch Smart Digital Picture Frame [pdf] User Manual BS-W11A, 11 inch Smart Digital Picture Frame, BS-W11A 11 inch Smart Digital Picture Frame, Smart Digital Picture Frame, Digital Picture Frame, Picture Frame
- Read more: https://manuals.plus/bsimb/bs-w11a-11-inch-smart-digital-picture-frame-manual#ixzz7odgOTHpj
FAQ’S
How do I upload photos from my mobile device to the frame?
Open the VPhoto app, select the photo you would like to upload and tap “Upload”. The photo will be uploaded to your frame in seconds.
What is the difference between VPHOTO and VPhoto?
VPHOTO is a photo management application for iOS and Android devices. VPhoto is a photo management application for iOS devices only.
How do I add videos to the frame?
Open the VPhoto app, select the video you would like to upload and tap “Upload”. The video will be uploaded to your frame in seconds.
How do I delete photos and videos from my frame?
Open the VPhoto app, select the photo or video you would like to delete and tap “Delete”. The photo or video will be deleted from your frame in seconds.
What happens if I delete a photo or video from my mobile device but not from my frame?
Your frame will continue to display that photo or video. To remove it from your frame, please follow steps 1-3 again and tap “Remove” under that particular photo or video.
Can I use other apps on my mobile device while it is connected to my frame?
Yes, you can use other apps on your mobile device while it is connected to your frame (as long as the Wi-Fi connection is stable). However, please note that if you are using a 3G/4G network on your mobile device, uploading photos and videos may take longer due to bandwidth limitations. If this occurs, we recommend you connect your mobile device directly to your router via Ethernet cable instead of using Wi-Fi if possible. If this is not possible, we recommend you use Wi-Fi Direct instead of Wi-Fi (this feature may not be available on all mobile devices). Please refer to your mobile device’s manual for more details about how to use Wi-Fi Direct. If you are still having issues uploading photos and videos after trying these solutions, please contact our customer service center at [email protected] for further assistance.
What types of files can I upload via VPhoto?
You can upload photos in JPEG format and videos in MOV format via VPHOTO app only (VPhoto does not support uploading any other file formats). However, when using VPHOTO app on iOS devices, you can upload files in PNG format as well as JPEG format (VPhoto does not support uploading any other file formats on iOS devices). When using VPHOTO app on Android devices, you can upload files in PNG format as well as JPEG format (VPhoto does not support uploading any other file formats on Android devices). When using VPHOTO app on both iOS and Android devices, you can upload files
Can a digital frame work without Wi-Fi?
Although most digital picture frames require Wi-Fi to connect to services like Google Photos or Dropbox, there are some products available that don’t need Wi-Fi. Instead, they use a USB or an SD card to showcase photos and videos.
Can I transfer pictures from my iPhone to a digital picture frame?
Find your frame’s mobile app on the App Store (iPhone/iPad) or Play Store (Android). Once you install the app, follow the on-screen instructions to sign in or create an account. You can then easily transfer photos from your phone or tablet to your frame using the mobile app.
Can I delete photos from digital photo frame?
Delete files and folders on the frame
Use the remote control or onboard controls to select all the folders and files you want to delete. Remember that you can open a folder and repeat the same selection process to delete individual photos and sub-folders.
Where do the permanently deleted photos go?
When a computer deletes a file permanently, or the Recycle Bin is emptied, it is removing the reference to the file on the hard drive. Once the file header, or reference, is removed, the computer can no longer see the file. The file is no longer readable by the computer.
Can you view pictures on a digital frame without Wi-Fi?
Although most digital picture frames require Wi-Fi to connect to services like Google Photos or Dropbox, there are some products available that don’t need Wi-Fi. Instead, they use a USB or an SD card to showcase photos and videos.
VIDEO
BSIMB BS-W11A 11 inch Smart Digital Picture Frame