Dash AirCrisp Compact Air Fryer Instruction Manual
AirCrisp ™ Technology | 1.2 Quart Capacity | 1000 Watts

IMPORTANT SAFEGUARDS
IMPORTANT SAFEGUARDS: PLEASE READ AND SAVE THIS INSTRUCTION AND CARE MANUAL.
When using electrical appliances, basic safety precautions should be followed, including:
- FOR HOUSEHOLD USE ONLY.
- Remove all bags and packaging from appliance before use.
- Never leave appliance unattended when in use.
- Make sure the appliance is cleaned thoroughly before using.
- Keep all ingredients in the Basket to prevent any contact with heating elements.
- Do NOT cover the Air Inlet and the Air Outlet when the appliance is working.
- Do NOT fill the Basket with oil as this may cause a fire hazard.
- Do NOT touch the inside of the appliance while it is operating.
- The appliance has a built in Timer, and the appliance will automatically shut off after it counts down to zero. You can manually switch off the appliance by turning the Timer knob to zero counter-clockwise.
- The appliance complies with all standards regarding Electro-Magnetic fields (EMF). Under proper handling, no harm shall be inflicted on person(s).
- Do not use appliance for purposes other than its intended use.
- Do not use outdoors.
- To prevent the risk of fire, electric shock, or personal injury, do not put cord, plug, or appliance in or near water or other liquids.
- Never use abrasive cleaning agents to clean your appliance as this may damage the Compact Air Fryer and its nonstick surface.
- Only use the appliance on a stable, even, and dry surface.
- Never submerge the appliance in water or any other liquids.
- Do NOT operate this appliance with a damaged cord, damaged plug, after the appliance malfunctions, is dropped, or damaged in any manner. Return appliance to the nearest authorized service facility for examination, repair, or adjustment.
- Do NOT use the Compact Air Fryer near water or other liquids, with wet hands, or while standing on a wet surface.
- For maintenance other than cleaning, please contact StoreBound directly at 1-800-898-6970 from 7AM – 7PM PST Monday – Friday or email at [email protected]
- This appliance is not intended for use by persons (including children) with reduced physical, sensory, or mental capabilities, or lack of experience and knowledge unless they are provided with supervision and instruction concerning use of the appliance by a person responsible for their safety.
- This appliance is designed for household use only. It may not be suitable for environments, such as, staff kitchens, farms, motels, and other non-residential environments.
- The warranty is invalid if the appliance is used for professional or semi-professional purposes or it is not used according to instructions.
- Always unplug the appliance when not in use.
- Do NOT let the cord hang over edge of table, hang over the sink, or touch hot surfaces between each use.
- Allow the Compact Air Fryer to cool completely (it will take approximately 30 minutes) before assembling, disassembling, moving, cleaning,
or storing. - Check to make sure the voltage indicated on the appliance is compatible with the voltage supplied.
- Do NOT connect appliance to an external timer switch.
- Do NOT place the appliance on or near combustible materials such as a tablecloth or curtain.
- Do NOT place the appliance against a wall or against other appliances. Leave at least 4” of space on the back, sides, and above the appliance.
- Do NOT place anything on top of the appliance.
- Do NOT use the appliance for any other purpose than described in this manual.
- Do NOT leave the appliance unattended
while operating. - During hot air frying, hot steam is released through the air outlet openings. Keep your hands and face at a safe distance from the steam and the air outlet openings.
- Be careful of hot steam and air when you remove the Basket from the appliance.
- CAUTION: Surfaces may become hot during use.
- WARNING: Immediately unplug the appliance if you see dark smoke coming out of the appliance. Wait for the smoke emission to stop before you remove the Basket from the appliance.
IMPORTANT SAFEGUARDS: PLEASE READ AND SAVE THIS INSTRUCTION AND CARE MANUAL.
PARTS & FEATURES
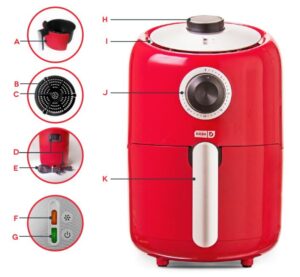
- A Basket
- B Fry Pan
- C Pan Handle
- D Air Outlet
- E Cord
- F Heating Light
- G Power Light
- H Temperature Control Dial
- I Air Inlet
- J Timer
- K Basket Handle
Tips & Tricks
GETTING READY
- Remove all packaging materials, stickers or labels.
- Clean the Basket and Fry Pan with hot water, with some dish soap, and a non-abrasive sponge. These parts are dishwasher safe.
- Wipe inside and outside of the appliance with a damp cloth.
DO NOT fill the Basket with oil as the appliance functions with hot air.
TIPS FOR GETTING STARTED
- Preheat your Compact Air Fryer before use to ensure better results.
- Smaller ingredients, like french fries, usually require a slightly shorter preparation time than larger ingredients, like chicken fingers. Larger ingredients only require a slightly longer preparation time.
- Shaking smaller ingredients halfway through the preparation time optimizes the end result and can help prevent uneven frying. Some ingredients require shaking halfway through the preparation time.
- Avoid preparing extremely greasy ingredients in the Compact Air Fryer.
- Snacks that can be prepared in an oven can also be prepared in the Compact Air Fryer.
- Excess oil from the ingredients is collected on the bottom of the Basket.
- Pull the Basket out of the appliance by the Handle and shake it. Then slide the Basket back into the Air Fryer.
- To remove large or fragile ingredients, lift the ingredients out of the Basket with a pair of heat-safe nylon or silicone tongs.
- Once the batch is ready, the Air Fryer is instantly ready for the next batch.
REHEATING IN AN AIR FRYER
You can also use the Compact Air Fryer to reheat ingredients. To reheat ingredients, set the temperature to 300ºF for up to 10 minutes.
TIPS FOR MAKING FRIES
- For fresh potatoes, rinse and dry the potatoes thoroughly to remove excess moisture and starch. The optimal amount of fries is 1lb. or less.
- Shake, shake, shake. Shaking smaller ingredients halfway during the preparation time optimizes the end result and can help make results more even and consistent. Resume frying until crispy.
- Once the batch is ready, the Air Fryer is instantly ready for the next batch.
TIPS FOR BAKING
- Pre-made dough also requires a shorter preparation time than homemade dough.
- Place a small baking tin or oven dish in Compact Air Fryer Basket if you want to bake a cake or quiche, or if you want to fry fragile ingredients or filled ingredients.
- To remove large or fragile ingredients, lift the ingredients out of the Basket with a pair of nylon or silicone tongs.
MEAT & POULTRY
Once frying is complete, slide the Basket out and use tongs to remove ingredients containing fat such as poultry or red meat. For ingredients such as chips or vegetables not containing animal fat or excess oil, remove the Basket and simply empty the ingredients out onto a serving dish.
NOTE: Any ingredients with animal fat will yield excess oil that will be collected at the bottom of the Basket. When removing these ingredients from the Basket, use tongs to remove each piece and avoid flipping the Basket over, as this will cause the oil residue to leak on the ingredients.
Using YOUR Compact Air Fryer
CAUTION: Do not touch the Basket during the frying and immediately after use, as it gets very hot. Only hold the Basket by the Handle.
NOTE: During the hot air frying process, the Heating Light process turns on and off from time to time. This indicates that the heating element is maintaining the temperature.
- Place the Compact Air Fryer on a stable, horizontal, and even surface and plug it into the wall socket.
Note: Do NOT place the appliance on a non heat-resistant surface.
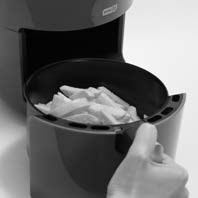
- Carefully pull the Basket out of the Air Fryer and place the Fry Pan inside with the Pan Handle facing up.
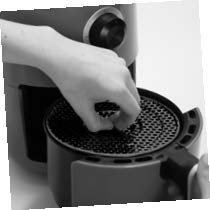
- Place ingredients in the Basket, then slide the Basket back into the Air Fryer.
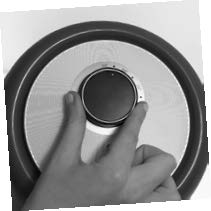
- Adjust the Temperature Control Dial to the specified temperature.
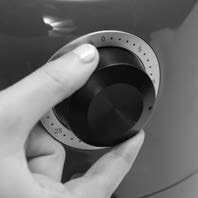
- Turn the Timer to your recipe’s specified time and now the Heating and Power Light will turn on.
- Once the Timer bell goes off, the frying session is done. Check if the ingredients are ready. If the ingredients are not ready yet, simply slide the pan back into the appliance and set the Timer to a few extra minutes.

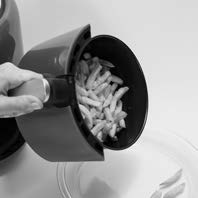
- Once frying is complete, pull out the Basket and remove any larger ingredients (e.g. beef, chicken, meat) using tongs. For smaller ingredients (e.g. chips, vegetables, or ingredients with no excess oil), simply take the Basket and empty the ingredients out onto a serving dish.
- Unplug the Compact Air Fryer from the wall and allow 30 minutes for the appliance to cool after each use.
NOTE: Remove the Basket to let the appliance cool quicker. - Clean the appliance after every use.
- Do not use metal utensils or abrasive cleaning agents when handling the Compact Air Fryer as this may damage the non-stick coating of the appliance.
- Wipe the outside with a moist cloth.
- Clean the Fry Pan and Basket with hot water, a little dish soap, and a non-abrasive sponge.
- Remove any remaining residue with degreasing liquid.
- You may put the Fry Pan and Basket in the dishwasher as these parts are dishwasher safe.
NOTE: If dirt is stuck to the Basket, fill the Basket with hot water and some dish soap.
Let the Fry Pan and the Basket soak for about 10 minutes. - Clean the heating element with a cleaning brush to remove any food residue.
- Store the Compact Air Fryer once it is unplugged and all of its parts are clean and dry.
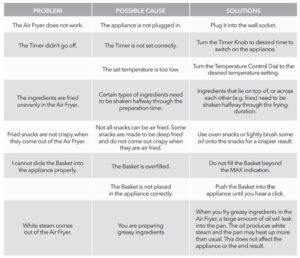
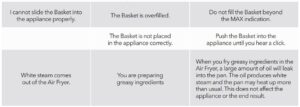
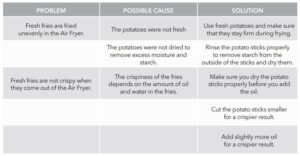
TROUBLESHOOTING

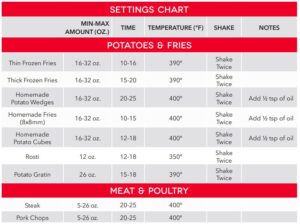
SETTINGS
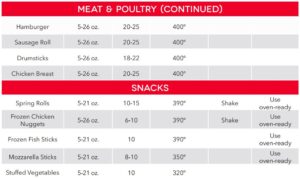
This table below will help you to select the basic settings for the ingredients.
NOTE: Keep in mind that these settings are general indications. As ingredients differ in origin, size, shape and brand, we cannot guarantee the best settings for your ingredients. Because the Rapid Air technology reheats the air inside the appliance instantly, pulling the Basket out of the appliance briefly during hot air frying barely disturbs the process.

COMPACT AIR FRYER
RECIPE BOOK
Enjoy cooking these delicious, easy, healthy recipes with your Compact Air Fryer!
ONION RINGS

INGREDIENTS:
- 1 vidalia onion, peeled, ends cut off, sliced into ¾” rings
- 1 cup all-purpose flour
- 1 egg, beaten
- 1 cup panko breadcrumbs
- ½ tsp kosher salt
DIRECTIONS: (Temperature: 400ºF Time: 15 minutes)
Dredge onion rings in flour and shake off excess. Combine panko and salt.
Dip onion rings in egg, then panko mixture to cover thoroughly.
Place into Air Fryer 4-6 at a time, overlapping rings as little as possible.
Fry for 15 minutes.
Serve with ketchup and mustard, if desired.

CRISPY ROASTED

INGREDIENTS:
- 2 cups broccoli florets
- 2 tsp vegetable oil
- ½ tsp kosher salt
- ½ tsp garam masala powder
- ⅛ tsp chili powder
- ½ lemon, cut into wedges (optional)
DIRECTIONS: (Temperature: 400ºF Time: 12–15 minutes)
Toss broccoli florets with vegetable oil and salt. Place broccoli in Air Fryer and fry 12-15 minutes until desired level of crispiness.
Remove from Air Fryer and toss with garam masala powder and chili powder.
Serve with lemon wedges, if desired.
CAULIFLOWER
BUFFALO BITES
INGREDIENTS:
Buffalo Sauce
- 1 tbsp unsalted butter
- ⅓ cup hot sauce
- 1 tsp honey
- 1 dash garlic powder
Cauliflower
- 4 cups cauliflower florets, sliced into ¼ inch pieces
- 1 tbsp vegetable oil
DIRECTIONS: (Temperature: 400ºF Time: 15 minutes)
Toss cauliflower with oil. Place cauliflower florets into Air Fryer in 2 batches.
Fry at 400ºF for 15 minutes, shaking once or twice throughout the cycle.
Melt butter in a small saucepan over medium-low heat. Add hot sauce, honey, and garlic powder to the butter and whisk to combine.
Toss the cauliflower florets with the hot sauce mixture and drain any extra sauce.
Serve immediately.
SRIRACHA

INGREDIENTS:
- 4 complete chicken wings, split into flats and drumsticks
- ½ cup sriracha
- ½ cup all-purpose flour
- 1 cup unsalted, plain breadcrumbs
DIRECTIONS: (Temperature: 400ºF Time: 25–30 minutes)
Place chicken wings on paper towels and pat to dry thoroughly.
Dredge chicken wings in all-purpose flour and shake off excess.
Dip chicken wings in sriracha, then breadcrumbs to cover thoroughly.
Place only flats or only drumsticks in Air Fryer and fry 25 minutes for flats and 30 minutes for drumsticks.

AVOCADO

INGREDIENTS:
- 1 avocado, pitted and sliced
- ¼ cup all-purpose flour
- 1 egg, beaten
- ½ cup panko breadcrumbs
- ¼ tsp kosher salt
DIRECTIONS: (Temperature: 400ºF Time: 10 minutes)
Carefully scoop avocado slices from avocado and separate. Place all-purpose flour in one large bowl, beaten egg in one large bowl, and panko breadcrumbs with salt in final large bowl.
Dredge avocado in all-purpose flour and shake to remove excess flour. Coat avocado in egg mixture, then panko breadcrumbs. Shake avocado to remove excess panko breadcrumbs.
Place into Air Fryer. Fry at 400ºF for 10 minutes, shaking once halfway through cycle.
ZUCCHINI

INGREDIENTS:
- 3 cups zucchini, sliced into ¼” thick rectangular fries (approx. 1 zucchini)
- 1 cup all-purpose flour
- 3 large eggs, beaten
- 2 cups panko breadcrumbs
- 1 tsp kosher salt
- 1 tsp parmesan cheese, grated (optional)
DIRECTIONS: (Temperature: 400ºF Time: 20 minutes)
Toss zucchini with flour and shake off excess. Dip zucchini wedges into the egg to coat, then toss thoroughly into the panko.
Place 1 cup of wedges at a time into Air Fryer and air fry for 20 minutes, shaking once halfway.
SWEET POTATO

INGREDIENTS:
- 2 sweet potatoes, cut into ¼” rectangular strips
- ¼ tsp cornstarch
- ¼ tsp kosher salt
DIRECTIONS: (Temperature: 350ºF Time: 10 minutes and 5 minutes)
Place sweet potato strips into cold water. Let soak 30 minutes. Pat dry with paper towels. Toss sweet potatoes with cornstarch until just lightly coated.
Place one single layer of fries into Air Fryer and fry at 350ºF for 10 minutes.
Remove from Air Fryer and shake. Air fry again at 400ºF for 5 minutes.
Toss immediately with salt..

CRUNCHY
DILL PICKLES

INGREDIENTS:
Special Dip
- 2 tbsp mayonnaise
- 2 tbsp ketchup
- ¼ tsp yellow onion, minced
Pickles
- 1 cup dill pickles, sliced into ¼ inch thick circles
- ½ cup all-purpose flour
- 2 large eggs, beaten
- 1 cup panko breadcrumbs
- 1 tsp Cajun seasoning
- 1 tsp dried basil
- 1 tsp dried oregano
DIRECTIONS: (Temperature: 400ºF Time: 10 minutes)
Placed the sliced pickles on paper towels and pat dry. Place all-purpose flour in one large bowl, beaten eggs in another large bowl, and panko breadcrumbs with Cajun seasoning and herbs in a final large bowl.
Dredge the pickles with all-purpose flour and shake to remove the excess. Coat the pickles in the egg mixture, then in the panko breadcrumbs.
Shake pickles to remove any excess. Place them into the Air Fryer. Fry at 400ºF for 10 minutes or until crispy, shaking once halfway through the cycle.
Mix the mayonnaise, ketchup, and minced onion together to serve as a dip, if desired.
CRISPY
KALE CHIPS

INGREDIENTS:
- 1 bunch dinosaur kale, stemmed, chopped into large pieces
- ½ tsp kosher salt
- 2 tsp olive oil
Mexican Inspired
- ¼ tsp ancho chile powder
- 1 tsp lime juice
Indian Inspired
- ¼ tsp curry powder
- ¼ tsp garam masala
DIRECTIONS: (Temperature: 400ºF Time: 6-8 minutes)
Toss kale with salt, olive oil and your choice of toppings. Place into Air Fryer, roughly 1 cup at a time. Air fry for 5 minutes before checking. Shake and air fry for another 1-3 minutes, depending on how crispy you like your chips.
SPRING
ROLLS

INGREDIENTS:
- 1 cup garlic chives, cut into 2-3” slices
- 2 cups shiitake mushrooms, sliced
- 1 cup mung bean sprouts
- 2 cups red or green cabbage, shredded
- 2 tsp toasted sesame oil
- 1 tsp chili oil (optional)
- soy sauce, to taste
- 10-15 spring roll wrappers
DIRECTIONS: (Temperature: 350ºF Time: 20 minutes)
Heat sesame and chili oil in large sauté pan on medium heat until slick and shiny. Add garlic chives, shiitake mushroom, bean sprouts, cabbage and soy sauce. Cook 10-15 minutes, stirring, until vegetables have cooked through and moisture has evaporated from the pan. Remove from heat and let cool until cool to the touch.
Place approximately 2 tbsp of mixture in straight line at base of spring roll wrapper,
½ inch from bottom edge and ¼ inch from sides. Tuck in both sides and roll spring roll wrapper to enclose mixture. Wet the top ½ inch of spring roll wrapper to seal roll.
Place 3-4 rolls in Air Fryer in one layer, avoiding overlapping or wrappers touching each other. Fry 12-15 minutes until wrappers are golden brown.

BUTTERMILK
FRIED CHICKEN
INGREDIENTS:
- 1 lb chicken thighs and drumsticks, bone in
- 2 tsp kosher salt
- 1 cup buttermilk
- 2 cups unsalted, plain breadcrumbs
- 1 tbsp unsalted Cajun seasoning
DIRECTIONS: (Temperature: 400ºF Time: 25 minutes)
Toss chicken with salt and place in medium bowl. Cover with buttermilk and mix to coat thoroughly. Let marinate in refrigerator 4 hours minimum. Combine breadcrumbs with Cajun seasoning and mix thoroughly.
Remove chicken from buttermilk and shake gently to drain excess. Dredge chicken
in breadcrumbs until fully covered.
Place in the Air Fryer, 2-3 pieces at a time, in one layer. Air fry at 400ºF for 25 minutes until the chicken is fully cooked and juices run clear.
CURRY FRIED
OKRA

INGREDIENTS:
- 1 cup okra, sliced lengthwise into 4 pieces
- ¼ tsp kosher salt
- ½ to ¾ tsp curry powder (depending on your preference)
- ¼ tsp cornstarch
DIRECTIONS: (Temperature: 400ºF Time: 15 minutes)
Toss okra with kosher salt and curry powder. Add cornstarch and toss until thoroughly mixed. Place in Air Fryer and fry 15 minutes at 400ºF.
CUSTOMER SUPPORT
We welcome and value all concerns and questions from our customers. Please do not hesitate
to contact us for product support, warranty, and maintenance related questions directly at:
1(800)-898-6970 from 7AM – 7PM PST, Monday – Friday, or by email at .
Feel free to give us a call any time
during the hours below: 1 (800) 898-6970

Hey Hawaii! You can reach our customer service team from 5AM to 5PM HAST.
And also, Alaska, feel free to reach out from 6AM – 6PM UTC.
WARRANTY
STOREBOUND, LLC – 1 YEAR LIMITED WARRANTY
Your StoreBound product is warranted to be free from defects in material and workmanship for a period of one (1) year from the date of the original purchase when utilized for normal and intended household use. Should any defect covered by the terms of the limited warranty be discovered within one (1) year, StoreBound, LLC will repair or replace the defective part. To process a warranty claim, contact Customer Support at 1-800-898-6970 for further assistance and instruction.
A Customer Support agent will assist you by troubleshooting minor problems. If troubleshooting fails to fix the problem, a return authorization will be issued. Proof of purchase indicating the date and place of purchase is required and should accompany the return. You must also include your full name, shipping address, and telephone number.
We are unable to ship returns to a PO box. StoreBound will not be responsible for delays or unprocessed claims resulting from a purchaser’s failure to provide any or all of the necessary information. Freight costs must be prepaid by the purchaser.
Send all inquiries to [email protected]
There are no express warranties except as listed above.
REPAIR OR REPLACEMENT AS PROVIDED UNDER THIS WARRANTY IS THE EXCLUSIVE REMEDY OF THE CUSTOMER. STOREBOUND SHALL NOT BE LIABLE FOR ANY INCIDENTAL OR CONSEQUENTIAL DAMAGES OR FOR BREACH OF ANY EXPRESS OR IMPLIED WARRANTY ON THIS PRODUCT EXCEPT TO THE EXTENT REQUIRED BY APPLICABLE LAW. ANY IMPLIED WARRANTY OF MERCHANTABILITY OR FITNESS FOR A PARTICULAR PURPOSE ON THIS PRODUCT IS LIMITED IN DURATION TO THE DURATION OF THIS WARRANTY.
Some states do not allow the exclusion or limitation of incidental or consequential damages, or limitations on how long an implied warranty lasts. Therefore, the above exclusions or limitations may not apply to you. This warranty gives you specific legal rights and you may also have other rights, which vary from state to state.
REPAIRS
DANGER! Risk of electric shock! The Dash Compact Air Fryer is an electrical appliance.
Do not attempt to repair the appliance yourself under any circumstances.
Contact Customer Support regarding repairs to the appliance.
TECHNICAL SPECIFICATIONS
Voltage 120V ~ 60Hz
Power Rating 1000W
Stock#: DCAF150_20180321_v1
1-800-898-6970 | @unprocessyourfood | bydash.com
FAQS
What is the difference between the Dash Compact Air Fryer and the Dash XL Air Fryer?
The Dash Compact Air Fryer is a smaller version of the Dash XL Air Fryer. It has a 1.2 quart capacity, 1000 watts, and an adjustable timer.
What is AirCrisp ™ technology?
The patented technology that allows food to be cooked in a fraction of the time compared to conventional cooking methods. This technology utilizes hot air circulation to circulate hot air around food for even cooking results.
What are some of the features of this appliance?
This appliance has a compact design, 1.2 quart capacity, 1000 watts, adjustable timer, dishwasher safe basket and lid, removable drip tray, non-stick coating on basket and drip tray for easy cleaning, and cord storage with cord wrap.
How do I clean my appliance?
To clean your appliance you can use warm water and soap or a non-abrasive sponge or cloth with warm water to wipe down all surfaces of your appliance. For tougher stains you can use baking soda or vinegar on your sponge or cloth to wipe down surfaces as well. You can also put your basket in the dishwasher for easy cleaning!
Does this model have Teflon?
Xylan is a PTFE (polytetrafluorethylene) just like the brand Teflon. Any concerns that you have about Teflon apply to Xylan.
Does it heat up quickly? How long does it take to reach the highest temperature?
it takes 15 minutes max to reach the highest temp
The tray in the basket has little rubber pieces on the side. Are these supposed to be removed before using it?
No, they stay on. They will not burn 🙂
in what country is this made?
Look on the website. The company’s name is posted.
What are the measurements?
You can fit 6/7 whole chicken wings in it
The temp dial is not going past 170. Am i missing something here? Need to get it to 400.
Turn it counter-clockwise.
Does the fat go to bottom of the cup?
A little does, yes it goes under the rack inside the cup. Depends on what you are cooking.
Why is price different then prime offer ?
Price is too high, can be bought for $30 less elsewhere.
anyone make breakfast toast with this?
Don’t know about toast but definitely can make biscuits
Is it ok for electricity for saudi arabia or not?
You would have to get in touch with the manufacturer. Works for me because its small and good for one person.
Can you open the fryer before the timer has gone off to check the food or do you have to turn the timer completely off?
You can open it to check the food, but we are not sure if that stops the timer or not. We are happy with the fryer though. It does a great job.
]]>
Dash Rapid Egg Cooker Instruction Manual
Instruction Manual
Model # DEC005
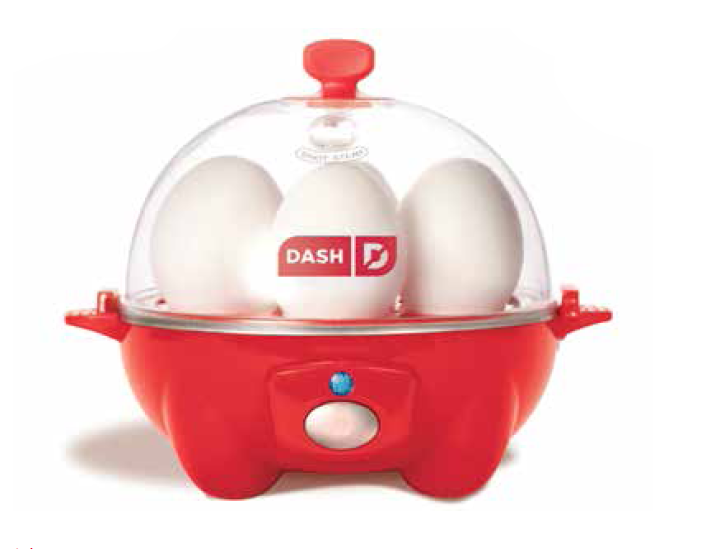
RAPID
EGG COOKER
One Touch Cooking | 6 Egg Capacity | 360 Watts

IMPORTANT SAFEGUARDS
IMPORTANT SAFEGUARDS: PLEASE READ AND SAVE THIS INSTRUCTION
AND CARE MANUAL.
When using electrical appliances, basic safety precautions should be followed, including:
- Please read and save instruction and care manual.
- Read all instructions carefully.
- Remove all packaging and labels from appliance prior to use.
- Never leave appliance unattended when in use.
- Make sure the appliance is cleaned thoroughly before using.
- Do not use appliance for other than its intended use. For household use only. Do not use outdoors.
- Do not operate this appliance with a damaged cord, damaged plug, after the appliance malfunctions, is dropped, or damaged in any manner. Return appliance to the nearest authorized service facility for examination, repair, or adjustment.
- For maintenance other than cleaning, please contact StoreBound directly at
1- 800-898-6970 from 7AM-7PM PST Monday-Friday or by email at . - Only use approved ingredients with this appliance. Other ingredients may damage the appliance.
- This appliance is not intended for use by persons (including children) with reduced physical, sensory, or mental capabilities, or lack of experience and knowledge unless they are provided with supervision and instruction concerning use of the appliance by a person responsible for their safety.
- Always be sure to unplug the appliance from outlet prior to moving, cleaning, storage, and when not in use.
- Refrain from using attachments that are not recommended by the appliance manufacturer, as this may result in fire, electric shock, or personal injury.
- Do not let the power cord touch hot surfaces or hang over the edges of tables or counters.
- Unplug the appliance from power outlet and allow to cool when not in use, during assembly/disassembly, and before cleaning the Rapid Egg Cooker.
- When cleaning the Body of the appliance, do not submerge in water or other liquids. The Rapid Egg Cooker is NOT dishwasher safe.
- Do not place this appliance on or near a hot gas burner, hot electric burner, or in a heated oven.
- Do not put your hands or other foreign objects into the Rapid Egg Cooker while it is operating. If food spills onto the Heating Plate, make sure the Rapid Egg Cooker is turned off and cooled before cleaning.
- DO NOT place the Lid in the locked position while using the Rapid Egg Cooker as this will increase the risk of injury when removing the Lid once eggs have cooked.
- WARNING! Hot steam! Never place your hands or arms over the Steam Hole while the appliance is in use.
- Keep hands and utensils away from Heating Plate while cooking eggs to reduce the risk of injury or damage to the Rapid Egg Cooker.
- Internal base and contents (water and eggs) of Rapid Egg Cooker are hot when in use. Let cool before handling and/or cleaning.
- Do not touch the Heating Plate when the Rapid Egg Cooker is hot. Use the handles.
- If using a longer power-supply cord or extension cord, make sure that the electrical rating of the wire is compatible with the appliance. If the appliance is of the grounded type, the extension cord should be a grounding-type 3-wire cord.
- Use extreme caution when handling the Measuring Cup as it contains a sharp Pin on the bottom of the cup which may cause injury.
- Warning! The Lid becomes hot. When eggs are done, carefully remove the Lid by the Cover Handle. Allow the Lid to cool completely before touching or cleaning.
- NEVER place the Poaching Tray or Omelette Bowl directly on the Heating Plate.
Always place on top of the Boiling Tray. - Make sure the Rapid Egg Cooker is off before removing the eggs.
- A short power cord should be used to reduce the risk of tripping and entanglement.
- This appliance has a polarized plug (one blade is wider than the other). To reduce the risk of electric shock, this plug will fit in a polarized outlet only one way. If the plug does not completely fit in the outlet, reverse the plug. If it still does not fit, contact a qualified electrician. Do not attempt to modify the plug in any way.
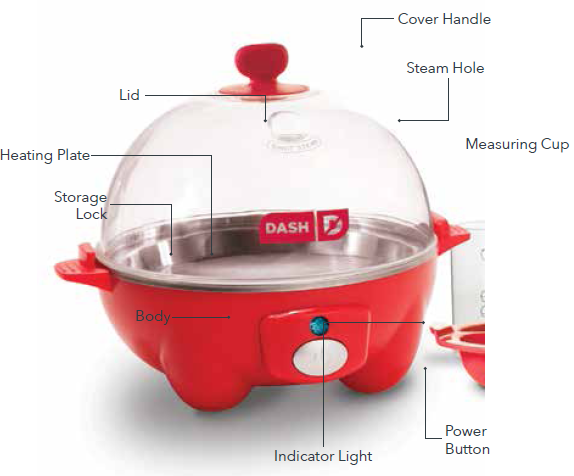
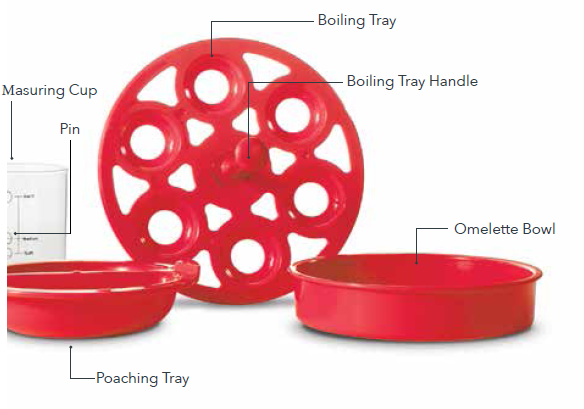
PARTS & FEATURES
USING YOUR RAPID EGG COOKER
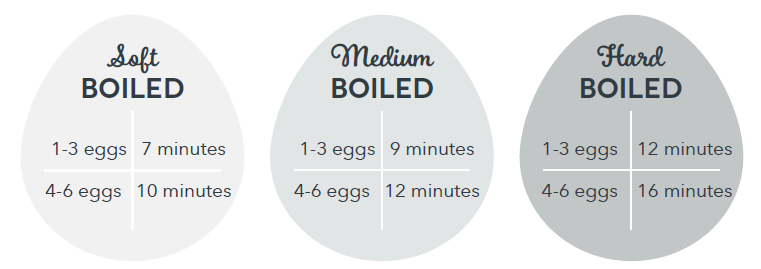
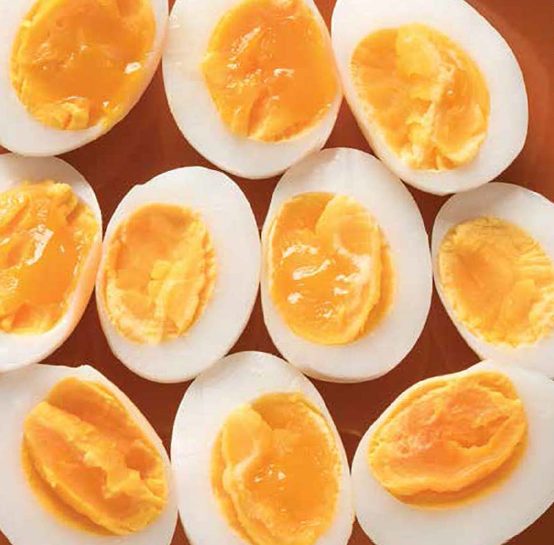
SOFT, MEDIUM, AND HARD-BOILED EGGS:
The times listed below are guidelines so that you will know how long it will take to cook your eggs. The thermostat in the Rapid Egg Cooker will shut off automatically when the eggs are done – no additional timer is necessary. The following time guidelines are for medium to large eggs. Extra large or jumbo eggs may require additional time/water in the appliance to achieve the desired results.
If you like medium eggs firm: let the eggs sit covered in the Rapid Egg Cooker for a few extra minutes before removing them.
If you like completely hard-boiled eggs: let the eggs sit for an extra minute in the Rapid Egg Cooker after the buzzer sounds.
TIP: If you live at a higher altitude, add up to 25% more water to your Egg Cooker to ensure best results!
Timer Auto-Off
This Rapid Egg Cooker is equipped with a precision thermal sensor and will turn off automatically when the water has fully evaporated from the Heating Plate and when the buzzer sounds.
ATTENTION: Do not unplug the unit while cooking. If you unplug the unit while cooking, it will still be turned on when you plug it back in. If the unit does not detect water on the Heating Plate, it will automatically shut off and reset itself in a few seconds.
BOILING EGGS
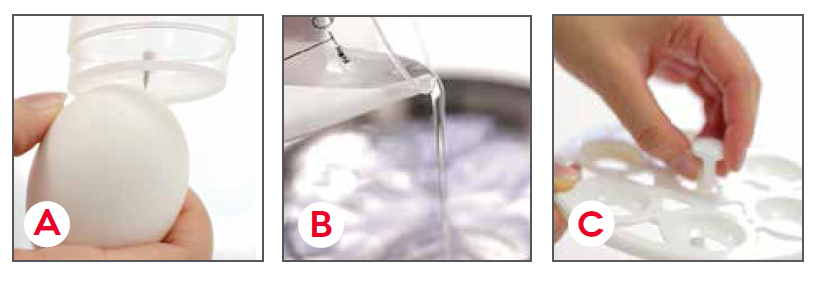
1. Make sure the Rapid Egg Cooker is unplugged before starting. Pierce the larger end of each egg with the attached Pin at the bottom of the Measuring Cup (photo A).
2. Use the Measuring Cup to pour the appropriate corresponding amount of cold water into the Heating Plate (photo B).
3. Attach the Boiling Tray Handle to the Boiling Tray (photo C), and place the Boiling Tray on the Heating Plate. Place an egg in each designated spot in the Boiling Tray. Make sure that the holes in the larger end of the eggs are pointed upwards.
WARNING: Do not lock the Lid when using your Rapid Egg Cooker as this may cause injury when removing the Lid once the buzzer sounds.
4. Cover with the Lid and plug in the Rapid Egg Cooker. Press the Power Button to start cooking (photo D). The Indicator Light will turn on.
5. When the eggs are finished cooking (photo E), a buzzer will sound. Press the power switch to silence the buzzer. Actual cooking time will depend on number of eggs and desired style. Uncover Lid by using the Lid Handle and remove eggs with heat-resistant tongs. Do not touch the parts with bare hands as they will be hot!
6. Press the Power Button to silence the buzzer and remove your eggs (photo F).
Be careful when handling eggs. They will be hot!
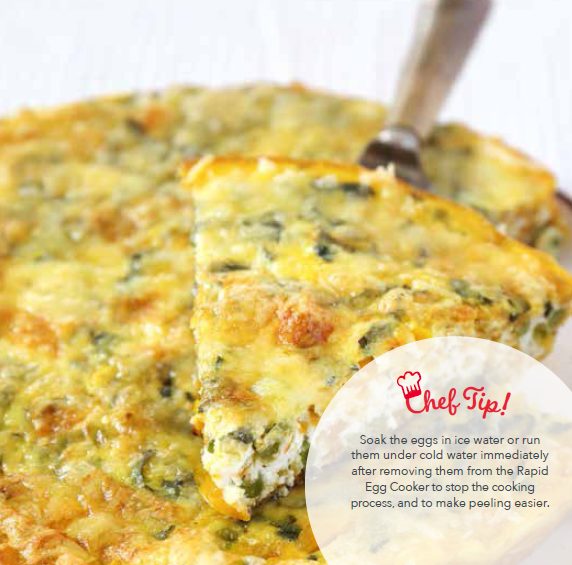
Soak the eggs in ice water or run them under cold water immediately after removing them from the Rapid Egg Cooker to stop the cooking process, and to make peeling easier.
POACHING EGGS
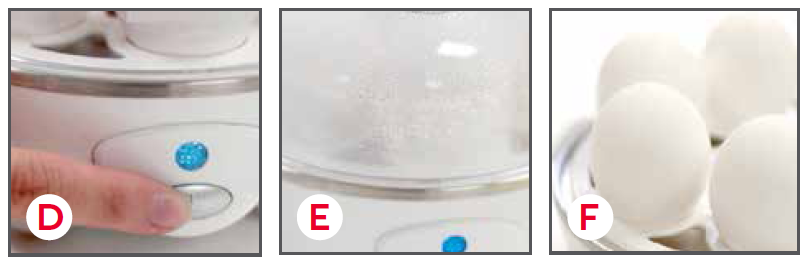
1. Fill the Measuring Cup with cold water until it reaches the “Omelette/Poached” marking. Pour the water into the Heating Plate (photo A). Place the Boiling Tray on top of the Heating Plate.
2. Use cooking spray to lightly grease the Poaching Tray. Always place the Omelette Bowl or Poaching Tray on top of the Boiling Tray and never directly on the Heating Plate.
3. Break an egg into each section of the Poaching Tray (photo B). Cover with the Lid and plug in the Rapid Egg Cooker. Press the Power Button. When the buzzer sounds, your eggs will be ready to eat (photo C)!
WARNING: Do not lock the Lid when using your Rapid Egg Cooker as this may cause injury when removing the Lid once the buzzer sounds.
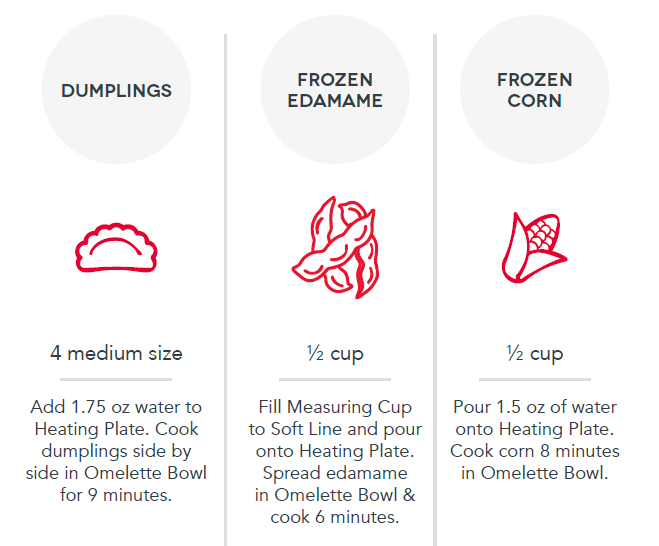
USING THE OMELETTE BOWL
1. Fill the Measuring Cup with cold water to the Poached / Omelette Line. Pour cold water onto the Heating Plate (photo A).
2. Use cooking spray to lightly grease the Omelette Bowl. Always place the Omelette Bowl on top of the Boiling Tray and never directly on the Heating Plate. Pour your eggs into the Omelette Bowl (photo B).
3. Cover with the Lid and plug in the Rapid Egg Cooker. Press the Power Button. When the buzzer sounds, your eggs will be ready to eat (photo C)! It is normal for the eggs to expand while cooking. They will contract once the Lid has been opened. Remove your omelette with a spatula.
For a drier omelette, leave the eggs in the Rapid Egg Cooker for an extra two minutes.
CLEANING & MAINTENANCE
Cleaning the Heating Plate:
- Before cleaning or moving the appliance, make sure to unplug the Rapid Egg Cooker.
- Wash the Rapid Egg Cooker Accessories and Lid with warm, soapy water.
- Wipe down the Body and Heating Plate with a wet cloth.
- Dry all parts thoroughly. When storing, place the accessories on the Heating Plate, cover with the Lid, and turn clockwise until the tabs on the Lid slide completely underneath the handles on the base of the Rapid Egg Cooker.
Cleaning the Heating Plate:
Your Rapid Egg Cooker will not rust. Over time, the Rapid Egg Cooker may begin to develop some mineral deposits on the Heating Plate. While this may look like rust, it is merely the residue of natural minerals present in your water.
- Two different ways to clean the Heating Plate: Clean the Heating Plate with a mild solution of water and vinegar (10 parts water: 1 part vinegar) from time to time.
- Gently scrub the Heating Plate in a circular motion with a “magic eraser”-type sponge and a little warm water.
CAUTION:
- During and after use the appliance will be hot.
- Do not attempt to clean your Egg Cooker until the appliance has cooled. Do not submerge the Body in water or other liquids.
- The Body of the appliance is NOT dishwasher safe.
TROUBLESHOOTING
Although your Rapid Egg Cooker is simple to use and durable, please refer to the following list if problems occur:

RAPID EGG COOKER
RECIPE GUIDE
Follow us Instagram @unprocessyourfood
for recipes, videos, & daily inspiration
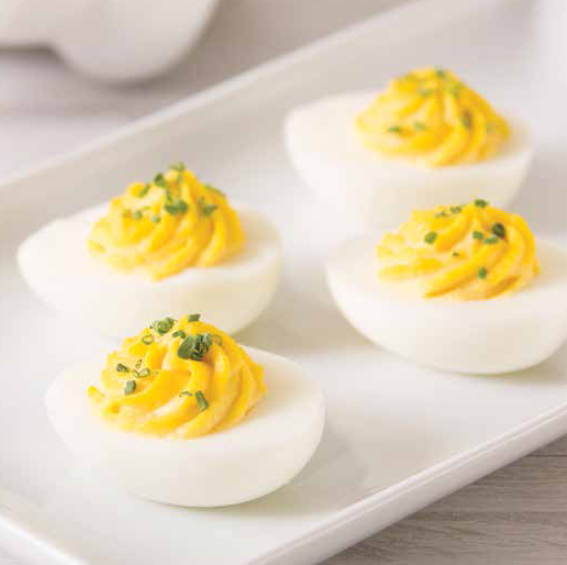
Deviled EGGS
Ingredients:
- 6 hard-boiled eggs, cooled
- 3 tbsp mayonnaise
- 1 tbsp Dijon-style mustard
- 1/8 tsp salt
- Paprika, chives, plus dill to garnish
Directions:
- Peel the eggs and cut in half lengthwise.
- Remove the yolks, place them in a large bowl, and cream them into a paste with a fork or spoon.
- Mix in the mayonnaise, mustard, and salt.
- Spoon or pipe the mixture into the egg white halves.
- Place the eggs in the refrigerator until they are ready to be served. Just before serving, garnish with a dash of paprika and freshly cut chives or dill.
EGGS BENEDICT
Ingredients:
For Hollandaise Sauce
- 4 eggs
- 3 ½ tbsp lemon juice
- 1 pinch ground white pepper
- 1/8 tbsp water
- 1 cup butter, melted salt, to taste
For Eggs Benedict
- 4 eggs
- ½ bunch asparagus, trimmed and boiled
- 4 strips Canadian-style bacon
- 2 English muffins, toasted
- 2 tbsp butter, softened chives or cayenne pepper, to garnish
Directions for the hollandaise sauce:
- On the stovetop, fill the bottom of a double boiler part-way with water. Make sure that water does not touch the bottom of the bowl. Bring water to a gentle simmer.
- In the top of the double boiler, whisk together egg yolks, lemon juice, white pepper, Worcestershire sauce, and 1 tablespoon water.
- Add the melted butter to the egg yolk mixture, 1 tablespoon at a time, while whisking yolks constantly. If the sauce becomes too thick, stir in a little hot water.
- Add salt and continue whisking until fully incorporated. Remove from heat and cover with a lid to keep the sauce warm.
Directions for the eggs benedict:
- Fill the Measuring Cup with water to the Omelette / Poached marking. Pour water into the Heating Plate.
- Place the Boiling Tray, then place the lightly greased Poaching Tray on top. Break an egg into each poaching section.
- Replace the Lid and plug in the Express Egg Cooker. Press the Power Lever.
- When the buzzer sounds, the eggs will be poached. Remove the eggs immediately to prevent overcooking. To make two servings of Eggs Benedict, repeat the poaching process with the other two eggs, starting at Step 1.
- Butter the toasted English muffin halves.
Place a slice of Canadian-style bacon, a few asparagus spears, a poached egg, and a spoonful of hollandaise sauce on each half. - Garnish with chives or cayenne pepper and serve immediately.

Egg SALAD
Ingredients:
- 6 hard-boiled eggs, cooled and peeled
- ½ stalk celery
- 1/8 cup mayonnaise
- 2 tbsp Dijon-style mustard
- ¼ tbsp salt
- 1/8 tsp black pepper
Directions:
- Remove shells from fully cooked eggs. Cut the eggs into quarters.
- Finely dice the eggs and celery and mix together.
- Add the mayonnaise, mustard, salt, and pepper. Mix until desired texture is reached.
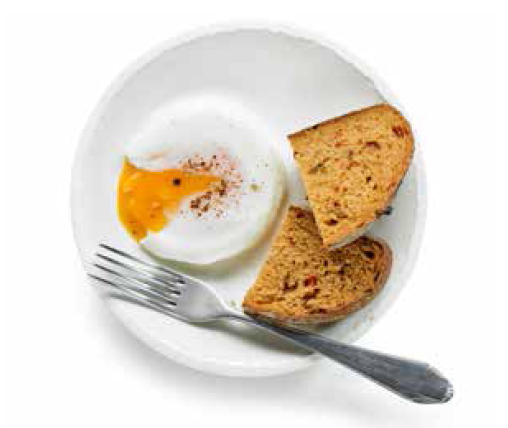
- Serve on multigrain bread with sliced cucumber.

TOMATO & SPINACH FRITTATA
Ingredients:
- 2 egg whites
- 1 whole egg
- 2 tbsp spinach, chopped
- 2 tbsp mozzarella
- 2 basil leaves, cut into thin strips
- salt & pepper, to taste
- lettuce & tomato, to garnish
Directions:
- Fill the Measuring Cup with water to the Omelette / Poached Line and pour onto the Heating Plate.
- Place the Boiling Tray on the Heating Plate and then sit the lightly greased Omelette Bowl on top.
- Beat eggs and pour into the Omelette Bowl.
- Sprinkle the basil, spinach, mozzarella, and tomatoes over the whisked egg.
- Cover with the Lid and turn on the Rapid Egg Cooker. When buzzer sounds, remove eggs immediately to prevent overcooking.
- Add salt and pepper to taste.
MORE RECIPE IDEAS
CUSTOMER SUPPORT
 Dash values quality and workmanship and stands behind this product with our Feel Good Guarantee™. To learn more about our commitment to quality, visit bydash.com/feelgood.
Our US-based customer support team is at your service Monday – Friday during the times below.
Reach us at 1 (800) 898-6970 or [email protected]

Hey Hawaii! You can reach our customer service team from 5AM to 5PM. And also, Alaska, feel free to reach out from 6AM – 6PM.
STOREBOUND, LLC – 1 YEAR LIMITED WARRANTY
Your StoreBound product is warranted to be free from defects in material and workmanship for a period of one (1) year from the date of the original purchase when utilized for normal and intended household use. Should any defect covered by the terms of the limited warranty be discovered within one (1) year, StoreBound, LLC will repair or replace the defective part. To process a warranty claim, contact Customer Support at 1-800-898-6970 for further assistance and instruction. A Customer Support agent will assist you by troubleshooting minor problems. If troubleshooting fails to fix the problem, a return authorization will be issued. Proof of purchase indicating the date and place of purchase is required and should accompany the return. You must also include your full name, shipping address, and telephone number. We are unable to ship returns to a PO box. StoreBound will not be responsible for delays or unprocessed claims resulting from a purchaser’s failure to provide any or all of the necessary information. Freight costs must be prepaid by the purchaser.
Send all inquiries to [email protected].
There are no express warranties except as listed above.
REPAIR OR REPLACEMENT AS PROVIDED UNDER THIS WARRANTY IS THE EXCLUSIVE REMEDY OF THE CUSTOMER. STOREBOUND SHALL NOT BE LIABLE FOR ANY INCIDENTAL OR CONSEQUENTIAL DAMAGES OR FOR BREACH OF ANY EXPRESS OR IMPLIED WARRANTY ON THIS PRODUCT EXCEPT TO THE EXTENT REQUIRED BY APPLICABLE LAW. ANY IMPLIED WARRANTY OF MERCHANTABILITY OR FITNESS FOR A PARTICULAR PURPOSE ON THIS PRODUCT IS LIMITED IN DURATION TO THE DURATION OF THIS WARRANTY.
Some states do not allow the exclusion or limitation of incidental or consequential damages, or limitations on how long an implied warranty lasts. Therefore, the above exclusions or limitations may not apply to you. This warranty gives you specific legal rights and you may also have other rights, which vary from state to state.
REPAIRS
DANGER! Risk of electric shock! The Dash Rapid Egg Cooker is an electrical appliance.
Do not attempt to repair the appliance yourself under any circumstances.
Contact Customer Support regarding repairs to the appliance.
TECHNICAL SPECIFICATIONS
- Voltage 120V ~ 60Hz
- Power Rating 360W
- Stock#: DEC005_20181120_V10
FAQS
are the plastic parts that come into contact with the eggs BPA free?
For those who point out that you don’t eat the shell, this cooker also does shell-less eggs (poached, etc) so that’s not a valid response.
What is valid, though is that BPA-free is misleading–what chemical did they substitute for the BPA?
It’s commonly BPS, which is a close chemical analog. Search for the Scientific American article “BPA-Free Plastic Containers May Be Just as Hazardou
Is this product BPA free
Yes, the Dash Go Rapid Egg Cooker is BPA free.
does it cook jumbo eggs?
Yes it does. But the first time you do them cut one open… if they are not done add more water and re-run!
Has anyone used a Kill-a-Watt meter on one of these to determine how much power is used to hard boil (cook?) 2 or 6 eggs? What is the power rating?
Hope this helps. 360 watts is accurate. I measured it [3 amps x 120 volts = 360 watts] If you used this egg cooker for 2 hours and 45 minutes a day it would consume 1 kilowatt hour of electricity per day. What that costs you I don’t know, but here in Tampa it’s currently 10¢ per kilowatt-hour. If I use it everyday [30 days] that would be $3.00 a month.
What the AC voltage and the socket plug as we are based in hk?
120 v
Will liquid egg whites cook well in this?
no, you need to use whole eggs still in the shell
How do you prevent the egg from coming out of the pierced hole?
You pierce the large end of the egg then place the egg in the holder with large end facing up. Only time i had egg released from the shell was when the it had a crack in it. I had not noticed the crack before, but there wasnt much of the white of the egg that had seeped out.
How to mute the music?
Press “mute music” button
Is this bpa free?
Yes it says so in the description
how long does it take to cook
1-6 eggs takes 7 to 12 min depends on how you like it.
Can my baby use this product a lot?
No. It gets very hot.
the cup for the water can you buy that separately
comes included
Is this pfoa and ptfe free? i have parrots so i need to know that it’s safe for them to be around.
The eggs in the shell are boiled/steamed in shell. The plastic for poaching and omelets, I can’t say, as I bought this just for hard boiled. Which have been perfect.
How much water do you use to make an omelet?
1/4 of a cup of water for omelette slightly less for poached
When you soft boil an egg does the shell come off easily?
The shell comes off easily whether you soft or hard boil (well for me it does). Maybe since the hole you have to poke let’s the steam build inside and helps to separate the egg from shell. Just a guess.
how voltage 220 or 120?
Well here in America ALL household appliances work on 120 volts. Smh
What is the voltage of the product?
It plugs into a standard U.S. wall socket. 120V (+-)
How to best use this product?
If you’re going to make an omelette or poached eggs be sure to use cooking spray. If you’re making hard boiled eggs I always let mine sit covered inside the cooker for a few minutes because I like mine to be cooked all the way through.
how long does it take to cook
For 6 eggs, approx 12 min. Very fast and perfect hard boiled eggs.
Does it shut off automatically when the cooking is done?
No but buzzer sound will let you know when to shut off (which could be a little bit annoying but it helps you not to forget to shut it off). It all depends how much water you pour. For example, you put little water for soft boiled egg and more for hard boiled egg. Buzzer goes off whenever all the water evaporates. I am the seller and using one for myself too. It’s very easy to make boiled eggs, poached eggs and steamed veggies. Highly recommended!
How does it make omlets
it comes with a small booklet .Crack eggs in bowl add stuff you like pour in tray .bake enjoy
Can it work with 220V
yes.
]]>
IMPORTANT SAFEGUARDS
PLEASE READ AND SAVE THIS INSTRUCTION AND CARE MANUAL.
When using electrical appliances, basic safety precautions should be followed, including:
- Read all instructions.
- Remove all bags and packaging from appliance before use.
- Never leave appliance unattended when in use.
- Make sure the appliance is cleaned thoroughly before using.
- Do not use appliance for other than intended use. For household use only. Do not use outdoors.
- Warning: Hot surfaces! Never touch the Cooking Surface or Cover while appliance is in use. Always lift and lower the Cover by the Cover Handle.
- DO NOT lift the Cover so that your arm is over the Cooking Surface as it is hot and may cause injury. Lift from the side.
- To prevent the risk of fire, electric shock, or personal injury, do not put cord, plug, or appliance in or near water or other liquids. The Mini Waffle Maker is NOT dishwasher safe.
- Never use abrasive cleaning agents to clean your appliance as this may damage the Mini Waffle Maker and its nonstick Cooking Surface.
- Do not operate this appliance with a damaged cord, damaged plug, after the appliance malfunctions, is dropped, or damaged in any manner. Return appliance to the nearest authorized service facility for examination, repair or adjustment.
- DO NOT use the Mini Waffle Maker near water or other liquids, with wet hands, or while standing on a wet surface.
- For maintenance other than cleaning, please contact StoreBound directly at1-800-898-6970 from 7 AM – 7PM PST Monday – Friday or by email at .
- Do not use metal utensils on the Cooking Surface as this will damage the nonstick surface.
- This appliance is not intended for use by persons (including children) with reduced physical, sensory, or mental capabilities, or lack of experience and knowledge unless they are provided with supervision and instruction concerning use of the appliance by a person responsible for their safety.
- Do not place appliance on or near a hot gas burner, hot electric burner, or in a heated oven.
- Be cautious when moving an appliance containing hot oils or other hot liquids.
- Refrain from using attachments that are not recommended by the appliance manufacturer, as this may result in fire, electric shock, or personal injury.
- Allow Mini Waffle Maker to cool completely before moving, cleaning, or storing.
- Close supervision is necessary when any appliance is used by or near children.
- Do not let the cord touch hot surfaces or hang over the edge of tables or counters.
- Always be sure to unplug the appliance from outlet prior to moving, cleaning, storage, and when not in use.
- StoreBound shall not accept liability for damages caused by improper use of the appliance.
- Improper use of the Mini Waffle Maker can result in property damage or even in personal injury.
- This appliance has a polarized plug (one blade is wider than the other). To reduce the risk of electric shock, this plug will fit in a polarized outlet only one way. If the plug does not completely fit in the outlet, reverse the plug. If it still does not fit, contact a qualified electrician. Do not attempt to modify the plug in any way
- A short power supply cord is to be provided to reduce the risk resulting from becoming entangled in or tripping over a longer cord. An extension cord may be used if care is exercised in its use. If an extension cord is used, the marked electrical rating of the extension cord should be at least as great as the electrical rating of the appliance. If the appliance is of the grounded type, the extension cord should be a grounding 3-wire cord. The extension cord should be arranged so that it will not drape over the countertop or tabletop where it can be pulled on by children or tripped over unintentionally.
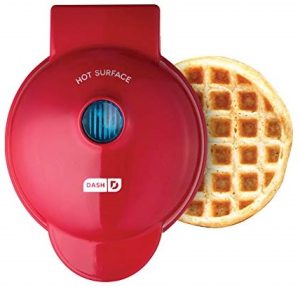
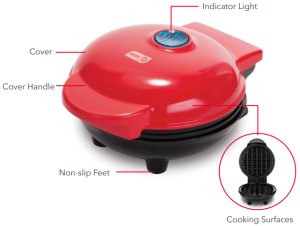
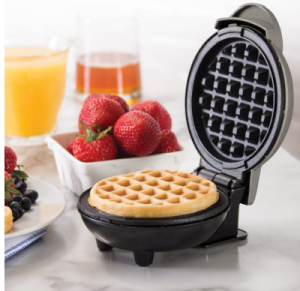
Parts & Features
Using your Mini Waffle Maker
Before first use, remove all packaging material and thoroughly clean your Mini Waffle Maker.
- Never touch the Cooking Surface or Cover while appliance is in use.
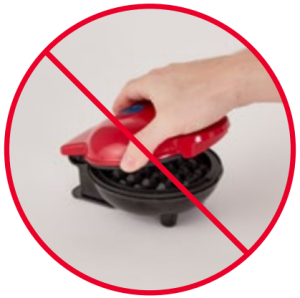
- DO NOT lift the Cover so that your arm is over the Cooking Surface as it is hot and may cause injury.
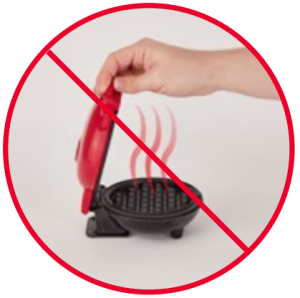
- Always lift and lower the Cover by the Cover Handle. Lift from the side.
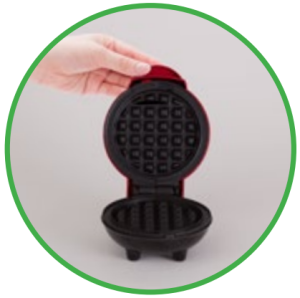
- Place the appliance on a stable and dry surface. Plug the cord into a power outlet. The Indicator Light (photo A) will illuminate, signaling that the Mini Waffle Maker is heating up.
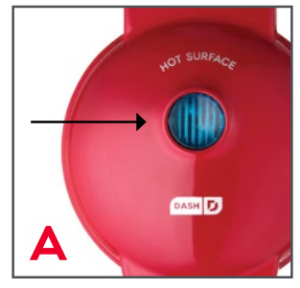
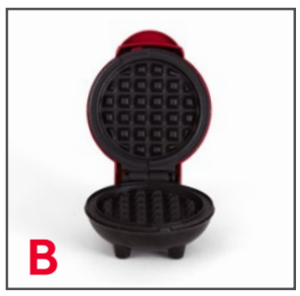
- Once the Cooking Surface reaches the optimal cooking temperature, the Indicator Light will automatically shut off. Now, you’re ready to get cooking (photo B)!
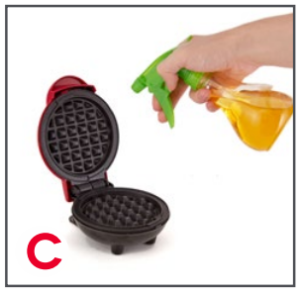
- Carefully lift the Cover by the Cover Handle and spray both Cooking Surfaces with a small amount of cooking spray (photo C).
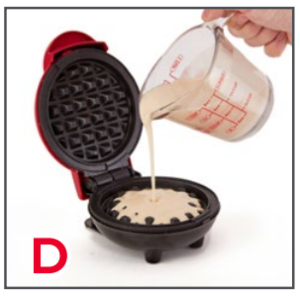
- Place or pour batter onto the Cooking Surface (photo D) and close the Cover.
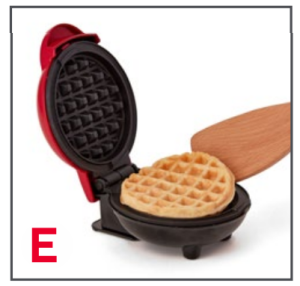
- Once waffle is cooked to your preference, carefully remove it from the Cooking Surface with a heat-resistant nylon, wood, or silicone cooking utensil (photo E).
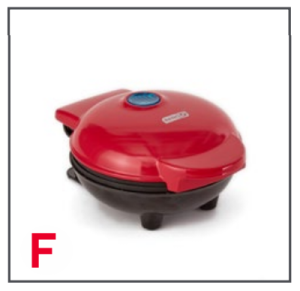
NOTE: Do not use metal utensils to remove or place food on the Cooking Surface as this will damage the nonstick surface. - When you have finished cooking, unplug your Mini Waffle Maker and allow it to cool before moving or cleaning (photo F).
Cleaning & Maintenance
Always allow the appliance to cool completely before moving, cleaning, or storing. Do not submerge appliance in water or any other liquids. Never use abrasive cleaning agents to clean your appliance as this may damage the Mini Waffle Maker.
In order to keep your Mini Waffle Maker in pristine working order, thoroughly clean the appliance after each use. This will prevent the build-up of food or oil.
- Unplug Mini Waffle Maker and allow it to cool completely.
- Using a damp, soapy cloth, wipe down the Cooking Surface and Cover. Thoroughly rinse the cloth and wipe again.
- Thoroughly dry Mini Waffle Maker before storing.
- If there is food burned onto the Cooking Surface, pour on a little cooking oil and let sit for 5 to 10 minutes. Scrub the Cooking Surface with a sponge or soft bristled brush to dislodge food. Use a damp, soapy cloth to wipe down the Cooking Surface. Thoroughly rinse the cloth and wipe again. If any food remains, pour on cooking oil and let sit for a few hours, then scrub and wipe clean.
- Never use abrasive cleaning agents to clean your appliance as this may damage the Mini Waffle Maker and its nonstick Cooking Surface.
Troubleshooting
While Dash products are durable, you may encounter one or more of the problems listed below. If the issue is either not solved by the solutions recommended below or not included on this page, please contact our Customer Support Team at 1-800-898-6970 or .
- The light on the Mini Waffle Maker keeps shutting off.
- This is normal. During the cooking process, the heating element will automatically turn on and off to regulate the temperature and ensure that the Cooking Surface does not get too hot or cold. When this occurs, the Indicator Light turns on and off.
- How do I know when the Mini Waffle Maker is heated and ready to use?
- When the Waffle Maker reaches the optimal temperature, the Indicator Light shuts off and that means you’re ready to get cooking!
- There is no On/Off Button. How do I turn the Mini Waffle Maker off and on?
- To turn on, simply plug in the power cord. When you’re done cooking, turn off the Mini Waffle Maker by unplugging it.
- When using my Mini Waffle Maker, the Cover gets very hot. Is this normal?
- Yes, this is completely normal. When using your Waffle Maker, always lift and lower the Cover by the Cover Handle. To prevent personal injury, DO NOT lift the Cover so that your arm is over the Cooking Surface as it is hot and may cause injury. Lift from the side.
- After using my Mini Waffle Maker a few times, food is starting to stick to the surface. What is happening?
- There is probably a build-up of burnt food residue on the Cooking Surface. This is normal, especially when cooking with sugar. Allow the appliance to cool fully, pour on a little cooking oil and let sit for 5–10 minutes. Scrub Surface with a sponge or soft bristled brush to dislodge food. Use a damp, soapy cloth to wipe down the Cooking Surface. Rinse
the cloth and wipe again. If food remains, pour on cooking oil and let sit for a few hours, then scrub and wipe clean.
- There is probably a build-up of burnt food residue on the Cooking Surface. This is normal, especially when cooking with sugar. Allow the appliance to cool fully, pour on a little cooking oil and let sit for 5–10 minutes. Scrub Surface with a sponge or soft bristled brush to dislodge food. Use a damp, soapy cloth to wipe down the Cooking Surface. Rinse
- The Indicator Light will not turn on and the Cooking Surface is failing to heat.
- Ensure that the power cord is plugged into the power outlet.
- Check to make sure the power outlet is operating correctly.
- Determine if a power failure has occurred in your home, apartment or building.
Classic Waffles
Ingredients:
- 1 cup flour
- 1 tbsp sugar
- 2 tsp baking powder
- ¼ tsp salt
- 1 egg
- 1 cup milk
- 2 tbsp melted butter or vegetable oil
Directions
- In a medium bowl, sift the flour, sugar, baking powder, and salt. Whisk the egg, milk, and melted butter in a separate bowl. Add the wet ingredients to the dry and mix until just incorporated.
- Grease the Mini Waffle Maker with butter or coat with a light coat of cooking spray. Pour ¼ cup of the batter into the Mini Waffle Maker and cook until golden brown. Repeat with the remaining batter.
- Serve with a drizzle of maple syrup and fresh berries.
Pizza Chaffle
Ingredients
- 1 large egg
- ½ cup riced cauliflower
- ½ cup shredded mozzarella cheese
- ½ tsp dried oregano
- ¹/8 tsp garlic powder
- ½ cup shredded Parmesan cheese
- 4 tbsp pizza sauce
- 4 tbsp shredded mozzarella (for pizza topping)
Directions
- In a mini food processor, pulse the egg, cauliflower, mozzarella, oregano,
and garlic powder until the mixture is very finely chopped. - Spread 1 tbsp of the Parmesan cheese on the bottom of the Dash Mini Waffle Maker. Add half the cauliflower mixture, spreading it evenly. Sprinkle 1 tbsp more of the Parmesan cheese on top of the cauliflower mixture.
- Cook the chaffle until well-browned and crisp, 6 mins. Set chaffle aside to cool. Repeat 3 more times making 4 chaffles.
- Top each chaffle with 2 tbsp of the pizza sauce. Sprinkle on 1 tbsp mozzarella. Place the chaffles under the broiler until the cheese melts, 1-2 mins. Watch carefully so they don’t burn and serve immediately.
Paleo waffles
Ingredients
- 2 large eggs
- ½ banana, mashed
- ¾ tsp maple syrup
- ½ tsp vanilla extract
- ½ tsp baking powder
- ¼ cup almond flour
- 1 ½ tbsp coconut flour
- Pinch of salt
Directions
- Mix together eggs, banana, vanilla extract and maple syrup in a small bowl.
- Whisk together dry ingredients in a separate bowl. Add the wet ingredients to the dry and mix until just incorporated.
- Add 3.5 tbsp of batter to your Mini Waffle Maker and cook until golden brown on both sides.
Banana Bread waffles

Ingredients
- 1 ½ cups all-purpose flour
- 1 tsp baking powder
- ¼ tsp baking soda
- ¼ tsp kosher salt
- 1 cup mashed bananas (roughly 2 bananas)
- ¾ cup buttermilk
- ¼ cup light brown sugar
- 2 large eggs
- 3 tbsp canola oil
Directions
- Whisk together flour, baking powder, baking soda and salt in a medium bowl.
- Mash bananas with a fork or place in stand mixer with paddle attachment until no large chunks remain. Add buttermilk, brown sugar, eggs and oil. Whisk until well-combined. Add dry ingredients and mix until no clumps remain.
- Add 3 tbsp of batter to your Mini Waffle Maker and cook until golden brown on both sides. Serve with additional bananas, honey and powdered sugar, if desired.
Chocolate Tacos waffles

Ingredients
- 2 tbsp cocoa powder
- ½ cup all-purpose flour 2/3 cup white sugar
- 1 large egg
- 2 tbsp canola oil
- ½ cup whole milk
Directions
- Mix together cocoa powder, flour and sugar.
- Whisk together egg, oil and milk until smooth. Add dry ingredients and mix until no clumps remain.
- Add 3 tbsp of batter to your Mini Waffle Maker and cook until crispy on both sides.
- Remove waffles and immediately drape over a rolling pin, or similarly sized cylindrical object, to form taco shape. Let waffles cool on rolling pin for 3 minutes, then place in freezer.
- Serve with ice cream, sprinkles and a caramel drizzle.
MORE RECIPE IDEAS
| Recipe idea | ingredients | cooking time |
| Protein Waffle | Classic Waffle Recipe (pg 20) 1 scoop protein powder | 4-6 min |
| Cornbread Waffle | ¼ cup cornbread batter | 6-8 min |
| Mashed Potato Bite | 3 tbsp mashed potatoes | 5 min |
| Smore Biscuit | 1 refrigerated biscuit dough, sliced lengthwise 2 squares milk chocolate 5 mini marshmallows | 5-7 min |
| Grilled Cheese | 2 slices white or wheat bread, buttered 2 slices American Cheese | 5 min |
| Chocolate Chip Cookie | 2 tbsp cookie dough | 5-7 min |
| Waffle Omelette | 1 egg beaten 2 tbsp chopped veggies 1 tbsp grated Swiss cheese |
5 min |
Customer support
Feel good guarantee™
Dash values quality and workmanship and stands behind this product with our Feel Good Guarantee™. To learn more about our commitment to quality, visit bydash.com/feelgood.
Our US-based customer support team is at your service
Monday – Friday during the times below.
Reach us at 1 (800) 898-6970 or

Hey Hawaii! You can reach our customer service team from 5AM to 5PM. And also, Alaska, feel free to reach out from 6AM – 6PM.
Warranty
STOREBOUND, LLC – 1 YEAR LIMITED WARRANTY
Your StoreBound product is warranted to be free from defects in material and workmanship for a period of one (1) year from the date of the original purchase when utilized for normal and intended household use. Should any defect covered by the terms of the limited warranty be discovered within one (1) year, StoreBound, LLC will repair or replace the defective part. To process a warranty claim, contact Customer Support at 1-800-898-6970 for further assistance and instruction. A Customer Support agent will assist you by troubleshooting minor problems. If troubleshooting fails to fix the problem, a return authorization will be issued. Proof of purchase indicating the date and place of purchase is required and should accompany the return. You must also include your full name, shipping address, and telephone number. We are unable to ship returns to a PO box. StoreBound will not be responsible for delays or unprocessed claims resulting from a purchaser’s failure to provide any or all of the necessary information. Freight costs must be prepaid by the purchaser.
Send all inquiries to .
There are no express warranties except as listed above.
REPAIR OR REPLACEMENT AS PROVIDED UNDER THIS WARRANTY IS THE EXCLUSIVE REMEDY OF THE CUSTOMER. STOREBOUND SHALL NOT BE LIABLE FOR ANY INCIDENTAL OR CONSEQUENTIAL DAMAGES OR FOR BREACH OF ANY EXPRESS OR IMPLIED WARRANTY ON THIS PRODUCT EXCEPT TO THE EXTENT REQUIRED BY APPLICABLE LAW. ANY IMPLIED WARRANTY OF MERCHANTABILITY OR FITNESS FOR A PARTICULAR PURPOSE ON THIS PRODUCT IS LIMITED IN DURATION TO THE DURATION OF THIS WARRANTY.
Some states do not allow the exclusion or limitation of incidental or consequential damages, or limitations on how long an implied warranty lasts. Therefore, the above exclusions or limitations may not apply to you. This warranty gives you specific legal rights and you may also have other rights, which vary from state to state.
REPAIRS
DANGER! Risk of electric shock! The Dash Mini Waffle Maker is an electrical appliance. Do not attempt to repair the appliance yourself under any circumstances. Contact Customer Support regarding repairs to the appliance.
TECHNICAL SPECIFICATIONS
- Voltage 120V ~ 60Hz
- Power Rating 350W
- Stock#: DMW001_20170615_V7
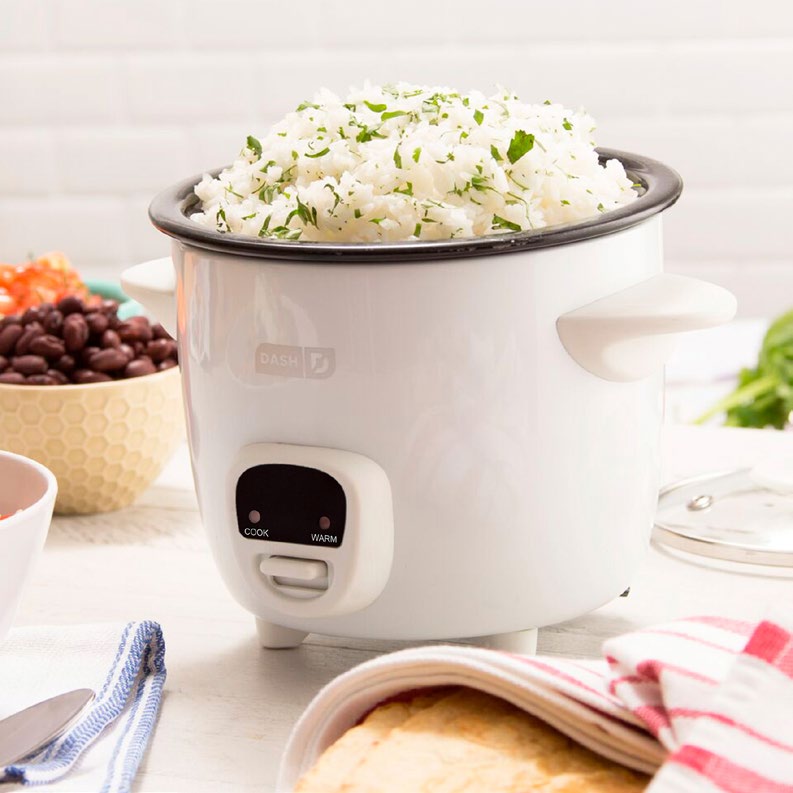
DASH DRCM200 Mini Rice Cooker
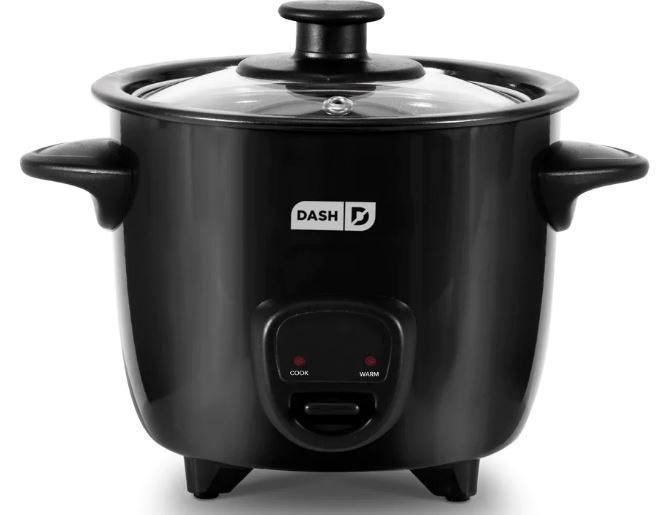
DASH DRCM200 Mini Rice Cooker
#DRCM200
MINI RICE COOKER

IMPORTANT SAFEGUARDS
IMPORTANT SAFEGUARDS: PLEASE READ AND SAVE THIS INSTRUCTION AND CARE MANUAL.
When using electrical appliances, basic safety precautions should be followed, including:
- Read all instructions.
- Remove all bags and packaging from appliances before use.
- Make sure the appliance is cleaned thoroughly before using.
- Make sure that the Rice Cooker and power cord are completely dry before each use.
- Unplug the appliance when not in use and prior to cleaning. Allow cooling before putting on or taking off parts
- For maintenance other than cleaning, please contact StoreBound directly at 1-800-898-6970 from 7 AM – 7 PM PT Monday – Friday or by email at .
- Only use the appliance on a stable, dry surface.
- To prevent the risk of fire, electric shock, or personal injury, do not place the cord, plug, or unit near water or other liquids. Do not pour liquid into the body of the device.
- Never leave appliances unattended when in use.
- Take special care when removing the Lid as escaping steam may cause personal injury.
- WARNING: Hot steam! Never place your hands or arms over the Steam Hole while the appliance is in use.
- Do not touch hot surfaces with bare hands. Use handles or knobs. Use pot holders when removing the lid or handling the Rice Cooker.
- To prevent personal injury, do not touch the surface of the Rice Cooker during or following use. Allow the appliance to cool.
- Never submerge the Rice Cooker in water or any other liquid; instead, wipe the surface with a soft, damp cloth and properly clean inside of Rice Cooker (see the Cleaning & Maintenance section in this manual).
- Do not operate any appliance with a damaged cord or plug or after the appliance malfunctions or has been damaged in any manner. If damaged, return the appliance to the nearest authorized service facility for examination, repair, or adjustment.
- Always be sure to unplug the appliance from the outlet and allow it to cool completely prior to assembly, disassembly, cleaning, and storage.
- Never use abrasive cleaning agents to clean the Pot as this may damage the non-stick surface.
- Do not use appliances outdoors or for commercial purposes.
- Do not let the cord touch hot surfaces or hang over the edge of tables or counters.
- Do not leave the Mixing Paddle or Measuring Scoop in the Removable Pot while you are operating your Rice Cooker.
- This appliance is not intended for use by persons (including children) with reduced physical, sensory or mental capabilities, or lack of experience and knowledge unless they are provided with supervision and instruction concerning the use of the appliance by a person responsible for their safety.
- Refrain from using attachments that are not recommended by the appliance manufacturer, as this may result in fire, electric shock, or personal injury.
- Extension cords are not recommended for use with this appliance. If an extension cord must be used, make sure the electrical IMPORTANT SAFEGU plug (one blade is wider than the other). To reduce the risk of electric shock, this plug is intended to fit into a polarized outlet only one way. If the plug does not fit fully into the outlet, reverse the plug. If it still does not fit, contact a qualified electrician. Do not attempt to modify the plugin anyway.
- A short power-supply cord (or detachable power-supply cord) is provided to reduce the risk resulting from becoming entangled in or tripping over a longer cord.
- Longer detachable power-supply cords or extension cords are available and may be used if care is exercised in their use.
- If a longer detachable power supply cord or extension cord is used:
1) The marked electrical rating of the cord set or extension cord should be at least as great as the electrical rating of the appliance;
2) The cord should be arranged so that it will not drape over the countertop or tabletop where it can be pulled on by children or tripped over unintentionally; and 3) If the appliance is of the grounded type, the cord set or extension cord should be a grounding-type 3-wire cord. detachable power-supply cord) is provided to reduce the risk resulting from becoming entangled in or tripping over a longer cord. - Longer detachable power-supply cords or extension cords are available and may be used if care is exercised in their use.
- If a longer detachable power supply cord or extension cord is used:
1) The marked electrical rating of the cord set or extension cord should be at least as great as the electrical rating of the appliance;
2) The cord should be arranged so that it will not drape over the countertop or tabletop where it can be pulled on by children or tripped over unintentionally; and 3) If the appliance is of the grounded type, the cord set or extension cord should be a grounding-type 3-wire cord.
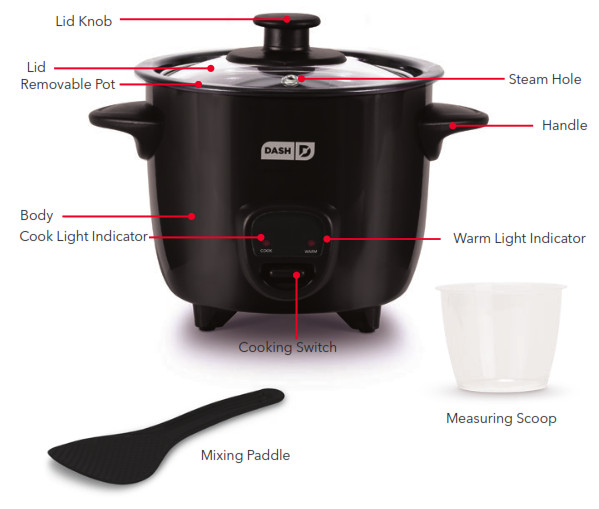
PARTS & FEATURE
Setting up your rice cooker
Clean the Rice Cooker and all of its components prior to assembly and use.
BEFORE FIRST USE
- Remove all packaging material and stickers before using your Rice Cooker.
- Gently wipe down all parts. Do not submerge the Body or Power Cord in water or other liquids.
- Wash Removable Pot, Lid, Measuring Scoop, and Mixing Paddle with warm, soapy water and then dry thoroughly. Do not use abrasive scrubbers, sponges, or chemical cleaners when cleaning the Removable Pot as they may damage the non-stick surface.
- Assemble the Rice Cooker by placing the Removable Pot inside the Body and cover with Lid.
Using your rice cooker
- Remove the Pot from the Body.
- Fill the Removable Pot with your ingredients.
Note: If cooking white rice, use the included Measuring Scoop. Do not use a standard measuring cup. Scoop desired amount of white rice into the Pot, rinse, and then fill the Pot with water to the line that corresponds to the number of scoops of white rice being cooked.
For example, if you place ½ Measuring Scoop of rice into the Pot, fill the Removable Pot to the bottom of the ½ line with water. Depending on your preference, you may need to adjust the amount of water to achieve the desired consistency. - Place the Removable Pot into the Body and cover with the Lid.
- Plug the Rice Cooker into an outlet. The Warm Indicator Light will turn on automatically. To begin cooking your food, press down the Cooking Switch.
The Cook Light Indicator will turn on. - When the Cooking Switch turns off, check to see if your food is done. Once the Cooking Switch turns off, the Warm Indicator Light will automatically turn on and will stay on indefinitely to warm your food until you unplug the Rice Cooker. When your food is done, use the Mixing Paddle or other non-metal utensils to serve.
Note: Use caution. The appliance is hot.
GRAIN COOKING CHART
In the following chart, we have listed several types of grains along with their ideal water to grain ratio. Measurements are based on a standard measuring cup, not the included Measuring Scoop.
| GRAIN | DRY GRAIN | WATER |
| White Rice | 1 cup | 1¼ cups |
| Long Grain Brown Rice | 1 cup | 1½ cups |
| Short Grain Brown Rice | ¾ cup | 1½ cups |
| Quinoa | ¾ cup | 1½ cups water or broth |
| Sushi Rice | ½ cup | ¾ cup |
| Barley | ½ cup | 1½ cups |
| Oats (steel cut) | ¾ cup | 2 cups |
| Oats (rolled) | ¾ cup | 1¼ cups |
CLEANING & MAINTENANCE
WARNING: Do not submerge Rice Cooker Body in water or any other liquids. To avoid damaging the appliance, never use abrasive or harsh cleaning products to clean the Rice Cooker. In order to keep your Rice Cooker in pristine working order, follow the cleaning recommendations after each use:
- Before cleaning or moving the appliance, unplug the Rice Cooker and allow it to cool completely.
- Remove the Pot and wash in warm, soapy water. Never use abrasive or harsh cleaning products as they may damage the non-stick surface. For tougher stains or residue, soak the Pot in warm, soapy water for 10-15 minutes to soften the food residue before cleaning.
- Wash the Lid, Measuring Scoop, and Mixing Paddle in warm, soapy water.
- Wipe the exterior of the Rice Cooker with a slightly damp cloth. Dry thoroughly with a soft cloth.
- Dry all parts before storing them in a cool, dry location.

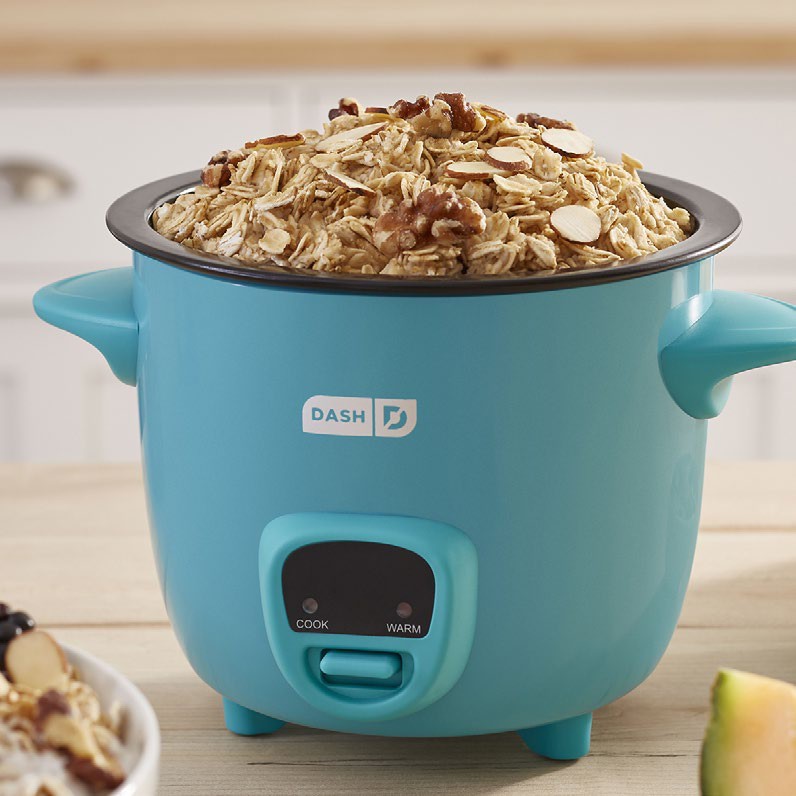
MINI RICE COOKER
RECIPE BOOK
Prepare perfectly delicious, healthy meals in a dash with the Mini Rice Cooker and keep them warm and fresh!

INGREDIENTS:
1 tsp olive oil
¼ onion, finely chopped
¼ carrot, sliced
1 tsp garlic, minced
½ boneless chicken breast, diced in ½” cubes
1½ cups chicken broth
2 tsp parsley, finely chopped
¼ cup spiral pasta salt and pepper, to taste
DIRECTIONS:
Pour the olive oil into the Rice Cooker and add onion, carrot, garlic, and cook with the Lid on for a few minutes.
Remove Lid and add the pasta, chicken, broth, parsley, salt, and pepper. Stir to combine and then cover with the Lid. After 5 minutes, remove the Lid and stir.
You may need to switch the cooker on for an additional cooking cycle.
Re-cover and cook until the pasta is tender.


INGREDIENTS:
1 tsp olive oil
¼ cup chopped onion
1 clove garlic,
finely chopped
¾ cup long-grain jasmine rice
1¼ cup water
¹/8 tsp sea salt
1 tbsp freshly squeezed lime juice
¹/8cup cilantro, chopped
DIRECTIONS:
Add olive oil and chopped onion to Rice Cooker then switch on. When the onion begins to soften, add the garlic, rice, water, and salt. Cook until all the water is absorbed.
Fluff rice with a fork.
Stir in lime juice and cilantro and serve immediately.

INGREDIENTS:
¼ cup pineapple, diced
½ cup frozen peas, carrots
¼ cup onion, diced
2 tbsp olive oil, divided
2 tsp sesame oil, divided
½ tsp ginger powder
¼ cup green onion, sliced
¾ cup short grain brown rice
1½ cups chicken broth
1 egg, scrambled
DIRECTIONS:
Cook brown rice in the Rice Cooker with the chicken broth. While the rice is cooking, saute the peas, carrots, and onion on the stovetop with 1 tbsp olive oil and 1 tsp sesame oil until onions are translucent.
Add pineapple, egg, and green onion. Set ingredients aside. When the rice is finished cooking, heat the remaining tbsp of olive oil and 1 tsp of sesame oil in a pan and add the rice.
Stir for about 1 minute before adding other ingredients. Cook for 2-3 minutes and serve immediately.

INGREDIENTS:
1 cup uncooked macaroni pasta
¾ cup chicken stock
¼ tsp salt
¼ cup milk
½ cup cheddar cheese, shredded
¼ cup part-skim mozzarella cheese
½ tbsp butter
½ cup cooked broccoli florets (optional)
salt and pepper, to taste
DIRECTIONS:
Put the pasta, chicken stock, milk, and salt in the Rice Cooker and stir. Cover with Lid and turn on the Rice Cooker.
Cook until all the liquid is absorbed. As soon as it’s is absorbed, carefully remove the Lid and add the cheese, butter, and stir well.
Close the Lid and cook until the cycle is complete. Add broccoli florets.

INGREDIENTS:
¾ cup quinoa
½ cup canned black beans
1½ cups chicken or vegetable broth
¼ cup pico de gallo or salsa
½ sliced avocado
¼ cup shredded cheese
¼ cup corn
½ tbsp taco seasoning (cayenne, cumin, coriander, paprika) sour cream, optional
½ lime, juiced
¹⁄8 tsp sea salt
DIRECTIONS:
Add quinoa and broth to the Rice Cooker. Cook for 20 minutes. Rinse and drain the black beans and add them to the Rice Cooker with the taco seasoning mix, lime, and sea salt.
Serve in a bowl topped with shredded cheese, sliced avocado, corn, and pico de gallo or salsa. Garnish with a drizzle of sour cream, if desired.

INGREDIENTS:
¾ cup jasmine rice
½ cup coconut cream
1 cup water
¼ tsp sea salt
¼ tsp coconut oil
DIRECTIONS:
Coat the inside of the Rice Cooker with coconut oil and add the rice, water, and coconut milk to the Rice Cooker.
Cover and turn the Rice Cooker on.

INGREDIENTS:
½ cup of white rice
1¹/³ cup of skim milk
½ cup of skim milk
¼ cup coconut or cane sugar
1 tsp cinnamon
¼ tsp nutmeg
½ tsp pure vanilla extract
DIRECTIONS:
Add the rice, 1¹/³ cups of skim milk, sugar, and vanilla to the Rice Cooker. Cook for one cycle (roughly 30 minutes or until the rice is fully cooked), stirring occasionally.
NOTE: Milk may bubble up around the Lid, please use caution. If milk bubbles up around the Lid, remove the Lid, while using an oven mitt, and stir. Once the milk settles, recover the Rice Cooker. Repeat if this happens again.
When the Rice Cooker finishes cooking the rice, stir in the cinnamon, nutmeg, and remaining ½ cup of skim milk. Cover with Lid and let cool before serving.

INGREDIENTS:
8 oz ground turkey
2 tbsp olive oil
½ (15 oz) can black beans
½ (15 oz) can kidney beans
1 tbsp chili powder
1 tbsp tomato paste
½ cup canned diced tomatoes
3 tbsp chili seasoning
salt and pepper, to taste
sour cream, (optional)
½ lime, juiced
¹⁄8 tsp sea salt


INGREDIENTS:
1½ cups coconut milk
2 tbsp Thai red curry paste
1 tsp ginger, minced
1 clove garlic, minced
½ cup snow peas, rinsed
½ yellow onion, sliced
½ cup bamboo shoots
¼ cup red bell pepper, chopped soy sauce, to taste
½ chicken breast, cut into ½” pieces
DIRECTIONS:
In a bowl, mix the curry paste and coconut milk. Place the mixture into the Rice Cooker with all ingredients except chicken and soy sauce and stir to combine.
Season to taste with soy sauce and then add chicken. Cover the Rice Cooker and switch it on. After 20 minutes, carefully remove the Lid and stir. Re-cover and cook for 10 more minutes.

CHOCOLATE CAKE
INGREDIENTS:
½ cup cane sugar
6 tbsp unsalted butter
1 egg
1 tsp vanilla extract
½ tsp baking powder
1 cup all-purpose flour
¼ cup cocoa powder
½ cup milk or non-dairy milk
DIRECTIONS:
Place sugar in a large bowl. Melt butter over low heat in a sauté pan and pour into sugar. Whisk thoroughly, 1-2 minutes, until fully combined. Add egg and vanilla extract and whisk again.
Combine baking powder, flour, and cocoa powder in a small bowl and whisk to combine. Mix into sugar mixture in 3 steps, alternating with milk. Whisk the mixture until smooth and to break up any clumps. Place approximately 1 cup of mixture into Rice Cooker and cook 1 cycle.
Test doneness at the center of the cake – if needed, cook another cycle. Serve with whipped cream and strawberries, if desired.


INGREDIENTS:
½ cup dry polenta
1 cup low-sodium chicken or vegetable stock
½ tsp kosher salt
¼ tsp garlic powder
¼ tsp black pepper
½ tsp dried rosemary
½ tsp dried thyme
½ tsp dried parsley
DIRECTIONS:
Combine all ingredients in the Rice Cooker and stir. Cook 1 cycle.
INGREDIENTS:
½ cup Yukon potatoes, chopped
½ cup low-sodium chicken or vegetable stock
Bacon & Dressing
4 slices bacon or turkey bacon, chopped
¼ cup apple cider vinegar
¼ cup drained potato liquid (from above)
2 tsp maple syrup
½ cup yellow onion, diced
¼ tsp ground black pepper
1 tbsp parsley, chopped
1 wedge lemon (optional)
DIRECTIONS:
Combine potatoes and stock in Rice Cooker. Cook 25-30 minutes until potatoes are fork-tender. Drain and reserve drained liquid.
Add bacon to medium sauté pan over low heat. Render 5-7 minutes, until well-browned. Drain bacon on paper towels. Add onion and let sauté on low-medium heat until translucent, 3-5 minutes.
Add apple cider vinegar, drained potato liquid, maple syrup, and black pepper.
Cook another 5-10 minutes over low-medium heat until the mixture has thickened and is bubbling. Add potatoes and cook 1-2 minutes to warm up potatoes. Remove from heat and toss with chopped bacon, parsley, and juice of 1 lemon wedge, if desired.
BANANA BREAD
INGREDIENTS:
2 medium bananas, very ripe, peeled
1 large egg
2/³cup cane sugar
¼ cup ricotta cheese
1 tbsp coconut oil
¼ cup walnuts or pecans, chopped (optional)
1 tsp vanilla extract
½ tsp kosher salt
1 tsp baking powder
2 tsp rum (optional)
1 ½ cups all-purpose flour
2 tbsp maple syrup
1 medium banana, sliced
DIRECTIONS:
Place bananas in a medium bowl and mash thoroughly with a spatula. Add egg and continue to mash. Add sugar, ricotta, and oil and stir to combine. Add oil, walnuts, vanilla extract, salt, baking powder, rum, and flour to bowl and mix thoroughly.
Pour approximately 1 cup of mixture into Rice Cooker. Cook 1 cycle. Carefully invert onto a clean plate. Transfer cake back into Rice Cooker, with the previous top side now facing down. Cook 1 cycle. Remove from Rice Cooker and garnish with sliced bananas and maple syrup, if desired.

INGREDIENTS:
1 cup pancake mix
1 cup water, milk, or non-dairy milk
1 tbsp canola or coconut oil
maple syrup (optional)
mixed berries (optional)
DIRECTIONS:
Combine pancake mix, water or milk, and oil in a small bowl. Whisk together thoroughly to incorporate. Pour ½ of the mixture into the Rice Cooker. Cook for 2 cycles. Once finished, invert pancake onto a plate and serve with maple syrup and berries, if desired. For the second pancake, repeat the process with the other half of the mixture. Makes 2 pancakes.
CUSTOMER SUPPORT
 Dash values quality and workmanship and stands behind this product with our Feel Good Guarantee ™. To learn more about our commitment to quality, visit bydash.com/feelgood.
Our US-based customer support team is at your service Monday – Friday during the times below.
Reach us at 1 (800) 898-6970 or

Hey Hawaii! You can reach our customer service team from 5 AM to 5PMAnd also, in Alaska, feel free to reach out from 6 AM – 6 PM.
WARRANTY
STOREBOUND, LLC – 1 YEAR LIMITED WARRANTY
Your StoreBound product is warranted to be free from defects in material and workmanship for a period of one (1) year from the date of the original purchase when utilized for normal and intended household use. Should any defect covered by the terms of the limited warranty be discovered within one (1) year, StoreBound, LLC will repair or replace the defective part. To process a warranty claim, contact Customer Support at 1-800-898-6970 for further assistance and instruction. A Customer Support agent will assist you by troubleshooting minor problems. If troubleshooting fails to fix the problem, a return authorization will be issued. Proof of purchase indicating the date and place of purchase is required and should accompany the return. You must also include your full name, shipping address, and telephone number. We are unable to ship returns to a PO box. stormbound will not be responsible for delays or unprocessed claims resulting from a purchaser’s failure to provide any or all of the necessary information. Freight costs must be prepaid by the purchaser.
Send all inquiries to .
There are no express warranties except as listed above.
REPAIR OR REPLACEMENT AS PROVIDED UNDER THIS WARRANTY IS THE EXCLUSIVE REMEDY OF THE CUSTOMER. STORMBOUND SHALL NOT BE LIABLE FOR ANY INCIDENTAL OR CONSEQUENTIAL DAMAGES OR FOR BREACH OF ANY EXPRESS OR IMPLIED WARRANTY ON THIS PRODUCT EXCEPT TO THE EXTENT REQUIRED BY APPLICABLE LAW. ANY IMPLIED WARRANTY OF MERCHANTABILITY OR FITNESS FOR A PARTICULAR PURPOSE ON THIS PRODUCT IS LIMITED IN DURATION TO THE DURATION OF THIS WARRANTY.
Some states do not allow the exclusion or limitation of incidental or consequential damages or limitations on how long an implied warranty lasts. Therefore, the above exclusions or limitations may not apply to you. This warranty gives you specific legal rights and you may also have other rights, which vary from state to state.
REPAIRS
DANGER! Risk of electric shock! The Dash Mini Rice Cooker is an electrical appliance. Do not attempt to repair the appliance yourself under any circumstances.
Contact Customer Support regarding repairs to the appliance.
TECHNICAL SPECIFICATIONS
Voltage 120V ~ 60Hz
Power Rating 200W
Stock#: DRCM200_20180322_V11
- 1-800-898-6970
- @unprocessyourfood
- bydash.com
FAQ’S
How do I make brown rice in my Mini Rice Cooker?
Brown rice takes longer to cook than white rice, so you will need to increase your cooking time by 15-20 minutes when using brown rice instead of white rice in your Mini Rice Cooker (see chart below). After cooking is complete, allow your brown rice to sit for 10 minutes before fluffing with a fork and serving.
White Rice Cooking Time: 20-25 minutesBrown Rice Cooking Time: 35-40 minutes
How do you use the dashboard rice cooker mini?
Using your rice cooker
Remove the Pot from the Body.
Fill the Removable Pot with your ingredients. …
Place the Removable Pot into the Body and cover with the Lid.
Plug the Rice Cooker into an outlet. …
When the Cooking Switch turns off, check to see if your food is done.
How long does the dash mini rice cooker take?
20 minutes
The Dash Mini Rice Cooker with Keep Warm technology is the ultimate mini rice cooker, ideal for single-serving cooking. Just add water and press cook: your meal will be ready in less than 20 minutes! The Keep Warm function ensures that food stays hot, and the removable, nonstick pot makes clean-up easy.
How much rice can you cook in a dash rice cooker?
Designed to make 2 cups of rice, grains, soups, stews, and much more, this mini appliance also features a nonstick coating to make cleanup super easy. Includes: Recipe guide with 14 meals and sides.
Can you cook meat in a rice cooker?
Yes, you can cook strips of meat or poultry in a rice cooker. You can steam them using a tray while cooking rice, or you can cook them directly on the rice cooker as you would with a slow cooker. Put your seasoned meat into the rice cooker.
Which rice cooker is dishwasher safe?
It can be challenging to find the right dishwasher safe rice cooker, as there are all kinds of dishwasher safe rice cooker brands to choose from, such as GreenLife, Sistema, Aroma Housewares, Prepsolutions, Servappetit.
What can you cook in a dash rice cooker?
DASH RICE COOKER
21 Non-Rice Meals You Can Make Using Your Rice Cooker.
Rice Cooker Ginger Chicken and Rice Recipe.
No Wok, No Problem: Rice Cooker Fried Rice.
Coconut Quinoa w/ Lime Zest (3-Ingredient Side Dish!) – Unsophisticook.
The Easiest Cilantro Lime Quinoa – Project Meal Plan.
How long can I leave rice in a rice cooker?
Storing rice in the rice cooker for several hours is completely safe, but keep it for a maximum of ten to 12 hours. However, leaving rice for that time is safe only if the keep-warm function keeps the rice at a temperature higher than 140 degrees Fahrenheit.
Is it OK to open a rice cooker while cooking?
If you are cooking it in the rice cooker, you wouldn’t need to lift the lid to check for done-ness. However if you are cooking in a rice cooker, the lid should not be immediately lifted off after it says it is done cooking. You need to let it sit for about 5-10 minutes so the steam can continue to cook.
Does rice cooker use a lot of electricity?
A typical 1.8 liter rice cooker has an estimated cost per use of P3. 11 for 27 minutes (at full capacity=10 cups of rice).10
How many watts rice cooker is best?
The power consumption of rice cookers ranges from 300 watts to 1100 watts. A typical rice cooker consumes 400 watts of power.
How does a rice cooker know when to shutdown?
The appliance has a thermostat that can detect when the temperature rises above 212 degrees F in the container, and it turns itself off.
]]>![]()
![]()
![]()
#K50780
DELUXE
Express EGG COOKER
Instruction Manual | Recipe Guide
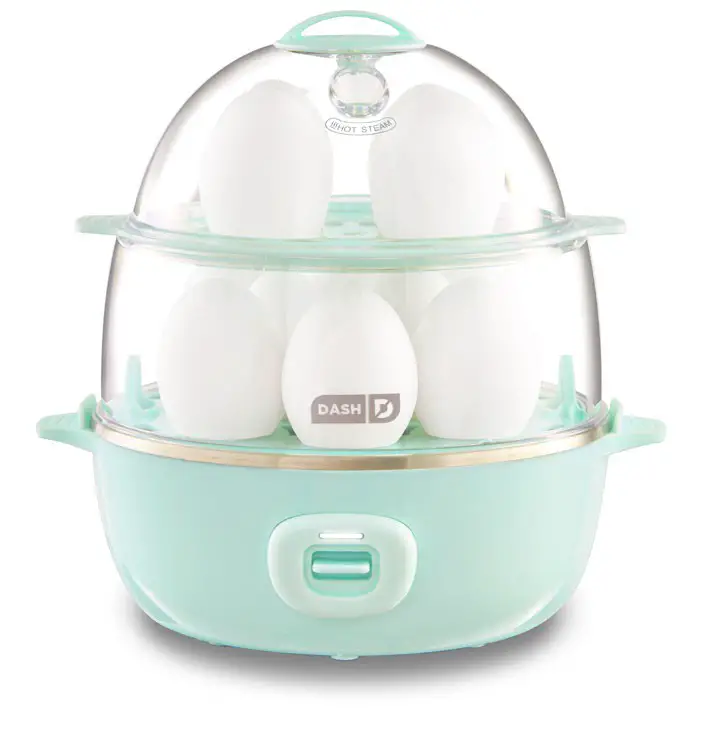

IMPORTANT SAFEGUARDS
IMPORTANT SAFEGUARDS: PLEASE READ AND SAVE THIS INSTRUCTION AND CARE MANUAL.
When using electrical appliances, basic safety precautions should be followed, including:
- Read all instructions.
- Remove all bags and packaging from appliances before use.
- Never leave the appliance unattended when in use.
- Make sure the appliance is cleaned thoroughly before using.
- Do not use appliance anything other than its intended use. For household use only. Do not use outdoors.
- Close supervision is necessary when any appliance is used by or near children.
- Do not operate this appliance with a damaged cord, damaged plug, after the appliance malfunctions, is dropped, or is damaged in any manner. Return appliance to the nearest authorized service facility for examination, repair, or adjustment.
- For maintenance other than cleaning, please contact StoreBound directly at 1-800-898-6970 from 7AM7PM PT Monday-Friday or by email at [email protected].
- Only use approved ingredients with this product. Other food may damage the appliance.
- The Deluxe Express Egg Cooker will turn on when plugged in and the power switch has been activated. When all the water has evaporated from the Heating Plate, a buzzer will sound and the Heating Plate will turn off. If the switch is not turned off immediately, the Heating Plate will cycle on and off until the Deluxe Express Egg Cooker is turned off. |
- Make sure the Lid is securely in place before turning on the appliance.
- When cleaning the Body, do not submerge in water or other liquids. Instead, use a soft damp cloth to wipe down the appliance.
• Do not put your hands or other objects into the Deluxe Express Egg Cooker while it is in operation. If food spills on the Heating Plate, turn off the Deluxe Express Egg Cooker and let cool completely before cleaning. - Keep hands and utensils away from the Heating Plate while cooking eggs to reduce the risk of injury or damage to the Deluxe Express Egg Cooker.
- The internal base and contents (water and eggs) of the Deluxe Express Egg Cooker are hot when in use. Let cool before handling and/or cleaning.
- Do not touch the eating Plate when the Deluxe Express Egg Cooker is hot. Use the handles.
- If using a longer power-supply cord or extension cord, make sure the electrical rating of the wire is compatible with the appliance.
- Use extreme caution when handling the Measuring Cup as there is a sharp Pin on the bottom of the cup which may cause injury.
- If the appliance is of the grounded type, the extension cord should be a grounding-type 3-wire cord.
- Warning: the Lid and Base Ring get hot when in use. When eggs are done, carefully remove the Lid by the handle and the Base Ring with a towel or oven mitt. Allow the parts to cool completely before touching or cleaning.
- NEVER place the Poaching Trays or Omelette Bowl directly on the Heating Plate. Always place on top of the Boiling Trays.
- Make sure the Deluxe Express Egg Cooker is off before removing eggs.
- Do not place the appliance on or near a hot gas burner, hot electric burner, or in a heated oven.
- Refrain from using attachments that are not recommended by the appliance manufacturer, as this may result in fire, electric shock, or personal injury.
- Do not let the cord touch hot surfaces or hang over the edges of tables or counters.
- This appliance is not intended for use by persons (including children) with reduced physical, sensory, or mental capabilities, or lack of experience and knowledge unless they are provided with supervision and instruction concerning the use of the appliance by a person responsible for their safety.
- Always be sure to unplug the appliance from the outlet prior to moving, cleaning, storage, and when not in use.
- stormbound shall not accept liability for damages caused by improper use of the appliance.
- Improper use of the appliance can result in property damage or even personal injury.
- This appliance has a polarized plug (one blade is wider than the other). To reduce the risk of electric shock, this plug will fit in a polarized outlet only one way. If the plug does not completely fit in the outlet, reverse the plug. If it still does not fit, contact a qualified electrician. Do not attempt to modify the plugin anyway.
- A short power-supply cord is to be provided to reduce the risk resulting from becoming entangled in or tripping over a longer cord. An extension cord may be used if care is exercised in its use. If an extension cord is used, the marked electrical rating of the extension cord should be at least as great as the electrical rating of the appliance. The
the extension cord should be arranged so that it will not drape over the countertop or tabletop where t can be pulled on by children or tripped over unintentionally.
 WARNING: This product can expose you to bisphenol A, which is known to the State of California to cause reproductive harm. For more information go to www.p65warnings.ca.gov.
IMPORTANT SAFEGUARDS: PLEASE READ AND SAVE THIS INSTRUCTION AND CARE MANUAL.
PARTS & FEATURES
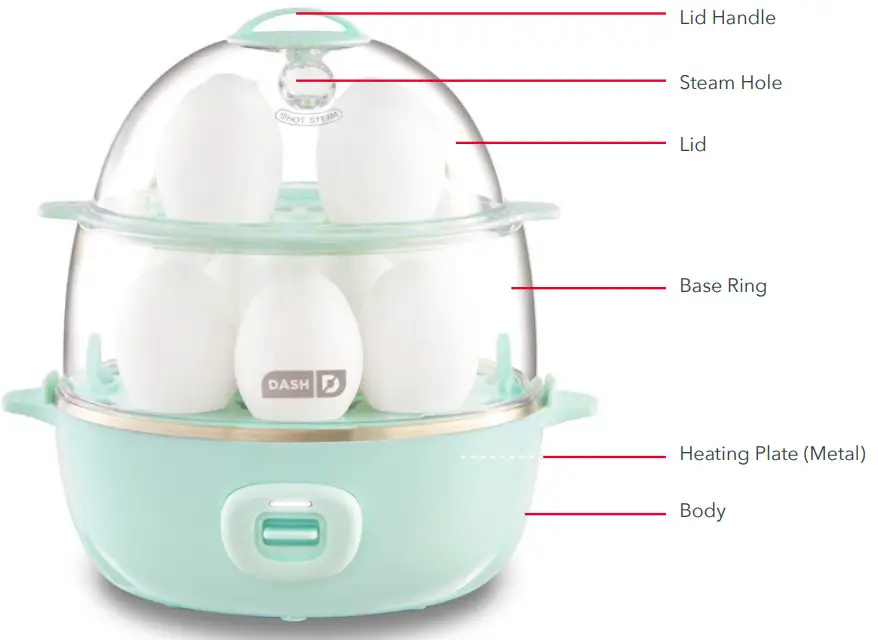

USING YOUR Deluxe Express Egg Cooker
Soft, Medium, and Hard-Boiled eggs:
The times listed below are guidelines so that you will know how long it will take to cook the eggs. The thermostat in the Deluxe Express Egg Cooker will shut off automatically and a buzzer will sound when the eggs are done – no additional time is necessary. The following time guidelines are for cold large eggs. Extra-large or jumbo eggs may require additional water and time in the cooker to achieve desired results.
| Style | # of Eggs | amount of water | Time |
| Soft-Boiled | 6 | 1.25 oz. | 9 min |
| 12 | 1.25 oz. | 11 min | |
| Medium Egg | 6 | 2 oz. | 10 min |
| 12 | 1.5 oz. | 11 min | |
| Hard-Boiled | 6 | 5 oz. | 18 min 45 sec |
| 12 | 4.25 oz. | 21 min |
USING YOUR Deluxe Express Egg Cooker
Omelets & Poached Eggs:
For omelets or poached eggs, fill the Measuring Cup with water to the designated Poached/Omelette Line. This line is applicable for 7 poached eggs or an omelet made with 2-3 eggs.
| COMBINATION | AMOUNT OF WATER | Time |
| Poached Eggs | 2.25 oz. | 6min 30sec |
| Omelet | 2.25 oz. | 5min 30sec |
Mix and Match
With the Deluxe Express Egg Cooker, you can now mix and match your eggs. Please refer to the following guidelines for a few ideas.
| COMBINATION | AMOUNT OF WATER |
| 4 poached eggs + 4 soft boiled eggs | 3 oz. |
| 7 mini omelets | 4 oz. |
| 7 mini omelets + 4 hard-boiled eggs | 4 oz. |
BOILING EGGS
- Make sure the Deluxe Express Egg Cooker is unplugged before starting. Pierce the larger end of each egg with the Pin attached to the bottom of the measuring cup.

- Use the Measuring Cup to pour the appropriate amount of cold water onto the Heating Plate.
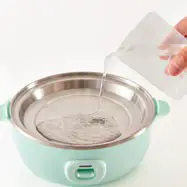
- Place Large Boiling Tray on Body. Place 8 eggs in the designated spots on the tray. Make sure that the holes in the larger end of the eggs are pointed upwards. Do not let the eggs touch the Heating Plate.
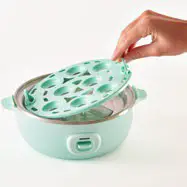 Note: When making less than a dozen eggs, you may use either the Large Boiling Tray or the Small Boiling Tray. If only using the Large Boiling Tray, the Lid can be placed right over the Base Ring without the Small Boiling Tray.
 - Place Base Ring over Large Boiling Tray.
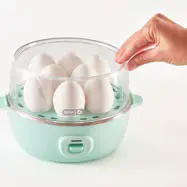
- Set Small Boiling Tray on top of Base Ring.
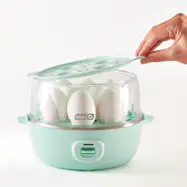
- Place an egg in each of the designated openings in the Small Boiling Tray so that the larger ends of the eggs are pointed upwards.
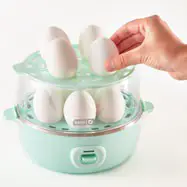
- Cover with Lid and plugin Deluxe Express Egg Cooker. Press the power switch on the Body to start cooking.
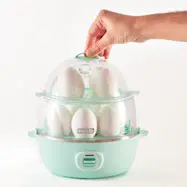
- When the eggs are finished cooking, a buzzer will sound. Press the power switch to silence the buzzer. Actual cooking time will depend on the number of eggs and desired style. Uncover Lid by using the Lid Handle and remove eggs with heat-resistant tongs. Do not touch the parts with bare hands as they will be hot!
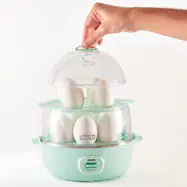 Tip: Soak eggs in ice water or run under cold water immediately after removing from the Deluxe Express Egg Cooker to stop the cooking process and to make peeling easier.
USING THE poaching trays
- Fill the Measuring Cup with cold water to the Poached / Omelette Line. Pour cold water onto the Heating Plate.
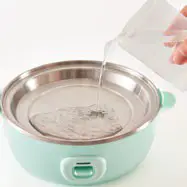
- Place Large Boiling Tray on the Body first, and then place the 4 Egg Poaching Tray on top. Spray Poaching Trays with a little cooking spray. Break an egg into each poaching section.
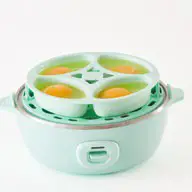 Note: Make sure to always place Poaching Trays on top of the Boiling Trays and never directly on the Heating Plate.
 - Place Base Ring over Large Boiling Tray. Then, place Small Boiling Tray over Base Ring and set the 3 Egg Poaching Tray on top. Break an egg into each poaching section.

- Cover with Lid and plug in the Deluxe Express Egg Cooker. Press the power switch on the Body to start cooking. When the buzzer sounds, switch the Deluxe Express Egg Cooker off and remove eggs immediately to avoid overcooking. If you like firmer eggs, leave them in the Deluxe Express Egg Cooker for a few extra minutes. Use tongs or oven mitts when handling Poaching Trays as they will be hot!

USING THE omelet bowl
- Fill the Measuring Cup with cold water to the Poached /Omelette Line. Pour cold water onto the Heating Plate.
- Spray Omelette Bowl with a little cooking spray. Whisk eggs in a bowl before pouring into Omelette Bowl. Place Large Boiling Tray on the Body and place Omelette Bowl on top.
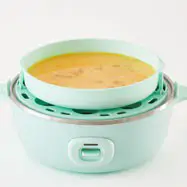 Note: Make sure to always place Omelette Bowl on top of the Boiling Tray and never directly on the Heating Plate.
 - Place Base Ring on the Body and then cover with Lid. Plugin the Deluxe Express Egg Cooker and press the power switch to begin cooking. When the buzzer sounds, switch the Deluxe Express Egg cooker off and open the Lid. It is normal for the eggs to expand while cooking. They will contract once the Lid has been opened. Remove
your omelet with a spatula.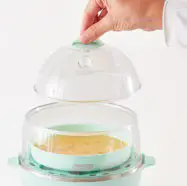 Note: To make mini omelets, whisk each egg individually and cook in Poaching Trays (one egg per poaching section). We recommend using 4 oz. of water for 7 mini omelets.
CLEANING & MAINTENANCE
- CAUTION: DURING AND AFTER USE, THE Deluxe Express Egg Cooker IS HOT.
- Do not attempt to clean your Deluxe Express Egg Cooker until the appliance has cooled.
- Do not submerge the Body in water or other liquids.
- The Body of the Deluxe Express Egg Cooker is not dishwasher safe.
- Before cleaning or moving the appliance, make sure to unplug the Deluxe Express Egg Cooker.
- Wash the Deluxe Express Egg Cooker accessories and Lid with some warm water & soap or place them on the top shelf of the dishwasher.
- Wipe down the Body and Heating Plate with a damp cloth.
- Dry all parts thoroughly. When storing, place the accessories on the Heating Plate and cover them with the Lid.
- CLEANING THE HEATING PLATE:
- Your Deluxe Express Egg Cooker will not rust. Over time, the Deluxe Express Egg Cooker may begin to develop some mineral deposits on the Heating Plate. While this may look like rust, it is merely the residue of natural minerals present in your water.
- Below are two different ways to properly clean the Heating Plate.
- Clean the Heating Plate with a mild solution of water and vinegar (10 parts water: 1 part vinegar) from time to time.
- Gently scrub the Heating Plate in a circular motion with a “magic eraser” type sponge and a little warm water.
TROUBLESHOOTING
Although your Deluxe Express Egg Cooker is simple to use and durable, please refer to the following list if problems occur:
| ISSUE | SOLUTION |
| The Indicator Light does not turn on. | Ensure that the power cord is plugged into the power outlet. Check to make sure the power outlet is operating correctly. Press the power switch (located on the front of your Deluxe Express Egg Cooker). Determine if a power failure has occurred in your home, apartment, or building. Use the Measuring Cup to determine the appropriate amount of water needed to make your eggs. Refer to the recommended cooking times for soft/runny, medium, and hard-boiled eggs. |
| The eggs are over or undercooked. | If overcooked, make sure to remove the eggs from the cooker immediately after the buzzer sounds. Make sure that the Heating Plate, Lid, and accessories are completely dry before adding the appropriate amount of water to the Heating Plate and cooking the eggs. If undercooked, leave eggs in the Deluxe Express Egg Cooker for a few extra minutes with the Lid on before serving. |
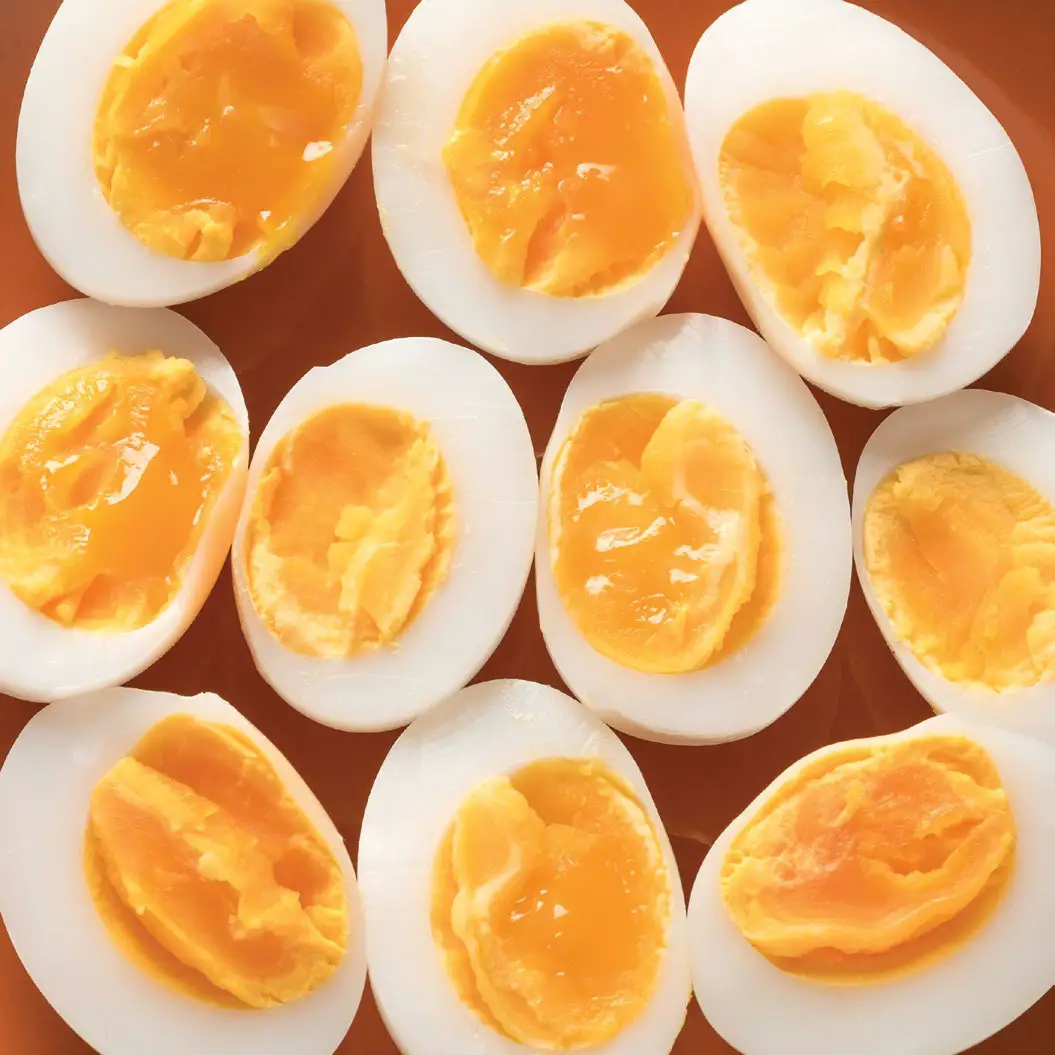
Deluxe Express Egg Cooker RECIPE Guide
 Follow us @unprocessyourfood for recipes, videos, & daily inspiration

Deviled
EGGS
Ingredients:
12 hard-boiled eggs, cooled
²∕3 cup mayonnaise
¼ cup Dijon-style mustard
¼ tsp salt
paprika, chives, and dill, to garnish
Directions:
Peel the eggs and cut in half lengthwise. Remove the yolks, place in a large bowl and cream them into a paste with a fork. Mix in the mayonnaise, mustard, and salt. Spoon or pipe the mixture into the egg white halves. Place the eggs in the refrigerator until ready to serve. Just before serving, garnish with a dash of paprika and freshly cut chives and dill.
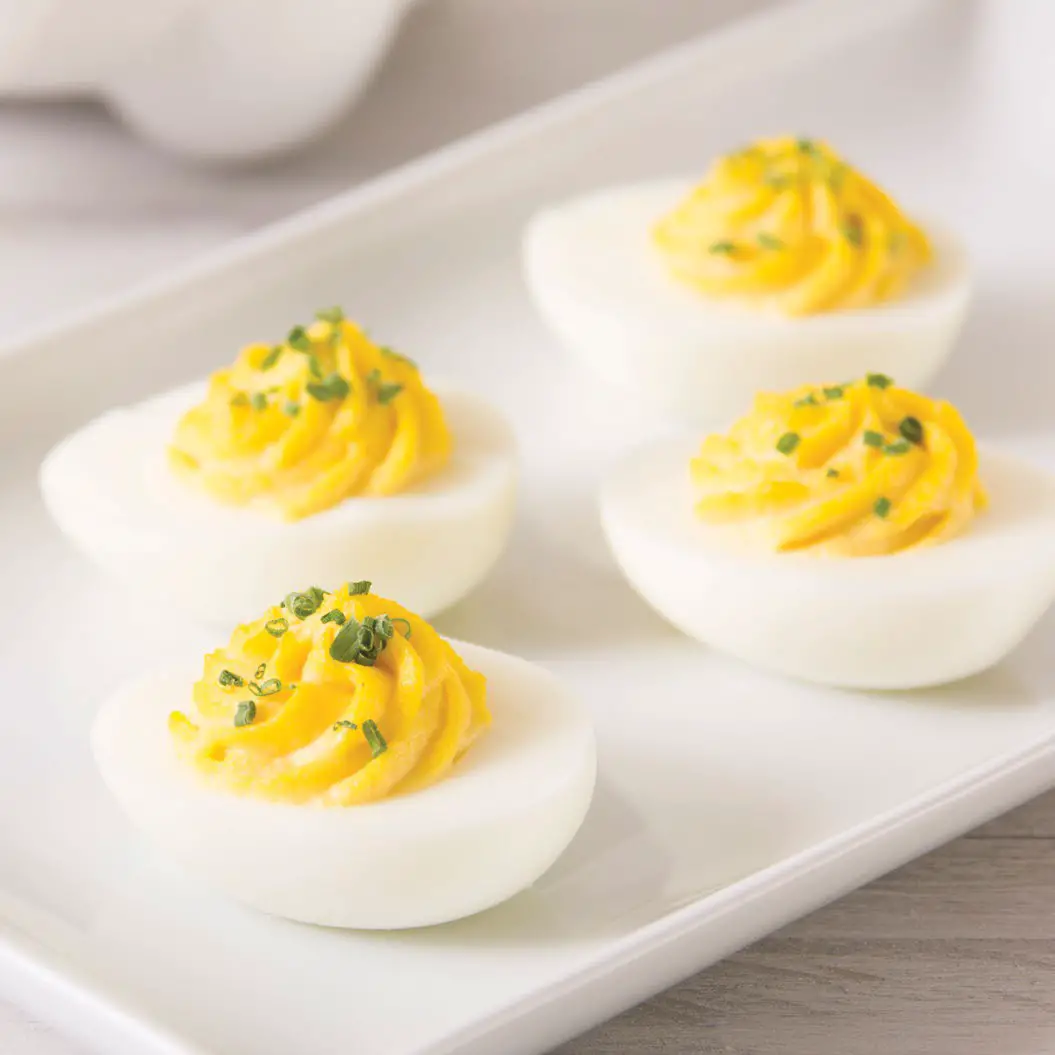

EGGS
BENEDICT
Ingredients:
| For Hollandaise Sauce 6 egg yolks 5 tbsp lemon juice ¹∕8 tsp ground white pepper ¼ tsp Worcestershire sauce 1½ tbsp water 1½ cup butter, melted salt to taste Directions: |
For Eggs Benedict 6 eggs 1 bunch asparagus, trimmed mand boiled 6 strips Canadian-style bacon 3 English muffins, toasted 2 tbsp butter, softened chives or cayenne pepper, to garnish |
Directions:
For the Hollandaise Sauce: On a stovetop, fill the bottom of a double boiler part-way with water. Make sure that water does not touch the bottom of the bowl. Bring water to a gentle simmer.
In the top of the double boiler, whisk together egg yolks, lemon juice, white pepper, Worcestershire sauce, and 1 ½ tablespoons water. Add melted butter to the egg yolk mixture 2 tablespoons at a time while whisking yolks constantly. If the sauce begins to get too thick, stir in a little hot water. Add salt and continue whisking until incorporated. Remove from heat and cover with a lid to keep sauce warm.
To Assemble: Fill the Measuring Cup with water to the Omelette / Poached Line and pour water onto Heating Plate. Put Large Boiling Tray on Body and place the lightly greased 4 Egg Poaching Tray on top. Break an egg into each poaching section. Add the Base Ring and the Small Boiling Tray. Place the lightly greased 3 Egg Poaching Tray on top and break the remaining eggs into each section.
Replace the Lid and turn the Deluxe Express Egg Cooker on. When the buzzer sounds, the eggs will be poached. Remove eggs immediately to prevent overcooking. Butter the toasted English muffin halves. Place a slice of Canadian-style bacon, a few asparagus spears, a poached egg, and a spoonful of hollandaise sauce on each half. Garnish with chives or cayenne pepper and serve immediately.


Egg SALAD
Ingredients:
12 hard-boiled eggs, cooled and peeled
1-2 stalks celery
²∕3 cup mayonnaise
¼ cup Dijon-style mustard
½ tbsp salt
¼ tsp black pepper
Directions:
Finely dice the eggs and celery and mix together. Add mayonnaise, mustard, salt, and pepper. Mix until desired texture is reached. Serve on multigrain bread with sliced cucumber.

For a healthy twist, you can make this egg salad with half the egg yolks and light, or olive oil-based, mayonnaise.
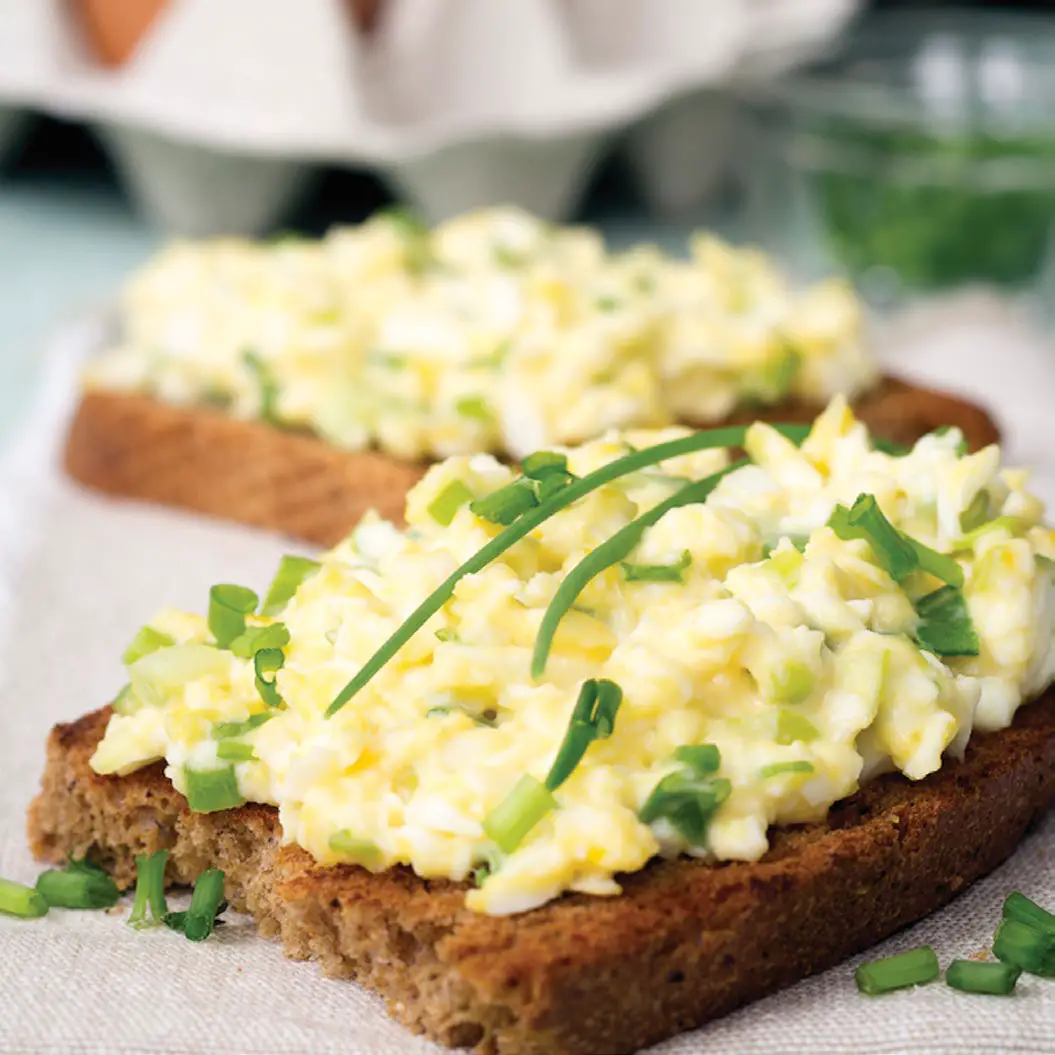

Tomato & spinach FRITTATA
Ingredients:
| 3 eggs (or 2 egg whites and | 3 basil leaves, cut into |
| ½ cup spinach, chopped | 2 tbsp shredded mozzarella |
| 3 cherry tomatoes, halved | salt & pepper, to taste |
Directions:
Fill the Measuring Cup with water to the Omelette / Poached Line and pour onto the Heating Plate. Place the Large Boiling Tray on the Heating Plate and then sit the lightly greased Omelette Bowl on top. Beat eggs and pour into the Omelette Bowl. Sprinkle the basil, spinach, mozzarella, and tomatoes over the whisked egg. Cover with the Lid and turn on the Deluxe Express Egg Cooker.
When the buzzer sounds, remove eggs immediately to prevent overcooking. Add salt and pepper to taste.

MORE RECIPE IDEAS
MINI OMELETTES
Make mini omelets for all tastes and preferences with the Poaching Trays. Whisk up to 7 eggs and pour mixture evenly into each poaching section (one egg per section). If using egg whites, pour 3 tablespoons of the egg white mixture into each poaching section. Then add your toppings, cover, and turn on the Deluxe Express Egg Cooker.
LARGE OMELETTE
Make one large tasty omelet in the Omelette Bowl with up to three large eggs. If using egg whites, pour in up to 9 tablespoons of egg white mixture. Then add your toppings and turn on the Deluxe Express Egg Cooker.
OMELETTE IDEAS
– mushroom, spinach, tomato, and green bell pepper
– feta cheese, spinach, onion, and red pepper
– goat cheese and fig
– sweet corn, salsa, and cheddar cheese
– tomato, basil, mozzarella, and sausage
– bell peppers, ham, and cheddar cheese
– red onion, asparagus, and tomato
– avocado, bacon, and tomato
– broccoli, cheddar cheese, mushroom, and tomato
– swiss cheese and turkey
– blue cheese, pear, and toasted pecans

MORE RECIPE IDEAS
The Deluxe Express Egg Cooker can be used to steam and reheat foods other than just eggs. Listed below are some guidelines to help you get started.
| ingredients | directions | Time |
| 1 cup raw broccoli florets | Pour 3 ounces of water onto Heating Plate. Cook broccoli in Omelette Bowl. | 8 min |
| 8 stalks of asparagus, cut in half | Pour 3 ounces of water onto Heating Plate. Spread asparagus in Omelette Bowl & cook. |
8 min |
| 2-4 oz. salmon, 1 inch thick | Add 5.5 ounces of water to Heating Plate. Cook fillets side by side in Omelette Bowl. |
15 min |
| 1 cup raw shrimp | Add 3 ounces of water to Heating Plate. Cook shrimp side by side in Omelette Bowl. |
8 min |
MORE RECIPE IDEAS
| ingredients | directions | Time |
| 5-6 medium-sized dumplings | Add 3.5 ounces of water to Heating Plate. Cook dumplings side by side in Omelette Bowl. | 9.5 min |
| 1 (15.25 oz.) can corn, drained | Pour 2.5 ounces of water onto Heating Plate. Cook corn in Omelette Bowl. | 6 min |
| 1 cup frozen edamame | Pour 2.5 ounces of water onto Heating Plate. Spread edamame in Omelette Bowl and cook. | 6 min |
| 1-3 small corn/flour tortillas | Place tortillas directly on Heating Plate. Place Base Ring and Lid on Deluxe Express Egg Cooker and turn on. When the buzzer sounds, turn off the cooker, flip tortillas, and re-cover. Wait a few minutes until tortillas are warm. | 8 min |
CUSTOMER SUPPORT
 Dash values quality and workmanship and stands behind this product with our Feel Good Guarantee ™. To learn more about our commitment to quality, visit ydash.com/feelgood.
Our US-based customer support team is at your service Monday – Friday during the times below. Reach us at 1 (800) 898-6970 or [email protected]

Hey Hawaii! You can reach our customer service team from 5 AM to 5 PM. And also, Alaska, feel free to reach out from 6 AM – 6 PM.
STOREBOUND, LLC – 1 YEAR LIMITED WARRANTY
Your StoreBound product is warranted to be free from defects in material and workmanship for a period of one (1) year from the date of the original purchase when utilized for formal and intended household use. Should any defect covered by the terms of the limited warranty be discovered within one (1) year, StoreBound, LLC will repair or replace the defective part. To process a warranty claim, contact Customer Support at 1-800-898-6970 for further assistance and instruction. A Customer Support agent will assist you by troubleshooting minor problems. If troubleshooting fails to fix the problem, a return authorization will be issued. Proof of purchase indicating the date and place of purchase is required and should accompany the return. You must also include your full name, shipping address, and telephone number. We are unable to ship returns to a PO box. stormbound will not be responsible for delays or unprocessed claims resulting from a purchaser’s failure to provide any or all of the necessary information. Freight costs must be prepaid by the purchaser.
Send all inquiries to [email protected].
There are no express warranties except as listed above.
REPAIR OR REPLACEMENT AS PROVIDED UNDER THIS WARRANTY IS THE EXCLUSIVE REMEDY OF THE CUSTOMER. STORMBOUND SHALL NOT BE LIABLE FOR ANY INCIDENTAL OR CONSEQUENTIAL DAMAGES OR FOR BREACH OF ANY EXPRESS OR IMPLIED WARRANTY ON THIS PRODUCT EXCEPT TO THE EXTENT REQUIRED BY APPLICABLE LAW. ANY IMPLIED WARRANTY OF MERCHANTABILITY OR FITNESS FOR A
PARTICULAR PURPOSE ON THIS PRODUCT IS LIMITED IN DURATION TO THE DURATION OF THIS WARRANTY.
Some states do not allow the exclusion or limitation of incidental or consequential damages, or limitations on how long an implied warranty lasts. Therefore, the above exclusions or limitations may not apply to you. This warranty gives you specific legal rights and you may also have other rights, which vary from state to state.
REPAIRS
DANGER! Risk of electric shock! The Dash Deluxe Express Egg Cooker is an electrical appliance. Do not attempt to repair the appliance yourself under any circumstances.
Contact Customer Support regarding repairs to the appliance.
TECHNICAL SPECIFICATIONS
Voltage 120V ~ 60Hz
Power Rating 500W
Stock#: K50780_20200616_v4
![]()
Designed in NYC | 1-800-898-6970 | @unprocessyourfood | bydash.com
]]>DASH DCAF200 Tasti-Crisp Air Fryer Instruction Manual

IMPORTANT SAFEGUARDS
IMPORTANT SAFEGUARDS: PLEASE READ AND SAVE THIS INSTRUCTION AND CARE MANUAL. important safeguards When using electrical appliances, basic safety precautions should be followed, including:
- Read all instructions.
- Remove all bags and packaging from appliance before use.
- Do not use appliance outdoors or for commercial purposes.
- Never leave appliance unattended when in use.
- Only use the appliance on a stable, dry surface.
- Make sure the appliance is cleaned thoroughly before using.
- Do not touch hot surfaces. Use handles.
- To protect against electrical shock to not immerse cord or plugs or appliance in water or other liquid.
- Do not use appliance for other than its intended use. For household use only. Do not use outdoors.
- Close supervision is necessary when any appliance is used by or near children. Children should be supervised to ensure that they do not play with the appliance.
- Do not operate this appliance with a damaged cord, damaged plug, after the appliance malfunctions, is dropped, or damaged in any manner. Return appliance to the nearest authorized service facility for examination, repair, or adjustment.
- For maintenance excluding cleaning, please contact Store Bound directly at 1-800-898-6970 from 7AM-7PM PT Monday-Friday or by email at [email protected].
- Do not place appliance on or near a hot gas burner, hot electric burner, or in a heated oven. Extreme caution must be used when moving an appliance containing hot oil or other hot liquids. Always attach plug to appliance first, then plug cord into the wall outlet. To disconnect, turn any control to “off,” then remove plug from wall outlet. Do not use appliance for other than intended use.
- Refrain from using attachments that are not recommended by the appliance manufacturer, as this may result in fire, electric shock, or personal injury.
- Do not let the cord touch hot surfaces or hang over the edges of tables or counters.
- This appliance is not intended for use by persons (including children) with reduced physical, sensory, or mental capabilities, or lack of experience and knowledge unless they are provided with supervision and instruction concerning use of the appliance by a person responsible for their safety.
- Always be sure to unplug the appliance from the outlet prior to moving, cleaning, storage, and when not in use.
- Store Bound shall not accept liability for damages · To avoid burns, use extreme caution when caused by improper use of the appliance. removing accessories or disposing of
- Improper use of the appliance can result in hot grease. property damage or personal injury.
- When not in use, always unplug the unit. Do not
- This appliance has a polarized plug (one blade is wider than the other). To reduce the risk of store any materials other than manufacturer’s recommended accessories in this appliance. electric shock, this plug will fit in a polarized outlet only one way. If the plug does not
- Do not place any of the following materials in the Air Crisp™: paper, cardboard, plastic and completely fit in the outlet, reverse the plug. If it similar products. still does not fit, contact a qualified electrician. Do not attempt to modify the plug in any way.
- Do not cover any part of the oven with metal foil. This will cause overheating of the oven.
- Turn the appliance OFF, then unplug from the outlet when not in use, before assembling or disassembling parts and before cleaning. To unplug, grasp the plug and pull from the outlet. Never pull from the power cord.
- A short power supply cord is to be provided to reduce the risk resulting from becoming entangled in or tripping over a longer cord. An extension cord may be used if care is exercised in its use. If an extension cord is used, the marked electrical rating of the extension cord should be at least as great as the electrical rating
of the appliance. The extension cord should be arranged so that it will not drape over the countertop or tabletop where it can be pulled on by children or tripped over unintentionally. If the appliance is of the grounded type, the cord set or extension cord should be a grounding-type 3-wire cord - Oversize foods, metal foil packages and utensils must not be inserted in the Air Fryer. as they may involve a risk of fire or electric shock.
- Do not allow the appliance to be covered by or touch flammable materials such as curtains, draperies or walls, when in operation. Do not store any items on top of the appliance when in operation. Do not operate under wall cabinets.
- Do not clean with metal scouring pads.
- Do not attempt to dislodge food when the appliance is plugged into the electrical outlet
- Use recommended temperature settings for all countertop or tabletop where it can be pulled on cooking/baking, roasting and air frying.
PARTS & FEATURES
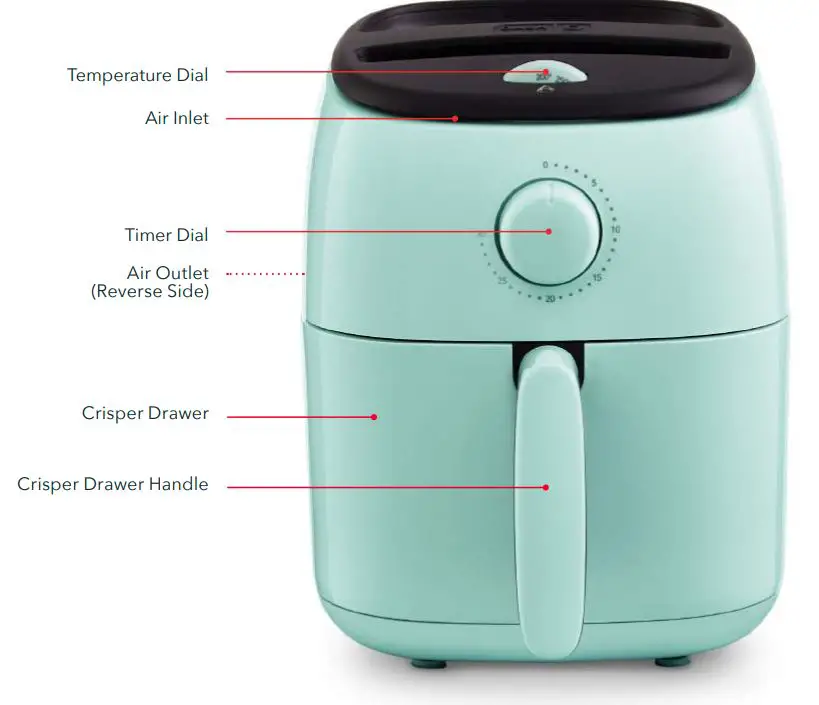
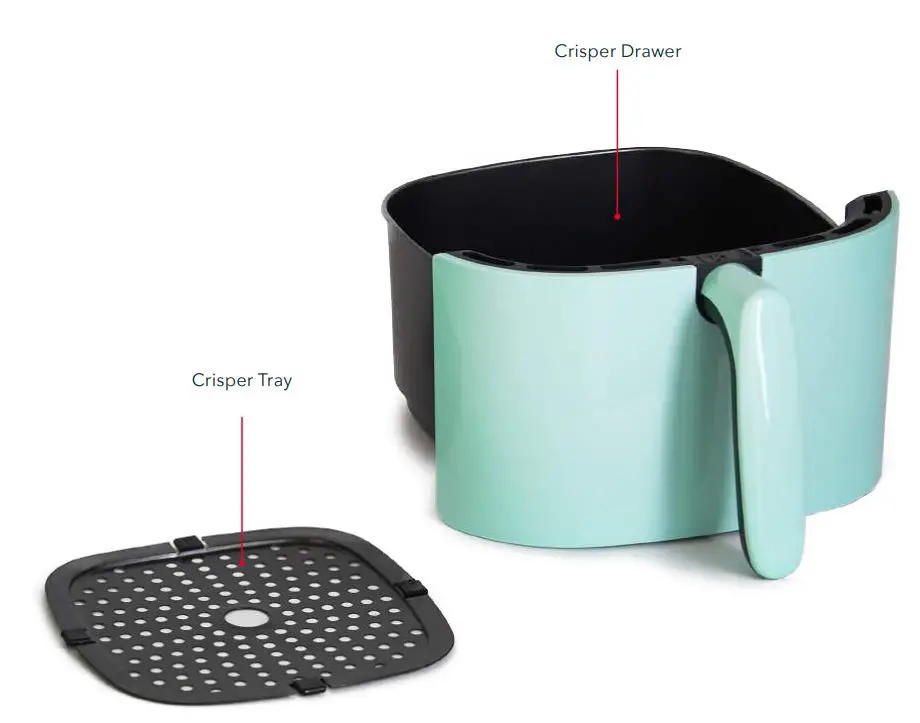
Using Your Tasti-Crisp™ Air fryer
BEFORE USING YOUR AIR FRYER
- Remove all packaging materials.
- Check that the Air Fryer has no visible damage and no parts are missing.
- Before using the appliance for the first time or before using it after prolonged storage, wash and dry the appliance and any accompanying accessories. See “Cleaning & Maintenance” for instructions.

- Place the appliance on a stable, flat, heat-resistant surface. Plug the Air Fryer into a wall socket.
- Remove the Crisper Drawer from the Air Fryer (photo A), and make sure that the Crisper Tray is inserted in the Crisper Drawer (photo B). Place food in the Crisper Drawer on the Crisper Tray. NOTE: There is no need to add any oil as the appliance works with hot air, although foods can be tossed in a small amount of oil for crispier results.
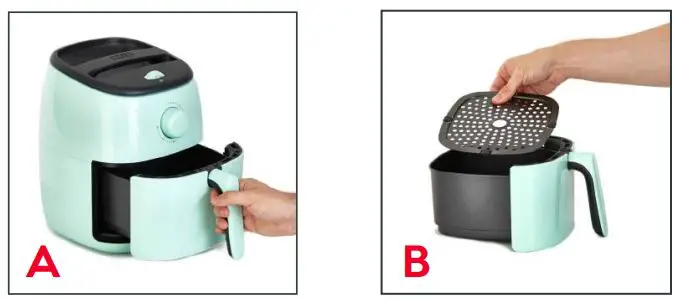 After adding food slide the Crisper Drawer back inside the Air Fryer (photo C).
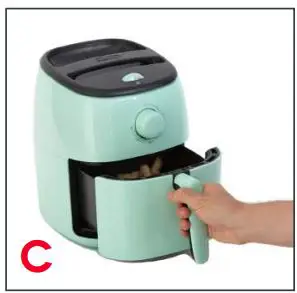
- Use the Temperature Dial to set the desired temperature. Refer to the Temperature & Time Charts on page (16-17) for suggested settings (photo D).
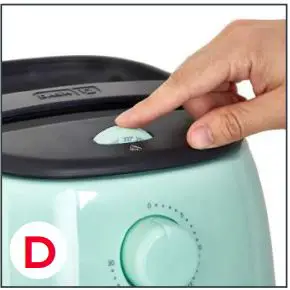
- Set the Timer Dial to your desired time. The Air Fryer will automatically begin air frying and the Timer Dial will start counting down (photo E).
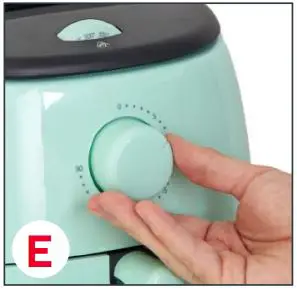
- For even results, some foods require shaking halfway through the preparation time. See the Temperature & Time Chart for recommendations. To do this, simply, remove the Crisper Drawer from the appliance and shake it gently side to side (photo F).
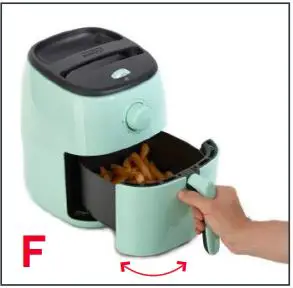 hen the Air Fryer is done cooking, a chime will sound.
- Pull the Crisper Drawer out of the appliance and place it on a heat-resistant surface. Caution:
The Crisper Drawer and Crisper Tray will be hot. Only touch the Crisper Drawer by the Crisper Drawer Handle. Check if the food is done. If the food is not ready, slide the Crisper Drawer back into the appliance and set the Timer Dial for a few extra minutes. - Empty the Crisper Drawer into a bowl or onto a plate. To remove large or greasy items, lift them out of the Crisper Drawer with a pair of tongs. Excess oil from any foods will be collected at the bottom of the Crisper Drawer. Allow the appliance to cool before disposing of any excess oil (photo G).
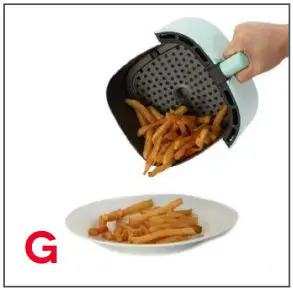
Tips & Tricks
- Air frying smaller items or fewer items will require a shorter cooking time than larger items or more items.
- Shaking items halfway during the cooking time optimizes the end result and can help prevent unevenly fried foods.
- Avoid preparing extremely greasy items, such as sausages, in the Air Fryer.
- Use a baking pan in the Crisper Drawer to bake a cake or quiche, or to fry fragile or filled items.
Air Frying Hacks! - Soak fresh potatoes in water for 30 minutes prior to frying, then add a small amount of oil for a crispy result. Fry potatoes in the Air Fryer within a few minutes of adding the oil.
- Snacks like chicken nuggets and mozzarella sticks usually prepared in an oven can also be prepared in the Air Fryer.
- Use store-bought dough to prepare filled snacks such as calzones quickly and easily. Items made with store-bought dough require less preparation than homemade dough.
Temperature & Time Charts
Please keep in mind that these temperatures and times are guidelines, not exact specifications. Actual cooking times vary depending on the size, shape, and amount of food. When air frying a new item, always make sure food is cooked properly before consumption. According to the USDA, the safe internal temperature is 165°F for poultry and 160°F for beef. If food is not cooked properly using these guidelines, add a few minutes to the Air Fryer and cook food longer.
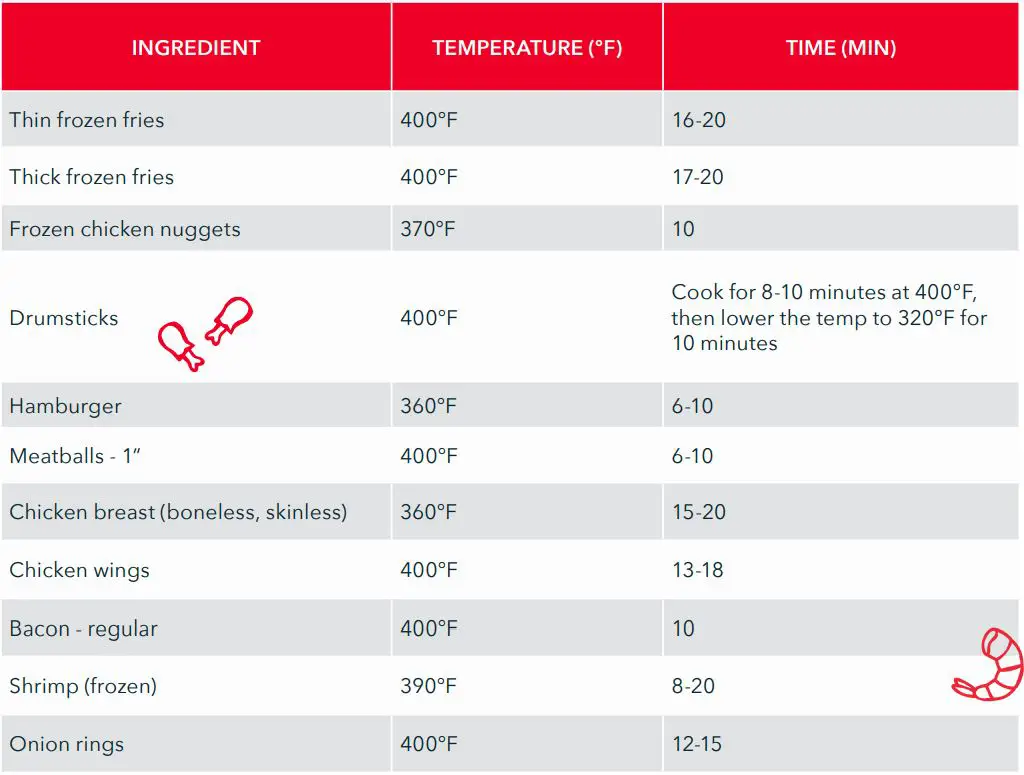
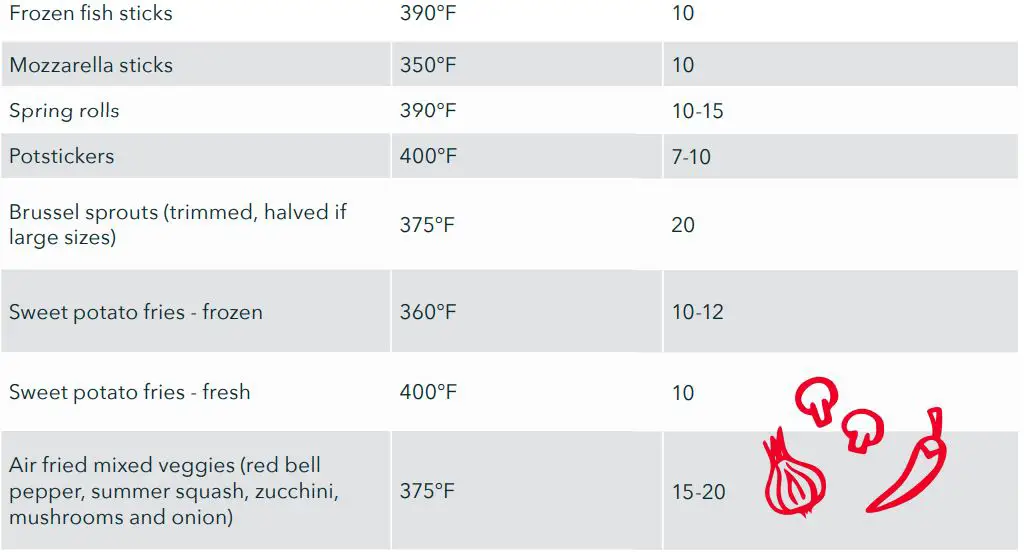 The Air Fryer can also be used to reheat foods. To reheat food, set the temperature to 300 for up to 10 minutes.
CLEANING & MAINTENANCE
- Remove the plug from the wall socket and let the appliance cool down completely. Removing the Crisper Drawer allows the Air Fryer to cool down quicker.
- Thoroughly clean the appliance after every use.
- Do not clean the Crisper Tray, Crisper Drawer, or the inside of the appliance with metal kitchen utensils or abrasive cleaning materials, as they may damage the non-stick coating.
- Wipe the outside of the appliance with a moist, soft cloth.
- The Crisper Tray and Crisper Drawer are dishwasher-safe.
- Alternatively, the Crisper Tray and Crisper Drawer can be cleaned with hot water, dish soap, and a non-abrasive sponge.
- Clean the heating element with a soft cleaning brush to remove any food residue.
- Make sure the appliance has cooled down completely before cleaning the heating element.
- Make sure that the appliance is unplugged and all parts are clean and dry before storing.
Chef Tip!
If the Crisper Drawer or the Crisper Tray is dirty, remove it from the Air Fryer and fill the Crisper Drawer with hot water and dish soap. Then, put the Crisper Tray in the Crisper Drawer and let them soak for about 10 minutes to release any food that has become stuck.

TROUBLESHOOTING

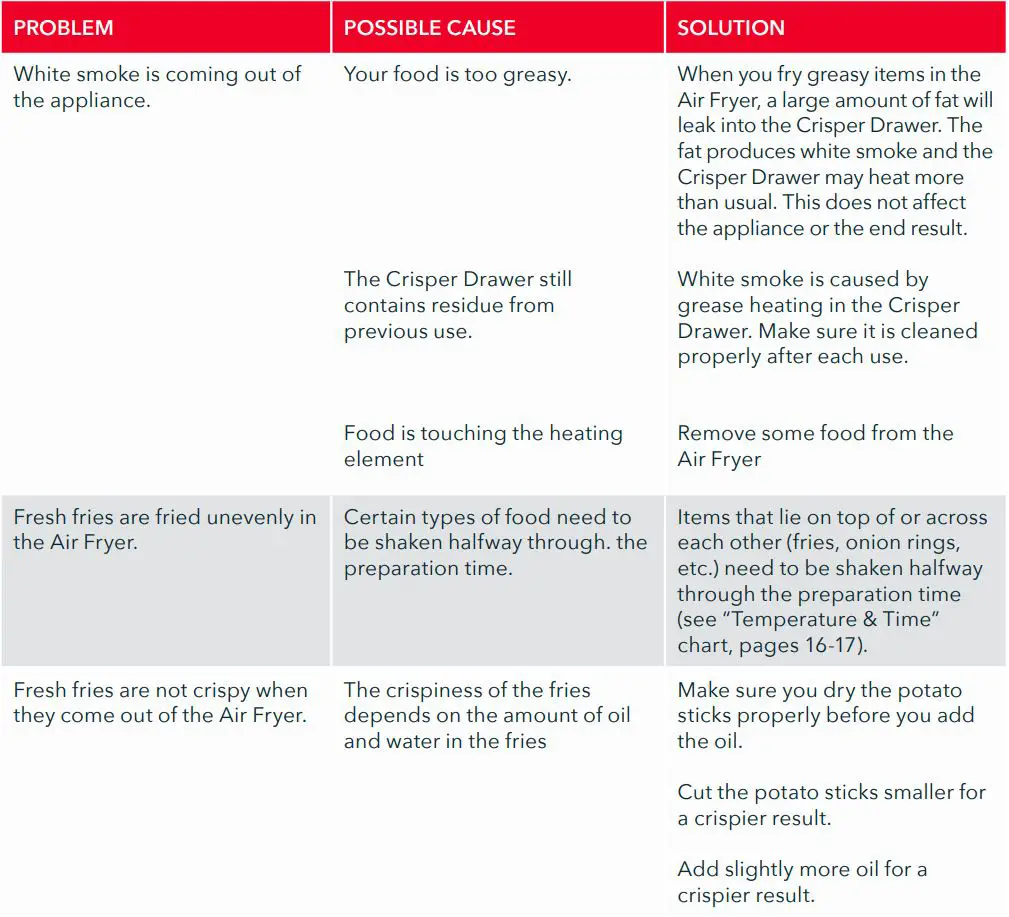

@bydash | recipes, videos, & inspiration
@unprocessyourfood | veg & vegan-friendly meals
RECIPES

BUFFALO CAULIFLOWER
Ingredients:
3 cups cauliflower florets, cut into ½ pieces
½ tbsp. cornstarch
1 tbsp. grapeseed or vegetable oil
Pinch of salt
For Buffalo Sauce:
1 tbsp. unsalted butter
¼ hot sauce
½ tbsp. honey
½ clove garlic, minced
Serve with blue cheese dressing or another dip
Directions:
- Temperature: 360°F Time: 15 minutes
- Preheat the Air Fryer to 360°F. Toss the florets with the oil and ½ tbsp. of cornstarch.
- Air fry at 360°F for 15 minutes.
- While the cauliflower is cooking, add all the hot sauce ingredients into a small pot over medium heat. Whisk to mix in the butter and reduce to heat to low.
- Toss the florets with hot sauce mixture and sprinkle with salt. 24


French Fries
Ingredients:
½ large Russet potato, washed and dried
½ tbsp. grape seed or vegetable oil
Pinch of salt
Directions:
- Temperature: 320°F Time: 15 minutes
- Preheat Air Fryer to 320°F.
- Cut the potato lengthwise into ¼ inch slices. Lay the slices flat and cut lengthwise again into ¼ inch pieces (think fast food style French fry size). Lay potato pieces on paper towel and roll them around to dry off any excess moisture.
- Toss the potato pieces in a bowl with the oil. Lay oiled pieces in the basket. Make sure they do not stick together. They can be layered as long as air can get through.
- Air fry potatoes for 15 minutes. Salt immediately when done.

Mac `n Cheese Balls
Ingredients:
4 cups cooked elbow macaroni
1 tbsp. butter
3 tsp all-purpose flour
11/3 cups heavy cream
2 cups sharp cheddar, shredded
2 cups Monterey jack, shredded
2 tsp sea or kosher salt
¼ tsp smoked paprika
½ tsp granulated garlic
¼ black pepper, ground
4 dashes hot sauce
2 tbsp. fresh parsley, chopped
3 large eggs, beaten
1 cup all-purpose flour
3 cups panko breadcrumbs
4 tbsp. grape seed or vegetable oil
Directions:
- Temperature: 360°F Time: 12 minutes
- Add butter to a medium sized pot over medium heat. When melted, whisk in the flour. Whisk for one minute. Pour in the heavy cream and whisk to mix.
- When cream is hot, whisk in 1 ½ cups of the cheddar and 1 ½ cups Monterey Jack in increments until the cheese is melted. Whisk in the salt, smoked paprika, granulated garlic, black pepper and hot sauce to combine.
- Pour in the pasta and, with a rubber spatula, mix to combine. Remove from the heat and fold in the remaining shredded cheese and chopped parsley. Transfer pasta mix onto a sheet tray lined with parchment paper and cool in the fridge for a half hour. Mix the panko with oil and coat the crumbs well with the oil.
- Preheat Air Fryer to 360°F. Form roughly a 2-inch ball with a scoop or by hand. Dredge balls in flour and shake off excess. Dip the mac & cheese balls in beaten eggs and then in the panko. Arrange 8 balls into the basket, 7 in a circle and one in the middle. Air fry for 12 minutes. Air fry in batches.
 Onion Rings
Ingredients:
½ large Vidalia onion, peeled, ends cut off and sliced into roughly ½ inch rings
1 cup all purpose flour
2 large eggs, beaten
1 cups panko breadcrumbs
1 ½ tbsp. grapeseed or vegetable oil
½ tsp sea or kosher salt
Directions:
- Temperature: 285°F Time: 10 minutes
- Preheat Air Fryer to 285°F.
- Mix the panko with the oil and salt to coat the crumbs well with the oil. Dredge onion rings in flour and shake off excess.
- Dip the rings into the egg and then into the panko mixture. Manually press and squeeze the crumbs onto the onion rings to get them to stick.
- Place rings into the basket in two layers, about 2 on the bottom and 2 on top, depending on ring size and fry for 10 minutes.
- Serve with sauces and condiments, if desired.


Buttermilk Fried Chicken
Ingredients:
2 each bone-in chicken drumsticks and thighs For Crumb Mix:
2 cups plain, unsalted bread crumbs
4 tbsp. grape seed oil
2 tsp onion powder
2 tsp garlic powder
2 tsp paprika
2 tsp dried thyme
2 tsp sea or kosher salt
1 tsp black pepper, freshly ground
For Buttermilk Marinade:
1 quart buttermilk
1 tbsp. sea or kosher salt
2 tbsp. hot sauce
Directions:
- Temperature: 285°F Time: 4 hours and 30 minutes
- Mix together the ingredients for the buttermilk marinade, add chicken and let marinate in the fridge for at least 4 hours.
- Mix together all ingredients for the crumb mixture, manually rubbing the crumbs to coat them with the oil.
- Preheat Air Fryer to 285°F. Remove chicken from the buttermilk and coat with the seasoned bread crumbs. Place chicken in the basket and fry for 30 minutes.
- Remove the chicken and season with salt. Place on a wire rack to rest for a few minutes before eating. Air fry chicken in batches.

Crab Cakes
Ingredients:
16 oz. crab meat, picked through for pieces of shell
2 tbsp. parsley, chopped
2 tbsp. scallion greens, chopped
1 tbsp. lemon zest
½ cups mayonnaise
1 egg, beaten few dashes of hot sauce
¼ cups panko crumbs, half crushed up
1 tsp Dijon mustard
Pinch of salt Pinch of black pepper
1 tsp oil
Directions:
- Temperature: 400°F Time: 8 minutes
- Combine crab meat with the parsley, scallion, lemon zest, mayo, egg, hot sauce, crushed panko, and Dijon. Mix thoroughly and season with salt and pepper.
- Form into 2-inch balls with a scoop or by hand and flatten into a disc. The mixture will be loose.
- Preheat the Air Fryer to 400°F. Mix the remaining panko with the oil and combine, season with salt. With a spatula, place 3 crab cakes into the basket and top each one with panko crumbs. Air fry for 8 minutes. Repeat with remaining crab cakes. Serve with lemon wedges.

Sriracha Chicken Wings
Ingredients:
5 chicken wing pieces, mixture of flats and drumettes
½ tbsp. grape seed or vegetable oil
½ tsp sea or kosher salt cup sriracha
½ tbsp. soy sauce
1 tbsp. unsalted butter
¾ tbsp. honey
1 tbsp. scallion greens, thin sliced
Directions:
- Temperature: 360°F Time: 25 minutes
- Preheat Air Fryer to 360°F. Pat dry excess moisture on the wings with paper towel, toss the dried wings with the oil and salt.
- Place just the drumettes in the basket of the Air Fryer and set the timer for 25 minutes. Cook for 5 minutes and then add the wing flats in a single layer in the basket. Cook for the remaining 20 minutes.
- While the chicken is cooking, add the sriracha, soy, butter and honey in a small pot over low heat. Whisk ingredients together until the honey has dissolved and the butter has melted, and reduce heat to low to keep warm.
- Toss the wings in a bowl with the glaze, garnish with sliced scallions and serve immediately.


Easy Donut
Ingredients:
1 can of biscuit dough
4 tbsp. butter, melted
1/3 cup granulated sugar
½ tsp cinnamon
4 tbsp. dark brown sugar
½ tsp sea or kosher salt
Directions:
- Temperature: 320°F Time: 5 minutes
- Combine sugar, cinnamon, brown sugar and salt in a bowl and set aside.
- Preheat Air Fryer to 320°F.
- Remove the dough from the can (do not flatten) and use a 1 inch ring cutter to cut a hole in the center of each biscuit.
- Arrange 3 pieces of dough in the basket at a time, and air fry for 5 minutes.
- As each round of donuts comes out, use a pastry brush to paint butter on entire surface of each donut. Coat each buttered donut in the sugar mix. Shake off excess and serve warm.

Cinnamon Rolls
Ingredients:
4 pieces biscuit dough (can be store-bought)
3 tbsp. brown sugar
1 tsp ground cinnamon
For Cream Cheese Icing Glaze:
¼ cup cream cheese
2 tbsp. milk, warm
¼ cup powdered sugar
Directions:
- Temperature: 350°F Time: 10 minutes
- Roll the biscuit dough pieces out into long ovals with a rolling pin. Toss together the brown sugar and ground cinnamon. Dust both sides of the dough ovals with the cinnamon sugar mix.
- Roll the ovals up into long cylinders. Slice the cylinders into 1″ thick rolls.
- Place the rolls into the Air Fryer and air fry in batches at 350ºF for 10 minutes each until well-browned on top and the centers are cooked through.
- Soften the cream cheese in a microwave for 30 seconds. Combine the milk with powdered sugar and whisk until smooth. Add the cream cheese and continue to whisk until combined. Top cinnamon rolls with cream cheese glaze, if desired.

Baja Fish Tacos
Ingredients:
1 lb. fish of your choice, sliced into long strips, about 1 inch wide
2 cup panko bread crumbs
4 tbsp. grape seed or vegetable oil
1 ½ tsp ground cumin
1 ½ tsp sea or kosher salt Freshly-ground black pepper, to taste
1 cups all-purpose flour
3 large eggs, beaten
6-8 (8″) corn tortillas
2 tsp vegetable oil
¼ cup red onion, sliced thin
1 red bell pepper, sliced thin
1 avocado, sliced thin
1 lime, cut into wedges
2 tbsp. cilantro, chopped
1 jalapeño, sliced thin (optional) Sour cream (optional)
Directions:
- Temperature: 400°F Time: 13-16
- Mix the panko with oil. Rub by hand to coat the oil onto the panko. Add the salt, cumin and black pepper and mix into the panko. Preheat the Air Fryer to 400°F.
- Season the fish with salt and pepper, dredge in the flour and shake off excess. Dip the fish into the egg and then into the seasoned panko. Press the crumbs onto the fish to help them stick.
- In a small sauté pan over medium heat, add oil and sauté the onions and peppers with a pinch of salt. Sauté for 2-3 minutes, until the onions are translucent.
- Lay fish in the basket in one layer and air fry for 6-8 minutes, depending on the thickness of the fish. Air fry in batches.
- In a preheated 350°F oven, place the tortillas on the oven rack and bake for 5 minutes while the fish is cooking. Assemble tacos with fish and accompaniments.

CUSTOMER SUPPORT

WARRANTY
STOREBOUND, LLC 1 YEAR LIMITED WARRANTY
Your Store Bound product is warranted to be free from defects in material and workmanship for a period of one (1) year from the date of the original purchase when utilized for normal and intended household use. Should any defect covered by the terms of the limited warranty be discovered within one (1) year, Store Bound, LLC will repair or replace the defective part. To process a warranty claim, contact Customer Support at 1-800-898-6970 for further assistance and instruction. A Customer Support agent will assist you by troubleshooting minor problems. If troubleshooting fails to fix the problem, a return authorization will be issued. Proof of purchase indicating the date and place of purchase is required and should accompany the return. You must also include your full name, shipping address, and telephone number. We are unable to ship returns to a PO box. Store Bound will not be responsible for delays or unprocessed claims resulting from a purchaser’s failure to provide any or all of the necessary information. Freight costs must be prepaid by the purchaser.
Send all inquiries to [email protected]. There are no express warranties except as listed above.
REPAIR OR REPLACEMENT AS PROVIDED UNDER THIS WARRANTY IS THE EXCLUSIVE REMEDY OF THE CUSTOMER. STOREBOUND SHALL NOT BE LIABLE FOR ANY INCIDENTAL OR CONSEQUENTIAL DAMAGES OR FOR BREACH OF ANY EXPRESS OR IMPLIED WARRANTY ON THIS PRODUCT EXCEPT TO THE EXTENT REQUIRED BY APPLICABLE LAW. ANY IMPLIED WARRANTY OF MERCHANTABILITY OR FITNESS FOR A PARTICULAR PURPOSE ON THIS PRODUCT IS LIMITED IN DURATION TO THE DURATION OF THIS WARRANTY.
Some states do not allow the exclusion or limitation of incidental or consequential damages, or limitations on how long an implied warranty lasts. Therefore, the above exclusions or limitations may not apply to you. This warranty gives you specific legal rights and you may also have other rights, which vary from state to state.
REPAIRS
DANGER! Risk of electric shock! The Tasti-Crisp™ Air Fryer is an electrical appliance. Do not attempt to repair the appliance yourself under any circumstances. Contact Customer Support regarding repairs to the appliance.
TECHNICAL SPECIFICATIONS
Voltage 120V ~ 60Hz Power Rating 1000W Stock#: DCAF200_20210413_v9
PLEASE NOTE: Your Tasti-Crisp™ Air Fryer is not dishwasher-safe.
FOOD SAFE
This product has passed food safety testing in accordance with FDA guidelines.
PFOA FREE
![]()
1-800-898-6970 | @bydash | bydash.com
]]>DASH DMWF001 Flower mini WAFFLE MAKER
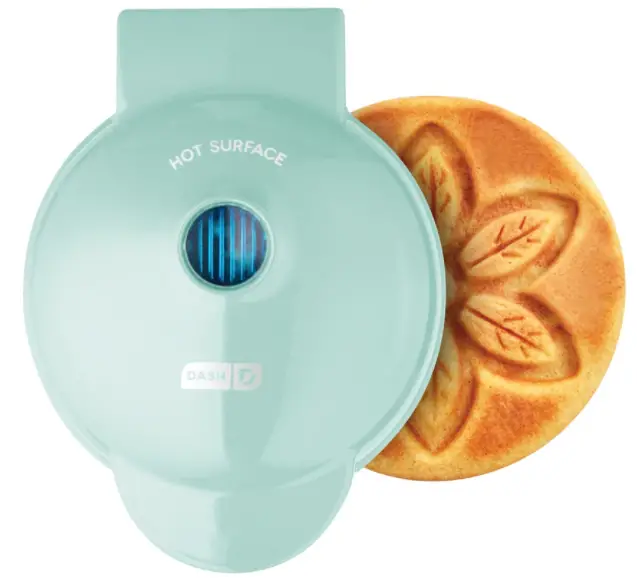
IMPORTANT SAFEGUARDS
When using electrical appliances, basic safety precautions should be followed, including:
- Read all instructions.
- Remove all bags and packaging from appliance before use.
- Never leave appliance unattended when in use.
- Make sure the appliance is cleaned thoroughly before using.
- Do not use appliance for other than intended use. For household use only. Do not use outdoors.
- Warning: Hot surfaces! Never touch the Cooking Surface or Cover while appliance is in use. Always lift and lower the Cover by the Cover Handle.
- DO NOT lift the Cover so that your arm is over the Cooking Surface as it is hot and may cause injury. Lift from the side.
- To prevent the risk of fire, electric shock, or personal injury, do not put cord, plug, or appliance in or near water or other liquids. The Flower Mini Waffle Maker is NOT dishwasher safe.
- Never use abrasive cleaning agents to clean your appliance as this may damage the Flower Mini Waffle Maker and its non-stick Cooking Surface.
- Do not operate this appliance with a damaged cord, damaged plug, after the appliance malfunctions, is dropped, or damaged in any manner. Return appliance to the nearest authorized service facility for examination, repair or adjustment.
- DO NOT use the Flower Mini Waffle Maker near water or other liquids, with wet hands, or while standing on a wet surface.
- For maintenance other than cleaning, please contact Store Bound directly at 1-800-898-6970 from 7AM – 7PM PST Monday – Friday or by email at [email protected].
- Do not use metal utensils on the Cooking Surface as this will damage the non-stick surface.
- This appliance is not intended for use by persons (including children) with reduced physical, sensory, or mental capabilities, or lack of experience and knowledge unless they are provided with supervision and instruction concerning use of the appliance by a person responsible for their safety.
- Do not place appliance on or near a hot gas burner, hot electric burner, or in a heated oven.
- Be cautious when moving an appliance containing hot oils or other hot liquids.
- Refrain from using attachments that are not recommended by the appliance manufacturer, as this may result in fire, electric shock, or personal injury.
- Allow the Flower Mini Waffle Maker to cool completely before moving, cleaning, or storing.
- Close supervision is necessary when any appliance is used by or near children.
- Do not let the cord touch hot surfaces or hang over the edge of tables or counters.
- Always be sure to unplug the appliance from outlet prior to moving, cleaning, storage, and when not in use.
- StoreBound shall not accept liability for damages caused by improper use of the appliance.
- Improper use of the Flower Mini Waffle Maker can result in property damage or even in personal injury.
- This appliance has a polarized plug (one blade is wider than the other). To reduce the risk of electric shock, this plug will fit in a polarized outlet only one way. If the plug does not completely fit in the outlet, reverse the plug. If it still does not fit, contact a qualified electrician. Do not attempt to modify the plug in any way.
- A short power supply cord is to be provided to reduce the risk resulting from becoming entangled in or tripping over a longer cord. An extension cord may be used if care is exercised in its use. If an extension cord is used, the marked electrical rating of the extension cord should be at least as great as the electrical rating of the appliance. If the appliance is of the grounded type, the extension cord should be a grounding 3- wire cord. The extension cord should be arranged so that it will not drape over the countertop or tabletop where it can be pulled on by children or tripped over unintentionally.
parts & Features
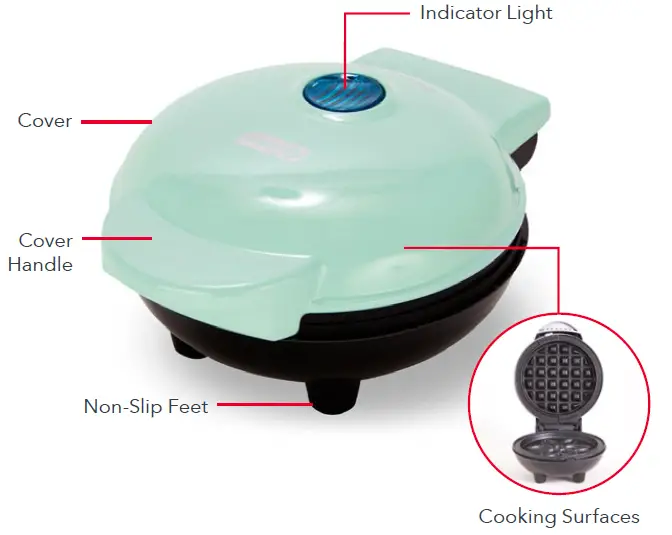
using your Flower mini Waffle maker
Before first use, remove all packaging material and thoroughly wipe down your Flower Mini Waffle Maker. DO NOT submerge the Mini Maker in water when cleaning!
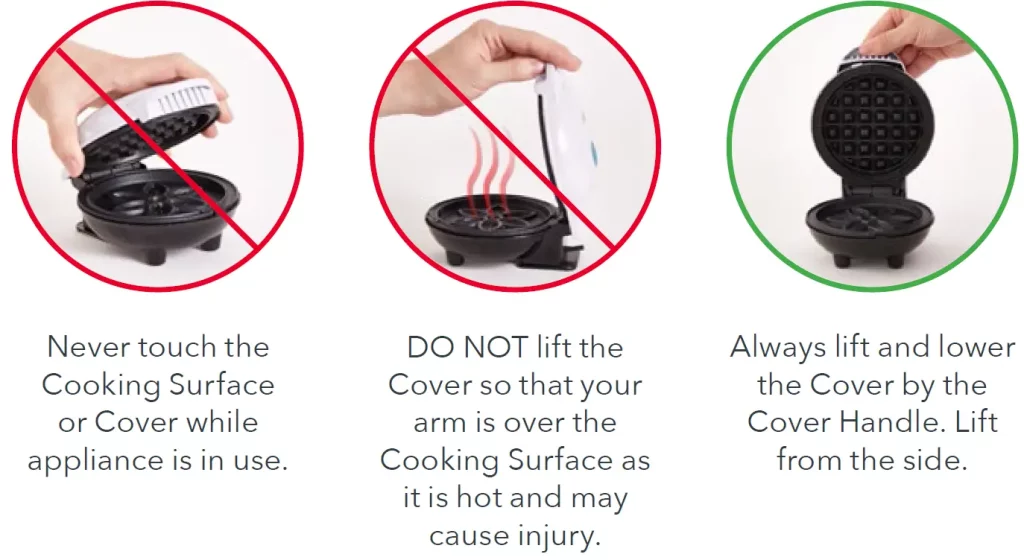
- Place the appliance on a stable and dry surface. Plug the cord into a power outlet. The Indicator Light will illuminate, signaling that the Flower Mini Waffle Maker is heating up.
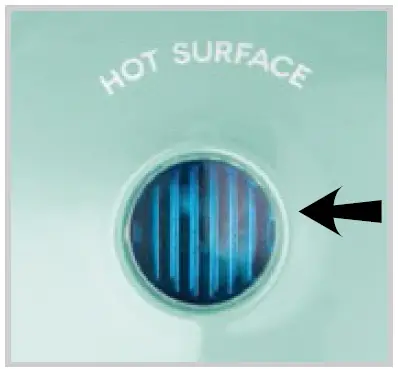
- Once the Cooking Surface reaches the optimal cooking temperature, the Indicator Light will automatically shut off. Now, you’re ready to get cooking!
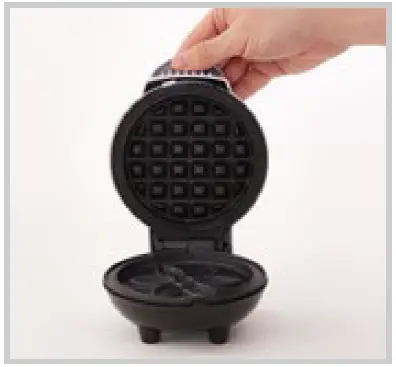
- Carefully lift the Cover by the Cover Handle and spray both Cooking Surfaces with a small amount of cooking spray.
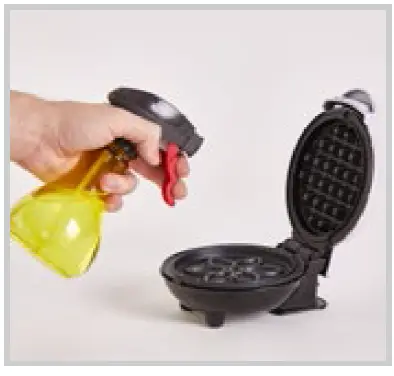
- Place or pour batter onto the Cooking Surface and close the Cover.
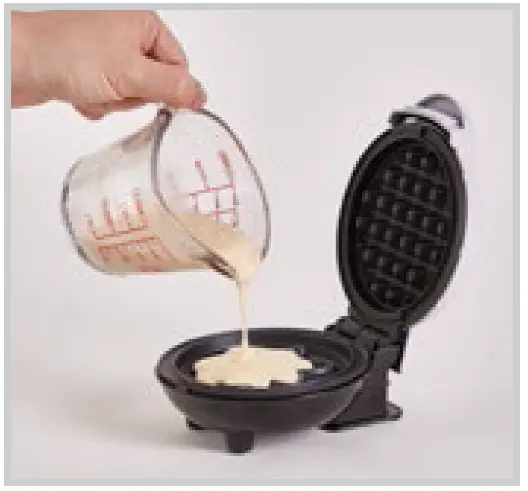
- Once waffle is cooked to your preference, carefully remove it from the Cooking Surface with a heat-resistant nylon or silicone cooking utensil.
NOTE: Do not use metal utensils to remove or place food on the Cooking Surface as this will damage the non-stick surface.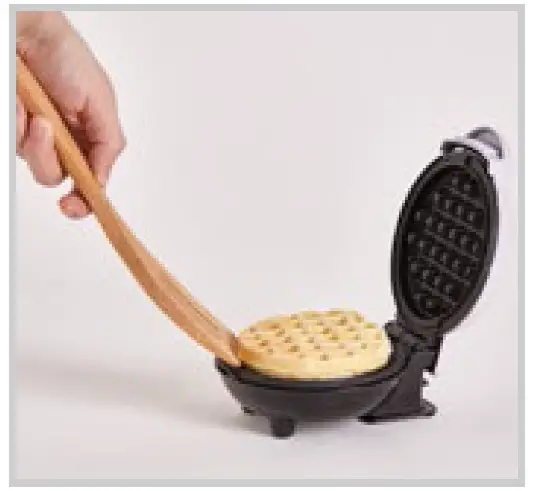
- When you have finished cooking, unplug your Flower Mini Waffle Maker and allow it to cool before moving or cleaning.
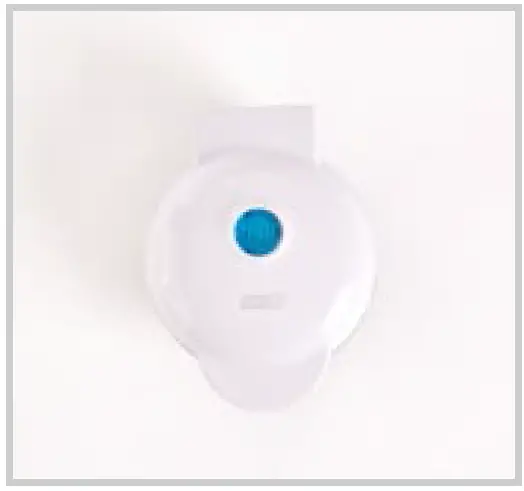
cleaning & maintenance
Always allow the appliance to cool completely before moving, cleaning, or storing. DO NOT submerge appliance in water or any other liquids. Never use abrasive cleaning agents to clean your appliance as this may damage the Flower Mini Waffle Maker.
In order to keep your Flower Mini Waffle Maker in pristine working order, thoroughly clean the appliance after each use. This will prevent the build-up of food or oil.
- Unplug Flower Mini Waffle Maker and allow it to cool completely.
- Using a damp, soapy cloth, wipe down the Cooking Surface and Cover. Thoroughly rinse the cloth and wipe again.
- Thoroughly dry Flower Mini Waffle Maker before storing.
- If there is food burned onto the Cooking Surface, pour on a little cooking oil and let sit for 5 to 10 minutes. Scrub the Cooking Surface with a sponge or soft bristled brush to dislodge food. Use a damp, soapy cloth to wipe down the Cooking Surface. Thoroughly rinse the cloth and wipe again. If any food remains, pour on cooking oil and let sit for a few hours, then scrub and wipe clean.
- Never use abrasive cleaning agents to clean your appliance as this may damage the Flower Mini Waffle Maker and its non-stick Cooking Surface.
Troubleshooting
While Dash products are durable, you may encounter one or more of the problems listed below. If the issue is either not solved by the solutions recommended below or not included on this page, please contact our Customer Support Team at 1-800-898-6970 or [email protected].
- The light on the Flower Mini Waffle Maker keeps shutting off.
- This is normal. During the cooking process, the heating element will automatically turn on and off to regulate the temperature and ensure that the Cooking Surface does not get too hot or cold. When this occurs, the Indicator Light turns on and off.
- How do I know when the Flower Mini Waffle Maker is heated and ready to use?
- When the Waffle Maker reaches the optimal temperature, the Indicator Light shuts off and that means you’re ready to get cooking!
- There is no On/Off Button. How do I turn the Flower Mini Waffle Maker off and on?
- To turn on, simply plug in the power cord. When you’re done cooking, turn off the Flower Mini Waffle Maker by unplugging it.
- When using my Flower Mini Waffle Maker, the Cover gets very hot. Is this normal?
- Yes, this is completely normal. When using your Waffle Maker, always lift and lower the Cover by the Cover Handle. To prevent personal injury, DO NOT lift the Cover so that your arm is over the Cooking Surface as it is hot and may cause injury. Lift from the side.
- After using my Flower Mini Waffle Maker a few times, food is starting to stick to the surface. What is happening?
- There is probably a build-up of burnt food residue on the Cooking Surface. This is normal, especially when cooking with sugar. Allow the appliance to cool fully, pour on a little cooking oil and let sit for 5–10 minutes. Scrub Surface with a sponge or soft bristled brush to dislodge food. Use a damp, soapy cloth to wipe down the Cooking Surface. Rinse the cloth and wipe again. If food remains, pour on cooking oil and let sit for a few hours, then scrub and wipe clean.
- The Indicator Light will not turn on and the Cooking Surface is failing to heat.
- Ensure that the power cord is plugged into the power outlet.
- Check to make sure the power outlet is operating correctly.
- Determine if a power failure has occurred in your home, apartment or building.
Follow us @unprocessyourfood for recipes, videos, & daily inspiration
waffle biscuit pizza
Ingredients:
- 2 cups all-purpose flour
- 1 tbsp baking powder
- ¾ cup milk
- ½ tsp salt
- ½ cup cold butter, cut into small chunks pepperoni and shredded mozzarella cheese (or preferred fillings)
Directions:
Sift together the flour, baking powder, and salt. Add the butter and use a pastry cutter or fork to cut butter into the flour until it is a coarse crumb. Stir in the milk. Roll your dough out on a floured surface so that it is ½ inch thick. Cut out as many 3 inch circles as possible. Alternatively, you can use premade biscuit dough instead of making dough from scratch. Slice each premade biscuit in half so that they are about ½ thick and then proceed with directions.
Cut dough circles horizontally just enough so that you can stuff the biscuit with the pepperoni and mozzarella. After you have put in your fillings, seal the biscuit by pinching the edges of the dough. Cook them in the Flower Mini Waffle Maker until golden and crispy. Serve with a side of marinara sauce for dipping.
cinnamon roll waffles
Ingredients:
- 1¼ tsp cinnamon
- ½ tsp vanilla extract
- Cream Cheese Icing
- 2 tbsp butter, melted
- 2 tbsp cream cheese, softened
- ½ cup powdered sugar
- ¼ tsp vanilla extract
- 2–3 tbsp milk
Directions:
Make the Classic Waffles batter (see page 20). Stir in the cinnamon and ½ teaspoon of vanilla extract. Pour ¼ cup of the batter into the Flower Mini Waffle Maker and cook until golden brown.
Repeat with the remaining batter.
In a medium bowl, mix the butter and cream cheese until well-combined. Stir in the powdered sugar, vanilla extract, and milk. Drizzle the icing over the waffles and serve warm.
classic waffles
Ingredients:
- 1 cup flour
- 1 tbsp sugar
- 2 tsp baking powder
- ¼ tsp salt
- 1 egg
- 1 cup milk
- 2 tbsp melted butter or vegetable oil
Directions:
In a medium bowl, sift the flour, sugar, baking powder, and salt. Whisk the egg, milk, and melted butter in a separate bowl. Add the wet ingredients to the dry and mix until just incorporated.
Grease the Flower Mini Waffle Maker with butter or coat with a light coat of cooking spray. Pour ¼ cup of the batter into the Flower Mini Waffle Maker and cook until golden brown. Repeat with the remaining batter.
Serve with a drizzle of maple syrup and fresh berries.
Chocolate waffles
Ingredients:
- ¾ cup all-purpose flour
- 2 tbsp sugar
- ¼ cup unsweetened cocoa powder
- 2 tbsp melted butter
- 1 cup buttermilk
- ½ tsp baking powder
- ¼ tsp baking soda
- 1 large egg
- ½ cup chocolate chips
Directions:
In a medium bowl, sift together the flour, sugar, cocoa powder, baking powder, and baking soda.
Whisk the egg, butter, and buttermilk in a separate bowl. Mix the wet ingredients with the dry. Gently fold in the chocolate chips.
Spray or grease the Flower Mini Waffle Maker with oil. Pour 2 tablespoons of the batter into the Waffle Maker and cook until crispy. Repeat until all of the batter is used.
Serve the waffles with vanilla ice cream, strawberries, and powdered sugar.
More Recipe Ideas
| recipe idea | ingredients | cooking time |
| Protein Waffle | Classic Waffle Recipe (page 20) 1 scoop protein powder | 4–6 min |
| Cornbread Waffle | ¼ cup cornbread batter | 6–8 min |
| Mashed Potato Bite | 3 tbsp mashed potatoes | 5 min |
| Smore Biscuit | 1 refrigerated biscuit dough, sliced lengthwise 2 squares milk chocolate 5 mini marshmallows |
5–7 min |
| Grilled Cheese | 2 slices white or wheat bread, buttered 2 slices American cheese |
5 min |
| Apple Pie | (2) 4” circles pie crust 2 tbsp chunky applesauce dash of cinnamon & nutmeg | 5–7 min |
| recipe idea | ingredients | cooking time |
| Waffle Omelette | 1 egg, beaten 2 tbsp chopped veggies 1 tbsp grated Swiss cheese |
5 min |
| Chocolate Chip Cookie | 2 tbsp cookie dough | 5 min |
| Cheesy Cauliflower Waffles | 1 cauliflower, finely chopped ¼ cup cauliflower mix ¼ breadcrumbs 2 eggs ½ cup grated Parmesan Cheese |
5 min |
| Waffle Quesadilla | 3 tbsp mashed potatoes | 4–6 min |
customer support
Dash values quality and workmanship and stands behind this product with our Feel Good Guarantee™. To learn more about our commitment to quality, visit bydash.com/feelgood.
Our US-based customer support team is at your service Monday – Friday during the times below.
Reach us at 1 (800) 898-6970 or [email protected]
warranty
STOREBOUND, LLC – 1 YEAR LIMITED WARRANTY
Your StoreBound product is warranted to be free from defects in material and workmanship for a period of one (1) year from the date of the original purchase when utilized for normal and intended household use. Should any defect covered by the terms of the limited warranty be discovered within one (1) year, StoreBound, LLC will repair or replace the defective part. To process a warranty claim, contact Customer Support at 1-800-898-6970 for further assistance and instruction. A Customer Support agent will assist you by troubleshooting minor problems. If troubleshooting fails to fix the problem, a return authorization will be issued. Proof of purchase indicating the date and place of purchase is required and should accompany the return. You must also include your full name, shipping address, and telephone number. We are unable to ship returns to a PO box. StoreBound will not be responsible for delays or unprocessed claims resulting from a purchaser’s failure to provide any or all of the necessary information. Freight costs must be prepaid by the purchaser.
Send all inquiries to [email protected].
There are no express warranties except as listed above.
REPAIR OR REPLACEMENT AS PROVIDED UNDER THIS WARRANTY IS THE EXCLUSIVE REMEDY OF THE CUSTOMER. STOREBOUND SHALL NOT BE LIABLE FOR ANY INCIDENTAL OR CONSEQUENTIAL DAMAGES OR FOR BREACH OF ANY EXPRESS OR IMPLIED WARRANTY ON THIS PRODUCT EXCEPT TO THE EXTENT REQUIRED BY APPLICABLE LAW. ANY IMPLIED WARRANTY OF MERCHANTABILITY OR FITNESS FOR A PARTICULAR PURPOSE ON THIS PRODUCT IS LIMITED IN DURATION TO THE DURATION OF THIS WARRANTY.
Some states do not allow the exclusion or limitation of incidental or consequential damages, or limitations on how long an implied warranty lasts. Therefore, the above exclusions or limitations may not apply to you. This warranty gives you specific legal rights and you may also have other rights, which vary from state to state.
REPAIRS
DANGER! Risk of electric shock! The Dash Flower Mini Waffle Maker is an electrical appliance.
Do not attempt to repair the appliance yourself under any circumstances.
Contact Customer Support regarding repairs to the appliance.
TECHNICAL SPECIFICATIONS
Voltage 120V ~ 60Hz
Power Rating 350W
Stock#: DMWF001_191003_V1
1-800-898-6970 | @unprocessyourfood | bydash.com
![]()
DAPP150V2
[ Download Recipe Guide PDF ]
IMPORTANT SAFEGUARDS
PLEASE READ AND SAVE THIS INSTRUCTION AND CARE MANUAL.
When using electrical appliances, basic safety precautions should be followed, including:
- Read all instructions carefully.
- Do not touch hot surfaces.
- To protect against electric shock, do not immerse cord, plugs, or appliance in water or any other liquid.
- Close supervision is necessary when any appliance is used by or near children.
- When not in use, unplug the appliance from wall outlet and allow Popcorn Maker to cool before assembling or disassembling parts, or cleaning.
- Do not operate any appliance with a damaged cord or plug, or after the appliance malfunctions. Call customer service for examination, repair,
or adjustment. - The use of accessory attachments not recommended by the appliance manufacturer may cause injuries.
- Do not use outdoors.
- Do not let the cord hang over the edge of tables or counters, or touch hot surfaces.
- Do not place the appliance on or near a hot gas or electric burner, or in a heated oven.
- Extreme caution must be used when moving an appliance containing hot oil or other hot liquids.
- Always attach plug to the appliance first, then plug the cord in the wall outlet. To disconnect, turn the appliance to “Off”, then remove plug from wall outlet.
- Do not use appliance for other than intended use.
- Do not leave appliance unattended.
- The Popcorn Maker will not shut off automatically. To avoid overheating, please add popcorn kernels before operating. Do not operate the appliance without popcorn kernels.
- This appliance has a polarized plug (one blade is wider than the other.) To reduce the risk of electric shock, this plug is intended to fit into a polarized outlet only one way. If the plug does not fit, contact a qualified electrician. Do not attempt to modify the plug in any way.
- A short power-supply cord is to be provided to reduce the risk resulting from becoming entangled in, or tripping over, a longer cord.
- Longer detachable power-supply cords are available and may be used if care is exercised in their use.
- The cord should be arranged so that it will not drape over the counter top or tabletop where it can be pulled on by children or tripped over unintentionally.
- The marked electrical rating of the cord or extension cord should be at least as great as the electrical rating of the appliance.
- For maintenance other than cleaning, please contact StoreBound directly at 1-800-898-6970 from 9AM
– 9PM PST Monday – Friday or by email at [email protected]. - StoreBound shall not accept liability for damages caused by improper use of the appliance.
- If the appliance is grounded, the extension cord should be a grounding prong.
- Allow the appliance to rest for at least 10 minutes between popping cycles.
- Do not exceed a 5 minute maximum continuous usage time.
- This appliance is not intended to be operated by means of an external timer or separate remote control system.
- Never operate a defective or damaged appliance. If the cord is damaged or defective for any reason, seek replacement by calling customer support.
- This appliance is not intended for use by persons (including children) with reduced physical, sensory or mental capabilities, or lack of experience and knowledge, unless they have been given supervision or instruction concerning use of the appliance by a person responsible for their safety.
- Children should be supervised to ensure that they do not play with the appliance.
PARTS & FEATURES
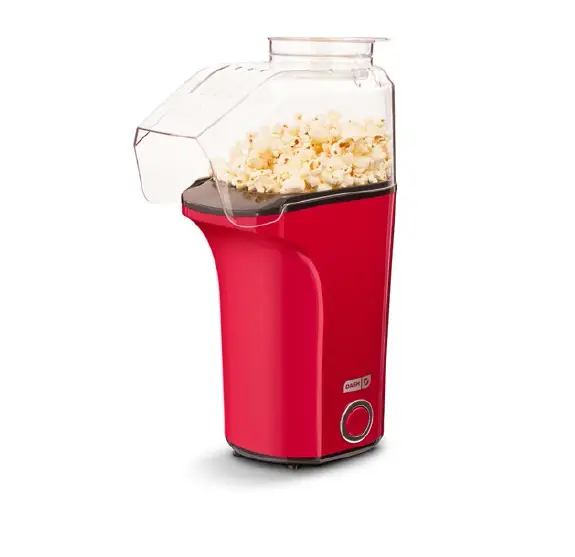
TIPS & TRICKS
- After the first popping cycle, wait for approximately 10 to 12 minutes before using the Popcorn Maker again.
- Place a small amount of butter in the Measuring Cup during the popping process and allow the butter to melt.
- Never put the butter in the Aluminum Heat Chamber.
- If the butter isn’t entirely melted after the duration of popping, leave the unit on for a few more minutes to let the hot air melt the butter.
- DO NOT exceed one Measuring Cup of kernels in one cycle as this will overfill the machine.
- DO NOT use less than the minimum amount of kernels in one cycle (1/2 Measuring Cup), as this will result in burnt popcorn.
- For best results use fresh kernels, as old kernels may dry out and be unable to pop during a cycle. If your kernels are dry, try adding them to a 12 oz sealable jar with 1 tsp of water, then seal, shake, and let sit overnight.
| Kernels | Popped Corn |
| 1 Measuring Cup | 16 Cups |
| ½ Measuring Cup | 8 Cups |
USING YOUR DASH POPCORN MAKER
NOTE: Wash the Popcorn Maker and parts with a damp cloth prior to use. Dry before using.
WARNING: DO NOT put butter into the Aluminum Heat Chamber.
CAUTION: Aluminum Heat Chamber will get very hot. NEVER insert fingers into the chamber while operating, or after use.
1. Assemble the Popcorn Maker by placing the Top Cover onto the Body until it clicks into place, then set the Popcorn Maker on a flat and stable surface.
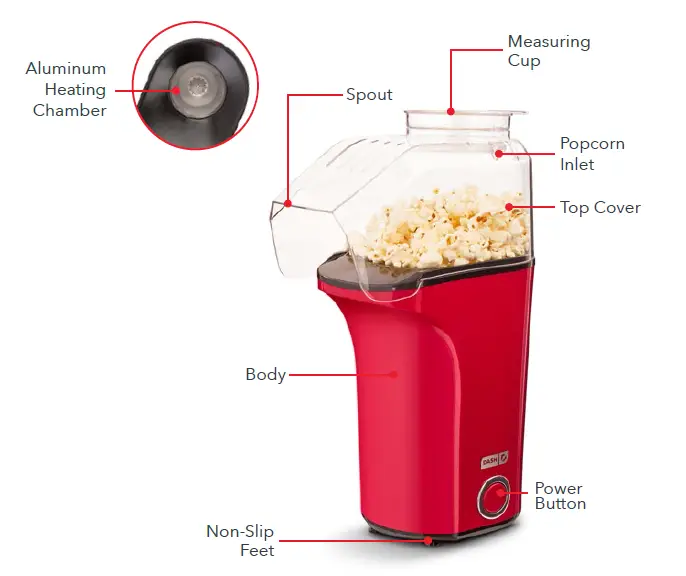
2. Using the Measuring Cup, add one Measuring Cup of kernels into the Aluminum Heat Chamber through the Popcorn Inlet. Note: one cup is enough, any more will overfill the Popcorn Maker and will keep the appliance from functioning.

3. Put the Measuring Cup back on the Top Cover after each use. You have the option to place a tablespoon of butter into the Measuring Cup as it will melt over the duration of the popping period.

4. Place a large bowl under the Spout so that the edge of the bowl is touching the Body of the Popcorn Maker. Be sure that there is nothing blocking the Spout so the popcorn can eject properly.
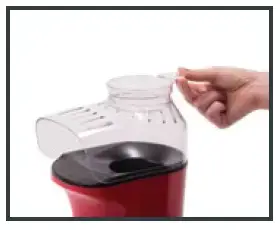
5. Switch the unit on by pressing the Power Button to “On.”

6. After a few minutes the Popcorn Maker will start making popcorn. It will continue to operate until all the kernels are popped. The popping cycle will last about 3 minutes.
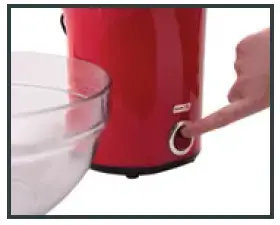
CAUTION: the Popcorn Maker will heat up, refrain from touching the Top Cover or Measuring Cup as they will be very hot.
7. Once popping is complete, turn off the unit by pressing the Power Button to “Off,” then unplug the unit.

8. Once the Popcorn Maker has cooled, carefully remove the butter-filled Measuring Cup and pour the melted butter onto the freshly popped popcorn. Mix the popcorn well to distribute the butter evenly.

Cleaning & Maintenance
- Unplug the unit before cleaning and/or disassembling.
- Make sure the Popcorn Maker has cooled down completely before disassembling and cleaning.
- Clean the Body of the Popcorn Maker with a damp cloth. Never use abrasive products as they could damage the Popcorn Maker.
- The Top Cover and the Measuring Cup can be cleaned in warm soapy water.
- Store unplugged Popcorn Maker in a safe, dry place, and out of reach from children.

@bydash | recipes, videos, & inspiration
@unprocessyourfood | veg & vegan-friendly meals

HOMEMADE UNPROCESSED POP
Ingredients:
1 Measuring Cup kernels
4 tbsp coconut oil
dash of salt
Directions:
Add 1 Measuring Cup of kernels into the Aluminum Heating Chamber through the Popcorn Inlet. Replace Measuring Cup on the Top Cover, then add 2 tbsp of solidified coconut oil to the Measuring Cup.
Place a large bowl directly next to the Body and under the Spout, turn on the appliance, and wait until your popcorn is finished popping. Take the Measuring Cup of melted coconut oil and pour it over the popcorn.
Option to sprinkle with a dash of salt.


MOVIE THEATER POPCORN
Ingredients:
1 Measuring Cup kernels
4 tbsp butter
dash of salt
Directions:
Add 1 Measuring Cup of kernels into the Aluminum Heating Chamber through the Popcorn Inlet. Replace Measuring Cup on the Top Cover, then add 2 tbsp of butter to the Cup.
Place a large bowl directly next to the Body and under the Spout, turn on the appliance, and wait until your popcorn is finished popping. Take the Measuring Cup of melted butter and pour it over the popcorn. Option to sprinkle with a dash of salt.


Cashew Caramel Corn
Ingredients:
1 Measuring Cup kernels
½ cup coconut sugar
¼ tsp baking soda
1 ½ cups light
brown sugar, packed
½ tsp vanilla
2 cups cashews
¾ cups butter
Directions:
Add 1 Measuring Cup of kernels to the Aluminum Heating Chamber through the Popcorn Inlet. Replace Measuring Cup on the Top Cover.
Place a large bowl directly next to the Body and under the Spout, turn on the appliance, and wait until your popcorn is finished popping.
Make the caramel coating by combining the sugars and butter in a small saucepan over medium heat. Stir continuously until caramel comes to a boil and cook for 5 minutes over medium heat. Turn off the stove and add vanilla and baking soda.
Add the popcorn, cashews, and caramel to a large mixing bowl and mix well. Spread onto a cookie sheet lined with parchment and bake at 300ºF for 15-20 minutes, turning once.

Spicy Jalapeño Popcorn
Ingredients:
1 Measuring Cup kernels
4 tbsp coconut oil
1 tsp jalapeño flakes
Directions:
Add 1 Measuring Cup of kernels into the Aluminum Heating Chamber through the Popcorn Inlet. Replace Measuring Cup on the Top Cover, then add 2 tbsp of solidified coconut oil to the Cup.
Place a large bowl directly next to the Body and under the Spout, turn on the appliance, and wait until your popcorn is finished popping. Take the Measuring Cup of melted coconut oil and pour it over the popcorn. Sprinkle jalapeño flakes over the popcorn and mix well.

Cheesy Cheddar Pop
Ingredients:
1 Measuring Cup kernels
4 tbsp butter
1 tsp mustard powder
1 cup cheese powder
1 tsp red chili powder
Directions:
Add 1 Measuring Cup of kernels into the Aluminum Heating Chamber through the Popcorn Inlet. Replace Measuring Cup on the Top Cover, then add 2 tbsp of butter to the Measuring Cup.
Place a large bowl directly next to the Body and under the Spout, turn on the appliance, and wait until your popcorn is finished popping.
Take the Measuring Cup of melted butter and pour it over the popcorn. Add a cup of cheese powder, 1 tsp of mustard powder, and 1 tsp of red chili powder. Toss the popcorn until all ingredients are evenly distributed.


Spicy Ranch Popcorn
Ingredients:
1 Measuring Cup kernels
3 tbsp butter, melted
3 tsp garlic powder
3 tsp dried parsley
3 tsp cayenne pepper
3 tsp dried chives
Directions:
Add 1 Measuring Cup of kernels into the Aluminum Heating Chamber through the Popcorn Inlet. Replace Measuring Cup on the Top Cover.
Place a large bowl directly next to the Body and under the Spout, turn on the appliance, and wait until your popcorn is finished popping.
In a small dish, combine the melted butter and spices. Transfer the popcorn to a large bowl. Slowly pour the spice mixture over popcorn while stirring. Continue stirring until the kernels are fully coated.


Easy Caramel Corn
Ingredients:
1 Measuring Cup kernels
½ cup butter
1 cup brown sugar
¼ cup milk
1 tsp vanilla extract
Directions:
Add 1 Measuring Cup of kernels into the Aluminum Heating Chamber through the Popcorn Inlet. Replace Measuring Cup on the Top Cover. Place a large bowl directly next to the Body and under the Spout, turn on the appliance, and wait until your popcorn is finished popping.
For the Caramel:
Bring the brown sugar, butter, and milk to a gentle boil on the stove and cook until thickened, about 1 to 2 minutes. Remove from heat; add vanilla extract.
Drizzle the caramel mixture over the popcorn. Use a spoon to gently fold the popcorn with the mixture until the kernels are all covered. Pour the popcorn out onto a cookie sheet covered with aluminum foil, or a silpat liner. Allow the Easy Homemade Caramel Corn to cool prior to serving.


S’MORES POPCORN
Ingredients:
1 Measuring Cup kernels
2 cups of golden grahams
½ cup mini marshmallows
½ cup chocolate wafers
Directions:
Add 1 Measuring Cup of kernels into the Aluminum Heating Chamber through the Popcorn Inlet. Replace Measuring Cup on the Top Cover.
Place a large bowl directly next to the Body and under the Spout, turn on the appliance, and wait until your popcorn is finished popping.
Combine popcorn, marshmallows, and golden grahams in a bowl and mix together. Spread popcorn on a baking sheet.
Melt the chocolate in the microwave, 15 seconds at a time, stirring in between cycles so it doesn’t burn.
Drizzle chocolate over the popcorn mixture and allow to harden (about 10 minutes).
Serve and enjoy!

Customer Support
Dash values quality and workmanship and stands behind this product with our Feel Good Guarantee™. To learn more about our commitment to quality, visit bydash.com/feelgood.
Our customer support teams in the US and Canada are at your service Monday – Friday during the times below. Contact us at 1 (800) 898-6970 or [email protected]
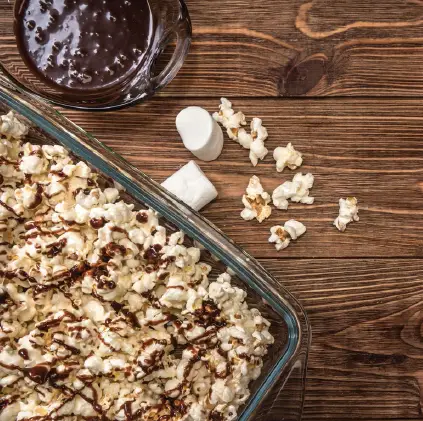
Hey Hawaii! You can reach our customer service team from 3AM to 3PM. And also, Alaska, feel free to reach out from 5AM to 5PM.
Warranty
STOREBOUND, LLC – 1 YEAR LIMITED WARRANTY
Your StoreBound product is warranted to be free from defects in material and workmanship for a period of one (1) year from the date of the original purchase when utilized for normal and intended household use. Should any defect covered by the terms of the limited warranty be discovered within one (1) year, StoreBound, LLC will repair or replace the defective part. To process a warranty claim, contact Customer Support at 1-800-898-6970 for further assistance and instruction. A Customer Support agent will assist you by troubleshooting minor problems. If troubleshooting fails to fix the problem, a return authorization will be issued. Proof of purchase indicating the date and place of purchase is required and should accompany the return. You must also include your full name, shipping address, and telephone number. We are unable to ship returns to a PO box. StoreBound will not be responsible for delays or unprocessed claims resulting from a purchaser’s failure to provide any or all of the necessary information. Freight costs must be prepaid by the purchaser.
Send all inquiries to [email protected].
There are no express warranties except as listed above.
REPAIR OR REPLACEMENT AS PROVIDED UNDER THIS WARRANTY IS THE EXCLUSIVE REMEDY OF THE CUSTOMER. STOREBOUND SHALL NOT BE LIABLE FOR ANY INCIDENTAL OR CONSEQUENTIAL DAMAGES OR FOR BREACH OF ANY EXPRESS OR IMPLIED WARRANTY ON THIS PRODUCT EXCEPT TO THE EXTENT REQUIRED BY APPLICABLE LAW. ANY IMPLIED WARRANTY OF MERCHANTABILITY OR FITNESS FOR A PARTICULAR PURPOSE ON THIS PRODUCT IS LIMITED IN DURATION TO THE DURATION OF THIS WARRANTY.
Some states do not allow the exclusion or limitation of incidental or consequential damages, or limitations on how long an implied warranty lasts. Therefore, the above exclusions or limitations may not apply to you. This warranty gives you specific legal rights and you may also have other rights, which vary from state to state.
REPAIRS
DANGER! Risk of electric shock! The Dash Fresh Pop Popcorn Maker is an electrical appliance.
Do not attempt to repair the appliance yourself under any circumstances.
Contact Customer Support regarding repairs to the appliance.
TECHNICAL SPECIFICATIONS
Voltage 120V ~ 60Hz
Power Rating 1400W
Stock#: DAPP150V2_20170809_V11
]]>
DASH DDTM200 mini dog treat maker
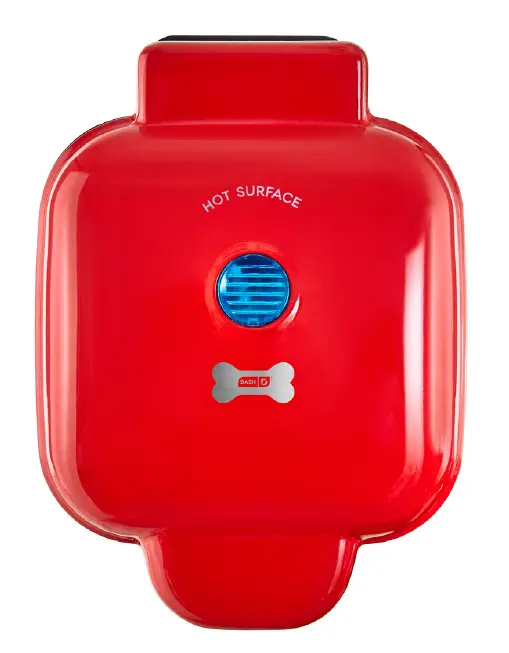
IMPORTANT SAFEGUARDS:
PLEASE READ AND SAVE THIS INSTRUCTION AND CARE MANUAL.
When using electrical appliances, basic safety precautions should be followed, including:
- Read all instructions.
- Remove all bags and packaging from appliance before use.
- Never leave appliance unattended when in use.
- Make sure the appliance is cleaned thoroughly before using.
- Do not use appliance for other than its intended use. For household use only. Do not use outdoors.
- DO NOT lift the Cover so that your arm is over the Cooking Surface as it is hot and may cause injury. Lift from the side.
- To prevent the risk of fire, electric shock, or personal injury, do not put cord, plug, or appliance in or near water or other liquids. The Mini Dog Treat Maker is NOT dishwasher safe.
- Never use abrasive cleaning agents to clean your appliance as this may damage the Mini Dog Treat Maker and its nonstick Cooking Surface.
- Do not operate this appliance with a damaged cord, damaged plug, after the appliance malfunctions, is dropped, or damaged in any manner. Return appliance to the nearest authorized service facility for examination, repair or adjustment.
- DO NOT use the Mini Dog Treat Maker near water or other liquids, with wet hands, or while standing on a wet surface.
- For maintenance other than cleaning, please contact StoreBound directly at1-800-898-6970 from 7AM – 7PM PST Monday – Friday or by email at [email protected].
- Do not use metal utensils on the Cooking Surface as this will damage the nonstick surface.
This appliance is not intended for use by persons (including children) with reduced physical, sensory, or mental capabilities, or lack of experience and knowledge unless they are provided with supervision and instruction concerning use of the appliance by a person responsible for their safety. - Do not place appliance on or near a hot gas burner, hot electric burner, or in a heated oven. • Be cautious when moving an appliance containing hot oils or other hot liquids.
- Refrain from using attachments that are not recommended by the appliance manufacturer, as this may result in fire, electric shock, or personal injury.
- Allow Mini Dog Treat Maker to cool completely before moving, cleaning, or storing.
- Close supervision is necessary when any appliance is used by or near children.
- Do not let the cord touch hot surfaces or hang over the edge
- Always be sure to unplug the appliance from outlet prior to moving, cleaning, storage, and when not in use.
- StoreBound shall not accept liability for damages caused by improper use of the appliance.
- Improper use of the Mini Dog Treat Maker can result in property damage or even in personal injury.
- This appliance has a polarized plug (one blade is wider than the other). To reduce the risk of electric shock, this plug will fit in a polarized outlet only one way. If the plug does not completely fit in the outlet, reverse the plug. If it still does not fit, contact a qualified electrician. Do not attempt to modify the plug in any way.
A short power supply cord is to be provided to reduce the risk resulting from becoming entangled in or tripping over a longer cord. An extension cord may be used if care is exercised in its use. If an extension cord is used, the marked electrical rating of the extension cord should be at least as great as the electrical rating of the appliance. If the appliance is of the grounded type, the extension cord should be a grounding 3-wire cord. The extension cord should be arranged so that it will not drape over the counter top or tabletop where it can be pulled on by children or tripped over unintentionally.
PARTS & FEATURES
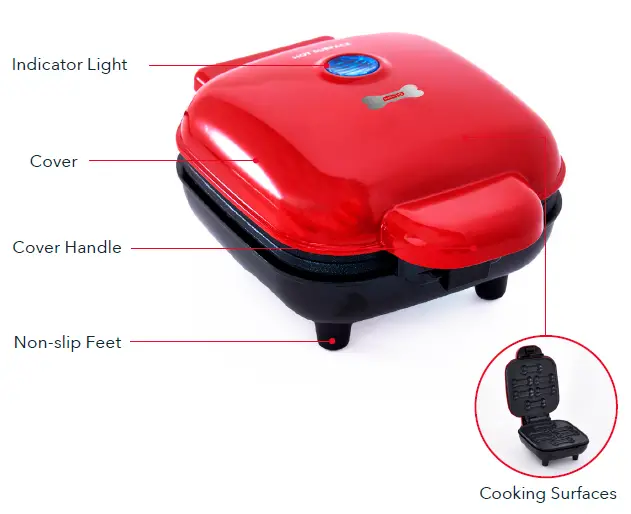
using your mini dog treat maker
Before first use, remove all packaging material and thoroughly clean your Mini Dog Treat Maker.
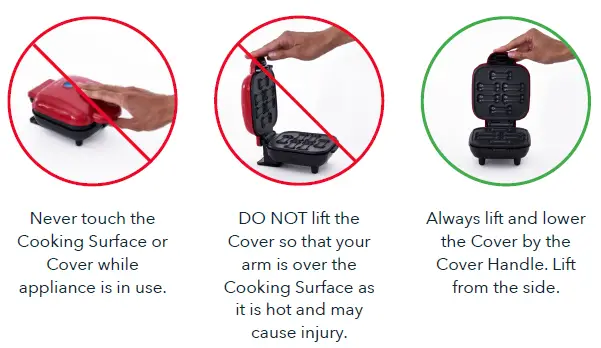
using your mini dog treat maker

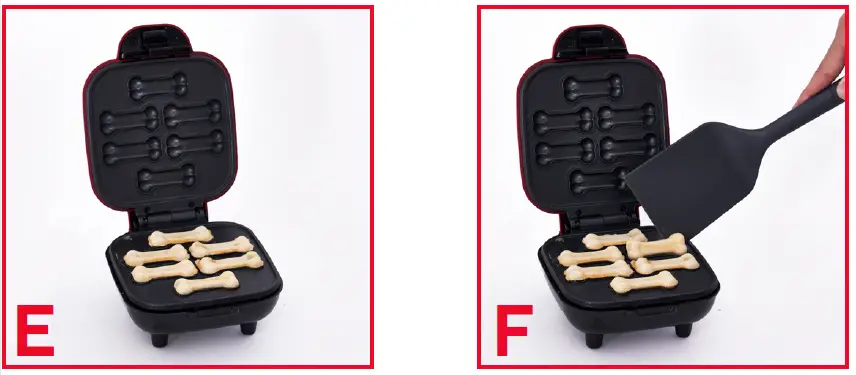
- A: Place the appliance on a stable and dry surface. Plug the cord into a power outlet. The Indicator Light (photo A) will illuminate, signaling that the Mini Dog Treat Maker is heating up.
- B: Once the Cooking Surface reaches the optimal cooking temperature, the Indicator Light will automatically shut off. Carefully lift the Cover by the Cover Handle (photo B). Now, you’re ready to get cooking!
- C: If you like, spray both Cooking Surfaces with a small amount of cooking spray (photo C). This will help the treats release more easily.
- D: Place or pour about 1 tsp of dough onto each mold in the Cooking Surface (photo D) and close the Cover.
- E: Once the dog treats are cooked (see cooking times in our Recipe Guide on page 19), carefully remove them from the Cooking Surface with a heat-resistant nylon, wood, or silicone cooking utensil (photo E).
NOTE: Do not use metal utensils to remove or place food on the Cooking Surface as this will damage the nonstick surface. - F: When you have finished cooking, unplug your Mini Dog Treat Maker and allow it to cool before moving or cleaning. Allow dog treats to cool and serve!
CLEANING & MAINTENANCE
Always allow the appliance to cool completely before moving, cleaning, or storing. Do not submerge appliance in water or any other liquids. Never use abrasive cleaning agents to clean your appliance as this may damage the Mini Dog Treat Maker. In order to keep your Mini Dog Treat Maker in pristine working order, thoroughly clean the appliance after each use. This will prevent the build-up of food or oil.
EVERYDAY CLEANING
- Unplug Mini Dog Treat Maker and allow it to cool completely.
- Using a damp, soapy cloth, wipe down the Cooking Surface and Cover. Thoroughly rinse the cloth and wipe again.
- Thoroughly dry Mini Dog Treat Maker before storing.
FOR TOUGH STAINS
- If there is food burned onto the Cooking Surface, pour on a little cooking oil and let sit for 5 to 10 minutes.
- Scrub the Cooking Surface with a sponge or soft bristled brush to dislodge food.
- Use a damp, soapy cloth to wipe down the Cooking Surface. Thoroughly rinse the cloth and wipe again.
- If any food remains, pour on cooking oil and let sit for a few hours, then scrub and wipe clean.
- Never use abrasive cleaning agents to clean your appliance as this may damage the Mini Dog Treat Maker and its nonstick Cooking Surface.
troubleshooting
While Dash products are durable, you may encounter one or more of the problems listed below. If the issue is either not solved by the solutions recommended below or not included on this page, please contact our Customer Support Team at 1-800-898-6970 or [email protected].
- The light on the Mini Dog Treat Maker keeps shutting off.
- This is normal. During the cooking process, the heating element will automatically turn on and off to regulate the temperature and ensure that the Cooking Surface does not get too hot or cold. When this occurs, the Indicator Light turns on and off.
- How do I know when the Mini Dog Treat Maker is heated and ready to use?
- When the Mini Dog Treat Maker reaches the optimal temperature, the Indicator Light shuts off and that means you’re ready to get cooking!
- There is no On/Off Button. How do I turn the Mini Dog Treat Maker off and on?
- To turn on, simply plug in the power cord. When you’re done cooking, turn off the Mini Dog Treat Maker by unplugging it.
- When using my Mini Dog Treat Maker, the Cover gets very hot. Is this normal?
- Yes, this is completely normal. When using your Mini Dog Treat Maker, always lift and lower the Cover by the Cover Handle. To prevent personal injury, DO NOT lift the Cover so that your arm is over the Cooking Surface as it is hot and may cause injury. Lift from the side.
- After using my Mini Dog Treat Maker a few times, food is starting to stick to the surface. What is happening?
- There is probably a build-up of burnt food residue on the Cooking Surface. This is normal, especially when cooking with sugar. Allow the appliance to cool fully, pour on a little cooking oil and let sit for 5–10 minutes. Scrub Surface with a sponge or soft bristled brush to dislodge food. Use a damp, soapy cloth to wipe down the Cooking Surface. Rinse the cloth and wipe again. If food remains, pour on cooking oil and let sit for a few hours, then scrub and wipe clean.
- The Indicator Light will not turn on and the Cooking Surface is failing to heat.
- Ensure that the power cord is plugged into the power outlet.
- Check to make sure the power outlet is operating correctly.
- Determine if a power failure has occurred in your home, apartment or building.
CHICKEN & WILD RICE TREATS
Ingredients: (Yields: 26 dog treats)
- ½ cup finely chopped cooked chicken breast
- ½ cup thoroughly cooked wild rice
- ¼ cup flat-leaf parsley leaves, coarsely chopped
Directions:
- Preheat the Mini Dog Treat Maker.
- In a mini food processor, combine the chicken and rice. Whirl until they form a grainy paste. Add the parsley. Pulse until the mixture is a fine paste. Add the egg, and pulse to make a wet purée.
- Add the rice flour. With a fork, mix until a soft, slightly sticky dough forms, adding a bit more flour if needed.
- Lightly coat the Cooking Surface of the Mini Dog Treat Maker with cooking spray. Add dough to the Mini Dog Treat Maker and close the Lid.
- Bake treats for 7 minutes.
- Remove with tongs and place on a rack to cool. Repeat with the remaining dough.
pumpkin, carrot & spinach TREATS
Ingredients: (Yields: 30 dog treats)
- ¼ cup finely shredded carrots
- ½ cup pumpkin purée
- 2 tbsp unsweetened smooth natural peanut butter
- 1 large egg, beaten
- ½ cup quick cooking oats
- 1 cup whole wheat flour
- ¼ cup finely chopped baby spinach
Directions:
- Preheat the Mini Dog Treat Maker.
- Spread the carrots on a paper towel. Cover with another paper towel and roll the carrots in the towels, pressing firmly to extract as much moisture as possible. Set the carrots aside.
- In a mixing bowl, combine the pumpkin, peanut butter, and egg. Whisk until they are combined and smooth. Add the carrots, spinach, oats, flour and mix until a soft, slightly sticky dough forms.
- Lightly coat the Cooking Surface of the Mini Dog Treat Maker with cooking spray. Add dough to the Mini Dog Treat Maker and close the Lid.
- Bake the treats for 6 minutes.
- Remove treats and place on a wire rack to cool. Repeat with the remaining dough.
CARROT AND APPLE TREATS
Ingredients: (Yields: approx. 30 dog treats)
- ¼ cup finely shredded carrots
- ¼ cup unsweetened apple sauce
- 1 large egg, beaten
- ½ cup quick-cooking oats
- 3/4 cup whole wheat flour
Directions:
- Preheat the Dog Treat Maker.
- In a mixing bowl, combine the carrots, apple sauce, and egg. Whisk until they are combined. Mix in the oats. Add the flour and mix until a soft, slightly sticky dough forms.
- Spray the inside of the Dog Treat Maker lightly with cooking spray. Place a log of dough into a cavity of the Dog Treat Maker. Fold in the ends and press them to fill the knobs on each end of the cavity. Repeat, filling all 6 cavities of the Dog Treat Maker. Close the lid, pressing until it clicks shut.
- Bake the treats for 6 minutes. Using short tongs, turn the treats. Close the lid, pressing down firmly; it is ok if it does not click shut. Bake the treats for 6 minutes, or until dark brown and firm when pressed. Transfer treats to a wire rack and cool completely.
- Repeat to bake the remaining treats. Using spray again is not needed.
peanut butter pumpkin treats
Ingredients: (Yields: 40 dog treats)
- ½ cup pumpkin purée
- 3 tbsp unsweetened, smooth natural peanut butter
- 1 large egg, beaten
- 1 cup whole wheat flour
Directions:
- Heat the Mini Dog Maker.
- In a mixing bowl, combine the pumpkin purée, peanut butter, egg, and whisk until the mixture is combined and smooth. Add the flour. Mix with a fork until a soft dough forms, using your hands at the end to work in the last bits if necessary.
- Lightly coat the Cooking Surface of the Mini Dog Treat Maker with cooking spray. Add dough to the Mini Dog Treat Maker and close the Lid.
- Bake for 5 minutes.
- Remove treats and cool on a wire rack. Repeat with remaining dough.
banana flax treats
Ingredients: (Yields: 26 dog treats)
- ½ cup quick-cooking oats
- ½ cup whole wheat flour
- 1 tbsp ground flax seed meal
- ½ tsp ground cinnamon
- 1 medium banana, mashed
- 3 tbsp coconut oil, melted
Directions:
- Preheat the Mini Dog Maker.
- In a mixing bowl, mix together the oats, flour, flax meal, and cinnamon to combine them. Add the banana, coconut oil, and with a fork mix to form a soft, slightly sticky dough.
- Lightly coat the Cooking Surface of the Mini Dog Treat Maker with cooking spray. Add dough to the Mini Dog Treat Maker and close the Lid.
- Bake for 5 minutes.
- Transfer treats to a wire rack to cool. Repeat the process with remaining dough.
quickie dog treats
For super easy homemade treats, pick your pup’s favorite flavor. Mix with nutritious grain, bake and enjoy! Recipes yield 16-30 treats.
| My dog loves | grain | How to combine | bake for |
| Carrots, Sweet Corn and Pumpkin blended, ½ cup | whole wheat flour
1 cup |
Blend the vegetables in a blender until smooth. Mix with flour in a bowl. | (Turning halfway) 5 minutes |
| Cooked Chicken
½ cup finely chopped |
old-fashioned oats
3/4 cup |
Whirl oats in food pro- cessor. Add chicken. Then add ¼ cup broth or water. | 6 minutes |
| Apple and Sweet Potato
blended, ½ cup |
toasted wheat germ
1 cup + 2 tbsp |
Blend apple and sweet potato in a blender until smooth. Mix in a bowl for 1-2 minutes. | 6 minutes |
| Sweet Potato
blended, ½ cup |
quick cooking oats
1 cup |
Mash sweet potato and mix in a bowl. | 6 minutes |
| Peanut Butter Natural, Unsweetened
½ cup |
whole wheat flour
½ cup |
Mix in a bowl. Then add 3 tbsp warm water.
Knead for 30 seconds. |
5 minutes |
STOREBOUND, LLC – 1 YEAR LIMITED WARRANTY
Your StoreBound product is warranted to be free from defects in material and workmanship for a period of one (1) year from the date of the original purchase when utilized for normal and intended household use. Should any defect covered by the terms ofthe limited warranty be discovered within one (1) year, Store Bound, LLC will repair or replace the defective part. To process a warranty claim, contact Customer Support at 1-800-898-6970 for further assistance and instruction. A Customer Support agent will assist you by troubleshooting minor problems. If troubleshooting fails to fix the problem, a return authorization will be issued. Proof of purchase indicating the date and place of purchase is required and should accompany the return. You must also include your full name, shipping address, and telephone number. We are unable to ship returns to a PO box. StoreBound will not be responsible for delays or unprocessed claims resulting from a purchaser’s failure to provide any or all of the necessary information. Freight costs must be prepaid by the purchaser. Send all inquiries to [email protected].
There are no express warranties except as listed above.
REPAIR OR REPLACEMENT AS PROVIDED UNDER THIS WARRANTY IS THE EXCLUSIVE REMEDY OF THE CUSTOMER. STOREBOUND SHALL NOT BE LIABLE FOR ANY INCIDENTAL OR CONSEQUENTIAL DAMAGES OR FOR BREACH OF ANY EXPRESS OR IMPLIED WARRANTY ON THIS PRODUCT EXCEPT TO THE EXTENT REQUIRED BY APPLICABLE LAW. ANY IMPLIED WARRANTY OF MERCHANTABILITY OR FITNESS FOR A PARTICULAR PURPOSE ON THIS PRODUCT IS LIMITED IN DURATION TO THE DURATION OF THIS WARRANTY. Some states do not allow the exclusion or limitation of incidental or consequential damages, or limitations on how long an implied warranty lasts. Therefore, the above exclusions or limitations may not apply to you. This warranty gives you specific legal rights and you may also have other rights, which vary from state to state. Refurbished items or items not purchased through an authorized retailer are not eligible for warranty claims.
REPAIRS
- DANGER! Risk of electric shock! The Dash Mini Dog Treat Maker is an electrical appliance.
- Do not attempt to repair the appliance yourself under any circumstances.
- Contact Customer Support regarding repairs to the appliance.
TECHNICAL SPECIFICATIONS
- Voltage: 120V ~ 60Hz
- Power Rating: 420W
- Stock#: DDTM200_20210331_V11
[ Download Recipe Guide PDF ]
QUICK START
ATTENTION:
Read this insert before using the appliance for the first time. In order to reach the best ice cream consistency you must pre chill your ingredients by following the below steps:
- STEP 1: Prepare your ice cream recipe.
- STEP 2: Place your ice cream mix into a freezer safe container, we recommend a sealable plastic bag for faster results.
- STEP 3: Place the container into the freezer for at least 30-45 minutes.
- STEP 4: After pre-chilling your ingredients, refer to pages 10-12 in your instruction manual on how to use your My Pint Ice Cream Maker.
NOTE: If you are still not satisfied with the consistency and thickness of your ice cream, pre-chill your ice cream mixture for a longer amount of time.
IMPORTANT SAFEGUARDS
PLEASE READ AND SAVE THIS INSTRUCTION AND CARE MANUAL.
When using electrical appliances, basic safety precautions should be followed, including:
- Please read and save instruction and care manual.
- Read all instructions carefully.
- Remove all bags and packaging from appliance before use.
- Do not use appliance outdoors or for commercial purposes.
- Never leave appliance unattended when in use.
- Only use the appliance on a stable, dry surface.
- Make sure the appliance is cleaned thoroughly before using.
- Do not use appliance for other than its intended use. For household use only. Do not use outdoors.
- Close supervision is necessary when any appliance is used by or near children.
- Children should be supervised to ensure that they do not play with the appliance.
- Do not operate this appliance with a damaged cord, damaged plug, after the appliance malfunctions, is dropped, or damaged in any manner. Return appliance to the nearest authorized service facility for examination, repair, or adjustment.
- For maintenance other than cleaning, please contact StoreBound directly at
1- 800-898-6970 from 7AM-7PM PST Monday-Friday or by email at [email protected]. - Do not place appliance on or near a hot gas burner, hot electric burner, or in a heated oven. Extreme caution must be used when moving an appliance containing hot oil or other hot liquids. Always attach plug to appliance first, then plug cord into the wall outlet. To disconnect, turn any control to “off”, then remove plug from wall outlet. Do not use appliance for other than intended use.
- Refrain from using attachments that are not recommended by the appliance manufacturer, as this may result in fire, electric shock, or personal injury.
- Do not let the power cord touch hot surfaces or hang over the edges of tables or counters.
- This appliance is not intended for use by persons (including children) with reduced physical, sensory, or mental capabilities, or lack of experience and knowledge unless they are provided with supervision and instruction concerning use of the appliance by a person responsible for their safety.
- Always be sure to unplug the appliance from outlet prior to moving, cleaning, storage, and when not in use.
- StoreBound shall not accept liability for damages caused by improper use of the appliance.
- Improper use of the appliance can result in property damage or even in personal injury.
- This appliance has a polarized plug (one blade is wider than the other). To reduce the risk of electric shock, this plug will fit in a polarized outlet only one way.
- If the plug does not completely fit in the outlet, reverse the plug. If it still does not fit, contact a qualified electrician. Do not attempt to modify the plug in any way.
- Turn the appliance OFF, then unplug from the outlet when not in use, before assembling or disassembling parts and before cleaning.
To unplug, grasp the plug and pull from the outlet. Never pull from the power cord. - A short power supply cord is to be provided to reduce the risk resulting from becoming entangled in or tripping over a longer cord. An extension cord may be used if care is exercised in its use. If an extension cord is used, the marked electrical rating of the extension cord should be at least as great as the electrical rating of the appliance. The extension cord should be arranged so that it will not drape over the countertop or tabletop where it can be pulled on by children or tripped over unintentionally. If the appliance is of the grounded type, the cord set or extension cord should be a grounding-type 3-wire cord.
Parts & Features
Before Using Your MY PINT Ice Cream Maker
- Remove all packaging materials from around the My Pint.
- Check that the My Pint has no visible damage and that no parts are missing.
- Before using for the first time, or before using after prolonged storage time, wash and dry the appliance and accompanying accessories. See “Cleaning & Maintenance” for instructions.
- The Cooling Bowl must be in an upright position. The freezer temperature must be at least -2℉ for the Cooling Bowl to freeze properly.
- Chilling your ingredients (freezer recommended) before using the appliance will speed the process.
- The Dash My Pint Ice Cream Maker can be used with two modes, Electric and Manual. The Electric Mode involves turning on the appliance using the Motor Unit. The Manual Mode can be used without the Motor Unit and simply involves mixing your ice cream with the included Mixing Spoon.
PRO TIP:
The Cooling Bowl is most effective in the first 20 minutes of use and needs to be placed in the freezer for 24 hours before being used again.
Making Ice Cream In Electric Mode
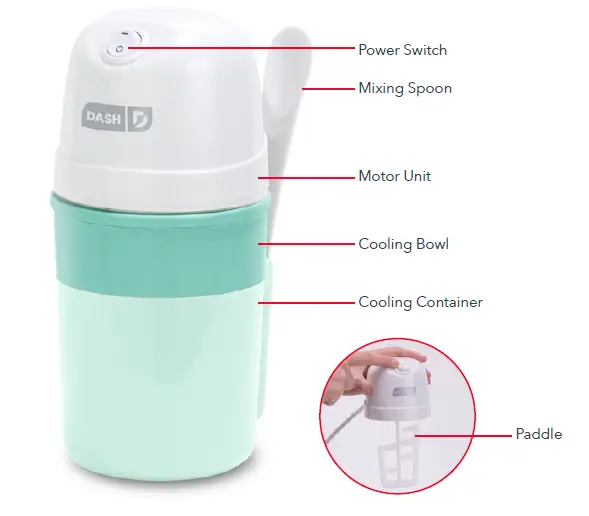
1. It is recomended to freeze the Cooling Bowl for 24 hours before preparing your ice cream (photo A). Prepare your ice cream mixture and allow to chill from 1-3 hours (freezer recommended).
NOTE: The Dash My Pint Ice Cream Maker can hold up to 1 cup of liquid mixture. Do not exceed 1 cup when preparing your ice cream.
2. When sufficiently cold, place your Cooling Bowl into the Cooling Container (photo B). Place on a stable surface.
3. Attach the Paddle to the Motor Unit, and plug in the Motor Unit (photo C).
4. SLOWLY pour your chilled ice cream mixture into the Cooling Bowl (photo D).
5. Press the Power Switch to turn on the Motor Unit with the Paddle spinning.
6. Immediately after turning your Power Switch on, gently lower the Motor Unit with the spinning Paddle into the Cooling Bowl and allow the Paddle to combine your mixture (photo E). Be sure to hold onto the base (photo F).
7. When the mixture is fully frozen and rises to fill the Cooling Bowl, the ice cream is ready to serve. Use your Mixing Spoon to enjoy your ice cream right from the chilled Cooling Bowl (photo G)!
Making Ice Cream In Manual Mode
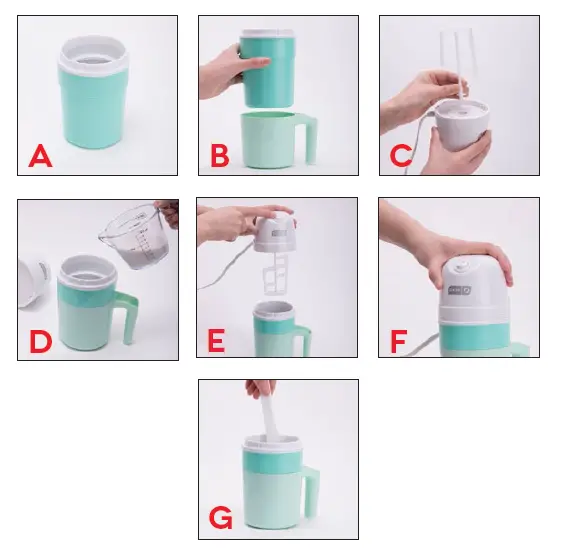
1. Remove the Cooling Bowl from the freezer. Place in the Cooling Container on a stable surface.
2. Pour your chilled ice cream mixture into the Cooling Bowl.
3. Using your Mixing Spoon, stir your ice cream mixture quickly with your Mixing Spoon coming into contact with the side of the Cooling Bowl. This will allow the ice cream to freeze faster. Mix and stir until the ice cream is frozen.
4. When the ice cream is ready to serve, enjoy with your Mixing Spoon right from the Cooling Bowl!
TIPS: The Dash My Pint Ice Cream Maker can hold up to 1 cup of liquid mixture. Do not exceed 1 cup when preparing your ice cream.
CLEANING & MAINTENANCE
- The Cooling Bowl and Paddle can be cleaned with warm water and mild detergent.
- DO NOT place any of the parts in the dishwasher. The Motor Unit can be cleaned using a damp cloth. NEVER immerse the Motor Unit in water or other liquids.
- Ensure that all parts of the appliance are dried thoroughly.
- Never place the Cooling Bowl in the freezer if it is still wet.
- Do not store the Paddle or the Mixing Spoon in the freezer.
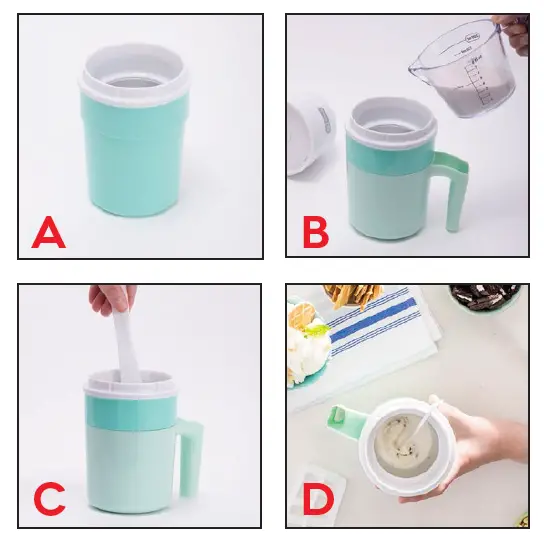
@unprocessyourfood for recipes, videos, & daily inspiration


CLASSIC VANILLA ICE CREAM
Ingredients:
2 cups heavy cream
1 cup milk
¾ cup sugar
1 tbsp vanilla extract
Directions:
1. Prepare the ice cream mixture: In a bowl, stir together the cream and milk. Add the sugar and whisk until the sugar is dissolved, 3 to 4 minutes.
2. Test for graininess by tasting a small amount of the liquid; it should feel smooth on the tongue and there should be no sugar visible on the bottom of the bowl when it is stirred or spooned out.
3. Continue whisking, if necessary, to ensure that the texture of the finished ice cream will be smooth. Stir in the vanilla.
4. Chill the mixture in the refrigerator until you are ready to make your ice cream.
5. When ready, add one cup of your mixture to the My Pint Ice Cream Maker and press start to begin churning.


FROZEN YOGURT
Ingredients:
1 cup of your favorite yogurt flavor (can be Greek Yogurt)
Directions:
Add the yogurt to your My Pint Ice Cream Maker and press start to begin freezing. Enjoy! Top with a drizzle of honey or granola for Greek Yogurt.

Raspberry Sorbet
Ingredients:
7-8 oz fresh raspberries
3-4 tbsp sugar syrup, or maple syrup
Directions:
1. In a food processor or personal blender, blend all the ingredients until smooth.
2. Pour one cup into your My Pint Ice Cream Maker and churn until frozen.

Sundae Ideas


Customer Support
Dash values quality and workmanship and stands behind this product with our Feel Good Guarantee™. To learn more about our commitment to quality, visit bydash.com/feelgood.
Our US-based customer support team is at your service Monday – Friday during the times below. Reach us at 1 (800) 898-6970 or [email protected]

Hey Hawaii! You can reach our customer service team from 5AM to 5PM. And also, Alaska, feel free to reach out from 6AM – 6PM.
Warranty
STOREBOUND, LLC – 1 YEAR LIMITED WARRANTY
Your StoreBound product is warranted to be free from defects in material and workmanship for a period of one (1) year from the date of the original purchase when utilized for normal and intended household use. Should any defect covered by the terms of the limited warranty be discovered within one (1) year, StoreBound, LLC will repair or replace the defective part. To process a warranty claim, contact Customer Support at 1-800-898-6970 for further assistance and instruction. A Customer Support agent will assist you by troubleshooting minor problems. If troubleshooting fails to fix the problem, a return authorization will be issued. Proof of purchase indicating the date and place of purchase is required and should accompany the return. You must also include your full name, shipping address, and telephone number. We are unable to ship returns to a PO box. StoreBound will not be responsible for delays or unprocessed claims resulting from a purchaser’s failure to provide any or all of the necessary information. Freight costs must be prepaid by the purchaser.
Send all inquiries to [email protected].
There are no express warranties except as listed above.
REPAIR OR REPLACEMENT AS PROVIDED UNDER THIS WARRANTY IS THE EXCLUSIVE REMEDY OF THE CUSTOMER. STOREBOUND SHALL NOT BE LIABLE FOR ANY INCIDENTAL OR CONSEQUENTIAL DAMAGES OR FOR BREACH OF ANY EXPRESS OR IMPLIED WARRANTY ON THIS PRODUCT EXCEPT TO THE EXTENT REQUIRED BY APPLICABLE LAW. ANY IMPLIED WARRANTY OF MERCHANTABILITY OR FITNESS FOR A PARTICULAR PURPOSE ON THIS PRODUCT IS LIMITED IN DURATION TO THE DURATION OF THIS WARRANTY.
Some states do not allow the exclusion or limitation of incidental or consequential damages, or limitations on how long an implied warranty lasts. Therefore, the above exclusions or limitations may not apply to you. This warranty gives you specific legal rights and you may also have other rights, which vary from state to state.
REPAIRS
DANGER! Risk of electric shock! The Dash My Pint Ice Cream Maker is an electrical appliance.
Do not attempt to repair the appliance yourself under any circumstances.
Contact Customer Support regarding repairs to the appliance.
TECHNICAL SPECIFICATIONS
Voltage 120V ~ 60Hz
Power Rating 12W
Stock#: DPIC100_20171207_V8