
GELOO Mini Smart Socket Instructions
What’s in the Box
- Home Control Outlet x 1
- User Manual x 1
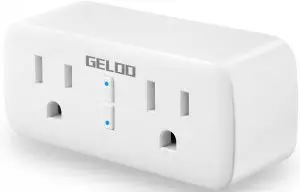
At a Glance

- Power Plug
- Flame Resistant Material
- ON/OFF Button(The upper button always control the left socket)
- Socket Panel
Note: ON/OFF button can be used as reset button, long press can change the flashing speed and will reset your smart socket to factory defaults. Only do this if you are sure you want to erase all your settings.
Parameters
| Model Number: | WP2 |
| Rated Voltage: | 120V~ |
| Rated Current: | 10 A (Max) |
| AC Frequency: | 50/60Hz |
| Working Temp.: | -20 ~ 45°C |
| WIFI Frequency: | 2.4Ghz |
| Maximum Total Power Output: | 1200W |
| Disconnection Means: | Type 1B |
| Pollution Degree: | 2 |
| Rated Impulse Voltage: | 1500V |
| Automatic Action: | 6000cycles |
| Altitude: | Not exceed 2000m |
| Rating: | AC120V 50/60Hz 10A 1200W Resistive |
Caution: Risk of electric shock; Dry location use only. Used indoor only.
Install the “Smart Life” APP
- You may find the “Smart Life” app on Apple App store, Google Play, or Scan the QR code below and install it.
- Enter the register / log in interface, input the email address for getting the verification code to register an account.
The free app “Smart Life” is compatible with mobile devices that support i0S 8.0 above, Android 4.4 above.

Google Play store
Apple App Store

Connecting Your Socket with APP
Easy Mode (Recommend)
- Please make sure the mini socket has connected with electricity at the beginning, then open the” Smart Life” APP, tap the” ADD DEVICES” or the”+”at the upper right corner of the page and select “Electrical outlet;”.
- long press on/off button of the device for 5 seconds until indicator light quickly flashed, the interface page already stepped into” Add Device” Page as the above;
- Make sure the indicator light is flashing rapidly and confirm it in app;
- Choose the local WIFI and enter the correct password and confirm;
- Wait for configuring successfully, then tap “Done”.
AP Mode
- Please change to “AP Mode” if connecting failed in “Easy Mode”. The AP Mode is at the upper right corner of the “ADD DEVICE” page.
- Long press on/off button until the indicator light flashes slowly;
- Make sure the indicator light is flashing slowly and confirm it in App;
- Choose the local WIFI and enter the correct password and confirm;
- Tap” Connect Now”, choose WIFI hotspot named ” SmartLife xxx”, then back to” Smart Life” application; 6. Wait for configuring successfully, then tap “Done”.
Getting to Know “Smart Life” APP
Devices
You can add listed devices by tap the “+” at the top right at this page.
Switches
Switches allows you to turn on/off your device anywhere. As long as you have an internet connection you can control the device in your home. Tap to the icon at the right of the page, you are able to modify the device name individually or even create a group ( If you have several device), which means you can turn multiple devices on or off at the same time.
Timer
You can set the devices individually on or off after the specific time as you want with this function.
Countdown
With the count down timer feature, you can automatically switches on/off the running household appliances.
Scenes
With this function, you can create your characteristic as you want.
Switches on/off the running household appliances.
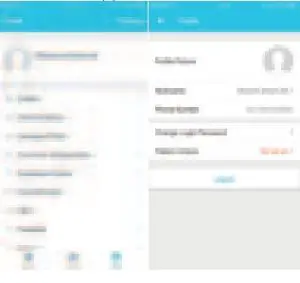
Profile
Profile is the entrance for the users to manage personal information, mainly show the following information: switches on/off the running household appliances.
Safety Information
- The device is recommended for use indoors and in a dry location only, power outlet shall be used within it’s published outlet rating on the instructions.
- Please contact seller for replacement if there is any damage caused by transportation.
- Please plug in the socket in proper condition and away from children. Please plug in the socket fully while using for safety concern.
- Please do not disassemble or install the socket, otherwise there may cause product damaged or security risks.
Using Amazon Echo Quick Guide
What You’ll Need
Amazon Alexa APP & Account Smart Life APP & Account (Users need to register your own account, select region as “The United States”).
Echo, Echo Dot, Tap or other Amazon voice operated devices Mini Smart Socket
Tip: Rename the device after configuring successfully, The name of the device is recommended to use easy pronunciation of the English words.
(Amazon Echo only supports English temporarily)
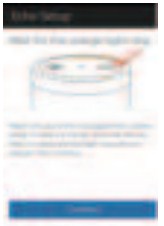
Set Your Echo Speaker By Alexa App
- Sign in with Alexa account & password (If not registered, sign up first); After login, click the menu at the top left, then click “Settings”, and choose “Set up a new device”;
- Choose a device (for example, Echo). When the right page appears, long press the small dot on your Echo device until the light turns to yellow. Then click “Continue” on App. (Note: at this time the mobile phone can not open a variety of VPN software).
- Choose users’ WIFI and wait for a few minutes.
- After an introduction video, click next step, it will turns to “Home” page automatically. Now the Echo is connected to Alexa APP through WiFi successfully.

Enable Our Skill in Alexa APP
- Choose “Skills” in the options bar, and then search “Smart Life” in the search bar; Select “Smart Life” in the search results, and then click “Enable”.
- Input the user name and password that you had previously registered (Only support the account in the United States); When you see the right page, it means the Alexa account is linked with Smart Life account.

Control Smart Socket by Voice
- After the previous operation, you can control the socket via Echo.
Discovering devices: Firstly, users need to say to Echo: “Echo(or Alexa), Discover my devices.”
Echo will start to finding the devices which is added in Smart Life APP, it will take about 20 seconds to show the result. Or you may click “Discover devices”.
In Alexa APP, it will show the devices that found successfully.
Note: “Echo” is one of the wake-up name, which can be any of these three names (Settings): Alexa/Echo/Amazon. - Support Skill List
User can control devices by instructions like below:
Alexa, turn on [fridge socket]
Alexa, turn off [fridge socket]
Attention: The name of the device must be consistent with the addition of Smart Life App.

Warranty
This Mini socket is covered by a limited warranty from GELOO for the original purchaser that covers the product from defects in workmanship and materials for 12 months from the date of purchase (damages through normal wear and tear, alteration, misuse, neglect, accident, service by anyone other than the authorized service center, or act of God are not included).
During the warranty period and upon verification of defects, this product will be replaced when returned with proper proof of purchase.
FCC WARNING: This device complies with part 15 of the FCC Rules.Operation is subject to the following two conditions:
- This device may not cause harmful interference,and
- this device must accept any interference received,including interference that may cause undesired operation
![]()
Do not attempt to service or disassemble. Attempting to open or service the unit voids all warranties. If you experience problems with the device, discontinue use, unplug the device from the wall outlet and contact Cuco Customer Services for assistance.
- Do not expose to water, dust, chemicals and moisture.
- Do not exceed the maximum power rating 10A or 2000W.
Contact Us
For any inquiries or comments concerning to our products, please do not hesitate to send email to [email protected], and we will respond to you as soon as possible.
We appreciate your support!
Manufacture: IMC International
Manufacturing Corporation Limited Address: 4871 Summerdale Ave. Unit #13 Philadelphia, PA 19124 Support
Email: [email protected]