introduction
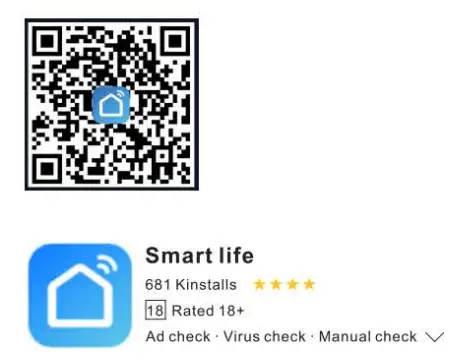
- Download the Smart life app from App Store or Google play
- Please use your phone to scan the QR codes, or you can search “Smart life” in-app markets. market to download and install the App
- Use the phone number + verification code or email to register in-app. Enter your phone number, and select the country you live in. If you select the phone number, you will receive a text with a registration code. If you choose to register with the email you will then create a password.
Wi-Fi Network Setup Method 1
In-App Popup
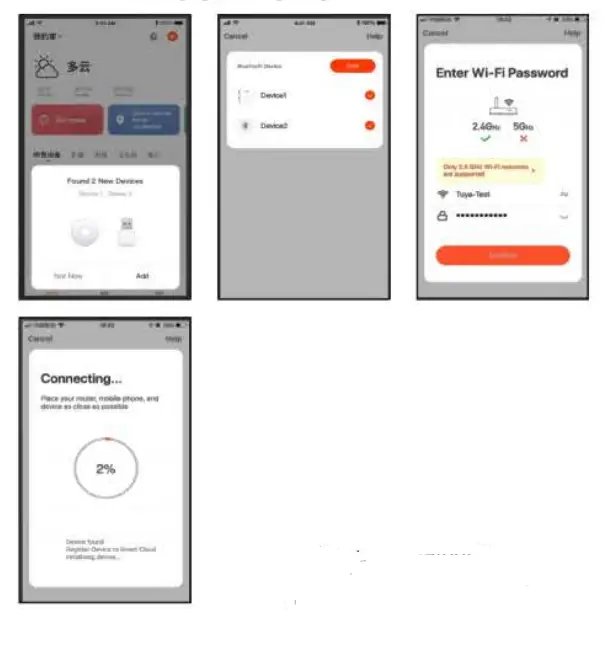
- Make sure Bluetooth on your phone/tablet is turned on, then open the app.
- When you open the app, you should see an in-app popup with any new devices found. If not, try one of the other Wi-Fi network setup methods.
- Click “Add” and follow the remaining prompts to setup your Wi-Fi network connection.
Wi-Fi Network Setup Method 2
Auto Scan
- Open the app on your phone/tablet and tap the”+” button in the top right corner.
- Tap on “Auto Scan” at the top right to begin scanning for new devices.
- If your new device is found, tap “Next” and follow the remaining prompts to setup your Wi-Fi network connection.
If your new device is not found, try one of the other Wi-Fi network setup methods.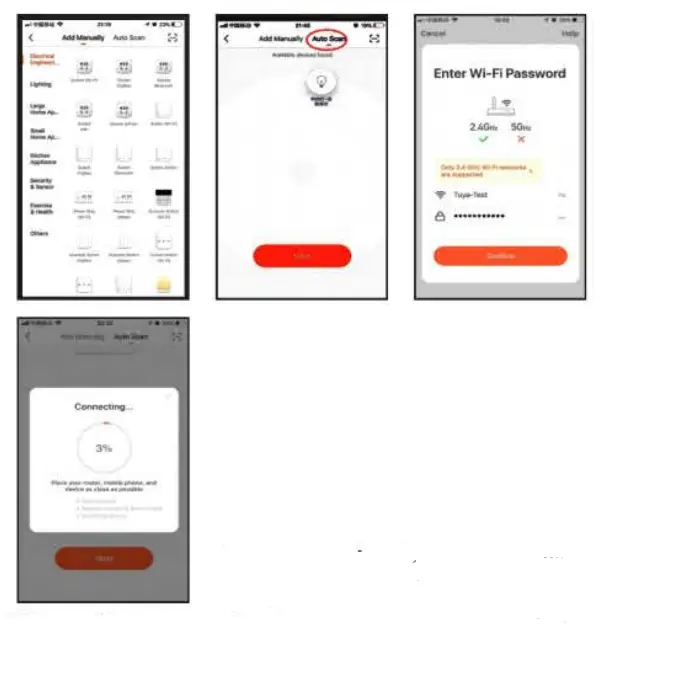
Wi-Fi Network Setup Method3
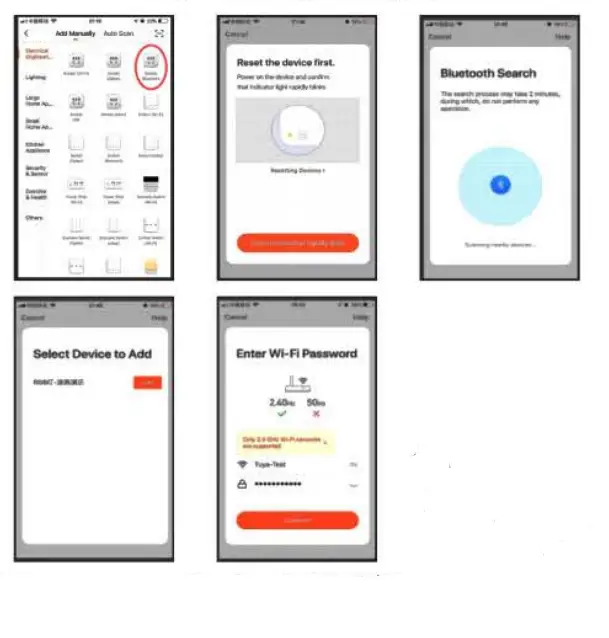
Bluetooth Search
- Open the app on your phone/tablet and tap the “+” button in the top right corner.
- Tap on “Add Manually” at the top, and then tap Socket (Bluetooth)” or “Socket (BLE).
- Follow the instructions to confirm the indicator light is flashing rapidly then tap the confirm button.
- On the Bluetooth Search page if your device is found, click “Add” and follow the remaining prompts to setup your Wi-Fi network connection. If not, try one of the other Wi-Fi network setup methods.
Wi-Fi Network Setup Method 4
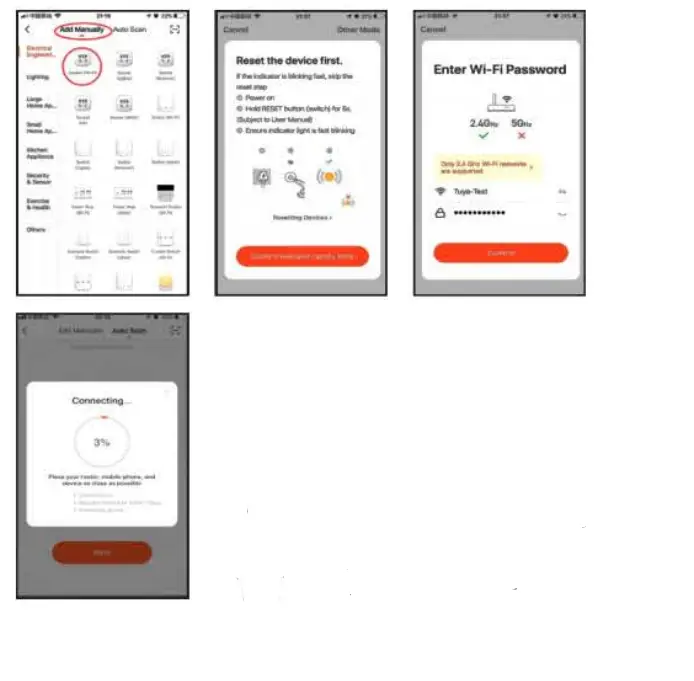
Manual Wi-Fi Setup
- Open the app on your phone/tablet and tap the “+” button in the top right corner.
- Tap on “Add Manually” at the top, and then tap “Socket (Wi-Fi)”.
- Follow the instructions to confirm the indicator light is flashing rapidly then tap the confirm button.
- Follow the remaining prompts to setup your Wi-Fi network connection. If your new device is not found, try one of the other Wi-Fi network setup methods.
AP Mode Configuration
- When you enter the fast mode, Press the power switch button for 5 seconds, the device indicator light will enter the slow flash state, which is 1 flash for 1.5 seconds.
- Then follow the instructions to connect smart life-XXX with WiFi. After connecting, you need to return to the Smart life App
- Once it is connected, the App will prompt the connection, and click “Done”.
- Now you can control smart devices or smart plug through the smart life app lication
- Once the devices has been configured successfully, the device will be added to the “device list.”
Please note: You can add the Smart devices to Echo/Google Home following the instructions below.
How to connect Smart Device with the Amazon Alexa
- Start the smart life app, log in your account, and make sure smart devices or plugs are in the device list.
- Change the name of the device so Sailh that it can be easily identified by Alexa such as: light bulb or plug in the living room, light bulb or plug in the bedroom, etc
- Minimize Smart life App, then open the Alexa App and log in your Alexa account and make sure you have at least one Alexa voice-controlled device installed like Echo, Echo dot, etc.
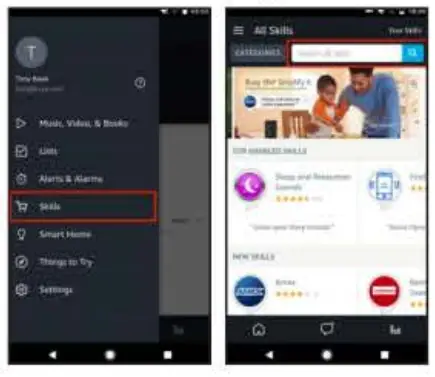
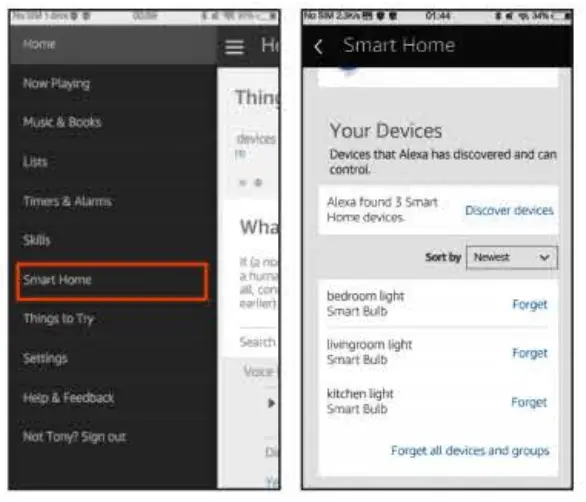
- In the top left corner of Home page, click button to show App menu. Then show Skills in the menu.
- Then search “Smart life “. Select ” Smart life ” and tap “Enable” to enable the skill.
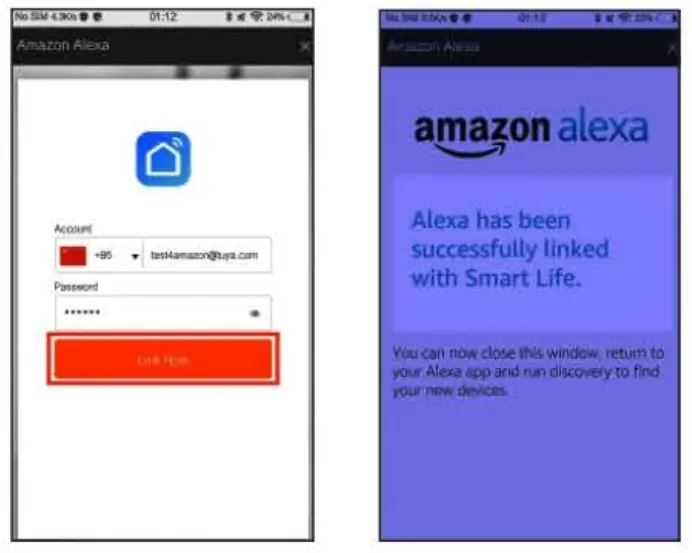
- You will be entered to the account link page. Type in your Smart life account and password, do not forget to select the country/region where your account belongs to. Then tap “Link Now” to link your Smart life account. When “Alexa has been successfully linked with Smart life” shows up, tap X on the top right corner, back to the Alexa app
- Discover devices Echo needs to discover your smart devices before it controls them. You can say “Alexa, discover devices” to Echo. Echo will discover devices which have already been added in the Smart life app. You can also tap “Discover devices” to discover the smart devices. Discovered devices will be shown in the list.
Note: every time you change the device’s name on Smart life app, Echo must re-discover before you control them. - Control devices by voice commands Now you can control your smart devices through Echo. You can use the following commands to control your devices (e.g., bedroom plug): Ø Alexa, turn on/off bedroom plug.
How to connect Smart Device with Google Home
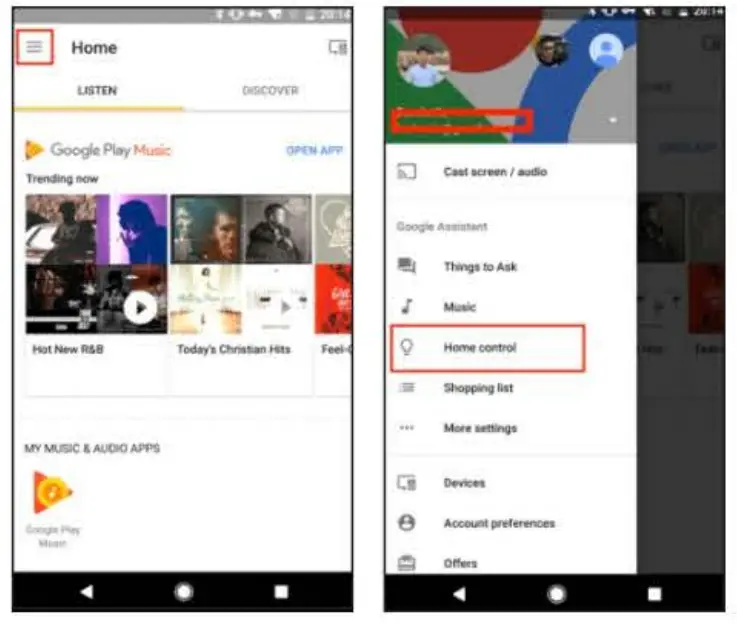
- Launch the Google Home App and make sure Google Home speaker is installed. If not, please follow Google Home speaker installation instruction to complete the installation.
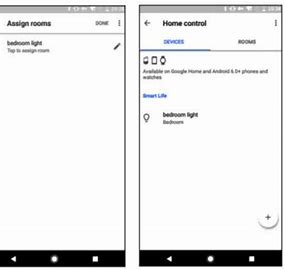
- Once Google Home is installed, in the top left corner of App Home page, click button to show App menu. Then click “Home Control” in the menu.
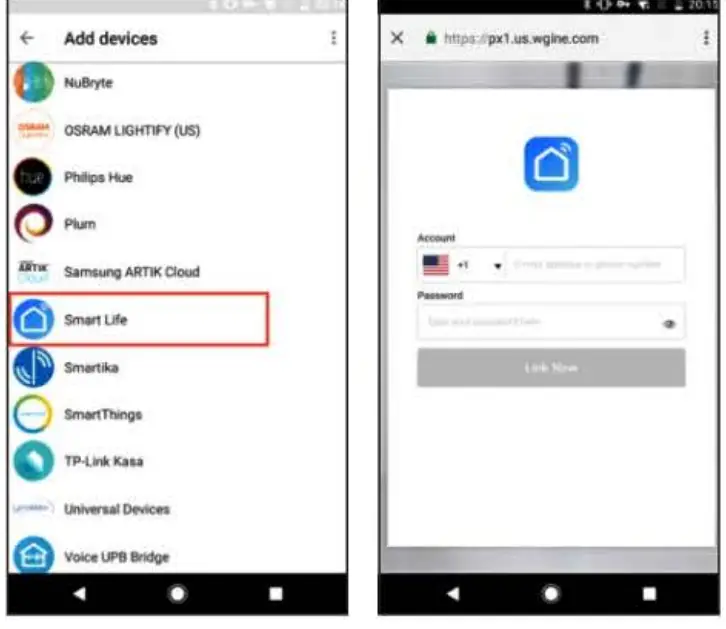
ATTENTION: If you log in Google Home app with several Google accounts, only the first Google account you logged can be used for “Home Control” - On “Add devices” page, scroll down to find “Smart life and then click it. Log in Smart life App with your Smart life App account and password and choose Smart life App in the dropdown menu to complete the account linking.
- After successful account linking, in Google Home App you can see all the smart devices from your Smart life App account. You can assign rooms for each device.
- Now you can use Google Home to control your smart devices, you can say: ok, Google, turn on/off wall plug

Note: every time you change the device’s name on Smart life app, Google Home must re-discover before you control them.
FCC WARNING
This device complies with part 15 of the FCC Rules. Operation is subject to the following two conditions: (1) this device may not cause harmfiul interference, and (2) this device must accept any interference received, including interference that may cause undesired operation. Any changes or modifications not expressly approved by the party responsible for compiance could void the user’s authority to operate the equipment.
NOTE: This equipment has been tested and found to comply with the imits for a Class B digital device, pursuant to Part 15 of the FCC Rules. These limits are designed to provide reasonable protection against harmful interference in a residential installation. This equipment generates, uses and can radiate radio requency energy and, f not installed and used in accordance with the nstrucions, may cause harmful interference to radio communications. However, there is no guarantee that interference will not occur in a particular instalation if this equipment does cause harmful interference to radio or television ec ception, which can be determined by turning the equipment off and on, the user is encouraged to try to correct the interference by one or more of the following measures:
- Reorient or relocate the receiving antenna
- Increase the separation between the equipment and receiver.
- connect the equipment into an outlet on a circuit different from that to which the receiver is connected.
- Consult the dealer or an experienced radio TV technician for help.
To maintain compliance with FCCs RF Exposure guidelines, This equipment should be installed and operated with minimum distance between 20cm the radiator your body: Use only the suppied antenna.