Display Tablet
1 Charging & Turning On
There are two charging methods available:
Plug one end of the included charging cable into the 5V charging port of the tool, and the other end to the external DC power.
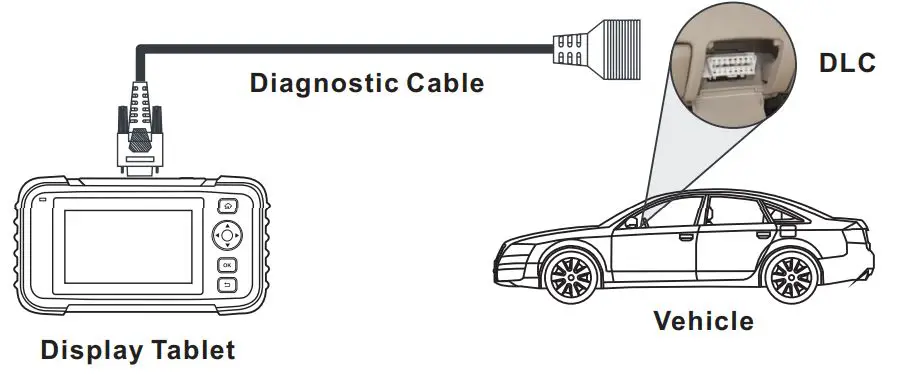
Insert one end of the diagnostic cable into the DB-15 connector of the tool, and the other end to the vehicle’s DLC. Once the charging LED illuminates solid green, it indicates that the battery is fully charged. Press the [Power] button to power it on.
2 Getting Started
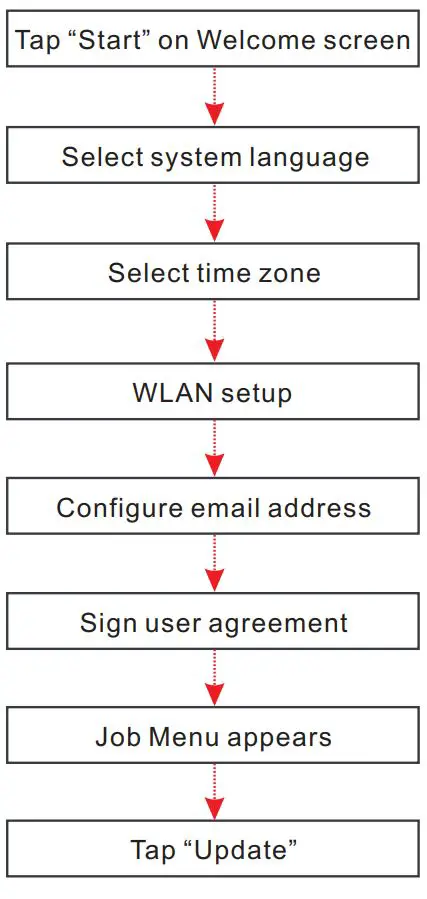
If it is the first time you have used this tool, you need to make some system settings and keep the diagnostic software synchronized with the latest version.
Follow the steps below to proceed.

*Note: If you choose “Ignore” in this step, it will go into the date setting page. If the tool has been properly connected to the Internet, the system will automatically obtain the correct network date and time.
*Note: After you configured it, the system will automatically send the diagnostic report to your email box every time a complete Auto-Detect process is successfully finished.
*Note: To enjoy more capabilities and better service, you are strongly recommended to update it on regular basis.
+86 755 8455 7891
[email protected]
3 Preparation
- Turn the ignition off.
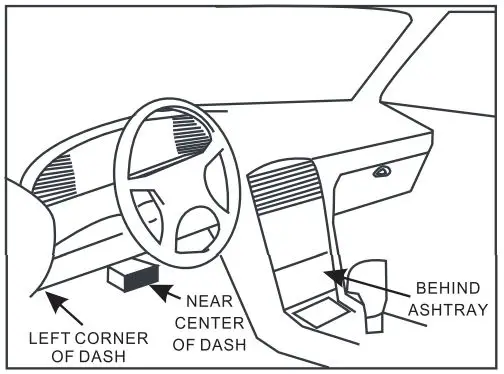
- Locate vehicle’s DLC: It provides standard 16 pins and is generally located on driver’s side, about 12 inches away from the center of dashboard. See Figure DLC Location. If DLC is not equipped under dashboard, a label indicating its position will be given. In case no DLC is found, please refer to Automobile Repair Manual.
- Plug one end of the diagnostic cable into the DB-15 connector of the tool, and tighten the captive screws. Connect the other end to the vehicle’s DLC.
*Note: The tool ONLY works with the 12V passenger cars equipped with
standard OBD-II diagnostic socket. - Turn the ignition key on.
4 Start Diagnostics
AutoDetect and manual diagnosis are supported. If the AutoDetect fails, you can choose to input the VIN manually or exit the AutoDetect session to switch to manual diagnosis mode.
*Note: If “Automatic detection on connect” in “Settings” is set as ON, this step can be ignored.