meross B086MKBC63 Smart Garage Door Opener
Safety Information
- Keep the device away from water, fire, humidity or hot environments.
- Make sure the device is fully plugged in and kept out of reach of children for safety concern.
- Do not attempt to disassemble, repair, or modify the device
- For indoor use only.
- When you leave the product unused for a long time unplug the product from the power outlet.
- Please contact seller for replacement if there is any damage caused by transportation.
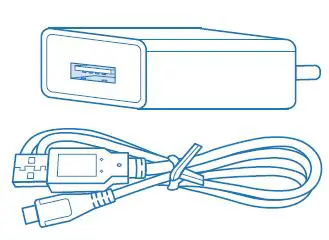
Package Contents

1 x USB Adapter and Cable
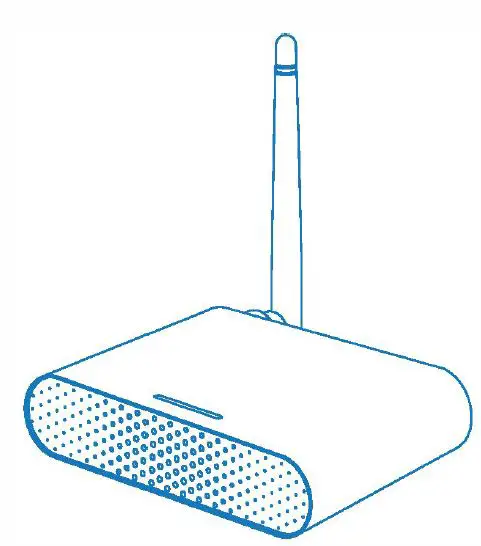
1 x Smart Garage Door Opener
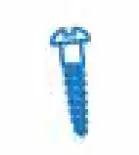
8 x Screws
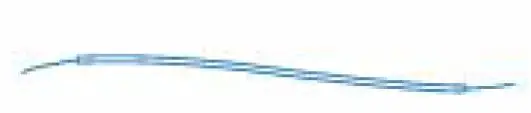
1 x TestWire

2 x Cable
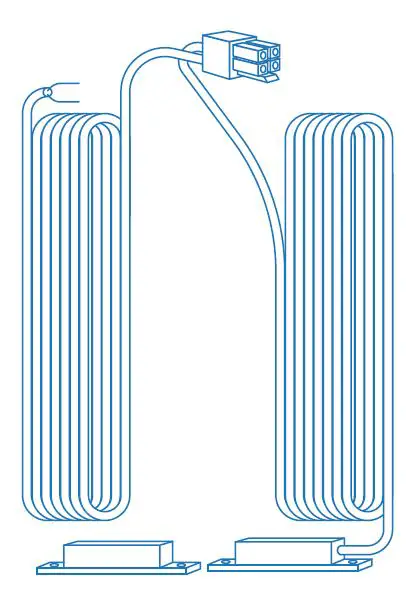
l x CableTwo
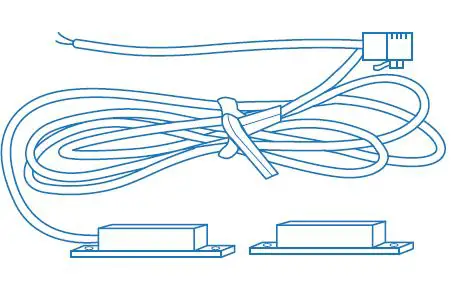
l x Cable One
2 x Double-sided
Adhesive Tapes
If you find any part is missing in the package, please contact https://meross.com/support/Email_Support, we will provide the proper solution for you.
Installation Guide
- Meross smart garage door opener is the companion device of your existing garage door opener. It supports up to 3 garage doors. Its main working principle is as follows
- Download the Meross opp ond choose Smort Goroge Door Opener to get start.

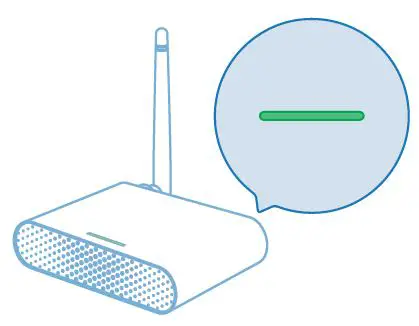
- Power on the device. Wait about 5 seconds until the status LED blinks amber and green.
- Set up the device.
Connect your smortphone or tablet to the 2.4 GHz Wi-Fi.
The smart device supports iOS 13/ iPadOS 13 and later. In order to have better user experience, it is recommended that you upgrade your iOS or iPadOS to the latest vers
ion before pairing with the bulb.
Launch the Meross app. and log in to your account, or if you are a new user, tap Sign up to create a new account.
Tap the”+” icon to select the type of smart device you want to add, then you can just follow the setup wizard to finish the configuration.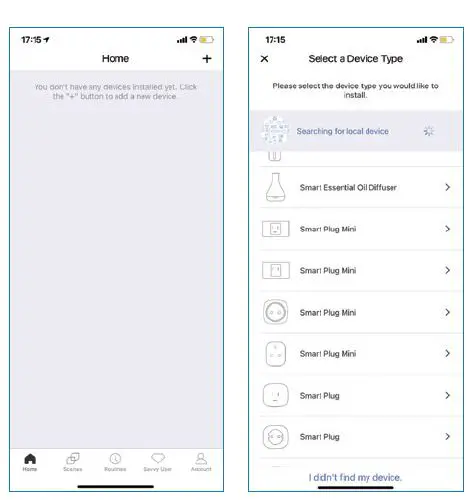
Note:
As long as you finish the configuration, you’ll also be able to manage the device in the Apple Home app.
If the QR code does not work, please try to add the smart bulb in the Apple Home app.
Should you have any questions, please visithttps://www.meross.com/support#/.
Connect the sensor cable. Move the sensor to check if it is functional
- Please contact [email protected] for help if the sensor is not functional.
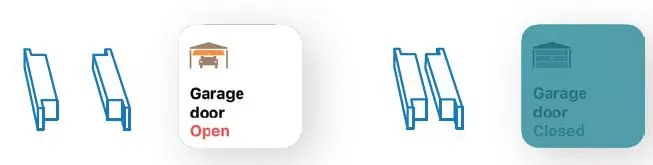
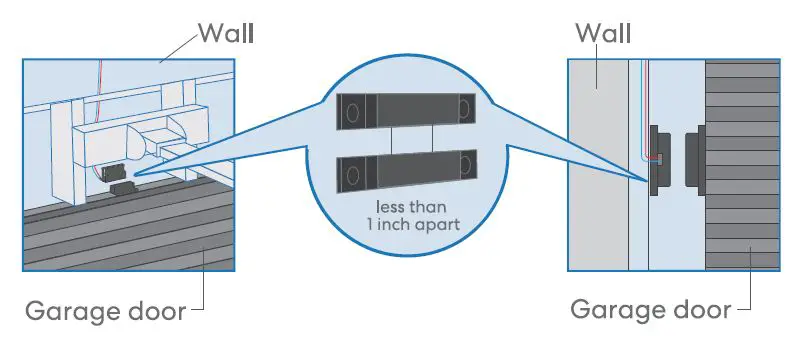
Find a proper position on the garage door to mount the sensors*. Please make sure the distance between the two sensors is less than l inch when the garage door is closed, and the two sensors are well separated when the garage door is open.
You can use the included double-sided adhesive tapes or screws for sensor fixation.
Power off your existing garage door opener. Connect the other end of the signal control cable to the two terminals that connect to the wall button. Wire order does not matter here. 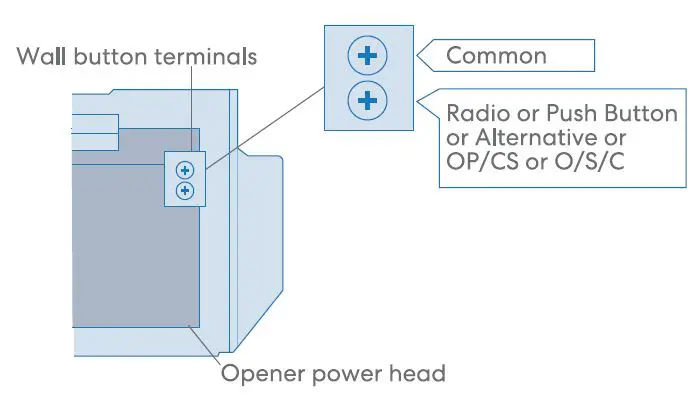
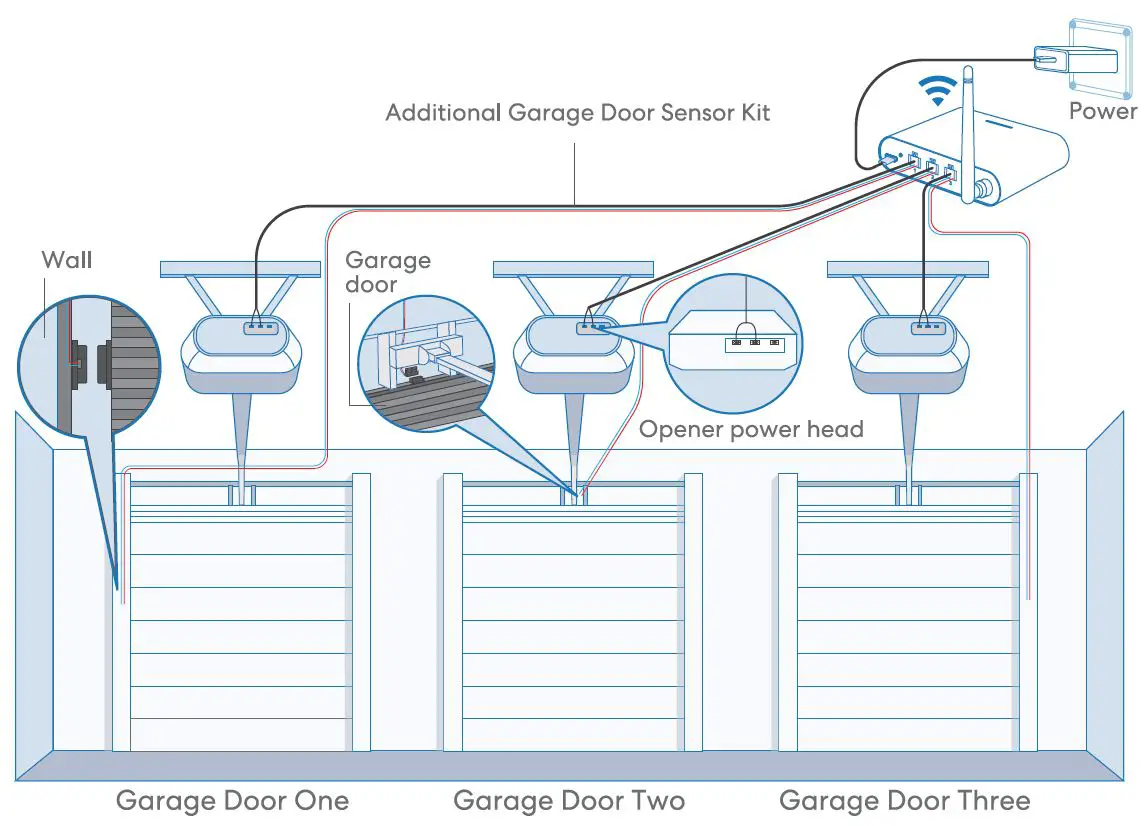
8. Deploy the device. We recommend to deploy it on the top of your existing garage door opener and if you have three single doors, please deploy the device on the middle door opener. Use the provided double-sided adhesive tapes for the fixation if necessary. 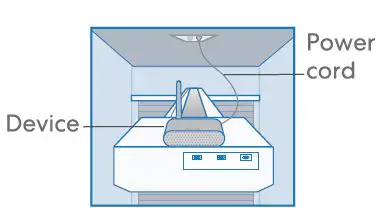
9. If you have two or three single doors, additional garage door sensor kit is required for the second or third single door.
10. Power on both existing garage door opener and smart garage door opener. The smart garage door opener will reconnect to Homekit/Meross cloud service automatically. Congratulations! You have completed all installation steps.
LED and Button Rules
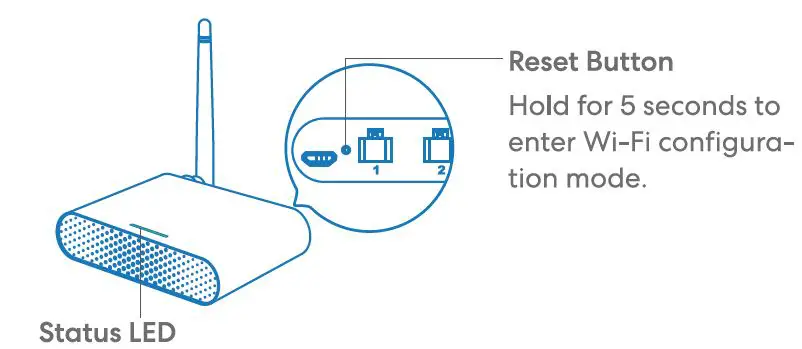
Status LED
Solid amber: Initialization/ Reset/ Firmware upgrading mode. Flashing amber and green slowly: Configuration mode. Flashing green rapidly: Wi-Fi connecting mode.Solid green: Successfully connected.
Solid red: No internet connection.
Flashing green 3 times: Sensors connected or disconnected (Door close or open detected).
Off: Power OFF.
How to Use
1. General Settings
Port 1/2/3:
Activate/Inactivate doors, and configure individual garage settings.
LED: Turn on/off LED .
User manual: Check user manual. 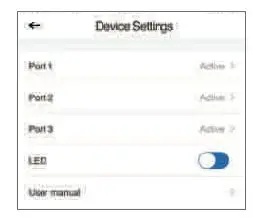
2. Port Settings
Garage door name:
Change garage name.
Garage door status:
Activate or inactivate this garage door. Operation history: Check operation history of this garage door. 
Door notification
Open:
Send me a notification each time my garage door opens.
Close:
Send me a notification each time my garage door closes. 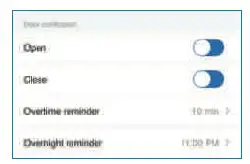
Overtime reminder:
Send me a notification when my garage door opens for 10-60 mins. Overnight reminder:
Send me a notification when my garage door is still open after particular time.
Advance settings
Overtime close:
Close the door automatically when the door opens for a period of time. Fixed time close:
Close the door automatically when the door is still open after particular time.
Opening time:
Choose the proper time duration for your garage door opener. App use it as a timeout parameter to confirm the status of your garage.
Trigger Duration:
Choose the proper trigger duration if you find your meross app can’t fully close or open your garage door. The trigger duration is the same time as you press the garage wall button.
Closing alarm:
Sound alarm when door is closing.
3. Voice Control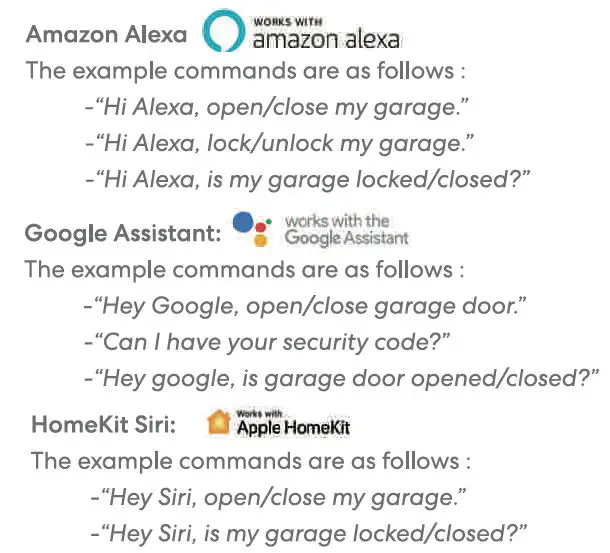
4. Widgets
Widgets are quick access to your Meross devices and Scenes. To enable it, please go to Account-> Widget to add shortcuts first. And then follow below steps on your smartphones to activate them.
- For iPhones:
1. Swipe to the right on your Home or Lock screen .
2. Scroll down to the bottom of your widget list and then tap edit.
3. Scroll down to find Meross and add it. For Android smartphones:
1. On the home screen, tap and hold on an available space.
2. Tap Widgets, find Meross widget and then add it.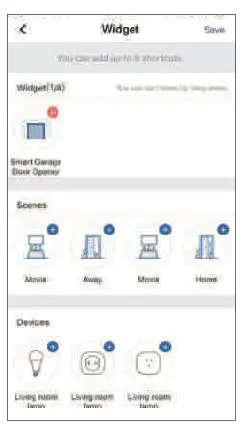
FAQ
At Meross, we strive to assure your satisfaction. Attached below is a non-exhaustive list of questions that users are mostly concerned about.
1. Is Meross MSG200 compatible with my garage door opener?
Go to www.meross.com/compatibility and choose your brand/model. If your model is not listed or needs an accessory to make it work, please email the below things to [email protected].
- Your order id.
- Learn the button color of your garage door opener.
- Your opener brand and model.
- An address for the accessory shipment.
2. What if I can’t control the smart device with the Meross app?
You can troubleshoot the following:
- Check if your home Wi-Fi is working properly.
- Make sure that you have disabled access control in your router and that the smart device is not blocked by the router’s firmware.
- Factory reset your smart device and try to add it again.
3. My Home app can’t add the device by scanning the QR code.
You can tap “Don’t Have a Code or Can’t Scan” and input the code manually.
4. I can’t pair my device with HomeKit anyhow.
Please make sure your iOS is connecting to the 2.4GHz of your home Wi-Fi and you are having iOS 13 or later. Restart your iOS will help due to some system cache issue.
Warranty
Most products are covered by a 12 months limited warranty from the date of its original purchase. If any problems occur, please contact [email protected] for help.
We can only provide aftersales service for products that are sold by Meross or Meross authorized retailers and distributors.
Disclaimer
l. The function of this smort device is tested under o typicol circumstance described in our specifications. Meross does NOT guarantee that the opener shall perform exactly the same as described under all circumstances.
2. By using third-party services including but not limitted to Amazon Alexa, Google Assistant, Apple Homekit, and SmartThings, customers acknowledge that Meross shall not be held liable in any way for the data and private information collected by such parties. Meross’s total liability is limited to what is expressly covered in its Privacy Policy.
3. Damages arising from ignorance of the SAFETY INFORMATION shall not be covered by Meross aftersales service, nor does Meross take any legal responsibility therefrom.
Customers acknowledge understanding of these articles clearly by reading this manual.
■ Canadian Compliance Statement
This device contains licence-exempt tronsmitter(s)/receiver(s) that comply with Innovation, Science and Economic Development Canada’s licence-exempt RSS(s). Operation is subject to the following two conditions:
(1) This device may not cause interference.
(2) This device must accept any interference, including interference that may cause undesired operation of the device.
l.’.Elmetteur/rE!cepteur exempt de licence contenu dons le present opporeil est conforme aux CNR d’lnnovotion, Sciences et DE!veloppement E!conomique Canada applicables aux appareils radio exempts de licence. l’.exploitation est autorisEle aux deux conditions suivantes:
1) L’appareil ne doit pas produire de brouillage;
2) L’opporeil doit accepter tout brouillage radio91ectrique subi, meme si le brouillage est susceptible d’en compromettre le fonctionnement.
The device meets the exemption from the routine evaluation limits in section 2.5 of RSS 102 and compliance with RSS-102 RF exposure, users can obtain Canadian information on RF exposure and compliance.
Le dispositif rencontre !’exemption des limites courantes d’E!valuation dons la section 2.5 de RSS 102 etla conformite Cl !’exposition de RSS-102 rf, utilisateurs peut obtenir l’informotion canadienne surl’exposition et lo conformitE! de rf.
This transmitter must not be co-located or operating in conjunction with any other antenna or transmitter. This equipment should be installed and operated with a minimum distance of 20 centimeters between the radiator and your body.
Cet emetteur ne doit pas etre Co-place ou ne fonctionnant en meme temps qu’aucune outre ontenne ouemetteur. Cet E!quipement devroit etre instolle et octionne ovec une distance minimum de 20 centimetres entre.
FCC
FCC Compliance Information Statement Changes or modifications not expressly approved by the party responsible for compliance could void the user’s authority to operate the equipment.
This device complies with Part 15 of the FCC Rules. Operation is subject to the following two conditions:
this device may not cause harmful interference, and (2) this device must accept any interference received, including interference that may cause undesired operation.
Note: This equipment has been tested and found to comply with the limits for a Class B digital device, pursuant to Port 15 of the FCC Rules. These limits ore designed to provide reasonable protection against harmful interference in a residential installation. This equipment generates, uses, and con radiate radio frequency energy,
and if not installed and used in accordance with the instructions, may cause harmful interference to radio communications. However, there is no guarantee that interference will not occur in a particular installation. If this equipment does cause harmful interference to radio or television reception, which con be determined by turning the equipment off and on, the user is encouraged to try to correct the interference by one or more of the following measures:
- Reorient or relocate the receiving antenna.
- Increase the separation between the equipment and receiver.
- Connect the equipment into an outlet on o circuit different from that to which the receiver is connected.
- Consult the dealer or an experienced radio/TV technician for help.
This equipment complies with FCC radiation exposure limits set forth for an uncontrolled environment. This equipment should be installed and operated with o minimum distance of 20cm between the radiator & your body. This transmitter must not be
co-located or operating in conjunction with any other antenna or transmitter.
SIMPLE DEVICE
SIMPLIFY YOUR LIFE
Email: [email protected] Website: www.meross.com