Pioneer SPH-20DAB Car Radio Receiver Instructions

REMARKS
- If you have any difficulty carrying out these instructions, please contact Pioneer Customer Support. Once upgraded to this version, it is not possible to downgrade to a lower version.
- Please download and print these instructions before downloading and installing the firmware update. It is important that you complete all steps correctly and in the order described below.
- This update applies only to SPH-20DAB models which are sold in Europe.
A. Check the current firmware version of the unit
PROCEDURE
- Start the vehicle engine.
- If AV Source is On, Press and hold SOURCE/MUSIC/OFF button to switch off the source. And if Pioneer Smart Sync is connected, please disconnect.
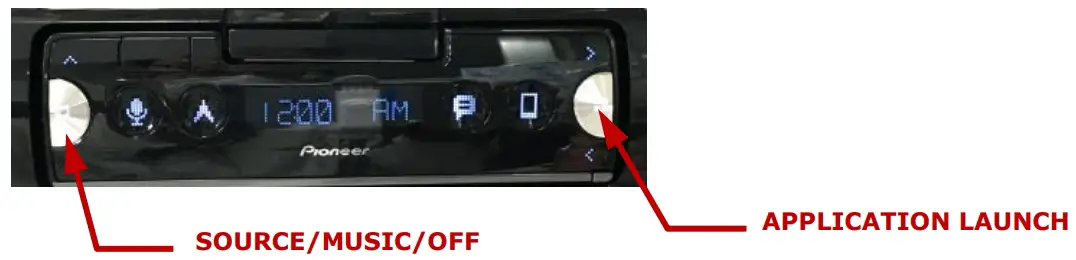
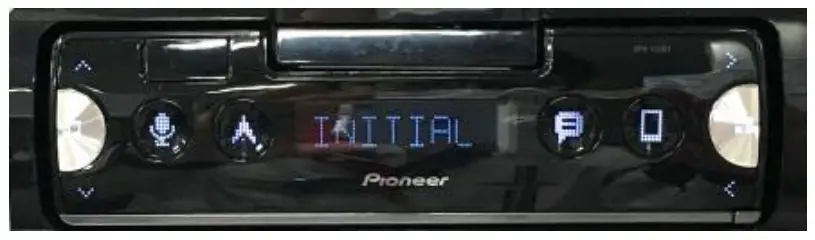
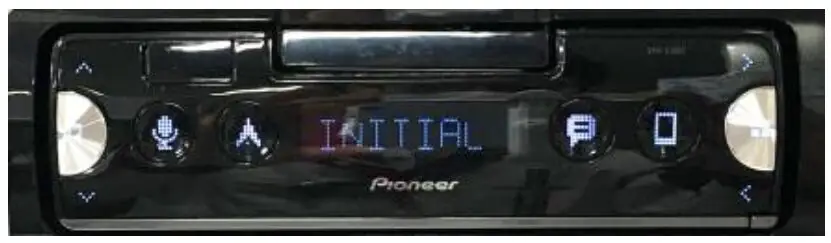
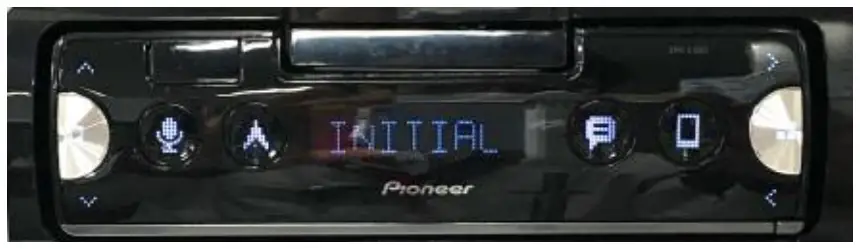
- Press and hold the Application launch button, to display the “Initial ”menu. then press to confirm.
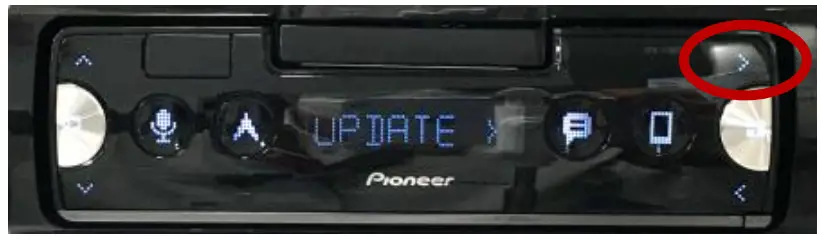
- Press “>” repeatedly to select “UPDATE”, next press the Application launch button to confirm.
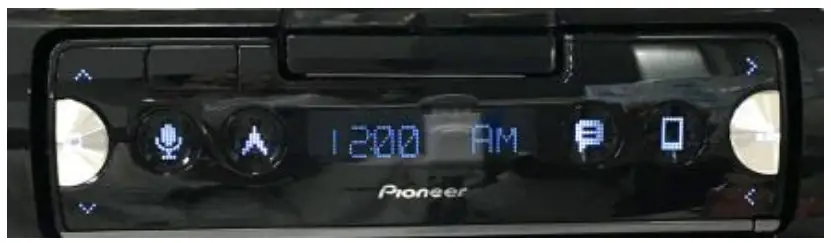
- Select “S/W VER” to confirm the system info.
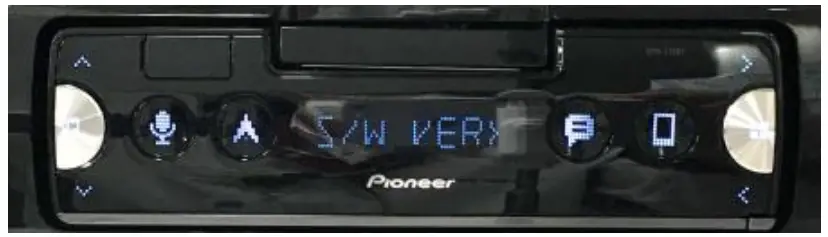
- After the “S/W VER” screen appears, check the firmware version.
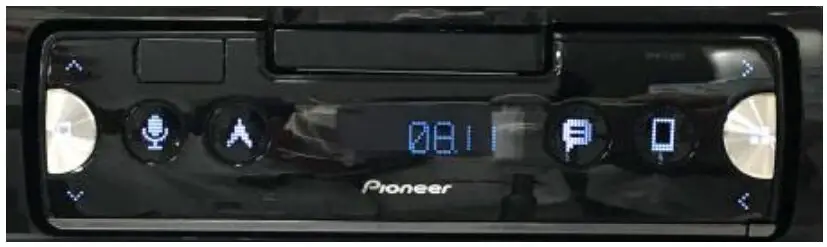
If the version number is 8.09 or higher, it is not necessary to update the firmware. If the version number is lower than 8.09, it is necessary to update the firmware. Please continue to Step B.
B. Downloading the Firmware Update File
Download the correct file from the website to a folder on your computer.
| MODEL | DOWNLOAD | FIRMWARE | FIRMWARE SIZE |
| SPH-20DAB | SPH-20DAB_A0809.zip | 99DREAM_DAB_A0809.scd | 6.790.640 bytes |
C. Create the System Firmware Update USB memory device
USB memory device requirements:
- USB specification 2.0 and 128 MB or more in capacity
- Should be blank (should not contain any files) and formatted in FAT32
PROCEDURE
- Connect the USB memory device to your computer.
- Double click the ZIP file named “SPH-20DAB_A0809.zip” to open it.
- Extract and save the file named “99DREAM_DAB_A0809.scd” to a folder on your computer
- Copy the firmware file “99DREAM_DAB_A0809.scd” to the USB memory device. Ensure that the update file is located within the root (top folder) of your USB storage device. There should be no other files on the USB storage device.
- Confirm that the file name and file size are correct on the USB memory device. To check the file size in Microsoft Windows, select the file, press the right mouse button, and select “Properties”. If the file name and size do not match the ones listed above, perform steps A and B again.
NOTE:
If the correct file is not copied to the USB memory device, your unit will not recognize it as an update USB memory device and you will not be able to carry out the update.
D. Updating the Firmware on Your Unit
REMARKS:
- Please DO NOT perform this firmware update if the model number of your Pioneer unit is anything other than the above listed model.
- While your unit is being updated, DO NOT turn off the system’s power, DO NOT touch the unit’s buttons, DO NOT remove the front panel and DO NOT remove the USB storage device during the firmware update process, as this may result in severe damage to your unit.
- Make sure to disconnect all external mobile devices connected to your unit.
- The update process takes approximately 6 minutes to complete.
PROCEDURE:
- Start the vehicle engine.
- Connect the USB storage device to the USB input on your unit.
- If AV Source is On, Press and hold SOURCE/MUSIC/OFF button to switch off the source. And if Pioneer Smart Sync is connected, please disconnect.
- Press and hold Application launch to display the Initial menu.
- Press “>” repeatedly to select “UPDATE“, next press the Application Launch button to confirm.

- Select the “START” item for updating the unit to the latest software.

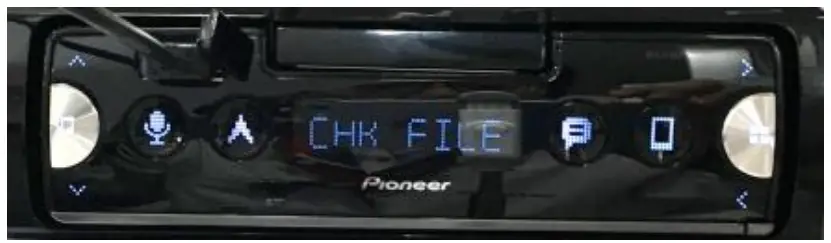
- The “CHECK FILE” screen appears. If it shows “ERROR” on the display, Try the following “FILE ERR->CHK USB” Confirm that the firmware file is correct, next restart the update or change to a new USB memory.
- After starting, there will be a progress bar while updating. If it shows “ERROR” on the display, try the following: “ERR->RETRY” Disconnect / connect the USB storage device. And press the Application Launch button to restart the update.
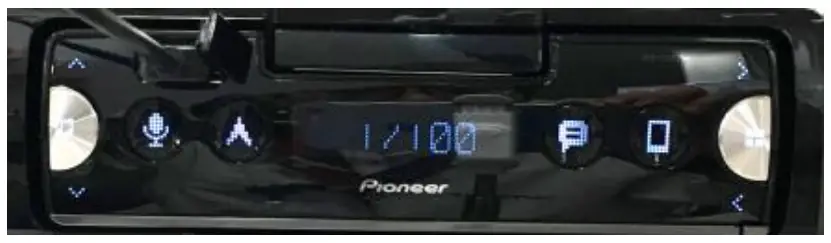
- Wait until the update procedure completes. (approx. 5 minutes)
- The product will reboot after the update is finished. Do not touch anything even when the screen is blacked out. After it has finished rebooting, the screen will return to Source OFF.
- Press and hold SOURCE(MUSIC)/OFF to set the unit Source OFF.
- Press and hold Application launch to display the Initial menu.
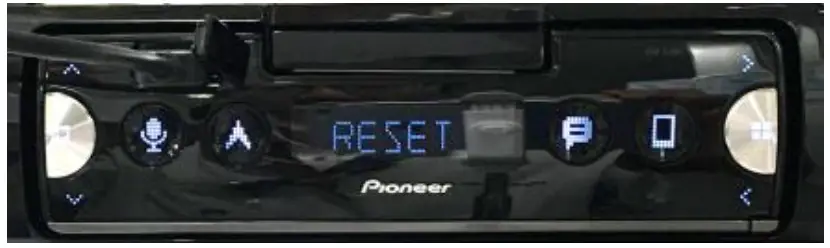
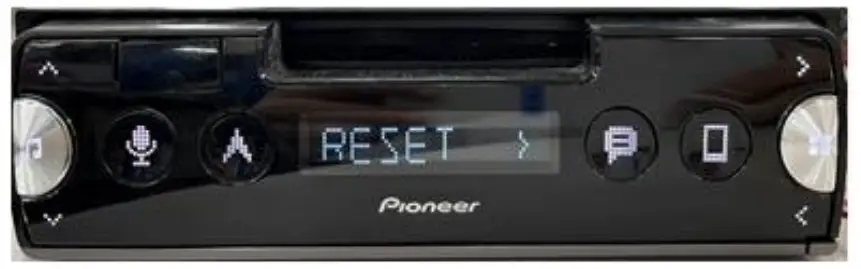
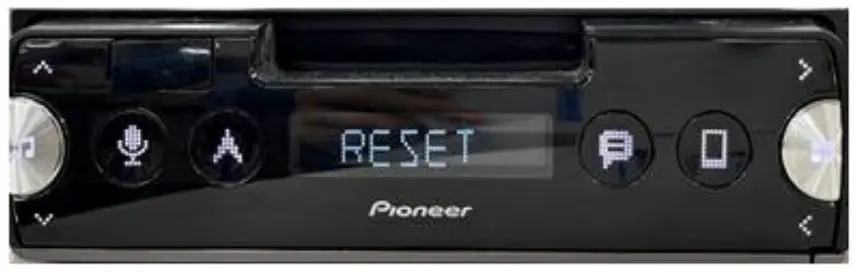
- Press “>” repeatedly to select “RESET“, press the Application Launch button to confirm.
- Select “YES” for a system reset.

- Do not touch anything even when the screen is blacked out. After the unit has finished rebooting, the screen will return to Source OFF.
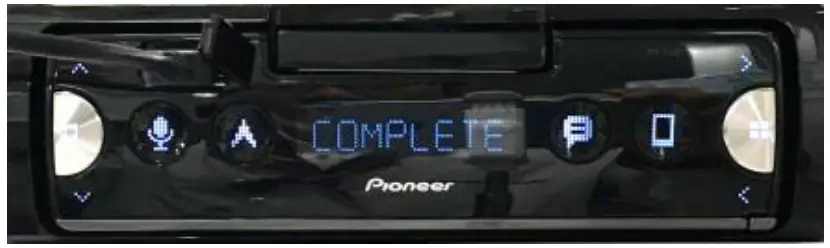
- The firmware update is now complete. Your Pioneer Smartphone receiver is now ready for use.
- Check if the firmware has been updated. Perform the same procedure “A. Check the current firmware version of the unit” to check if the firmware has been updated.
Contact Information
Pioneer Customer Support Center
http://www.pioneer.eu
Copyright(c) 2022 Pioneer Corporation