
PoE IP Camera
Quick Start Guide
QG4_A
Technical Support
For Windows Client & Mac Client, please download the PC software: https://reolink.com/software-and-manual/
For advanced setup, please download the user manual: https://reolink.com/software-and-manual/
For more troubleshooting, please go to FAQs on our website: https://reolink.com/faqs/
For other technical support, please contact us at [email protected]
Welcome to Reolink Easy Setup Within Minutes!
Access the Camera by Smartphones
Camera Connection Diagram
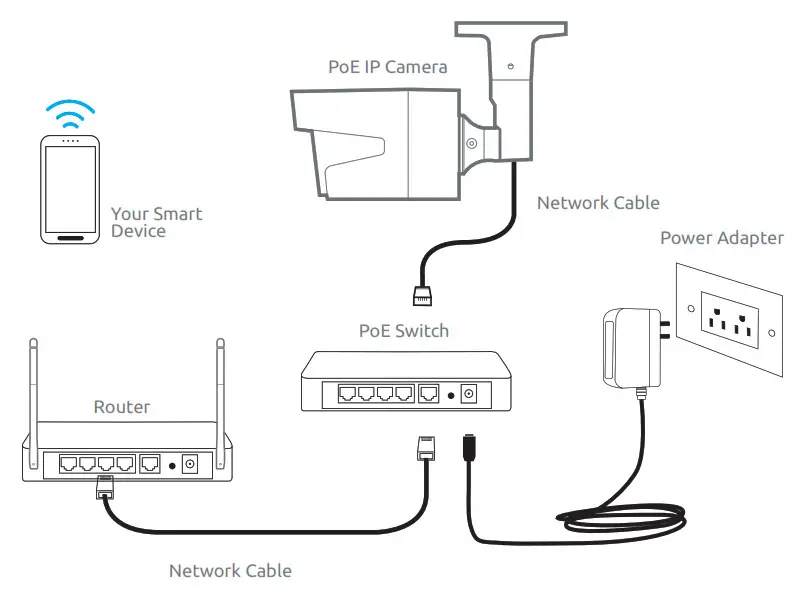
For initial setup, please connect the camera to your router LAN port with an Ethernet cable, and then follow the steps below to set up your camera. Make sure that your camera and your smart devices are in the same network.
Install Reolink App
There are two ways to get the Reolink App:
- Search “Reolink” in App Store (for iOS), or Google Play (for Android), download and install the app.
- Scan the QR code below to download and install the app.
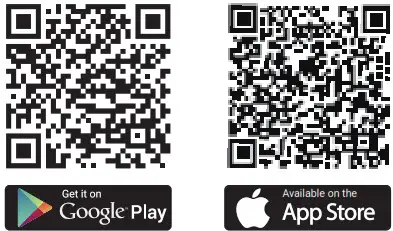
https://play.google.com/store/apps/details?id=com.mcu.reolink https://itunes.apple.com/us/app/reolink/id995927563?ls=1&mt=8
Add the Device
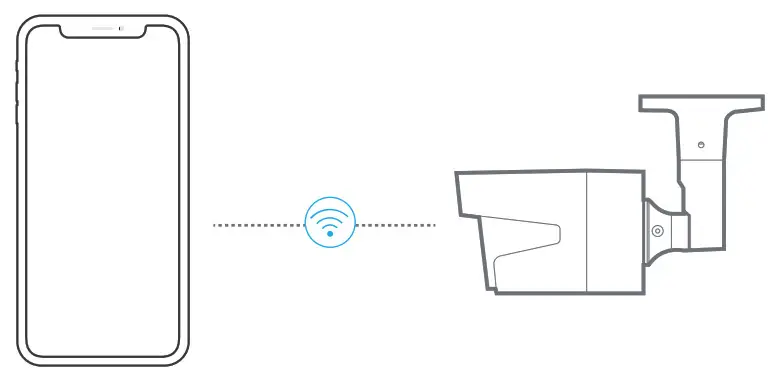
- When in LAN (Local Area Network)
The camera will be automatically added. - When in WAN (Wide Area Network)
You need to add the camera either by scanning the QR code on the camera or by entering the UID number manually.
In LAN
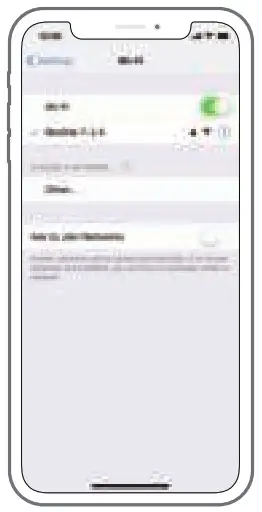
- Connect your smartphone to the WiFi network of your router.
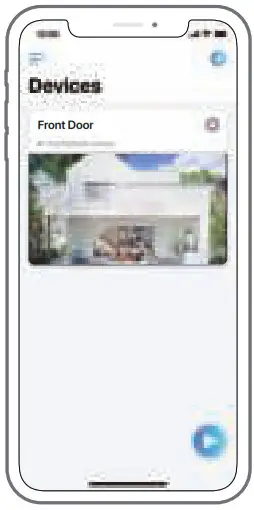
- Launch Reolink App. The camera will automatically display in the camera list in LAN.
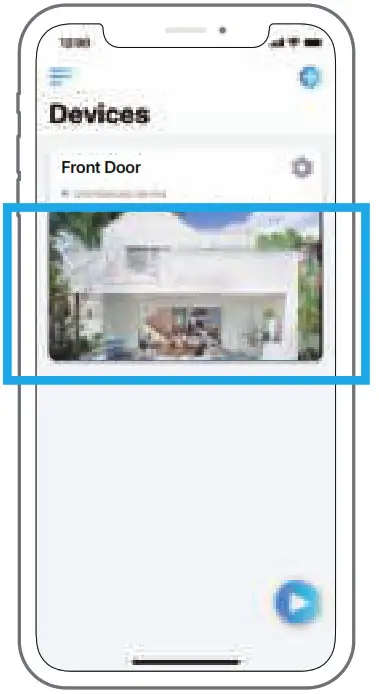
- Tap the screen to sync the time and create your password.
- Start live view or go to “Device Settings” for more configurations.
In WAN
- click ’+‘ on the upright corner.
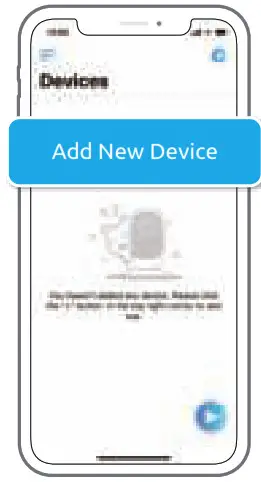
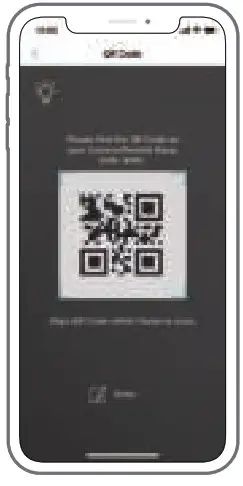
- Scan the QR code on the camera, and then tap “Login”. (There is no password at the factory default status.)
- Name your camera, create a password, and then start live view.
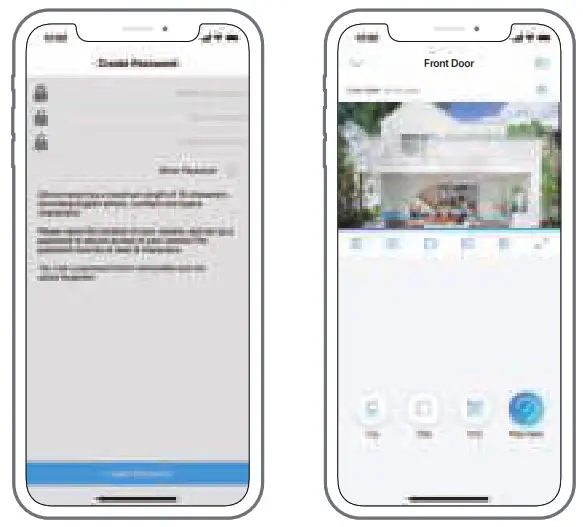
 This icon only displays if the camera supports 2-way audio.
 This icon only displays if the camera supports pan & tilt (zoom).
Access the Camera by Computer
Install Reolink Client
Please install the client software from the recourse CD or download it from our official website: https://reolink.com/software-and-manual.
Start Live View
Launch the Reolink Client software on the PC. By default, the client software will automatically search the cameras in your LAN network and display them in the “Device List” on the right-side menu.
Click the “Start” button, and you can view the live streaming now.
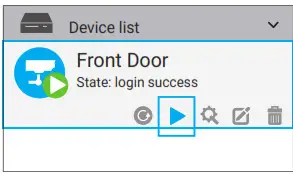
Add the Device
Alternatively, you can manually add the camera to the client.
Please follow the steps below.
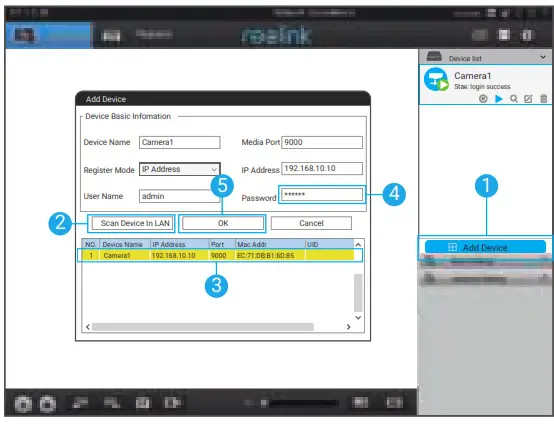
- Click “Add Device” on the right-side menu.
- Click “Scan Device in LAN”.
- Double click on the camera you want to add. The information will be filled in automatically.
- Input the password for the camera. The default password is blank. If you have created
the password on Reolink App, you need to use the password to log in. - Click “OK” to log in.

Reolink Argus 2/Argus Pro
Operational Instruction
July, 2019
QSG7_A
What’s in the Box
| Argus 2/Argus Pro Camera x1 Wall Mount (Only for Argus 2) x1 Outdoor Security Mount x1 Quick Start Guide x1 |
Power Cable x1 Surveillance Sign x1 Screws (in pack) x1 (x2 for Argus 2) |
- The camera and the rechargeable battery are packed separately in the same package.
- Please dress the camera with the skin for better weatherproof performance when you install the camera outdoors.
General Introduction
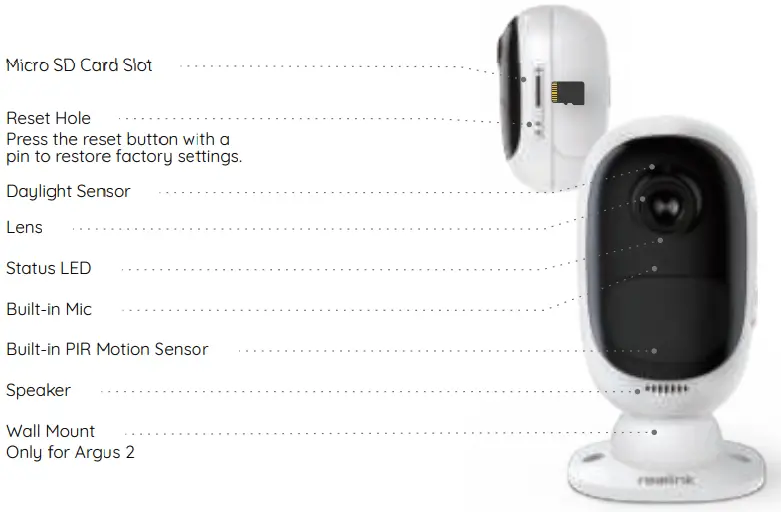
- The LED in Red (WiFi connection failed)
Blinking: Standby status
On: Working status - The LED in Blue (WiFi connection succeeded)
Blinking: Standby status
On: Working status
Install the Rechargeable Battery to the Camera

- Please press the button (on the top of the back casing), and slide the back casing downward to close it. The button also needs to be closed firmly for good weatherproof performance.
- For weatherproof performance, always cover the USB charging port with the rubber plug.

Set up Camera on Reolink App (For Smartphone)
Download and install the Reolink App on App Store (for iOS) and Google Play (for Android).

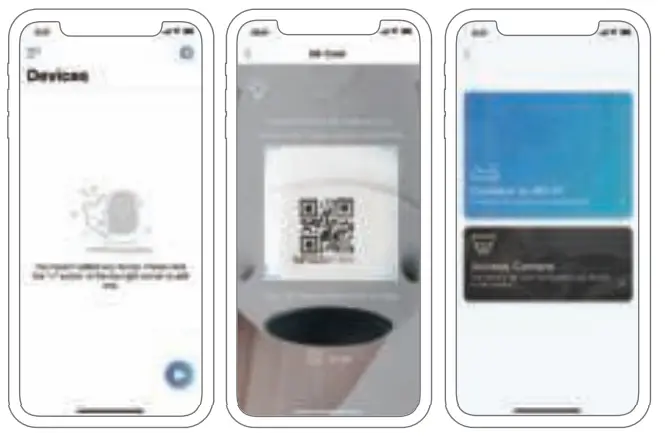
Please follow the prompt tones to configure the camera.
- Please click the “
 ” button in the top right corner to add the camera.
 - Scan the QR code on the back of the camera.
- Click “Connect to Wi-Fi” to configure the wifi settings.
 NOTICE:
• Reolink Argus 2/Argus Pro camera only supports 2.4 GHz Wi-Fi. 5 GHz is not supported.
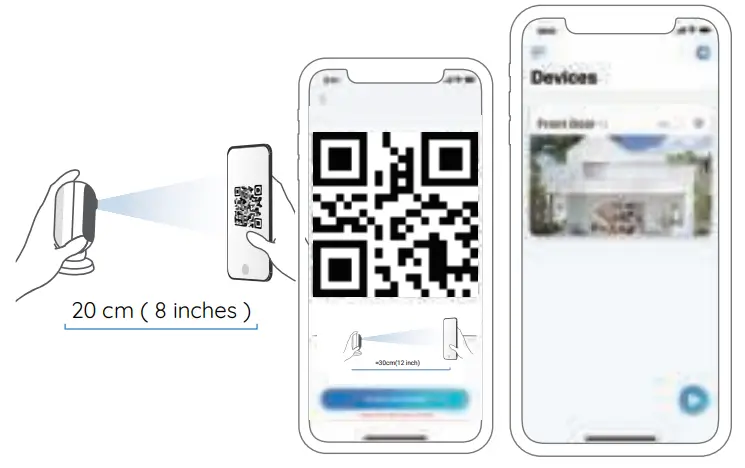
• Your family can click “Access Camera” for live view after the initial setup. - A QR code will be generated on the phone. Please place the QR code on your phone towards Reolink Argus 2 or Pro camera’s lens at a distance of about 20cm (8 inches) to let the camera scan the QR code. Please make sure that you’ve ripped the protection film of the camera’s lens.
- Follow the steps to finish the WiFi settings.
- After you created a password for your camera, please follow the steps to sync the time, and then start live view or go to “Device Settings”
 |
Menu |
 |
Add New Device |
 |
Enable/Disable PIR Motion Sensor (In default, the PIR sensors enabled.) |
 |
Device Settings |
 |
Access the Live View |
 |
Battery Status |
Set up Camera on Reolink Client (For PC)
Please download the Reolink Client software from our official website:
https://reolink.com/software-and-manual/ and install it.
NOTICE: It’s recommended to set up the camera on Reolink App first before adding the camera to Reolink Client.
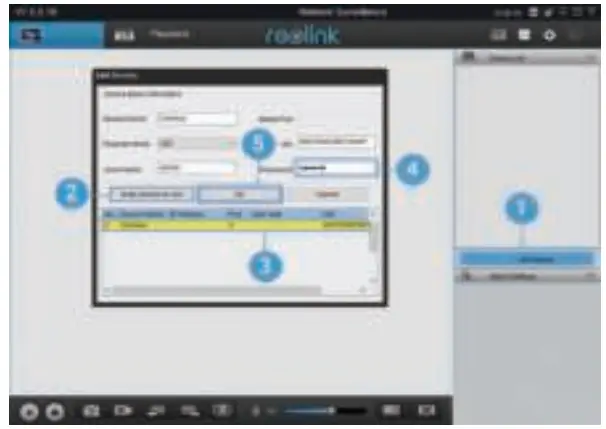
Launch the Reolink Client software and manually add the camera to the Client. Please follow the steps below.
In Same Network (In LAN)
- Click “Add Device” on the right-side menu.
- Click “Scan Device in LAN”.
- Double click on the camera you want to add. The information will be filled in automatically.
- Input the password created on Reolink App to log in.
- Click “OK” to log in.
In Different Network (In WAN)
- Click “Add Device” on the right-side menu.
- Choose “UID” as the Register Mode.
- Type in the UID of your camera.
- Create a name for the camera displayed on Reolink Client.
- Input the password created on Reolink App to log in.
- Click “OK” to log in.
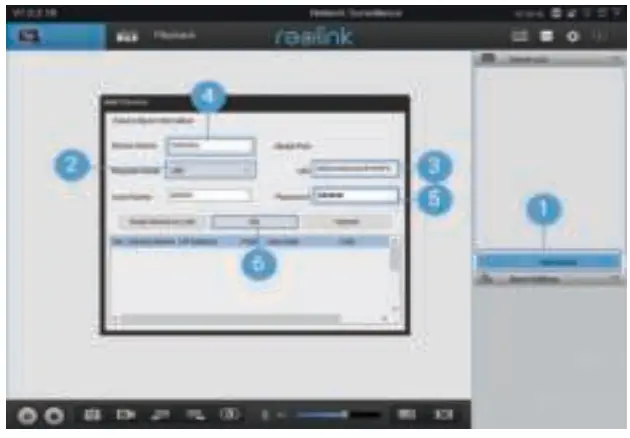
NOTICE: To save power, the camera will log out if no operation is conducted for about 5 minutes. You need to log in to the camera again by clicking the “ ” button.
Attention for Camera Installation
- PIR Sensor Detecting Distance
The PIR sensor has 3 sensitivity levels for your adjustment: Low/Mid/High.
Higher sensitivity offers a longer detecting distance. The default sensitivity of the PIR sensor is at “Mid”.
| Sensitivity | Detecting Distance
(For moving and living things) |
Detecting Distance (For moving vehicles) |
| Low | Up to 4 meters (13ft) | Up to 10 meters (33ft) |
| Mid | Up to 6 meters (20ft) | Up to 12 meters (40ft) |
| High, | Up to 9 meters (30ft) | Up to 15 meters (50ft), |
NOTICE:
- Path for adjusting distance in App: Device settings-PIR settings
- Path for adjusting distance in Client: Device settings-RF Alarm
- Higher sensitivity offers a longer detecting distance, but it would lead to more false alarms. You are advised to set up the sensitivity level to “Low” or “Mid” when you install the camera outdoors.
 Important Notes for Reducing
False Alarms
To reduce false alarms, please note that:
- Do not install the camera facing any objects with bright lights, including sunshine, bright lamp lights, etc.
- Do not place the camera too close to a place where there are frequently moving vehicles. Based on our numerous tests, the recommended distance between the camera and the vehicle is 15 meters (50ft).
- Stay away from the outlets, including the air conditioner vents, humidifier outlets, the heat transfer vents of projectors, etc.
- Do not install the camera where there are strong winds.
- Do not install the camera facing the mirror.
- Keep the camera at least 1 meter away from any wireless devices, including Wi-Fi routers and phones in order to avoid wireless interference.
- PIR Sensor Installation Angle
When installing the camera, please install the camera angularly (the angle between the sensor and the detected object is larger than 10°) for effective motion detection. If the moving object approaches the PIR sensor vertically, the sensor may not detect the motion events.
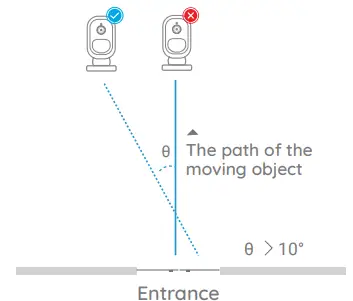
FYI:
- The PIR sensor’s detecting distance: 20ft (in default)
- The PIR sensor’s detecting angle: 120° (H)
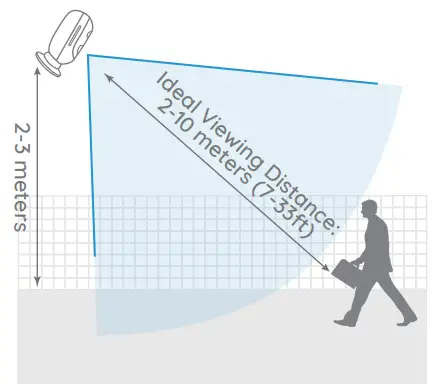
Camera Ideal Viewing
Distance
The ideal viewing distance is 2-10 meters (7-33ft), which enables you to recognize a human.
Charge the Battery
- Charge the battery when it’s installed to the camera.
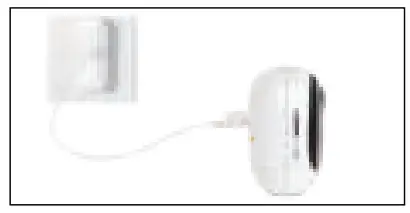
- Charge the battery separately.
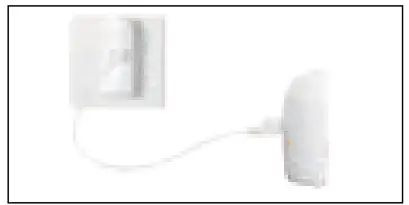
- Charge the battery with the Reolink Solar Panel.
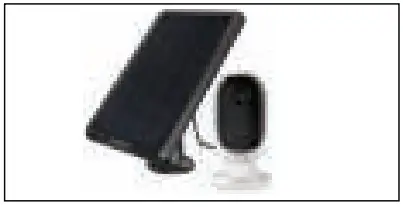
Charging indicator:
- Orange LED: Charging
- Green LED: Fully charged
NOTICE: Please note that the solar panel is NOT included in the package. You can buy the solar panel on Reolink official online store.
 Important Safeguards on Rechargeable Battery Use
Reolink Argus 2 or Argus Pro is not designed for 24/7 full capacity running or around-the-clock live streaming. It’s designed to record motion events and remotely view live streaming only when you need it.
Please learn some useful ways to maximize the battery life in this post:
https://support.reolink.com/hc/en-us/articles/360006991893
- Please charge the rechargeable battery with a standard and high-quality DC 5V or 9V battery charger.
- If you want to power the battery via the solar panel, please note that the battery is ONLY compatible with Reolink Solar Panel. You cannot charge the battery with other solar panel brands.
- Please charge the battery in temperatures between 0°C and 45°C.
- Always use the battery in temperatures between -20°C and 60°C.
- Please make sure the battery compartment is clean.
- Please keep the USB charging port dry, clean and free of any debris and make sure the battery contacts are aligned.
- Always make sure the USB charging port is clean. Please cover the USB charging port with the rubber plug after the battery has been fully charged.
- Never charge, use or store the battery near any ignition sources, such as fire or heaters.
- Always store the battery in a cool, dry and ventilated environment.
- Never store the battery with any hazardous or combustible objects.
- Do keep the battery away from children.
- Do not short-circuit the battery by connecting wires or other metal objects to the positive (+) and negative (-) terminals. Do NOT transport or store the battery with necklaces, hairpins, or other metal objects.
- Do NOT disassemble, cut, puncture, short-circuit the battery, or make it dispose of in water, fire, microwave ovens, and pressure vessels.
- Do NOT use the battery if it gives off an odor, generates heat, becomes discolored or deformed, or appears abnormal in anyways. If the battery is being used or charged, remove the battery from the device or the charger immediately, and stop using it.
- Always follow the local waste and recycle laws when throwing the used battery away.
Installation Guides
- Skin (for Argus 2)
Please dress the camera with the skin for better weatherproof performance when you install the camera outdoors.
Step 1
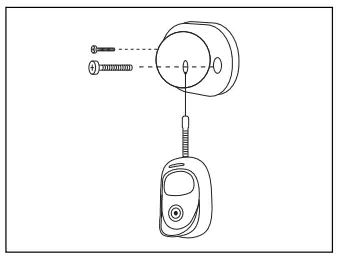
Please dress the Reolink Argus 2 camera with the skin provided in the package.
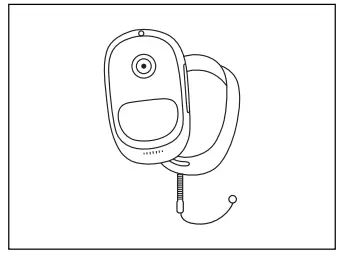
Step 2
The skin has an anti-falling safety rope. Please fasten the other end of the rope to the wall mount when mounting it to the wall.
Step 3
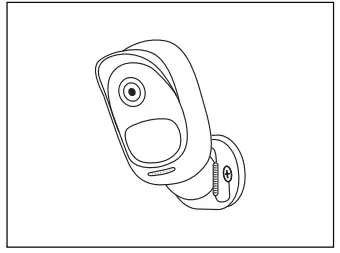
Stick the camera on the wall mount and twist the camera in any direction.
- Wall Mount
Step 1
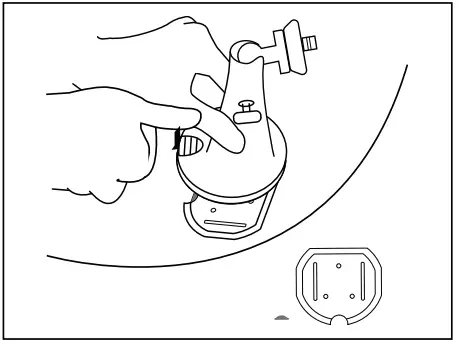
Press the button to release the plate from the security mount.
Step 2
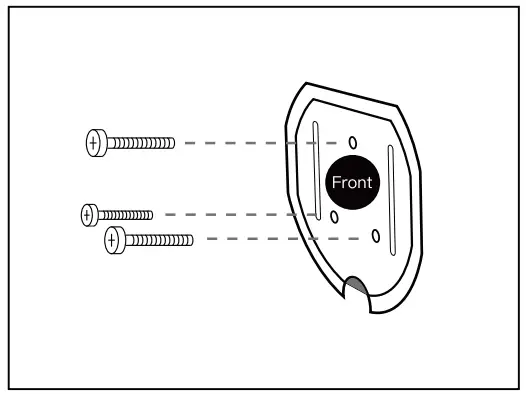
Screw the security mount plate into the wall.
Step 3
Latch the security mount on its plate. (Make sure the top edge of the backing plate is inserted into the mount.)
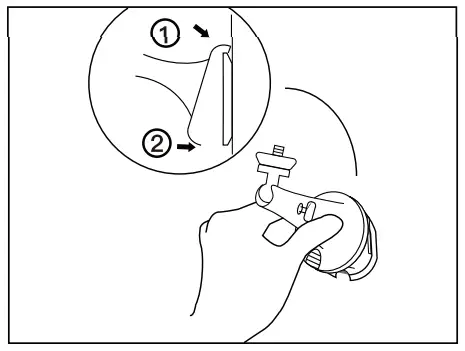
Step 4
Press the security mount button until its plate clicks into the mount.
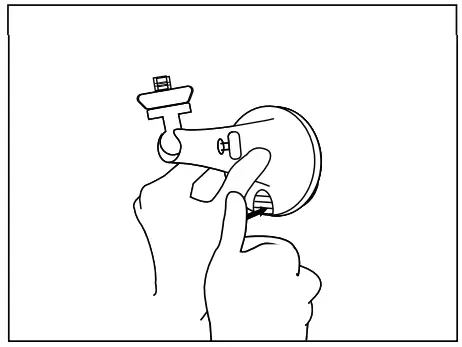
Step 5
Screw the camera, adjust its direction and tighten the knob to fix it.
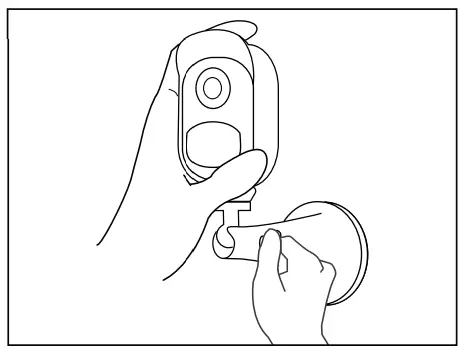
- Tree Mount
Step 1
Press the button to release the plate from the security mount.
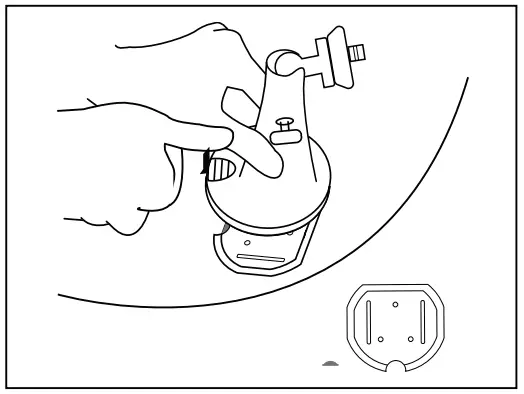
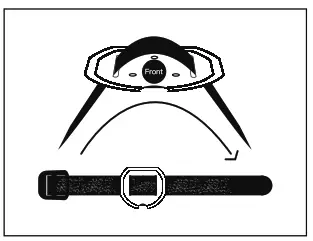
Step 2
Thread the hook & loop strap through the slots.
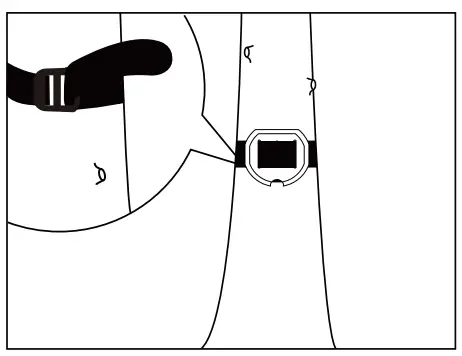
Step 3
Fasten the warp strap to the tree.
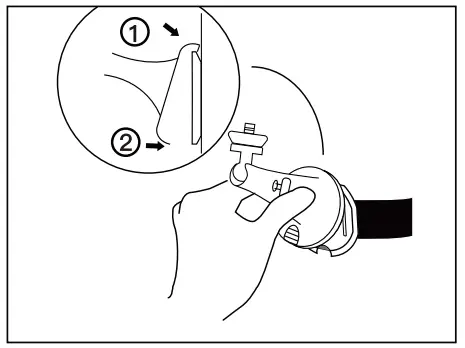
Step 4
Latch the security mount on its plate (make sure the top edge of the backing plate is inserted into the mount.)
Step 5
Press the security mount button until its plate clicks into the mount.
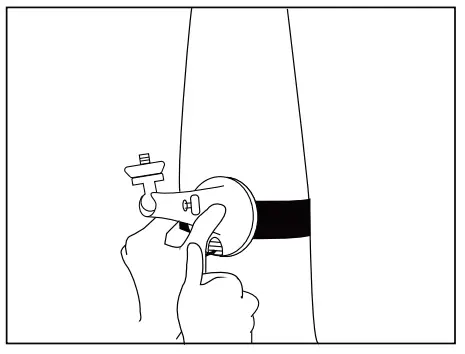
Step 6
Screw the camera, adjust its direction and tighten the knob to fix it.
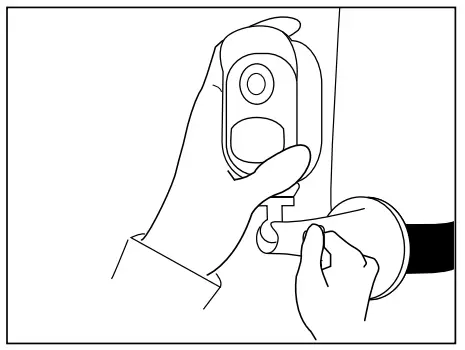
Remove the Camera
Step 1
Press the security mount button to pull the mount out.
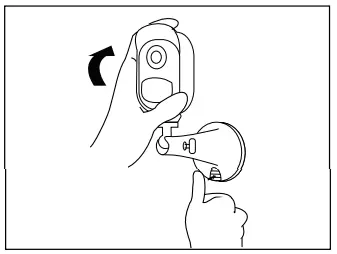
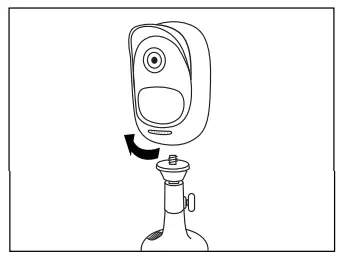
Step 2
Unscrew the camera from the wall mount.
Troubleshooting
- The camera is not powering on
If you find your camera is out of work, please try the following solutions: - Make sure the battery is correctly inserted into the compartment. If not, put the battery in.
- Charge the battery using the power adapter of DC 5V2A and make sure the battery indicator LED is on. When the green light is illuminated, the battery is fully charged.
- If you have another spare battery, please swap the battery for a double-check.
- If the camera still can’t be powered on after trying the troubleshooting steps above, contact the Reolink support team.
PIR sensor fails to trigger an alarm
If the PIR sensor fails to trigger any kind of alarm within the covered area, try the following solutions:
- Make sure that the PIR sensor or the camera is installed in the direction crossing the possible intruder.
- Make sure the PIR sensor is enabled or the time schedule is on and set properly.
- Please check the sensitivity and make sure it’s set properly.
- Go to Device Settings -> PIR Settings and make sure the corresponding action is checked.
- Make sure the battery is not deployed.
- Please reset the camera and try it again.
Unable to receive push notification
If you fail to receive any push notification when motion is detected, try the following solutions:
- Make sure the push notification has been enabled.
- Make sure the PIR schedule is set properly.
- Check the Internet connection of your phone and try again.
- Make sure the camera is connected to the Internet. If the LED indicator under the camera lens is solid red or flickering red, it means that your device has disconnected from the Internet.
- Make sure you’ve enabled notifications on your phone. Go to the System Settings of your phone and allow it to push notifications.
Specifications
Video
Video resolution: 1080p HD at 15 frames/sec Field of View: 130° diagonal Night Vision: Up to 10 m (33 ft)
PIR Detection & Alerts
PIR Detecting Distance: Adjustable up to 9m (30ft)
PIR Detecting Angle: 120° horizontal
Audio Alert: Customized voice-recordable alerts
Other Alerts: Instant email alerts and push notifications
General
Operating Frequency: 2.4 GHz
Operating Temperature: -10° to 55° C (14° to 131° F)
Weather Resistance: IP65 certified
weatherproof
Size: 96x58x59 mm
Weight (Battery included): 260 g (9.2 oz)
(Argus 2)/ 230g (8.1 oz) (Argus Pro)
 Notification of
FCC Compliance Statement
This device complies with Part 15 of FCC Rules.
Operation is subject to the following two
conditions: (1) this device may not cause
harmful interference, and (2) this device must accept any interference received, including
interference that may cause undesired
operation. For more information, visit:
https://reolink.com/fcc-compliance-notice/.
Simplified EU Declaration of
Conformity
Reolink declares that this device is in
compliance with the essential requirements
and other relevant provisions of Directive
2014/53/EU.
 Correct Disposal of this product
This marking indicates that this product should not be disposed of with other household wastes throughout the EU. To prevent possible harm to the environment or human health from uncontrolled waste disposal, recycle it responsibly to promote the sustainable reuse of material resources. To return your used device, please use the return and collection systems or contact the retailer where the product was purchased. They can take this product for environmentally safe recycling.
Limited warranty
This product comes with a 2-year limited warranty that is valid only if purchased from Reolink Official Store or a Reolink authorized
reseller. Learn more:
https://reolink.com/warranty-and-return/.
Terms and Privacy
Use of the product is subject to your agreement to the Terms of Service and Privacy Policy at reolink.com. Keep out of reach of children.
End-User License Agreement
By using the Product Software that is embedded on the Reolink product, you agree to the terms of this End User License Agreement (“EULA”) between you and Reolink. Learn more: https://reolink.com/eula/.
ISED Radiation Exposure Statement This equipment complies with RSS-102 radiation exposure limits set forth for an uncontrolled environment. This equipment should be installed and operated with a minimum distance of 20cm between the radiator & your body.