Getting started with your new equipment

Prefer to watch a video?
Scan the QR code or visit
ResMed.com/RemoteSetUp to see the setup process in action
Treating your obstructive sleep apnoea could improve your energy and health. When you set up a ResMed AirSense 11 machine, you’re taking an important step in the right direction. This setup guide explains how to use your new equipment.
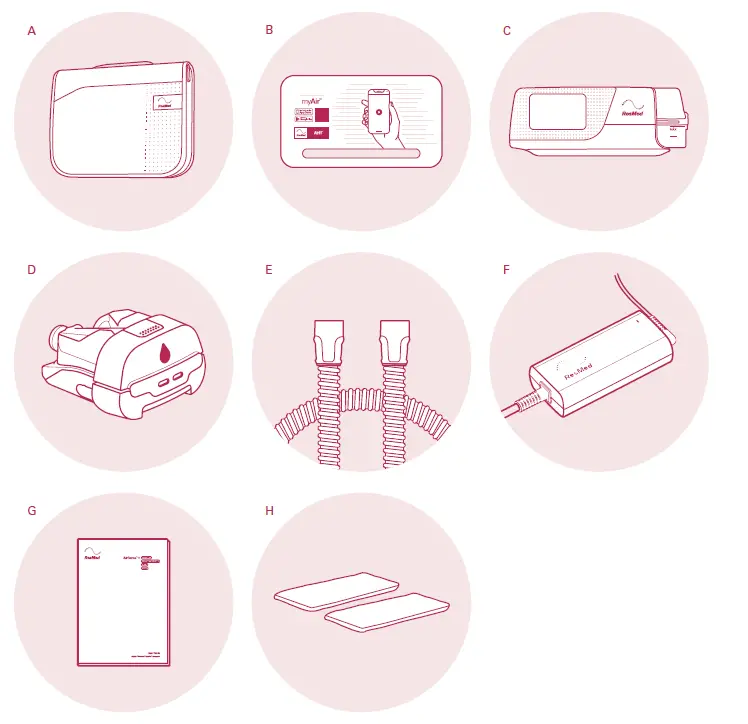
What’s inside?

- Device travel bag
- Quick start guide
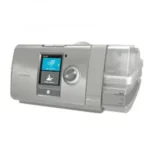
- AirSense 11 machine
- HumidAir™ 11 humidifier tub*
- Air tubing
- Power supply unit and power cord
- User guide
- 2 standard filters
only if you have been prescribed a humidifier with your machine.
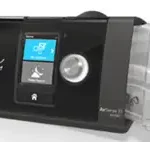
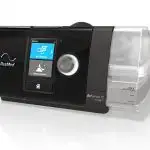
Setting up your AirSense 11 machine
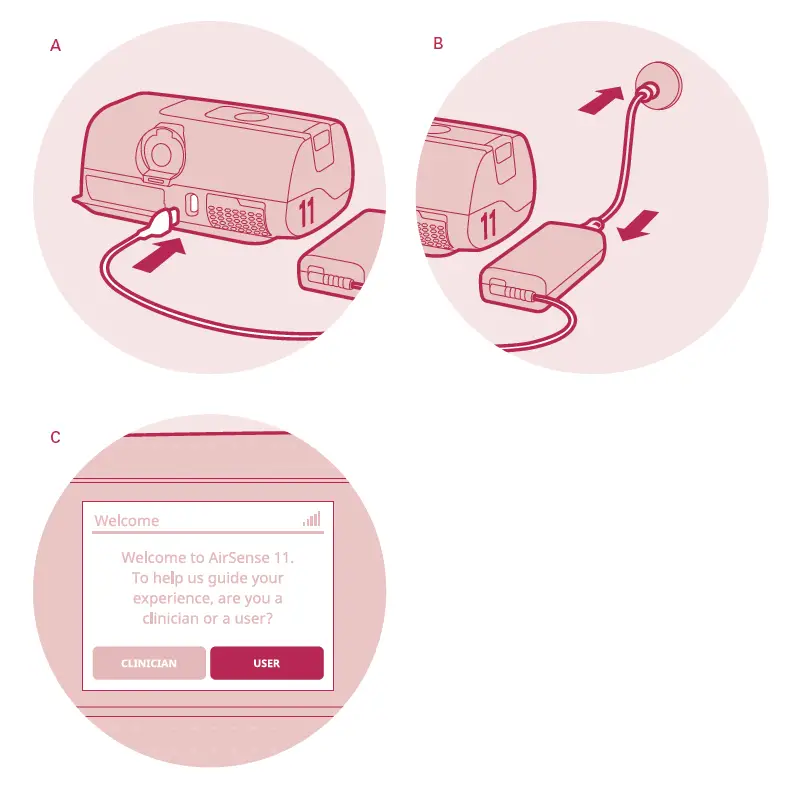
Let’s begin by setting up your AirSense 11 machine.
- Place the device on a stable, level surface and connect the power cord into the power inlet at the rear of the device.
- Connect one end of the power cord to the AC adaptor and the other end to the power outlet.
- Your machine will power on and display the Welcome screen. You might need to select your language. On the Welcome screen, select “USER”.
- You’ll be asked to answer some simple questions and will be invited to continue your set up with or without the myAir app.
Setting up the myAir app
To make the most of your AirSense 11 device, download the myAir app. It offers personalised support to build your PAP skills and confidence. It guides you through device and mask setup with clear, step-by-step ‘how-to’ videos

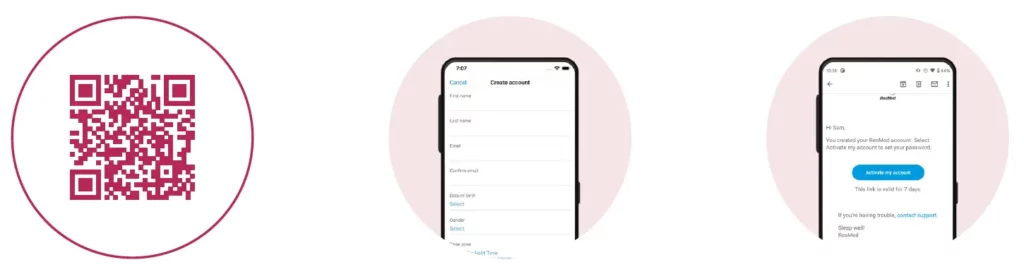
- Download the myAir™ app Search “myAir” in the App Store or on Google Play to download the app to your phone. You can also scan the QR code above using your smartphone camera.
- Sign in or create account If you already have a myAir account, you can sign in directly with your username and password. If you’re a new user, click “Create account“ and fill in the required fields.
- Activate your account Check your inbox – you should receive an email from myAir asking you to activate your account. Click on the link in the email, then follow the prompts to create your password. If you can’t see an activation email in your inbox, please check your spam folder.
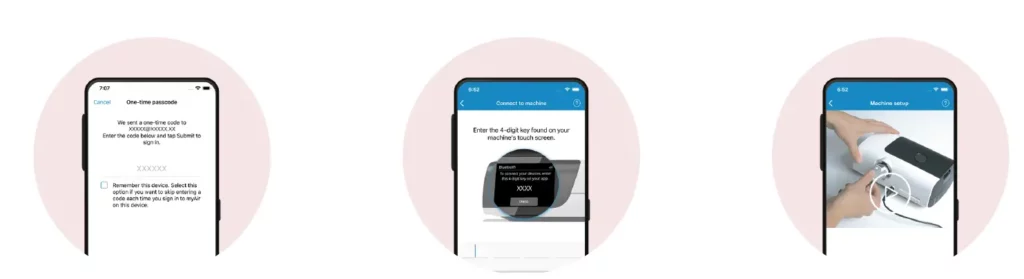
2-Step Verification
- To access myAir, you have to enter your log-in information (step and then enter a one-time passcode that is sent by email (step 2).
Note: To switch off the one-time passcode option and log in directly in the future, tick “Remember this device”.
E Add your equipment
Add CPAP machine
Enter the 4-digit key displayed on the AirSense 11 touchscreen to complete Bluetooth™ pairing*
Add mask
Select brand and model. F Continue the set-up process The myAir app will suggest you use the Personal Therapy Assistant feature, which will guide you through the rest of the setup process. Click on “Get started
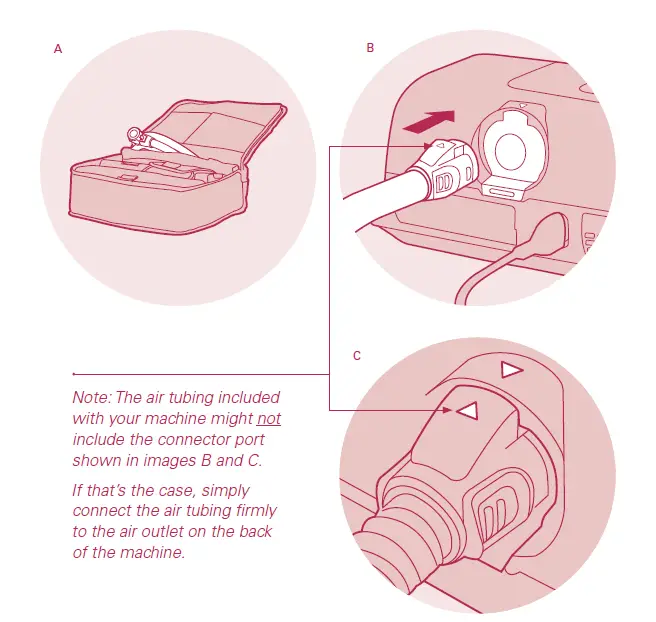
Attaching your air tubing
Follow step-by-step instructions on the myAir app or follow the steps below:
- Find your air tubing in the pocket of your AirSense 11 travel bag.
- Connect your air tubing by holding the cuff and lining it up with the connector port on the back of the machine.
- Line up the connector pin on the tubing cuff to the corresponding slot on the connector port.
- Push until the cuff clicks into place.
Note: The air tubing included with your machine might not include the connector port shown in images B and C. If that’s the case, simply connect the air tubing firmly to the air outlet on the back of the machineNote: The air tubing included with your machine might not include the connector port shown in images B and C. If that’s the case, simply connect the air tubing firmly to the air outlet on the back of the machine.
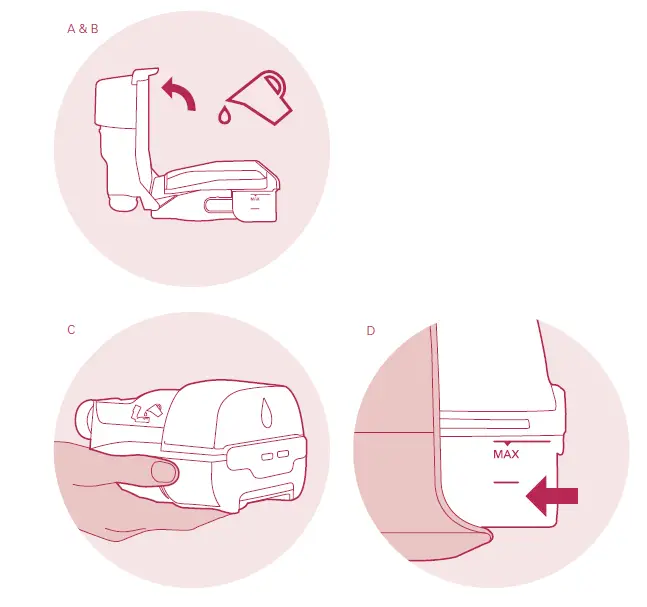
Preparing your HumidAir 11 humidifier tub
Follow step-by-step instructions on the myAir app or follow the steps below:
- Snap open the lid of the water tub.
- Fill it with drinking-quality water up to the maximum water level mark.
- Close the lid until it snaps shut.
- Gently push the water tub into the side of the machine until you feel it lock into place
*If your machine does not have a humidifier, please do not put water in the machine
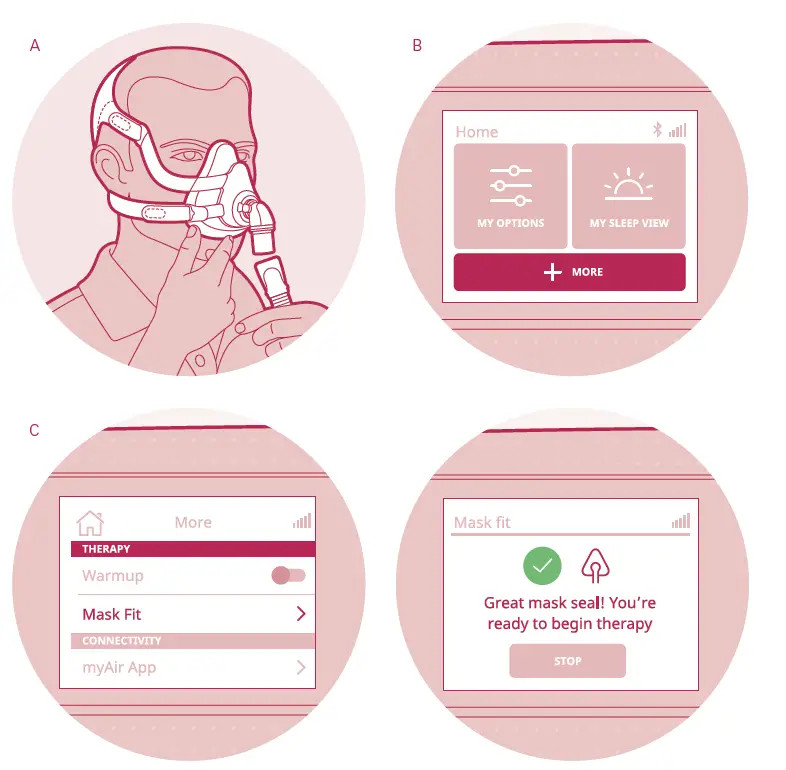
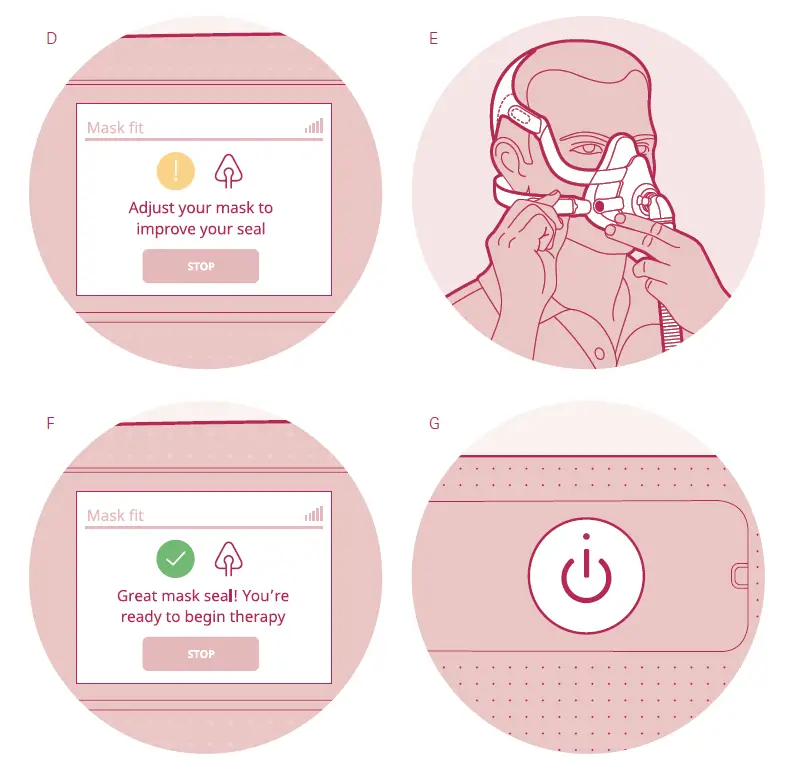
Fitting your mask
The myAir app offers step-by-step instructions to help you fit your mask and check the seal. You can also follow the steps below:
- With your mask on your face, connect the tube from your machine to your mask.
- On the Home screen, select “More”.
- Under “THERAPY”, tap the Mask Fit option and select “START”.
- The machine will start blowing air and a green tick will automatically appear on the screen. Wait a few seconds while the machine checks your mask fit.
- If the green tick changes to an orange exclamation mark, your mask may be leaking and you might need to make small adjustments to the fit.
- Readjust the top and bottom headgear straps so that your mask fits snugly but is not pulled tight. You can also pull the mask away from your face and gently let it fall back against your skin.
- Wait a few more seconds while the machine checks your fit. When your mask is properly fitted, you’ll see the green tick appear on the screen again.
- When you’re ready to start therapy, press the START/STOP button.
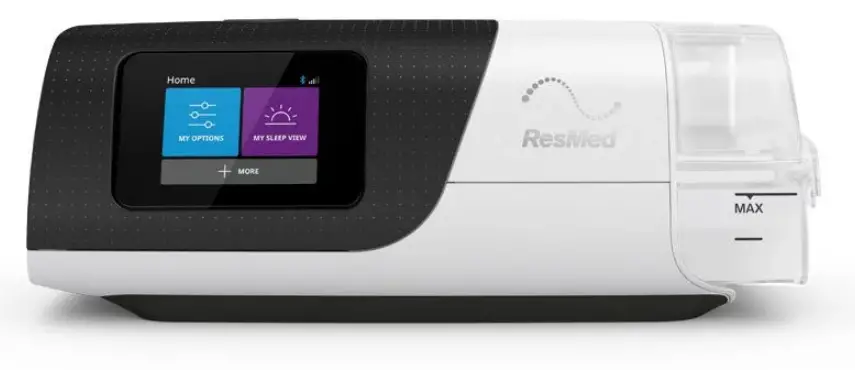
Navigating your AirSense 11 machine
- The START/STOP button located on the top of your machine is used to start and stop therapy sessions.
- On the Home screen, tap MY OPTIONS to adjust your comfort settings and tap MY SLEEP VIEW to see your sleep therapy data.
- At any time, you can tap the HOME icon at the top left corner to go back to the Home screen.
Note: You can adjust your comfort settings if you choose. All other device settings are pre-set in line with your prescription and can only be changed by a qualified healthcare professional
Monitoring your therapy progress with the myAir app
ResMed myAir is a free application that lets you know how you slept the night before and helps you stay on track throughout your sleep apnoea treatment journey.
myAir score
A daily snapshot of how well you slept.
Coaching tips
Learn ways to help make your therapy more comfortable.
Alerts
Know if something is wrong with your mask or machine, and learn how to fix it. Personalised sleep tools How-to instructions, videos and personalised information
Benefits of obstructive sleep apnoea treatment
Finding an OSA treatment that works for you – and sticking with it – can have a real and positive impact on your day-to-day life. Here are some of the main benefits that people can experience1 if they start – and stick with – PAP therapy.
Fewer risks and symptoms:
- 64% reduction in risk of cardiovascular disease among patients treated with CPAP therapy compared to patients receiving no treatment at all.2
- Reduction in motor vehicle collisions. People with sleep apnoea are up to 2.5 times more likely than normal sleepers to have traffic accidents.3
- Lower day time and night time blood pressure.4
Better quality of life:
- Reduced sleepiness.5
- Improved cognitive function.5
- Improved depressive symptoms in people with comorbid depression.6,7
For more information about setting up ResMed equipment,
visit ResMed.com/RemoteSetUp
For specific questions about your equipment, contact your equipment provider or ResMed customer support