Box Content
 |
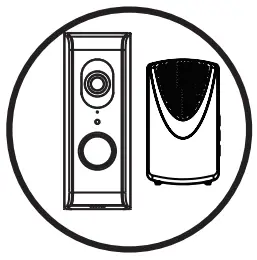
1x Wi-Fi Doorphone With Camera 1x Wireless Doorchime |
 |
1x Adaptor 12V DC /1A |
 |
1x Extension Cable For Adaptor |
 |
1x Ethernet Cable (Optional Use) |
 |
1x Screw Pack With Screw Driver |
 |
2x Window security sticker |
 |
1x Micro SD Card 16GB (Pre-installed In The Camera) |
 |
1x 15°Bracket |
 |
1x Position card |
 |
1x Quick Start Guide |
Product Overview

- Lens
- Microphone
- Day/Night Sensor (Automatically)
- Push Button
- Loudspeaker
- Micro SD Card Slot (Inside The Housing)
- Rubber Cover For Wiring
- Release pin for bracket and doorphone
- Loudspeaker
- Volume Settings
- Melody Settings
- Settings
- Wall mount holes
- Battery compartment (3x AA batt. Excl.)
Connections Wi-Fi doorphone

- Reset button (Hold for 10 seconds)
- Connection Wired Chime indoor (C1, C2 / 0V)It’s only possible to connect a Mechanical Chime which is powered by an 8V AC transformer. The separate power supply is AC, so it doesn’t matter which wire goes to C1 and C2.
- RJ45 internet cable connection (TD-, TD+, RD-, RD+)
Note, an internet cable has 8 wires. We only need 4 wires to connect to the Wi-Fi doorphone.
TD- = Internet cable, Orange color wire
TD+ = Internet cable, Orange / White color wire.
RD- = Internet cable, Green color wire.
RD+ = Internet cable, Green / White color wire.
Note, wired internet only works when you firstly connect the internet cable to the
Wi-Fi doorphone and router. After that, insert the adapter in the socket. - Adapter connection (V+, V- / 12V 1A)
V+ = Red Wire V- = Black wire
Note, pay attention to connect correctly!!! - Connection for electrical lock (B1 + B2 / 0V).
Preparation before installation on your smart device.

To install this Wi-Fi doorphone you need to prepair the following information:
- *Your own Wi-Fi name, and your own Wi-Fi password.
The Wi-Fi doorphone must be registered on your own Wi-Fi network during
this installation.
Please note, it is our help desk number 1 problem that customers enter their own Wi-Fi network password incorrectly during this installation. The result is that the camera cannot connect and will not display an image.
Check your Wi-Fi password carefully (on the back of the router / own documentation). - * Think of a new security password and document it carefully.
Security password: Provides access to live video images from your Wi-Fi doorphone.
During the installation with the app you will be asked to change this password.
Make up this passwords in advance to move faster through the installation.
The new password need to contain:
A) At least 12 characters. B) At least one capital letter (Example: A)
C) At least one lowercase letter (Example: a). D) At least one digit (Example: 1).
E) At least one reading sign (Example:!). - *During the installation, keep your phone or tablet close to the Wi-Fi Doorphone (max. 1 meter)
- *First install digitally on the app, then mount the Wi-Fi doorphone to your front door.
We strongly advise to firstly digital install the Wi-Fi doorphone inside your house.
After the installation is complete,you can mount the hardware.
Remove the rubber cover (2.7) on the backside of the Wi-Fi doorphone.Connect the adapter (1,,,,) with the extension cord (1,,,).Use the screwdriver to punch a hole into the rubber cover.
Insert the extension cord through the rubber cover.Connect the extension cord to the wifi doorphone (V+ red wire, V- black wire). After that, insert the adapter into the power socket. Close the rubber cover again (2.7).
Note, don’t connect an internet cable during the installation.

Set the Wi-Fi doorphone into the installation mode.
Press and hold the reset button (3.1) for 10 seconds, while the power adapter is connected to the power socket. After that, wait 1 minute before continue the installation.
Download the app “SecuFirst HD Professional Edition” from the Google Play Store (Android) or Apple Store (iOS).

For Android smart devices:

Open the app “SecuFirst HD Professional Edition” and tab “Press to add new system”.
The app will request you to turn on and off some connections, depending on the current settings of your phone.
- Location: On (Only needed during the installation for better searching preformance of the wifi networks).
- Wi-Fi: On
- Mobile data: Off
Tab “Smart Setup”
Tab “Confirm” if the push button LED of the wifi doorphone is flashing.
Tab “Allow” to enable bluetooth on your smart device.
The app will show the founded camera. Tab on the “DID701 Doorphone”number to select.
For iOS smart devices:

Open the app “SecuFirst HD Professional Edition” and tab “Smart Setup”.
The app will request you to turn on and off some connections, depending on the current settings of your phone.
- Location: On (Only needed during the installation for better searching preformance of the wifi networks).
- Wi-Fi: On
- Mobile data: Off
- Bluetooth: On
Tab “New Device”
Tab “Confirm” if the push button LED of the wifi doorphone is flashing.
The app will show the founded camera. Tab on the “DID701 Doorphone.”number to select.
Connect the camera to your own Wifi newtwork.

- The app will show you the Wi-Fi networks which the camera can see. Select your own Wi-Fi network (2.4Ghz)
- Insert your own Wi-Fi password.
Please note, it is our help desk number 1 problem that customers enter their own Wi-Fi network password incorrectly during this installation. The result is that the camera cannot connect and will not display an image.We advice you to tab the box “Show password” to avoid any typing mistakes. If you did insert a wrong Wi-Fi password, please remove the camera from your app and start from point 6 in this Quick Start Guide.
Adjust the Security password

During this installation the default password of the camera is 123456. We don’t think this is save enough and forse to change this password during the installation (4.2). The new password need to contain:
A) At least 12 characters.
B) At least one capital letter (Example: A)
C) At least one lowercase letter (Example: a).
D) At least one digit (Example: 1).
E) At least one reading sign (Example:!).
- Fill in a new security password. Below the password it must show 3 green bars, then the password meets up to our demands. Tab the eye on the right side of the password to also see the filled in password. This avoids typing mistakes.
Re-confirm the password in the second line.
Tab “Done” on your keyboard and press “Save” in the app.
Do not forget to turn on your mobile data.
The camera will restart in 30 seconds.

- The camera will try to connect with your own wifi network and password which you have filled in (9.1 and 9.2) The camera will show in green”Connected”. Press Play (
 ) to go to the live image of the camera.
In the Live view of the camera you see these options:

A) Make a snapshot of the image you have on your phone.
B) Audio microphone on the Wi-Fi Doorphone unmute / mute
C) Record the live video manually
D) Optional. If you have electric locks then it’s possible to connect to the Wi-Fi doorbell. With the app you can open a door after you confirmed the password.
E) Microphone. Tab 1x to turn on the microphone of your phone. Now you can communicate with your visitor. Microphone Grey: Microphone off, you will hear your visitor, but the visitor will not hear you. Microphone Orange: You can communicate with your visitor.
Microphone Yellow: You can communicate with your visitor, the volume increase of the speaker in the Wi-Fi Doorphone. To get a Yellow microphone:
* Tab the grey microphone so it will become Orange.
* Tab and hold the Orange microphone again, for 3 seconds. When you let go,
the microphone become Yellow.
F) Leave the live view. Note, always leave the live view when you want to close the app.
The Wi-Fi doophone will not call the smart devices if somebody is already in the live view.
Settings in the main menu.

A) Add a new device. Only needed when you buy another SecuFirst branded item like: IP camera, Door Entry, Alarm, Home automation and Lighting.
B) Edit settings. When you tab on this button then 3 buttons will appear in the screenshot. Go to point 14 and 15 of this manual for futher explaination.
C) Reconnect button. If the camera doesn’t show “Connected”,
D) Info button.
Advanced Settings

- Tab “Edit Setting”
- Tab “Setting” above in the app.
- Tab “Advanced” Below in the app.
- The app will ask you to fill in the password which you made in step 10 of this Quick start guide, then press “OK”.
If you select “Auto Login” then next time you login, there is no need to re-enter the password.Tab “OK”. In the big manual all the advanced settings options are explained.
You can download it from www.secufirst.eu
Playback recordings

- Tab “Edit Setting”
- Tab “Event” above in the app.
- A filter will show which looks default 1 hour back on the micro sd card. If you want to look back futher, kindly enlarge the filter by for example adjust the start date.
- Tab “OK”.
- You will get an overview of recordings. These can be playback with 2 different ways.
- Tab “Date / time” of the recording. The video will stream to your phone, leaving nothing behind.
- Tab “Download” to copy the recording from your Micro sd card to your phone.
When the download has been completed, the download button will change to a share button.
Tab the share button to directly share your video with Whats app, E-mail, etc.
Add 3x AA batteries in the chime battery compartment. The Chime and Wi-Fi doorphone are pre-learned in our factory. Press the push button on the Wi-Fi doorphone, the chime will also make a sound.

Calling page on the Smart device.

- Press the push button on your Wi-Fi doorphone. The calling page will appear on your smart device. Tab the green phone to pick up. The app will start up and go to the live view. If your smart device has a screen lock, you need to unlock it before the phone will go to the live view. Don’t forget to press in the live view the microphone, to be able to communicate back to your visitor (12E).
Downloads available on our website
- Big manual
- How to install movies
Installation 2nd Smart device.

- Download and install the “Secufirst HD Professional Edition” app on your smart device.
Open the app and tap “Press to add new system”.
Tap “Excisting System”. Enter camera name (Your own choice), DID code and password.
Tab “Save” Button, then “Yes” to save the system.
CUSTOMER SUPPORT
 Ericssonstraat 2
5121 ML Rijen The Netherlands
Email:[email protected]
Tel:+0031 (0)85 00 80 888
www.secufirst.eu
www.alceletronics.eu

Box Content
 |
1x Wi-Fi Doorphone With Camera 1x Wireless Doorchime |
 |
1x Adaptor 12V DC /1A |
 |
1x Extension Cable For Adaptor |
 |
1x Ethernet Cable (Optional Use) |
 |
1x Screw Pack With Screw Driver |
 |
2x Window security sticker |
 |
1x Micro SD Card 16GB (Pre-installed In The Camera) |
 |
1x 15°Bracket |
 |
1x Position card |
 |
1x Quick Start Guide |
Product Overview

- Lens
- Microphone
- Day/Night Sensor (Automatically)
- Push Button
- Loudspeaker
- Micro SD Card Slot (Inside The Housing)
- Rubber Cover For Wiring
- Release pin for bracket and doorphone
- Loudspeaker
- Volume Settings
- Melody Settings
- Settings
- Wall mount holes
- Battery compartment (3x AA batt. Excl.)
Connections Wi-Fi doorphone

- Reset button (Hold for 10 seconds)
- Connection Wired Chime indoor (C1, C2 / 0V)It’s only possible to connect a Mechanical Chime which is powered by an 8V AC transformer. The separate power supply is AC, so it doesn’t matter which wire goes to C1 and C2.
- RJ45 internet cable connection (TD-, TD+, RD-, RD+)
Note, an internet cable has 8 wires. We only need 4 wires to connect to the Wi-Fi doorphone.
TD- = Internet cable, Orange color wire
TD+ = Internet cable, Orange / White color wire.
RD- = Internet cable, Green color wire.
RD+ = Internet cable, Green / White color wire.
Note, wired internet only works when you firstly connect the internet cable to the
Wi-Fi doorphone and router. After that, insert the adapter in the socket. - Adapter connection (V+, V- / 12V 1A)
V+ = Red Wire V- = Black wire
Note, pay attention to connect correctly!!! - Connection for electrical lock (B1 + B2 / 0V).
Preparation before installation on your smart device.

To install this Wi-Fi doorphone you need to prepair the following information:
- *Your own Wi-Fi name, and your own Wi-Fi password.
The Wi-Fi doorphone must be registered on your own Wi-Fi network during
this installation.
Please note, it is our help desk number 1 problem that customers enter their own Wi-Fi network password incorrectly during this installation. The result is that the camera cannot connect and will not display an image.
Check your Wi-Fi password carefully (on the back of the router / own documentation). - * Think of a new security password and document it carefully.
Security password: Provides access to live video images from your Wi-Fi doorphone.
During the installation with the app you will be asked to change this password.
Make up this passwords in advance to move faster through the installation.
The new password need to contain:
A) At least 12 characters. B) At least one capital letter (Example: A)
C) At least one lowercase letter (Example: a). D) At least one digit (Example: 1).
E) At least one reading sign (Example:!). - *During the installation, keep your phone or tablet close to the Wi-Fi Doorphone (max. 1 meter)
- *First install digitally on the app, then mount the Wi-Fi doorphone to your front door.
We strongly advise to firstly digital install the Wi-Fi doorphone inside your house.
After the installation is complete, you can mount the hardware.
Remove the rubber cover (2.7) on the backside of the Wi-Fi doorphone. Connect the adapter (1,,,,) with the extension cord (1,,,).Use the screwdriver to punch a hole into the rubber cover.
Insert the extension cord through the rubber cover. Connect the extension cord to the wifi doorphone (V+ red wire, V- black wire). After that, insert the adapter into the power socket. Close the rubber cover again (2.7).
Note, don’t connect an internet cable during the installation.

Set the Wi-Fi doorphone into the installation mode.
Press and hold the reset button (3.1) for 10 seconds, while the power adapter is connected to the power socket. After that, wait 1 minute before continue the installation.
Download the app “SecuFirst HD Professional Edition” from the Google Play Store (Android) or Apple Store (iOS).

For Android smart devices:

Open the app “SecuFirst HD Professional Edition” and tab “Press to add new system”.
The app will request you to turn on and off some connections, depending on the current settings of your phone.
- Location: On (Only needed during the installation for better searching performance of the wifi networks).
- Wi-Fi: On
- Mobile data: Off
Tab “Smart Setup”
Tab “Confirm” if the push button LED of the wifi doorphone is flashing.
Tab “Allow” to enable bluetooth on your smart device.
The app will show the founded camera. Tab on the “DID701 Doorphone “number to select.
For iOS smart devices:

Open the app “SecuFirst HD Professional Edition” and tab “Smart Setup”.
The app will request you to turn on and off some connections, depending on the current settings of your phone.
- Location: On (Only needed during the installation for better searching performance of the wifi networks).
- Wi-Fi: On
- Mobile data: Off
- Bluetooth: On
Tab “New Device”
Tab “Confirm” if the push button LED of the wifi doorphone is flashing.
The app will show the founded camera. Tab on the “DID701 Doorphone.”number to select.
Connect the camera to your own Wifi network.

- The app will show you the Wi-Fi networks which the camera can see. Select your own Wi-Fi network (2.4Ghz)
- Insert your own Wi-Fi password.
Please note, it is our help desk number 1 problem that customers enter their own Wi-Fi network password incorrectly during this installation. The result is that the camera cannot connect and will not display an image. We advice you to tab the box “Show password” to avoid any typing mistakes. If you did insert a wrong Wi-Fi password, please remove the camera from your app and start from point 6 in this Quick Start Guide.
Adjust the Security password

During this installation the default password of the camera is 123456. We don’t think this is save enough and forse to change this password during the installation (4.2). The new password need to contain:
A) At least 12 characters.
B) At least one capital letter (Example: A)
C) At least one lowercase letter (Example: a).
D) At least one digit (Example: 1).
E) At least one reading sign (Example:!).
- Fill in a new security password. Below the password it must show 3 green bars, then the password meets up to our demands. Tab the eye on the right side of the password to also see the filled in password. This avoids typing mistakes.
Re-confirm the password in the second line.
Tab “Done” on your keyboard and press “Save” in the app.
Do not forget to turn on your mobile data.
The camera will restart in 30 seconds.

- The camera will try to connect with your own wifi network and password which you have filled in (9.1 and 9.2) The camera will show in green “Connected”. Press Play (
 ) to go to the live image of the camera.
In the Live view of the camera you see these options:

A) Make a snapshot of the image you have on your phone.
B) Audio microphone on the Wi-Fi Doorphone unmute / mute
C) Record the live video manually
D) Optional. If you have electric locks then it’s possible to connect to the Wi-Fi doorbell. With the app you can open a door after you confirmed the password.
E) Microphone. Tab 1x to turn on the microphone of your phone. Now you can communicate with your visitor. Microphone Grey: Microphone off, you will hear your visitor, but the visitor will not hear you. Microphone Orange: You can communicate with your visitor.
Microphone Yellow: You can communicate with your visitor, the volume increase of the speaker in the Wi-Fi Doorphone. To get a Yellow microphone:
* Tab the grey microphone so it will become Orange.
* Tab and hold the Orange microphone again, for 3 seconds. When you let go,
the microphone become Yellow.
F) Leave the live view. Note, always leave the live view when you want to close the app.
The Wi-Fi doophone will not call the smart devices if somebody is already in the live view.
Settings in the main menu.

A) Add a new device. Only needed when you buy another SecuFirst branded item like: IP camera, Door Entry, Alarm, Home automation and Lighting.
B) Edit settings. When you tab on this button then 3 buttons will appear in the screenshot. Go to point 14 and 15 of this manual for further explanation.
C) Reconnect button. If the camera doesn’t show “Connected”,
D) Info button.
Advanced Settings

- Tab “Edit Setting”
- Tab “Setting” above in the app.
- Tab “Advanced” Below in the app.
- The app will ask you to fill in the password which you made in step 10 of this Quick start guide, then press “OK”.
If you select “Auto Login” then next time you login, there is no need to re-enter the password. Tab “OK”. In the big manual all the advanced settings options are explained.
You can download it from www.secufirst.eu
Playback recordings

- Tab “Edit Setting”
- Tab “Event” above in the app.
- A filter will show which looks default 1 hour back on the micro sd card. If you want to look back futher, kindly enlarge the filter by for example adjust the start date.
- Tab “OK”.
- You will get an overview of recordings. These can be playback with 2 different ways.
- Tab “Date / time” of the recording. The video will stream to your phone, leaving nothing behind.
- Tab “Download” to copy the recording from your Micro sd card to your phone.
When the download has been completed, the download button will change to a share button.
Tab the share button to directly share your video with Whats app, E-mail, etc.
Add 3x AA batteries in the chime battery compartment. The Chime and Wi-Fi doorphone are pre-learned in our factory. Press the push button on the Wi-Fi doorphone, the chime will also make a sound.

Calling page on the Smart device.

- Press the push button on your Wi-Fi doorphone. The calling page will appear on your smart device. Tab the green phone to pick up. The app will start up and go to the live view. If your smart device has a screen lock, you need to unlock it before the phone will go to the live view. Don’t forget to press in the live view the microphone, to be able to communicate back to your visitor (12E).
Downloads available on our website
- Big manual
- How to install movies
Installation 2nd Smart device.

- Download and install the “Secufirst HD Professional Edition” app on your smart device.
Open the app and tap “Press to add new system”.
Tap “Excisting System”. Enter camera name (Your own choice), DID code and password.
Tab “Save” Button, then “Yes” to save the system.
CUSTOMER SUPPORT
 Ericssonstraat 2
5121 ML Rijen The Netherlands
Email: [email protected]
Tel:+0031 (0)85 00 80 888
www.secufirst.eu
www.alceletronics.eu
