![]()
Heat Press Instruction


https://www.youtube.com/embed/WI1Mq3HBVK8
Introduction
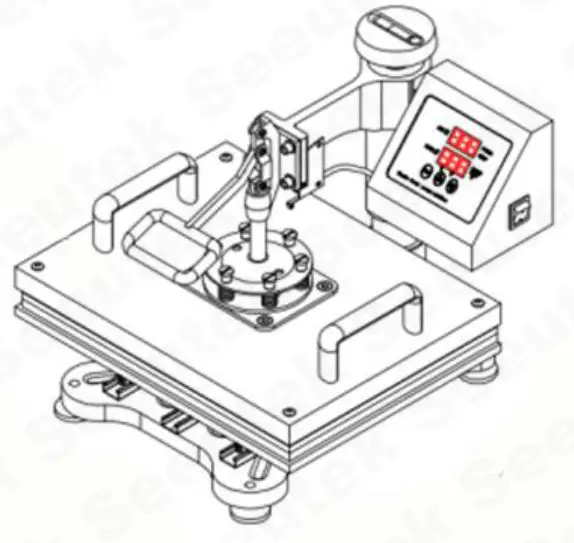
Thanks for purchasing the Seeutek heat press machine. This machine adopts microprocessor program control, featuring high precision in parameter memory and control, comes with a digital dual display control box, more steady and accurate. It can bake and fabricate colorful logos, portraits & photos as well as scenery patterns, etc. It is applicable for baking cups, baking trays, baking hats, heat transfer clothing T-shirts, mousepads, pillows, and metal ornaments, etc. It also can be used as an individualized article, integrating artistic appreciation and utility.
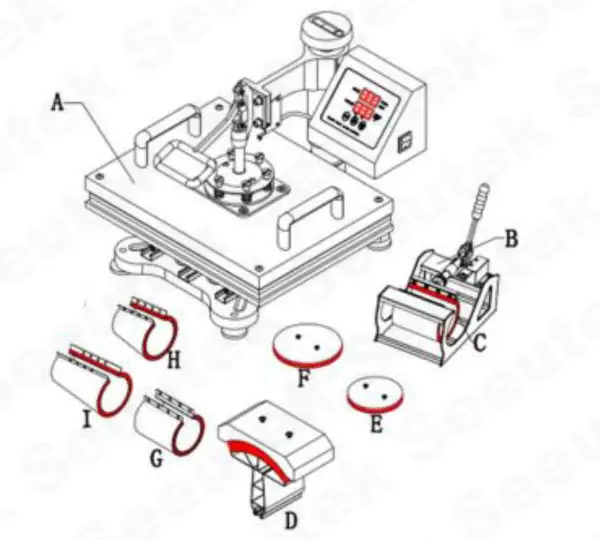
| A: Heating Plate B: Mug Press Machine C: Mug Press 3″-3.5″ diameter(110Z) D : Hat/Cap press : 5.5″x 3″(14A8cm) E : Plate Press #1 5″ max diameter(12.5cm) |
F : Plate Press #2 6″ max diameter(15.5cm) G : Mug Press 2″-2.75″ diameter(60Z) H : Mug Press 11oz latte mug(cone) I : Mug Press 12oz latte mug(cone) |
NOTE: Heat Press Machine 5 in 1 Package Include:
1 x Heat Press Mac hine(telfon-coated)
1 x Hat press 5.5″x 3″(14*8cm);
1 x Mug Press(3″-3.5″diameter,110Z);
1 x Plate Press #1 5″ 1 x Plate Press #2 6″;
1 x User Manual (T-shirts, cups and hats are NOT included.)
NOTE: Heat Press Machine 8 in 1 Package Include:
1 x Heat Press Mactimaglfon-coated)
1 x Hat press 5.5″x 3″(14*8cm); 1 x Plate Press #1 5″; 1 x Plate Press #2 6″;
1 x Mug Press(3″-3.5″ diameter,110Z); 1 x Mug Press(2″-2.75″ diameter,60Z) 1 x Mug Press 11oz latte mug(cone)
1 x Mug Press 12oz latte mug(cone) 1 x User Manual (T-shirts, cups and hats are NOT included.)
Features:
- Revolutionary sliding rails make components replacement easier.
- Auto timer & alarming clock.
- Digital dual displays are controlled with a microprocessor, which brings higher accuracy.
- Stable power offers intensive protection for the circuit board.
- The new-generation thermocouple is safer and sturdy.
- The thickened aluminum board brings even capacity. Sunday, It, and construction are guaranteed.
- 360’swivel design for easy transport.
- Place a heat-resistant silicone rubber foam mat on the base, and the base can withstand up to 752°F without deformation.
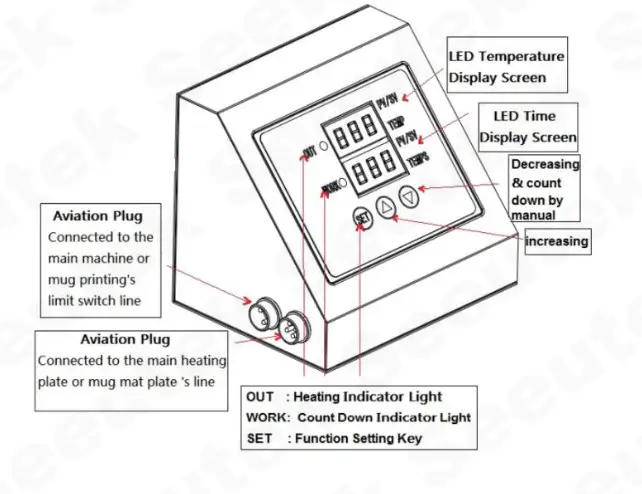
Control Box Introduction:
OUT: Heating; WORK: Countdown; SET: Function setting ▲: Increase; ▼: Decrease&(count down by manual)
Firstline Led: temperature; the Second line Led: countdown
How to set the control box?
- Temperature setting:
Press the “SET” key, upper display frame shows “SP”; lower display frame shows temperature values, press ▲ or ▼ to increase or decrease temperature. - Time setting:
Double press “SET”, upper display frame shows”S ”, lower display frame shows time, press ▲ or ▼ to increase or decrease the time-temperature.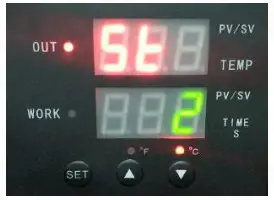
- Centigrade / Fahrenheit conversion:
Press “SET”3 times, upper display frame shows “C-F”, lower display frame shows temperature units, press ▲ or ▼ to increase or decrease to convert between centigrade and Fahrenheit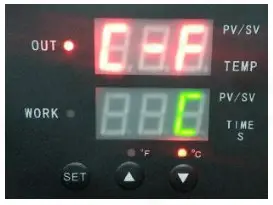
- Start the countdown:
In the interface shown in the picture, press ▼ to start the countdown.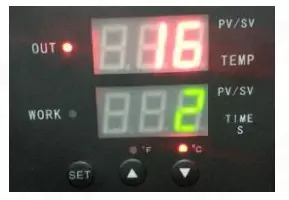
Heat Press Machine Users’ Guide
Thank you for purchasing our product, we appreciate your business. It is a multi-purpose heat press machine with which you can apply it on T-shirts, caps, china, or mugs. However, it does require different attachments to make it compatible with different tasks.
- Attachment for T-shirts
The machine defaults to T-shirt mode. The default temperature is 356°F while the timer is set to 30 seconds.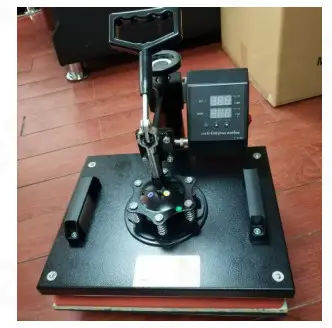
- Ceramic plate installation
Remove screws on the heating plate, install the plate press via switch the two screws on the backside of the plate press.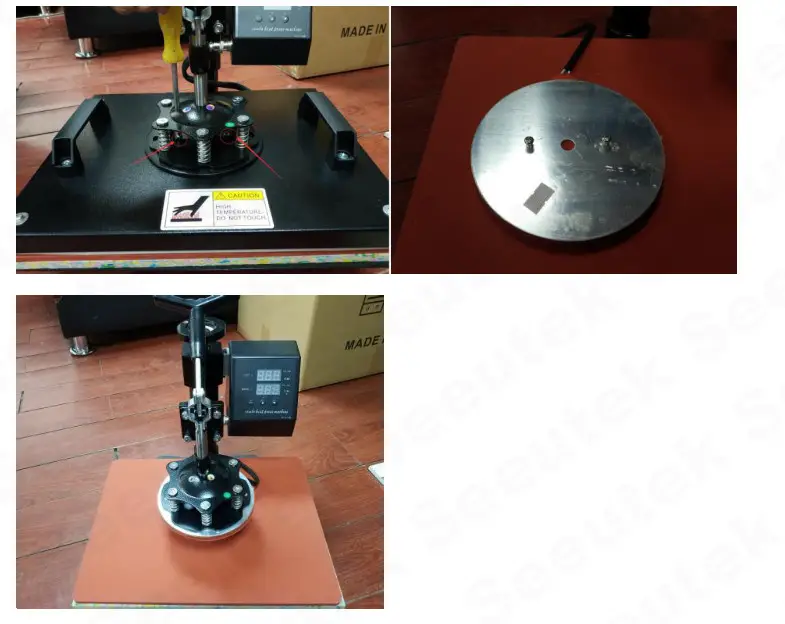
- Attachment for caps/hats installation
The whole attachment easily slides in/out, after taking out the previous attachment, insert the attachment for caps/hat and slide it in, fix it with screws.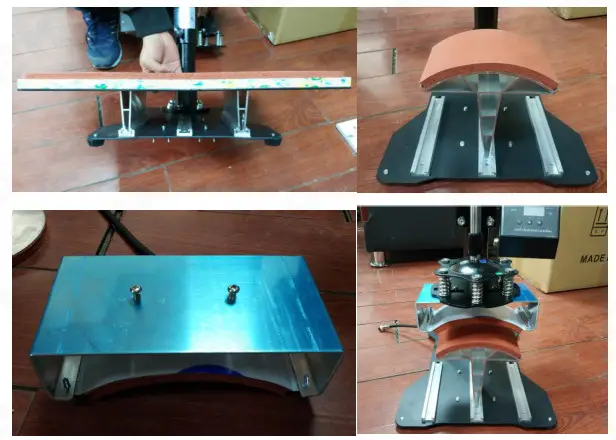
- Attachment for cups and cylindrical objects installation
This attachment does not need to install and just needs to plug in the control box, then it will work. If you want to replace the cup, lose the clamp and replace the cup.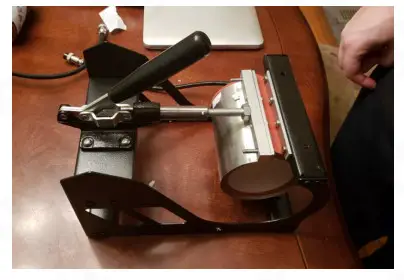
Note:
- Different heating press materials, time, and temperature will be different
- Please try a sample to test the right temp and time before a large quantity of printing.
- Clothing requires temp about 180°C/356℉, Fabric clothing use with sublimation paper:30-50 sec,100% cotton clothing use with transfer paper: 15-20sec.
| Problem | cause | Handling methods | |
| 1. | Picture burning | Too much time or temp | Adjust time or temp. |
| 2. | Fails to heat up. but display well | Heating plate or Relay broken | Check the heating plate or Relay |
| 3. | Lack of color, faded image. | Insufficient temperature and/or press time. | Adjust the temperature and/or increase the heating time. |
| 4. | Darkened. deep color: blurred image. | Pressed for too long, temperature too high | Adjust the temperature and heating time. |
| 5. | No action after turn on the power | Plug whether touch well Fuse whether burn | Check the plug and fuse |
| 6. | The real temp pass over setting temp | Relay broken | Replace the relay |
Kindly prompts:
To print and make individualized DIY products, it is also necessary for you to prepare the following equipment and materials.
- Inkjet printer/ six colors printer (For example: Epson R-230 / R270 / R290 / T50)
- CISS (Continuous ink supply system) Different models of Inkjet Printer will need different CISS.
- Sublimation ink / Heat transfer ink;
- High-temperature resistant tape;
- Sublimation paper / Heat transfer paper (for Ceramic and fabric)
- Paper cutter
- Press mug/cup and plate: Normal mug and plate will not use for press, Only sublimation mug and plate can be use.