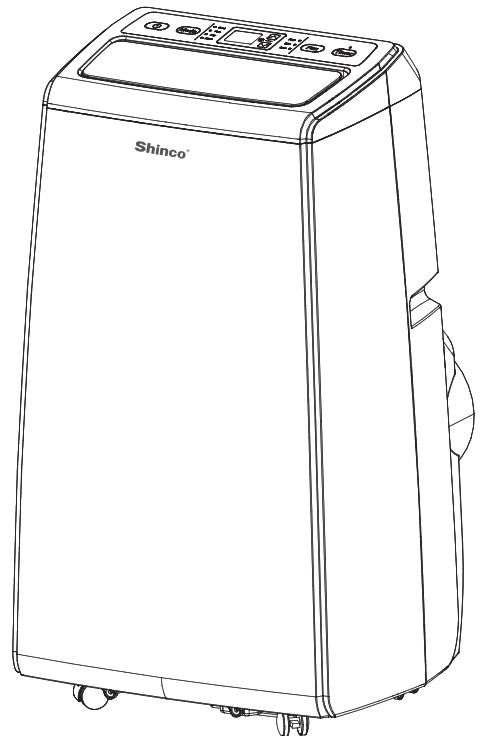
![]() SPS5-14H
SPS5-14H
Portable Air Conditioner
User’s Manual
Thanks for choosing this high-quality portable air conditioner.
Please read the Manual carefully before operation. In case of any problem, please contact professional maintenance personnel in time.
USER KNOWLEDGE
The meaning of this user manual is shown below.
 |
Please prohibit such operations for your health and safety with your family. |
 |
For the sake of the health and safety of your family, you must do the following. |
MATTERS NEEDING ATTENTION
This machine is for household use only.
 This machine is for indoor use only Please place it in dry environment.
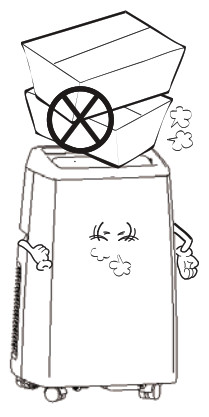
 Do not stack items around the machine so as not to impede the air exchange.
Do not place heavy objects on the machine to avoid damage to the machine.
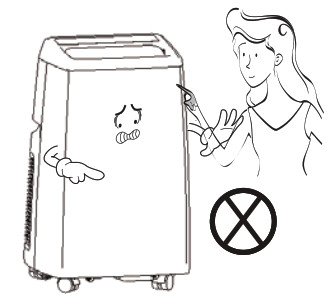
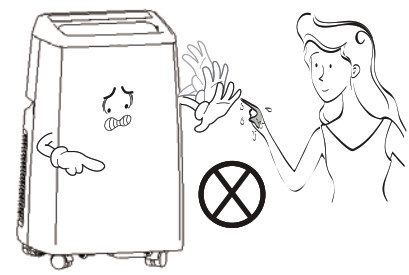
 Do not operate the unit with wet hands or in a humid environment.
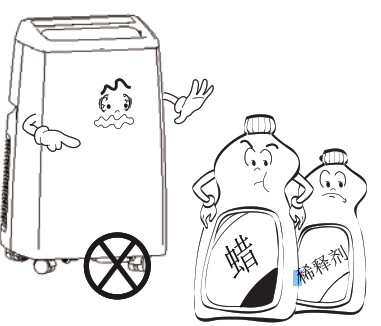
 Please wipe the machine with a soft cloth. Do not use wax, thinner or irritant detergent.
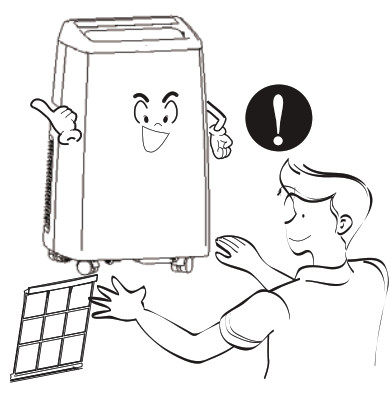
 Please clean the filter regularly and recommend cleaning once every two weeks.
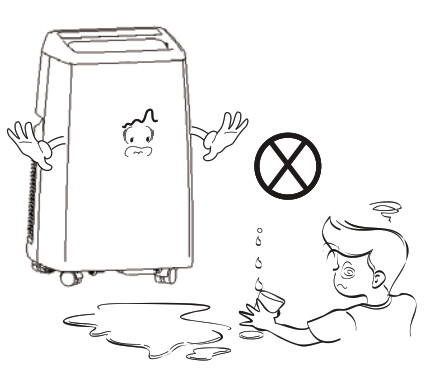
For your health, please don not drink condensed water discharged from the machine.
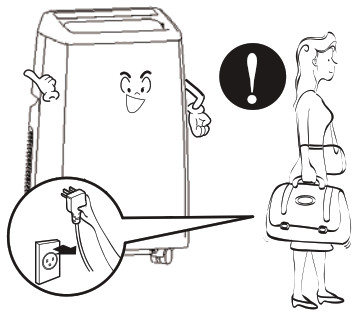
Please unplug the power supply if the machine is not used for a long time.
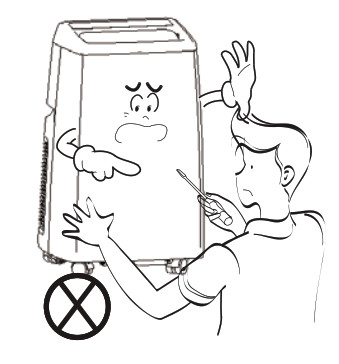
 Nonprofessionals should not disassemble or repair the machine without authorization.
IMPORTANT SAFETY TIPS
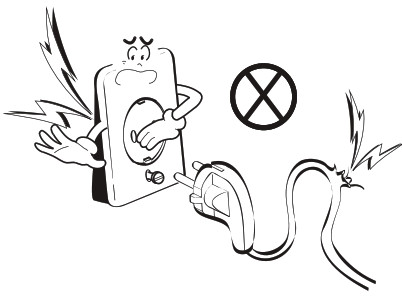
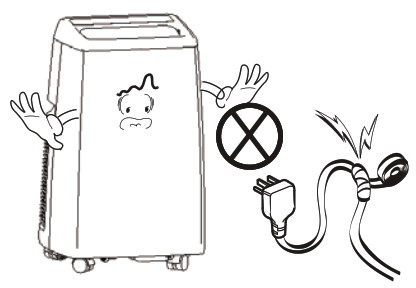
Please not use a damaged power cord or power cord plug, do not insert power cord into the loose socket.
Do not damage or use damaged or unknown type of power cord. Please ensure that the voltage used meets the requirements before use.

Do not modify or extend the power cord.
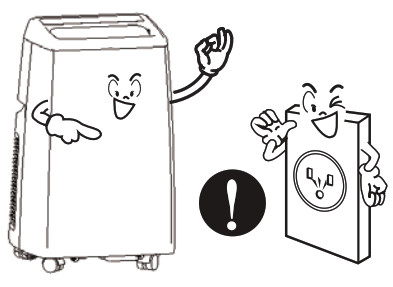
It is recommended to use grounding receptacles when running this unit.
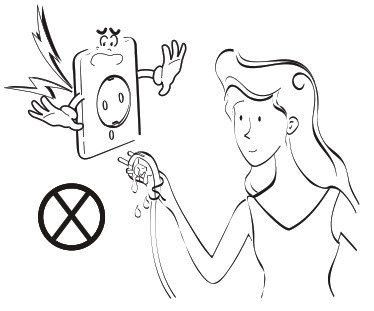
Do not plug or unplug the power cord with wet hands, this operation has the risk of causing electric shock.
When pulling the power cord, please pinch the plug and do not pull the power cord.
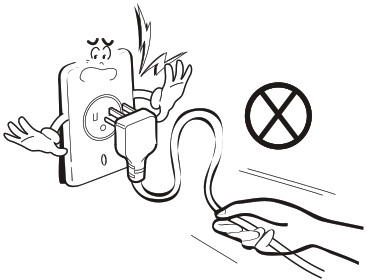
Do not control the opening and closing state of the machine by plugging the power plug.
 Please turn off the machine before you pulling the plug.
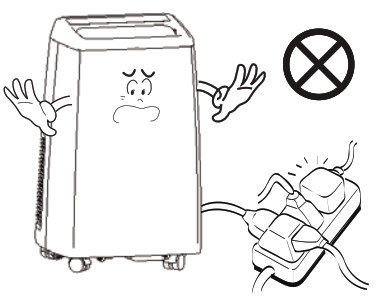
Do not share a power outlet with multiple high-power electrical appliances.
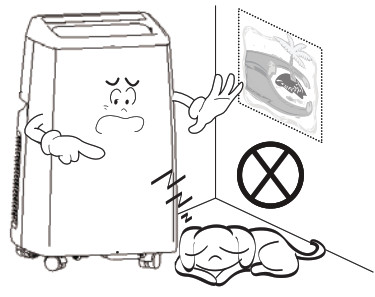
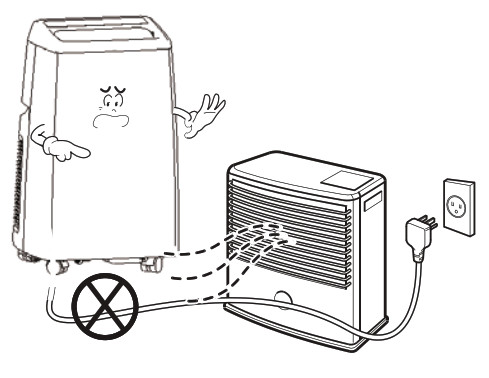
Please keep the machine away from the heat source and avoid direct sunlight.
If the machine makes a strong noise, smell or smoke, please turn off the machine immediately and pull the plug to check the cause.
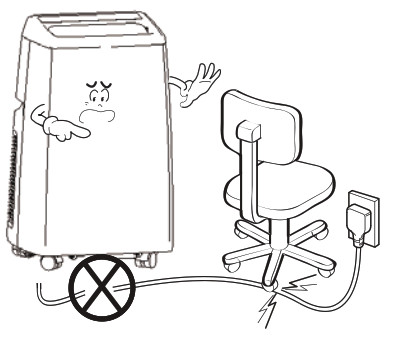
 Do not press heavy objects on the power cord, so as to prevent the power cord from being crushed and cause electric shock.
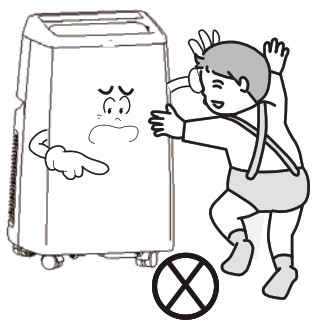
Don’t insert your fingers or any hard object to wind guide bar of the air outlet.
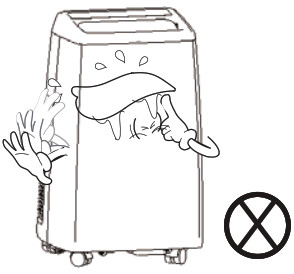
Do not let water enter the electrical part of the machine.
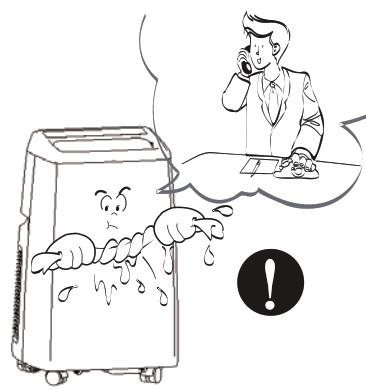
If water enters the machine, shut it down immediately and pull out the plug, then contact the professional maintenance personnel for repair.
If you need to wipe, clean, move the machine or replace the machine parts, please turn off the machine and unplug the power plug first.

When the gas leak occurs, please open the windows first, ensure the air circulation, then run the machine.
The appliance user must be eight years of age. Weak people, people with weak sensory abilities or low psychological quality must be supervised and used when they understand the correct use methods and harmfulness. Children are prohibited from playing. Children must be cleaned and maintained under supervision.
SPECIAL WARNING
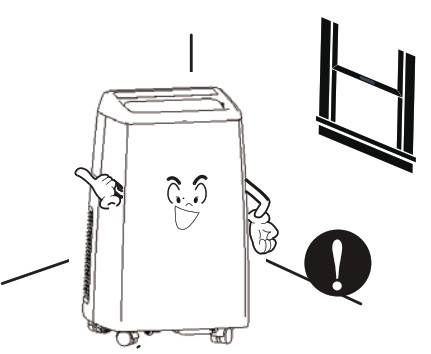
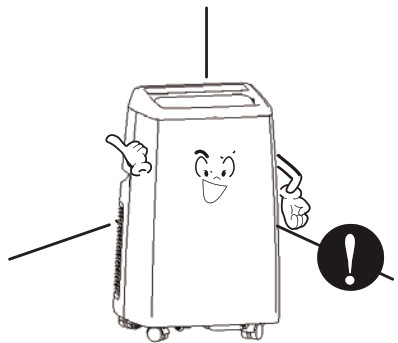
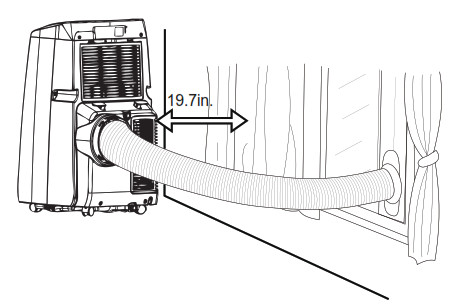
Place the A/C on even ground and install it vertically, so as to ensure normal operation of the compressor.
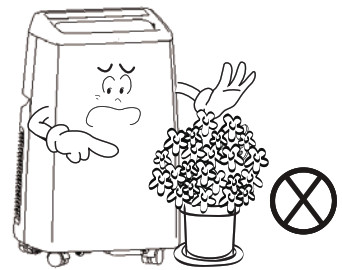
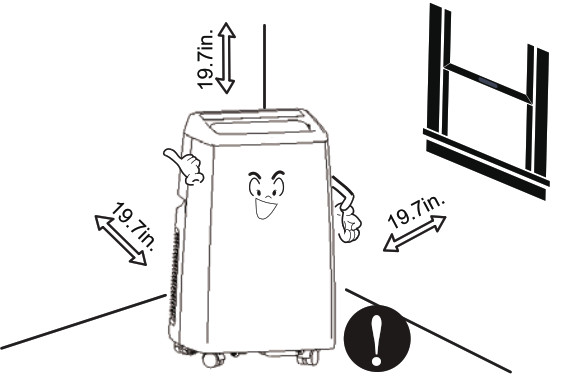
The A/C should be at least 19.7in. away from surrounding objects. Keep air inlet and outlet smooth.
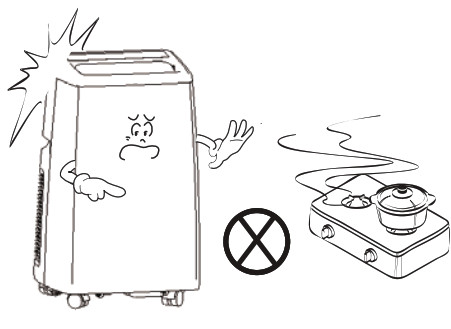
 Don’t use the A/C beside gasoline or any other inflammable liquid.
Don’t use spraying agents and other solvent or flammable substances near the A/C; otherwise, its plastic may deform and electric parts may be damaged.

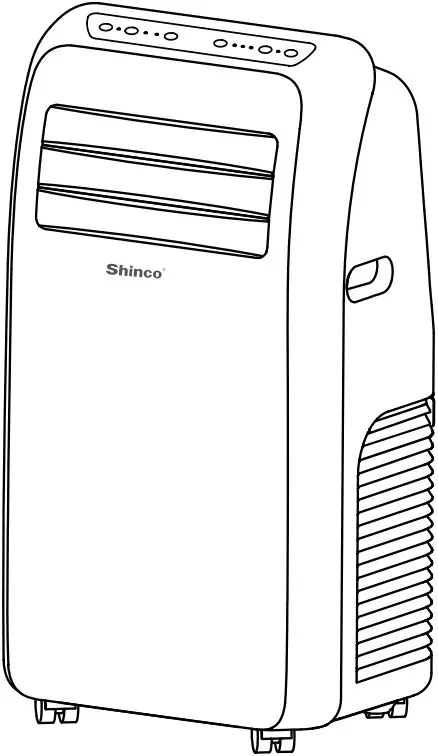
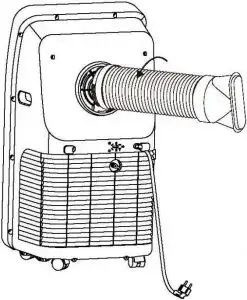
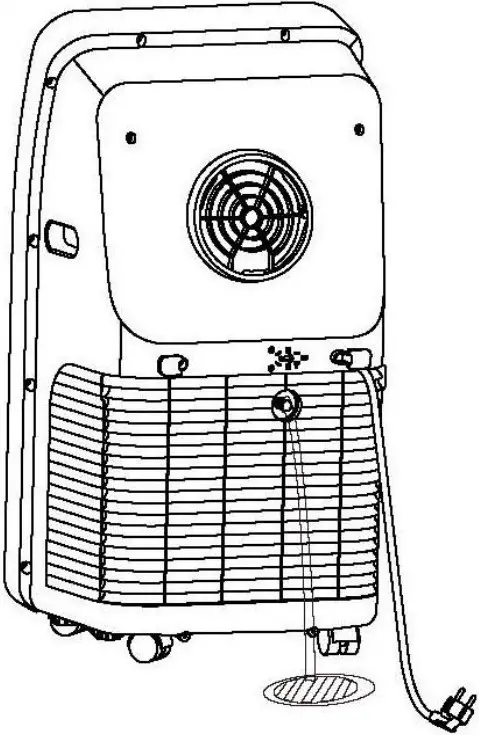
PRODUCT INTRODUCTION
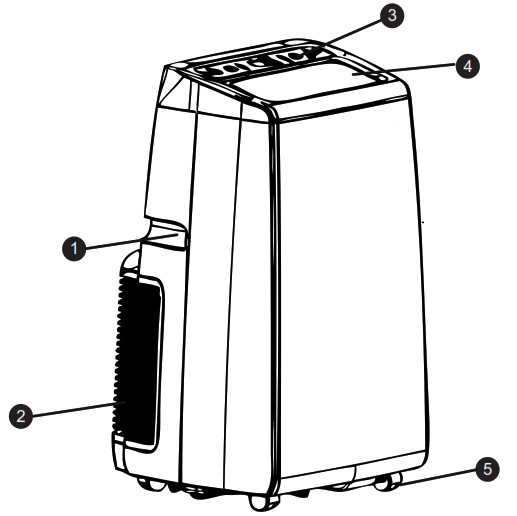
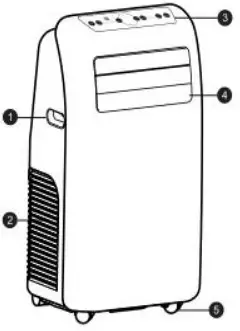
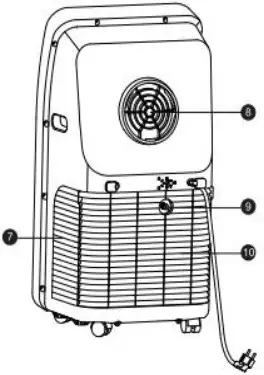
MAIN PARTS COMPONENTS
 |
 |
 |
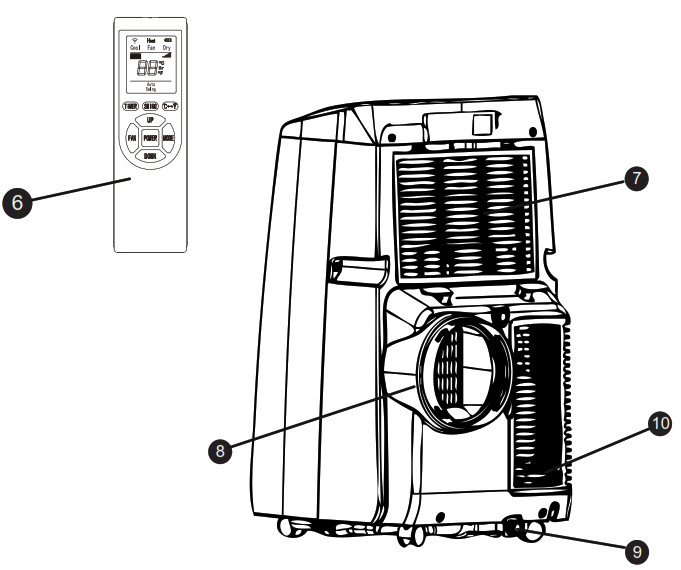
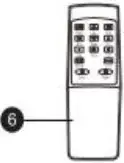
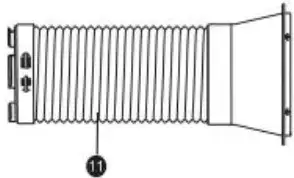
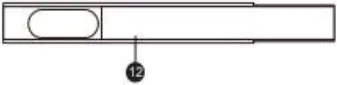
| 1.Handle 2.Air inlet (Down) 3.Control Panel 4. Air outlet louver 5. Castor 6. Remote controller 7. Air outlet(Up) |
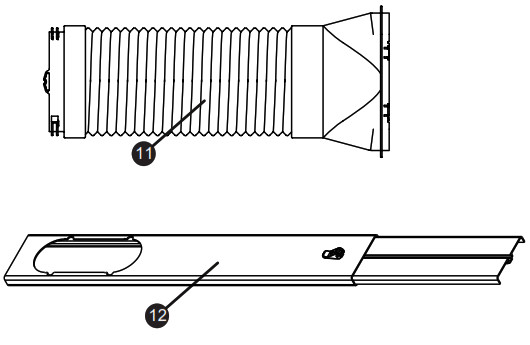
8.Hot air outlet 9.Drainage nozzle 10. Air outlet grille 11. Exhaust duct assembly 12. Window sealing plate assembly |
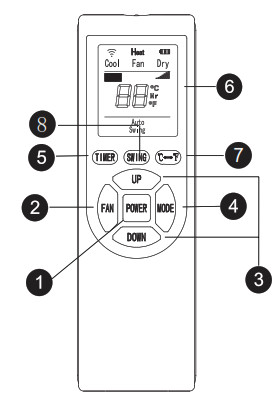
CONTROL PANEL AND REMOTE CONTROLLER
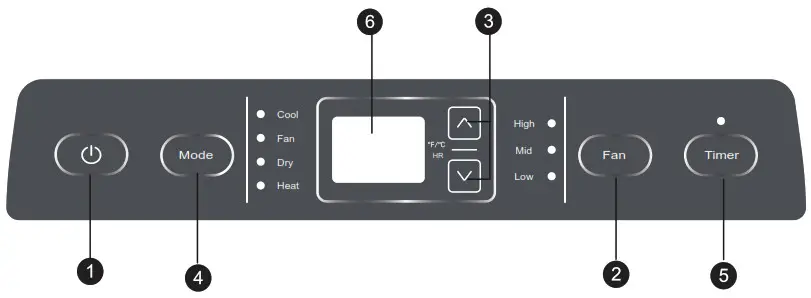
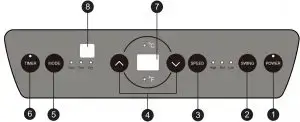
- Power key
Press the key to turn ON/OFF the A/C. - Speed key
Press the key to choose high/middle/low speed. - Temperature/ time adjusting key
Press the key at cooling mode or heating mode to increase/reduce the set temperature; press it at timing mode to adjust timing ON/OFF time; press Up and Down keys simultaneously to switch Fahrenheit and Centigrade degree temperature. - Mode key
Press the key to choose cooling, heat, fan, dry. - Timer key
Press the key at standby mode to set ON time.
Press this key at ON mode to set OFF time. - Temperature/ time display window
This window displays the adjusted temperature and time. - Switch key
Press the key to switch ℃ and ℉. - Swing key
Press this button or press the speed key and timing key simultaneously to turn on / off the swinging function.
PRODUCT OPERATION
PLANCEMENT AND INSTALLATION
Placement
Place the machine on the horizontal floor near the window.
In order to maintain good air circulation and make the machine get the best performance, there should be at least 19.7in. space around it.
.
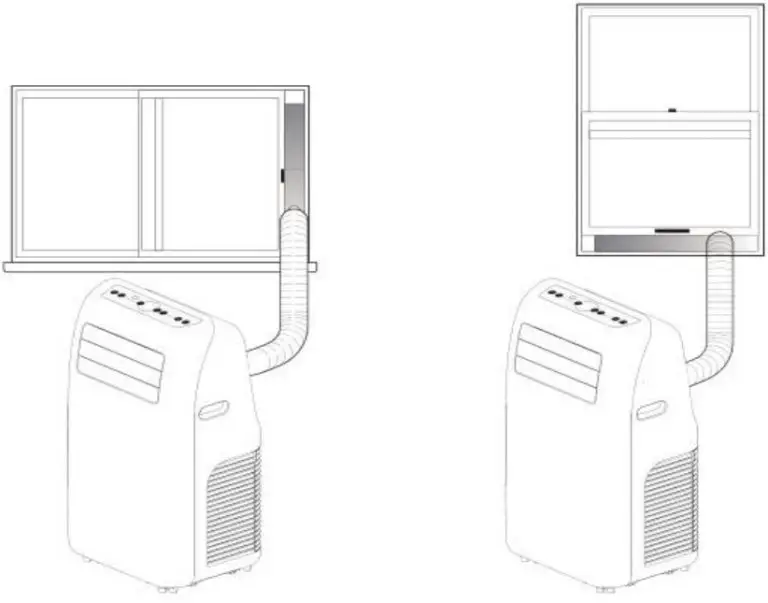
Installation
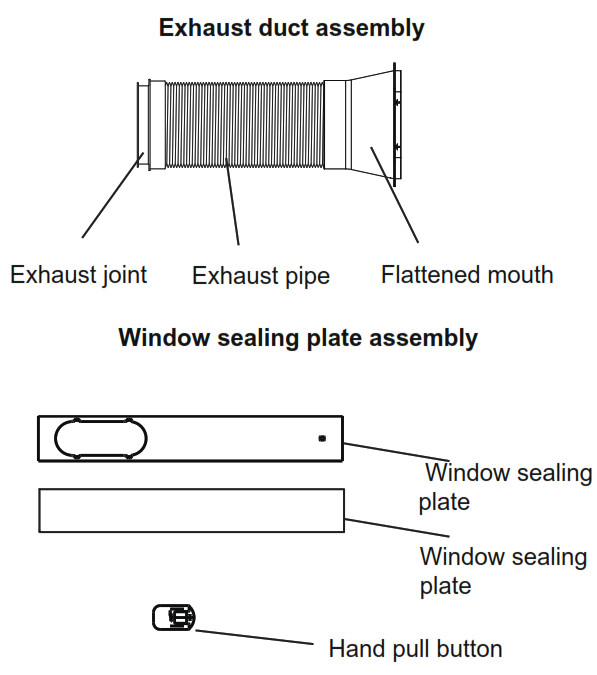
Step 1:
- Measure window size;
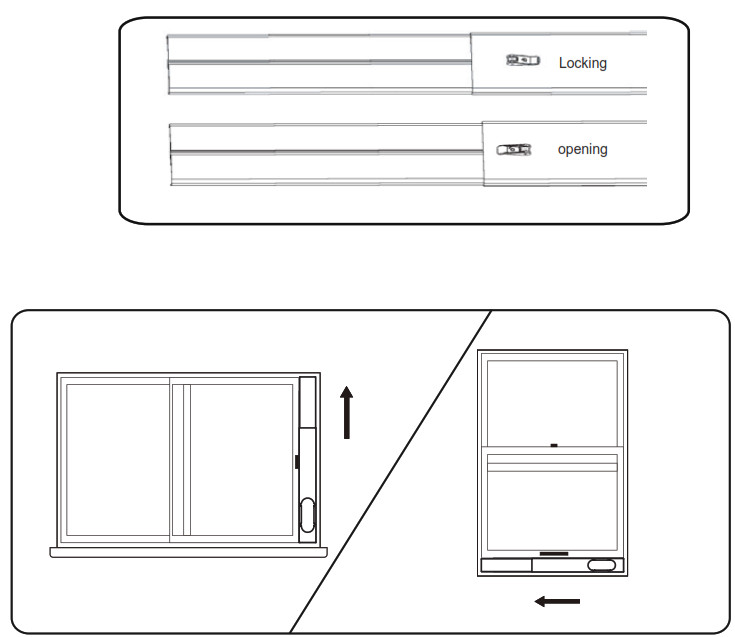
- Adjust the length of the window sealing plate to make it fit with the size of the window.
- When the length of the window seal plate is fixed, the length of the sealing plate is fixed by the hand pull button.
Step 2:
Install the fixed window seal on the window.

Step 3:
Swirl the exhaust pipe assembly (exhaust fitting end) into the rear panel outlet (counterclockwise).
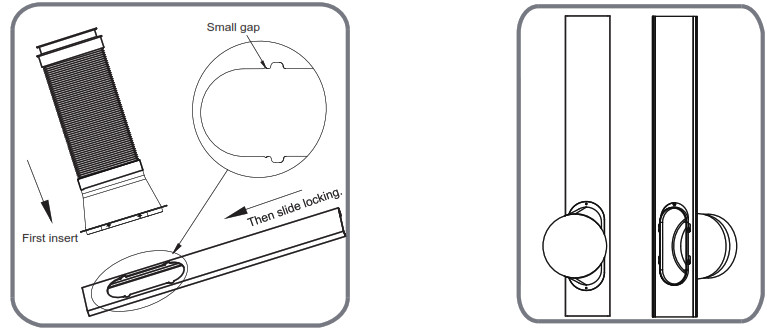
Step 4:
Clip the exhaust pipe assembly (exhaust port end) into the window seal panel assembly and screw it up.

Overall effect diagram after assembly
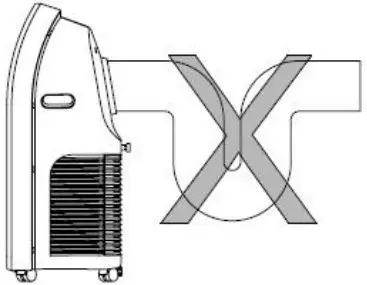
Incorrect installation
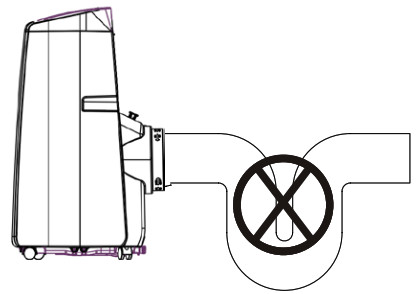
- It’s important to keep the exhaust duct smooth. Incorrect installation will affect the work of the A/C.
- Prevent the exhaust duct from sharp bending.
- Ensure air can flow smoothly in the duct.
Warning
The exhaust duct is designed especially for this model. Don’t replace or lengthen it; otherwise, it will result in failure.
Notice:
Max. developed length of the exhaust duct is 59in. It’s better to shorten it while use and keep it horizontal while installation.
REMOTE CONTROLLER
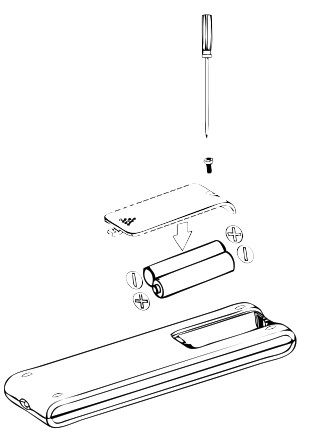
Please install the battery correctly before using the remote control.
The specific steps are as follows:
- Slide the battery cover on the back of the remote control.
- Insert 2*AAA(DC1.5V) new batteries and ensure that batteries, and ensure that the battery electrodes are installed correctly when inserted.
- Fit the battery cover in place.
Notice:
- The remote controller can only use AAA(DC1.5V) batteries.
Do not use rechargeable batteries or other types of batteries. - Replace two batteries when replacing batteries. Do not mix old and new batteries.
- If the air conditioner is not used for a long time, please remove the battery in the remote control.
Warning:
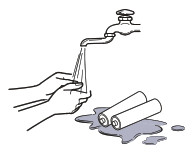
- Do not use batteries if there is any leakage.
- Chemicals in batteries may cause burns or other health hazards. If the liquid flows to the skin or clothes carelessly, please wash them with clean water immediately; if you eat it carelessly, rinse your mouth with clear water immediately, and then go to the hospital for further examination.
OPERATION METHOD
Cool mode
- When the A/C enters cooling mode automatically or cooling mode is selected after power ON, the cooling indicator lamp lights up.
- Press the Up/Down key to adjust the setting temperature (60°F ~ 86°F ).
- Press the Speed key to choose High/Mid/Low speed.
Fan mode
- When pressing mode key or choosing Fan mode by pressing the remote controller,
the wind indicator lamp lights up. - Press the Speed key to choose High/Mid/Low speed.
- Temperature can’t be set.
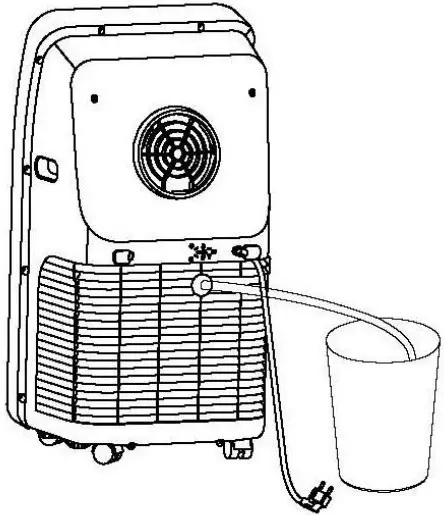
Dry mode
 When pressing the mode key or choosing dry mode by pressing the remote controller, the dehumidification indicator lamp lights up.
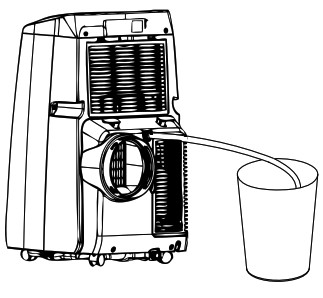
- Take off the water plug of the desiccant nozzle as shown on the right, insert the water guide pipe, and put the other end of the water guide pipe into the water container or drainage channel.
- When entering the dry mode, the compressor is started if the room temperature is greater than 63 F Thereafter the compressor is controlled according to the following rules: when the room temperature is less than 59 F, the compressor is turned off; when the room temperature is raised to more than 59 F, the compressor is restarted (the compressor restart must satisfy the three-minute delay protection function).
- In dry mode, the fan is defaulted to run at low speed, and wind speed can’t be adjusted ·
- Temperature can’t be set.
Use hint: when the dry function is used, the exhaust pipe assembly should be removed, otherwise, it will cause that dehumidification effect is not obvious and “FL” full of alarm display appears.
Heating mode
- When the A/C enters heating mode automatically or heating mode is selected after power ON, the cooling indicator lamp lights up.
- Press Up/Down key to adjust the setting temperature(60°F ~ 86°F ).
- Press Speed key to choose High/Mid/Low speed.
Timer mode
- In standby state, press the Timer key to set ON time. Press Up and Down keys to set ON time (1~24H), and the timer indicator lamp lights up.
- In ON state, pressure the timer key to set OFF time. Press Up and Down keys to set OFF time (1~24H), and the timer indicator lamp lights up.
CLEAN AND MAINTENANCE
DRAINAGE METHOD
This product is equipped with an automatic water vaporization system. The condenser is cooled with the circulating of condensing water, so as to improve cooling efficiency and save energy.
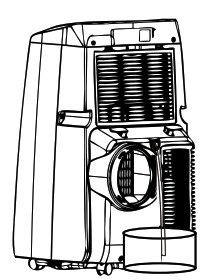
If the internal vessel is full of water, the display screen will display “FL”, and the compressor stops working automatically. At this point, the water needs to be discharged. The specific steps are as follows:
- Unplug the power cord and take down the exhaust duct assembly.
- Move the air conditioner to the right place.
- Pull off the drain at the drain and drain the water inside the machine.
- Re plug the water plug.
- Reinstall the exhaust duct assembly and start the machine.
MAINTENANCE
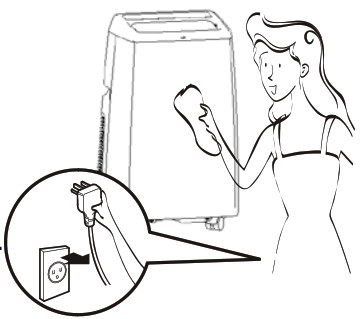
Notice: In order to avoid electric shock, please turn off the A/C and unplug it before maintenance or repair.
CLEANING
- Unplug before cleaning.
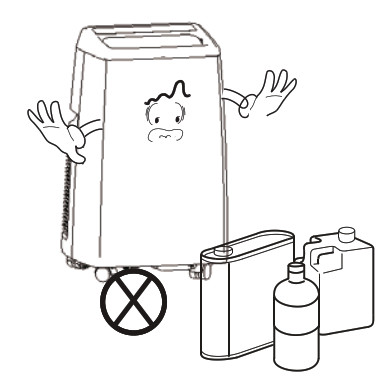
- Wipe with soft semi-dry cloth. Don’t use chemical reagents, such as benzene, alcohol and gasoline etc; otherwise, the surface of the A/C and even the whole NC will be damaged
- Prevent water from spattering in the NC.
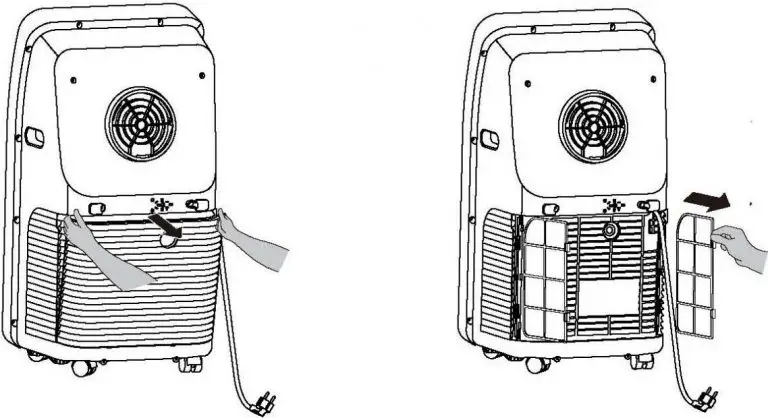
FILTER SCREEN
It is suggested to clean the filter every two weeks. If the indoor air quality is poor, the cleaning frequency should be improved appropriately. Because the filter screen is blocked by dust, it will reduce the efficiency of air conditioning. The specific cleaning steps are as follows:
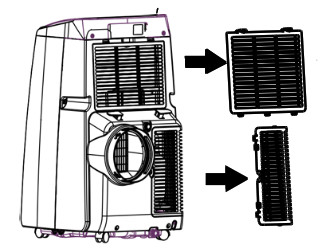
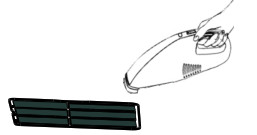
- According to the direction of the chart, the lower intake grille is first taken out and the filter screen is removed.
- Clean the filter with clean or warm water (about 104 F) which has been added with neutral detergent, then put it in a cool place to dry.
- The filter screen cleaned and dried will be re-installed.
- Restart the machine and run properly.
 |
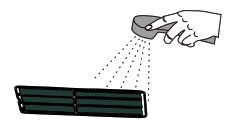 |
| If the filter screen is not too dirty, just use the vacuum cleaner to absorb the dust. | If the filter is dirty, clean the filter with clear water or warm water. The temperature is about 104° F. |
Notice:
- Do not use water with excessive temperature (suitable temperature is about 104° F) or irritant detergent (such as alcohol, gasoline, benzene, etc.) to clean the filter.
- To avoid deformation of the filter, the cleaned filter should be kept away from the heat source and put in dry air to dry naturally.
- Do not run machines without filters.
SEASONAL CLEANING
If the A/C will not be used for a long time, Please follow these steps to maintain it:
- Pull out the water plug to drain.
- Run the A/C in fan mode for 2H till the inside is dry.
- Turn off the A/C and unplug.
- Wash the filter screen and reassemble it.
- Dismantle the exhaust duct and keep it properly.
- Take the battery from the remote control.
- Cover the A/C with a plastic bag and place it at a dry place.
 If you haven’t used it for a long time, please pay attention to the following points when you use it again:
- Confirm whether water plugs and filters are installed.
- Check if the power cord is intact. If there is any damage, do not use it.
- Reinstall the remote battery.
- Reinstall the other components according to the installation instructions.
COMMON FAILURES AND DIAGNOSIS
INTELLIGENT ERROR DETECTION
| Error-detecting code | Multi-functional defection |
| E1 | The error of the coil’s temperature sensor |
| E2 | Error of indoor temperature sensor |
| E4 | Anti-freezing protection: temperature of the coil is too low and the whole A/C is off. When the temperature excesses 46 ° F, the protection is released and the previous working state is recovered. |
TROUBLE-SHOOTING
The following table lists the common faults and maintenance methods of this series of portable A/C. When the machine is in abnormal operation, the following table can be used for simple diagnosis and maintenance. If it still can not be solved, lease contact professional maintenance personnel.
| TROUBLE | CAUSE | SOLUTION |
| The NC doesn’t work | No display | Reset circuit breaker on AC cord |
| The display panel displays “F12 | Restart the NC after power off and draining, then it will become normal | |
| Time OFF function is started | The NC can be restarted 3 minutes after being turned off | |
| The NC
starts frequently |
Direct sunlight | Draw the curtain |
| Doors and windows keep open; there are lots of people or heat sources in the room | Close doors and windows, remove heat source | |
| Filter screen is very dirty | Clean or replace it | |
| Air inlet or air outlet is blocked | Remove the stem | |
| Big noise of the NC | The NC is placed unevenly | Place it at even and firm ground, avoid shaking |
MACHINE PARTS PARAMETERS
FUSE PARAMETERS
Specification: Φ5×20mm
Voltage: 250VAC
Current: 3.15A
MACHINE DIMENSIONS
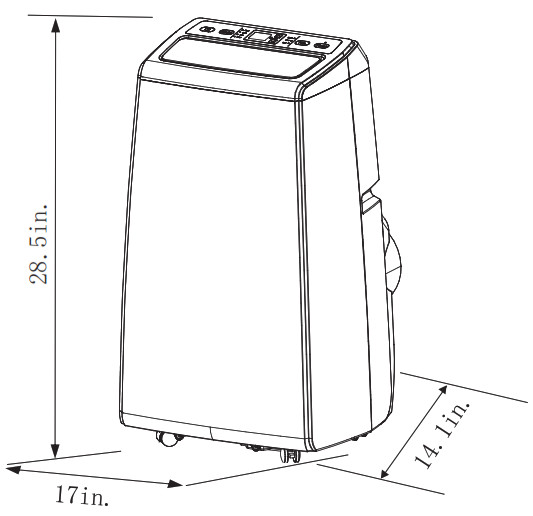
The above technical parameters are subject to change without notice.
Meaning of crossed-out wheeled dustbin:
Do not dispose of electrical appliances as unsorted municipal waste, use separate collection facilities. Contact your local government for information regarding the collection systems available. If electrical appliances are disposed of in landfills or dumps, hazardous substances can leak into the groundwater and get into the food chain, damaging your health and well-being. When replacing old appliances with new ones, the retailer is legally obligated to take back your old appliance for disposals at least free of charge.
TO OBTAIN WARRANTY SERVICE:
Toll number:833-3SHINCO
Working Time: From 8:30 AM to 5:00 PM Monday through Friday Standard (Eastern) Time
WARRANTY PERIOD:
Labor: 1 Year from the Date of Purchase.
Parts: 1 Year from the Date of Purchase.
YOU Electric Co., Ltd reserves rights to upgrade products without user notice.
Thanks for choosing this high quality portable air conditioner. Please read the Manual carefully before operation. In case of any problem, please contact professional maintenance personnel in time.
IMPORTANT SAFETY TIPS
PTECAUTION
Please read the Manual carefully before operating the machine:
- This machine is for household use only.
- This machine is for indoor use only. Please place it in dry environment.
- Check power cord frequently. When power cord, plug or A/C is damaged, please don’t operate.
If the power cord is not long enough, power extension cable can be used. Cable should not scatter at places where power cord may be pulled out or people may be stumbled. - The A/C should be away from heat source and avoid direct sunlight.
- Turn off the A/C before unplugging.
- Turn off and unplug the A/C before removing or cleaning it, or replacing its parts or when it is not used.
- Clean the A/C according to the Manual.
- Voltage of the A/C should meet requirements. Any damage incurred by incorrect power isn’t included in the warranty.
- Children are not allowed to play with the A/C.
This appliance is not intended for use by children, unless they have been given supervision or instruction concerning use of the appliance by a person responsible for their safety. - Don’t insert your fingers or any hard object to wind guide bar of the air outlet.
- Don’t place the A/C at any place with water or other liquid. Prevent water or liquid from entering the A/C.
- Don’t repair the A/C by yourself. Any possible hazard incurred by maintenance of laypeople will violate the warranty. If the supply cord is damaged, it must be replaced by professional maintenance personnel.
- Please use the accessories provided by the A/C manufacturer; otherwise, the A/C may be damaged.
- Cleaning and user maintenance shall not be made by children without supervision.
Special warning:
- Place the A/C on even ground and install it vertically, so as to ensure normal operation of the compressor.
- The A/C should be at least 19.7in away from surrounding objects. Keep air inlet and outlet smooth.
- Don’t use the A/C beside gasoline or any other inflammable liquid.
- Don’t use spraying agent and other solvent or flammable substances near the A/C; otherwise, its plastic may deform and electric parts may be damaged.
Power
- The plug should be in good condition and can’t be damaged. Don’t replace the plug with power lug.
- In order to run the A/C, plug the power cord first, and then press the power key.
- Place unit in upright position for 2 hours before turning on for first time.
PRODUCT INTRODUCTION
MAIN PARTS AND COMPONENTS
- Handle
- Air inlet (L)
- Control panel
- Air outlet louver
- Caster

- Remote controller
- Air inlet (R)
- Hot air outlet
- Drainage nozzle
- Air inlet grille
- Exhaust duct assembly
- Window sealing plate assembly
CONTROL PANEL AND REMOTE CONTROLLER
Cooling model
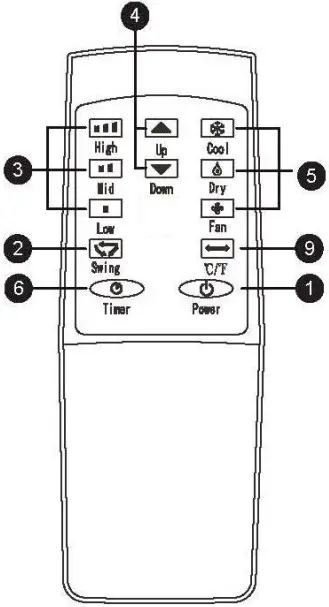
- Power key
Press the key to turn ON/OFF the A/C. - Swing key
Press this key at any time after turning on the A/C to swing the wind guide bar automatically. - Speed key
Press the key to choose high/middle/low gear wind speed. - Temperature/ time adjusting key
Press the key at cooling mode to increase/reduce the setting temperature; press it at timing mode to adjust timing ON/OFF time; press Up and Down keys simultaneously to switch Fahrenheit and Centigrade degree temperature. - Mode key
Press the key to choose cooling, fan, dehumidification - Timer key
Press the key at standby mode to set ON time.
Press this key at ON mode to set OFF time.
Temperature/ time display window
This window displays the adjusted temperature and time. - Remote controller receiving window
This window is used to receive signal of the remote controller. - ℃/℉ switching key
Press the key to switch ℃ and ℉.
PRODUCT OPERATION
PLACEMENT AND INSTALLATION
Placement
- Place it at even and dry place, and keep it at least 19.7in away from its surrounding object.
Installation
- Screw the exhaust duct assembly in the air outlet behind the panel (anticlockwise).

- Insert the air exhaust hose into the window sealing plate, adjust opening width of window so that the window can match with the sealing plate properly; length of the sealing plate is adjustable.
Incorrect installation
- It’s important to keep the exhaust duct smooth. Incorrect installation will affect work of the A/C.
- Prevent the exhaust duct from sharp bending.
- Ensure air can flow smoothly in the duct.
Warning:
The exhaust duct is designed especially for this model. Don’t replace or lengthen it; otherwise, it will result in failure.
Notice:
Max. developed length of the exhaust duct is 59in. It’s better to shorten it while use and keep it horizontal while installation.
OPERATION METHOD
Cooling mode
- When the A/C enters cooling mode automatically or cooling mode is selected after power ON, the cooling indicator lamp lights up.
- Press Up/Down key to adjust setting temperature (16℃~30℃) ~ .
- Press Speed key to choose High/Mid/Low speed.
Fan mode
- When pressing mode key or choosing Fan mode by pressing the remote controller, the wind indicator lamp lights up.
- Press Speed key to choose High/Mid/Low speed.
- Temperature can’t be set.
Dehumidification mode
- When pressing mode key or choosing dehumidification mode by pressing the remote controller, the dehumidification indicator lamp lights up.
- Remove the dehumidification water wedge, insert water manifold, place the other end of the water manifold into the water vessel or drainage passage, as shown in the right figure.
- In dehumidification mode, the fan is defaulted to run at low speed, and wind speed can’t be adjusted.
- Temperature can’t be set.
Timer mode
- In standby state, press the Timer key to set ON time. Press Up and Down keys to set ON time (1~24H), and the timer indicator lamp lights up.
- In ON state, pressure the timer key to set OFF time. Press Up and Down keys to set OFF time (1~24H), and the timer indicator lamp lights up
CLEAN AND MAINTENANCE
DRAINAGE METHOD
This product is equipped with automatic water vaporization system. The condenser is cooled with the circulating of condensing water, so as to improve cooling efficiency and save energy.
- If the internal vessel is full of water, the display screen will display “FL”, and the compressor stops working automatically. After power off, unscrew the water cover, pull out the water plug to drain off water, and it will become normal after being restarted.
MAINTENANCE
Notice: in order to avoid electric shock, please turn off the A/C and unplug before maintenance or repair.
CLEANING
- Unplug before cleaning.
- Wipe with soft semi-dry cloth. Don’t use chemical reagent, such as benzene, alcohol and gasoline etc; otherwise surface of the A/C and even the whole A/C will be damaged.
- Prevent water from spattering in the A/C.
FILTER SCREEN
- Vacum the filter screen once every two weeks. If it is blocked by dust, efficiency of the A/C will be reduced.
- Take out the air inlet grille and pull out the filter screen at both sides according to the direction shown in the following figures. Use vacum to remove lint from filters.
- Put the filter screen into the warm water (about 104℉) added with neutral detergent, dry it at a shady place after cleaning.
SEASONAL CLEANING
If the A/C will not be used for a long time:
- Pull out the water plug to drain.
- Run the A/C in fan mode for 2H till the inside is dry.
- Turn off the A/C and unplug.
- Wash the filter screen and reassemble it.
- Dismantle the exhaust duct and keep it properly.
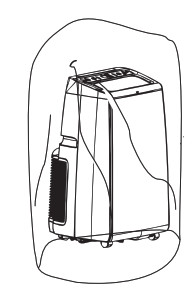
- Cover the A/C with a plastic bag and place it at a dry place.
- If possible store unit in its original box.
COMMON FAILURES AND DIAGNOSIS
INTELLIGENT ERROR DETECTION
| Error-detecting code | Multi-functional defection |
| E1 | Error of the coil’s temperature sensor |
| E2 | Error of indoor temperature sensor |
| E4 | Anti-freezing protection: temperature of the coil is too low and the whole A/C is off. When temperature excesses 46℉, the protection is released and previous working state is recovered. |
FUSE PARAMETERS
- Specification: Φ5×20mm
- Voltage: 250VAC
- Current: 3.15A
TROUBLE-SHOOTING
In case of any of the following trouble, please contact professional maintenance personnel in time.
| TROUBLE | CAUSE | SOLUTION |
| The A/C doesn’t work | No display | Reset circuit breaker on AC cord |
| The display panel displays “FL” | Restart the A/C after power off and draining, then it will become normal | |
| Time OFF function is started | The A/C can be restarted 3 minutes after being turning off. | |
| The A/C starts frequently | Direct sunlight | Draw the curtain |
| Doors and windows keep open; there are lots of people or heat source in room | Close doors and windows, remove heat source | |
| Filter screen is very dirty | Clean or replace it | |
| Air inlet or air outlet is blocked | Remove the stem | |
| Big noise of the A/C | The A/C is placed unevenly | Place it at even and firm ground, avoid shaking |
| The compressor doesn’t work | Its delay protection is started | Wait for 3min., turn on after temperature decreases |
Notice: When there is any abnormal to the A/C, turn it off and unplug, and then contact professional maintenance personnel.
The above technical parameters are subject to change without notice.
 Meaning of crossed –out wheeled dustbin:
Do not dispose of electrical appliances as unsorted municipal waste, use separate collection facilities.
Contact you local government for information regarding the collection systems available.
If electrical appliances are disposed of in landfills or dumps, hazardous substances can leak into the groundwater and get into the food chain, damaging your health and well-being.
When replacing old appliances with new ones, the retailer is legally obligated to take back your old appliance for disposals at least free of charge.
Support
Sales support: [email protected] <mailto:[email protected]>
YOAU Electric Co., Ltd reserve rights to upgrade products without user notice.