
Skullcandy Spoke
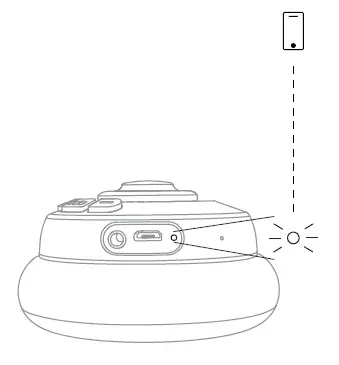
Auto Pair Mode

Auto Power- On

Auto Power- Off

Charge Earbuds

Charge Case

Pairing Mode
Left or Right Side * OFF Mode

Pair New Device
“Spoke”

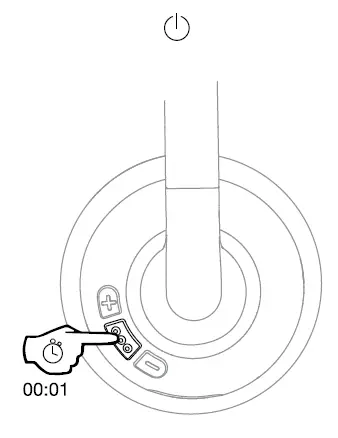
Power-On
Left Side and Right Side

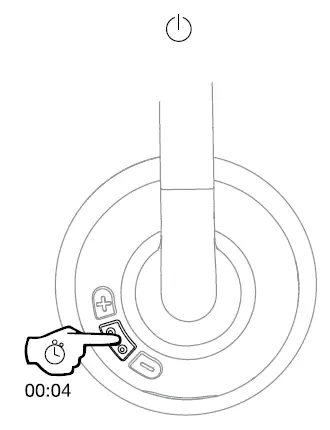
Power-Off
Left Side and Right Side

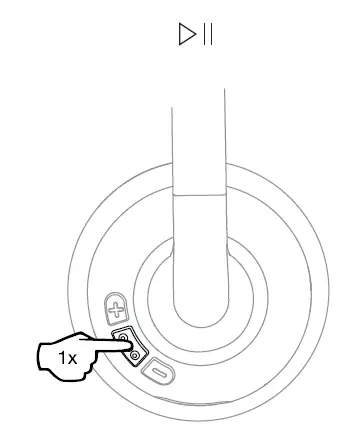
Play/Pause
Left Side or Right Side

Track Forward
Right Side

Track Back
Left Side

Volume Up
Right Side

Volume Down
Left Side

Answer/End
Left Side or Right Side

Activate Voice Assistant
Left Side or Right Side

Clear Paired Device
Left Side and Right Side
*Off Mode

Reset Device : Questions Visit: www.skullcandy.com
FCC Compliance Statement
This device complies with Part 15 of the FCC Rules. Operation is subject to the following two conditions: (1) this device may not cause harmful interference, and (2) this device must accept any interference received, including interference that may cause undesired operation. Changes or modifications not expressly approved by the party responsible for compliance could void the user’s authority to operate the equipment.
This equipment has been tested and found to comply with the limits for a Class B digital device, pursuant to Part 15 of the FCC Rules. These limits are designed to provide reasonable protection against harmful interference in a residential installation.
This equipment generates, uses and can radiate radio frequency energy and, if not installed and used in accordance with the instructions, may cause harmful interference to radio communications. However, there is no guarantee that interference will not occur in a particular installation. If this equipment does cause harmful interference to radio or television reception, which can be determined by turning the equipment off and on, the user is encouraged to try to correct the interference by one or more of the following measures:
- Reorient or relocate the receiving antenna.
- Increase the separation between the equipment and receiver.
- Connect the equipment into an outlet on a circuit different from
that to which the receiver is connected. - Consult the dealer or an experienced radionv technician for help.
ISED Compliance Statement
This device contains license-exempt transmitter(sVreceiver(s) that comply with Innovation, Science and Economic Development Canada’s license-exempt RSS(s). Operation is subject to the following two conditions: (1 )This device may not cause interference.(2)This device must accept any interference, including interference that may cause undesired operation of the device.
ISED SAR Compliance Statement
This equipment complies with ISED radiation exposure limits set forth for an uncontrolled environment. End user must follow the specific operating instructions for satisfying RF exposure compliance. This transmitter must not be co-located or operating in conjunction with any other antenna or transmitter.
The portable device is designed to meet the requirements for exposure to radio waves established by the ISED. These requirements set a SAR limit of 1.6 W/kg averaged over one gram of tissue. The highest SAR value reported under this standard during product certification for use when properly worn on the head.
Americas
Skullcandy, Inc.
6301 N Landmark Dr.
Park City, UT 84098 U.S.A.
Skullcandy.com
Skullcandy-Spoke-Manual-OptimizedOptimized PDFSkullcandy-Spoke-Manual-OriginalDownload
Questions about your Manual? Post in the comments!
References
]]>Skullcandy Dime True Wireless in-Ear Earbuds
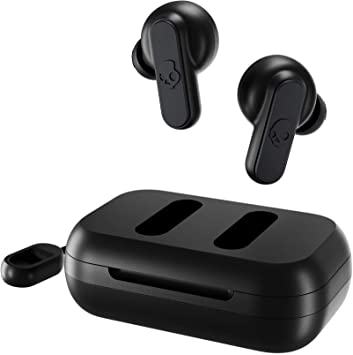
The smallest, lightest earbud we’ve ever made packs a powerful punch. Skullcandy® ultimate sound gives you the kind of full, rich sound you’d expect from far more costly earphones. Even when you’re on the phone, you can use either earbud alone thanks to the dual microphones. Dime is sweat- and water-resistant, so it can withstand workouts and outdoor excursions, and it’s covered by our Fearless Use Promise, so you can listen without stress.
What’s in the box
Specifications
| Driver Diameter |
6 mm |
| Impedance |
16 Ohm±15 |
| Sensitivity |
NA |
| Frequency Response | 20 Hz – 20000 Hz |
| Maximum Power Input | NA |
| Noise Cancelling | NA |
| Wearing Style | In Ear |
| Magnet Type | Dynamic |
| Bluetooth Version | 5.0 |
| Compatible Profiles | All Bluetooth Devices |
| Supported Codecs | HSP, HFP, AVRCP, A2DP |
| Bluetooth Range | 10 Meters |
| Battery Type | Lithium Polymer Batteries |
| Battery Life | 12 Hours |
| Charging Time | 2 Hours |
Setup Dime Earbuds
3 minutes.
Setup you new Skullcandy Dime Earbuds
- Remove the Earphones and Stickers to start charging
Remove the earphones from the case and clean the charging contact points of stickers. Before using the earphones for the first time, we recommend charging them for about 30 minutes in the case. Make sure the earphones’ LEDs glow red to signal that they are charging.
- Once charged, remove from the case
Remove the earbuds from the case once they’ve been charged to begin pairing. Both earbuds will turn on automatically, and the LEDs will glow blue at the same time as they sync.
- Enter pairing mode
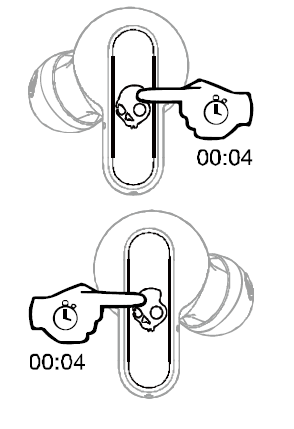
You’ll hear a voice prompt that reads ‘Pairing’ once the earbuds have synchronized up. The left earbud will be the only one to begin flashing red/blue. Turn on Bluetooth on your device and seek for ‘Dime®’ in the list of accessible Bluetooth Devices. If your buds don’t automatically enter pairing mode, hold the button for 4 seconds.
- Pair with your phone
You’ll hear a voice prompt that reads ‘Pairing’ once the earbuds have synchronized up. The left earbud will be the only one to begin flashing red/blue. Turn on Bluetooth on your device and seek for ‘Dime®’ in the list of accessible Bluetooth Devices.
Pairing the New Device
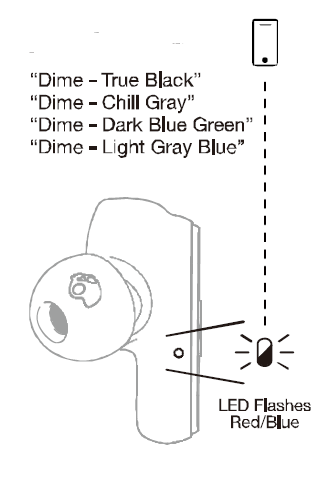
Following these simple steps, you may quickly link to another device if you have already set up and paired to one.
- With a 4-second button hold, turn off your headphones manually.
- Press and hold both earbuds for 4 seconds while they are turned off. This will turn your earphones on, sync them, and then put them into “Pairing” mode. Your LEFT earbud will begin to flash red/blue at this point.
- To pair your new gadget, simply search for and choose Dime® from your available Bluetooth Device list.
PAIRING ISSUES?
ISSUE:The biggest challenge with true wireless earbuds is ensuring your buds are properly connected to each other and your device. There are times when you may unintentionally disconnect your buds and change their paired state; this can create pairing challenges and impact your ability to hear audio in both earbuds or use either bud in Solo Mode. Do not worry, we have a few easy ways to get this fixed!
FIRST COMPLETE A POWER CYCLE by simply placing your buds into the charging case until the LED on both earbuds turns RED. Then remove your buds from the case and evaluate, sometimes this is all you need, but if you’re still having trouble we’ve got you covered.
SOLUTION 1: RE-SYNC YOUR EARBUDS – “AUDIO ISN’T PLAYING FROM BOTH OF MY EARBUDS”
- Power ON your earbuds by removing them from the charging case, or manually press and hold the button on each bud for 2 seconds.
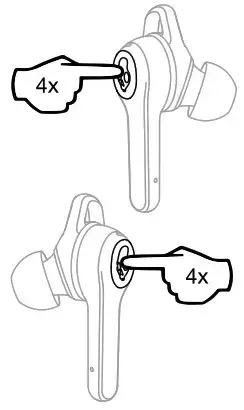
- Once powered ON (you can be in a connected or non-connected state) press the button on BOTH buds 4x to start the earbuds re-sync pairing mode (earbuds connecting to each other).
- Your earbuds will flash Red/Blue momentarily as they re-sync, once successful they will flash Blue together and you will hear a “connected” voice prompt.
- If you were connected to your device, your earbuds will automatically reconnect to your device and you’re ready to stream in stereo audio (sound will play from both earbuds).
SOLUTION 2: RESET YOUR PAIRED DEVICE LIST – “I CAN’T GET MY EARBUDS TO PAIR TO MY DEVICE CORRECTLY, OR SOLUTION 1 ISN’T FIXING MY AUDIO PLAYBACK”
- To ensure ease of re-pairing, please un-pair or forget your Dime® in your paired Bluetooth device list
- Remove your Dime® earbuds from the charging case and allow them to automatically power ON.
- Ensure your earbuds are in a non-connected state, then on either earbud, press the button 2x and then hold for 2 seconds.
- This will automatically reset your paired device list and enter you directly back into Pairing Mode. You will hear the voice prompt “Pairing” and only the LEFT bud will begin to flash RED/BLUE.
- At this time, turn ON your device’s Bluetooth and look for “Dime” in your list of Available Bluetooth devices, and select it.
- IMPORTANT – Select the “Pair” and “Ok” prompts that will pop up on your screen.
- Once successfully paired, a voice prompt will notify you are now “Connected”
User Controls
- Auto Power On & Power Off:
- Remove earbuds from Case, and Place them back into the case (charging will begin).
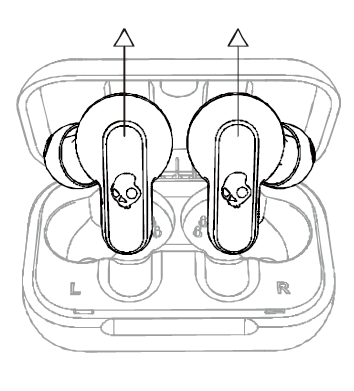
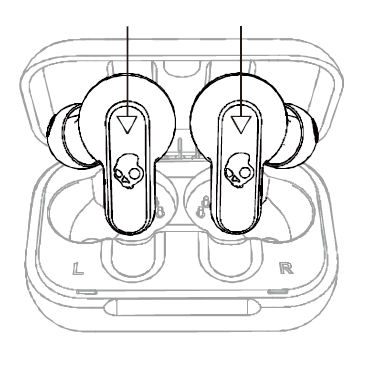
- Remove earbuds from Case, and Place them back into the case (charging will begin).
- Manually Power On:
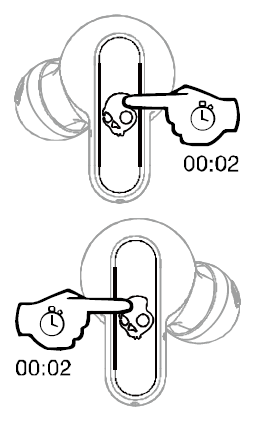
- 2-second hold
- Manually Power Off:
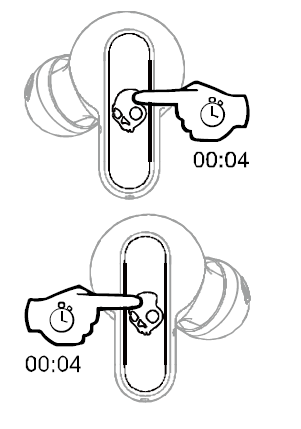
- 4 Second hold
- Play/Pause & Answer/End Calls:
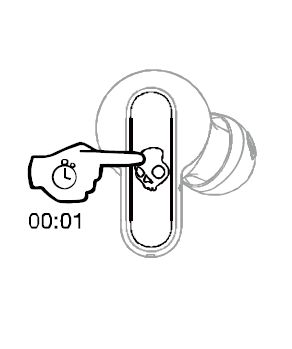
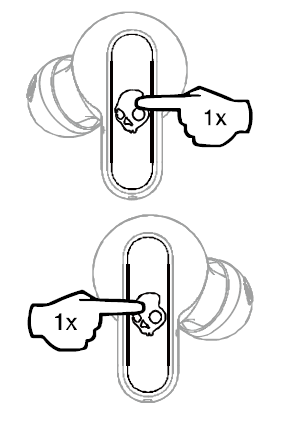
- 1x press on EITHER earbud
- Volume Up:
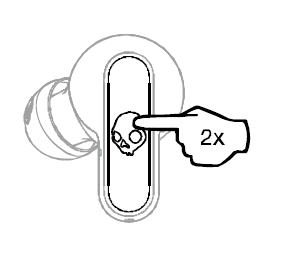
- 2x press on your RIGHT earbud
- Volume Down:

- 2x press on your LEFT earbud
- Track Forward:
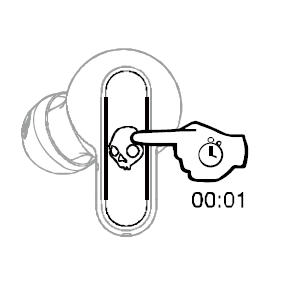
- 1 second hold on your RIGHT earbud
- Track restart/ track back:
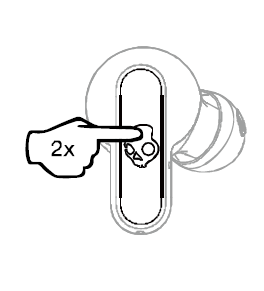
- 1 second hold on your LEFT earbud
- Activate Assistant:
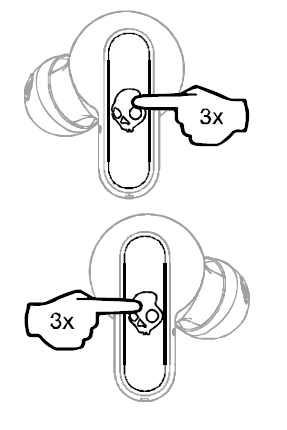
- 3x press on EITHER bud
Auto Pair Mode
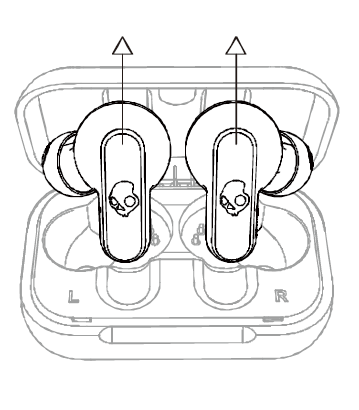
Charging
Earbuds
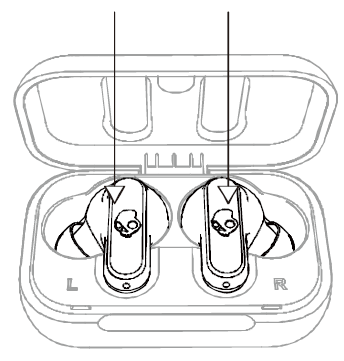
Case
Frequently Asked Questions
What is the total charging time?
EARBUDS:
- It takes an hour for the earbuds to charge to 100% within the case.
- Place your earbuds in the charging case to charge them. While charging, the earbud LEDs will be solid red.
- When the LEDs are fully charged, they will turn off.
- A voice prompt will tell you that your battery has less than 30 minutes of play time left, and the LEDs will blink red every 5 seconds.
CASE:
- It takes 5 hours for the case to charge to 100%.
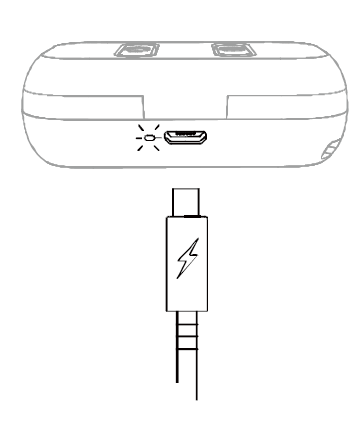
- Connect the Micro-USB charging cable to a computer, wall charger, power bank, or 12-volt adaptor in a car to charge your case.
- When the case is charging, the LED to the left of the micro-usb connector will glow RED, and when the case is fully charged, the LED will turn Green.
FAQ
What is the procedure for connecting my Skullcandy wireless earbuds to my phone?
To pair your Skullcandy headphones with your Android device, go to settings, turn on Bluetooth, pick “Pair New Device,” and then select your Skullcandy device. The pairing procedure has finished.
Is it okay for me to wear Skullcandy dime in the shower?
The Jib True Wireless earbuds are sweat and water resistant to IPX4 standards. That is to say, they are not waterproof.
Is it possible to connect Skullcandy dime to several devices?
Multipoint allows you to connect to and switch between multiple Bluetooth devices. You can effortlessly switch calls from one device to another without having to disconnect and reconnect manually, for example.
Is the Skullcandy dime noise-canceling?
There are no sophisticated capabilities, like as active noise cancellation, and no app support is available. You may, however, use either earpiece separately, and the earpieces are water resistant to IPX4. Even considering the size of the box, the Skullcandy Dime’s battery life is disappointing.
CAN I USE MY SKULLCANDY POWER ACCESSORIES/PC/LAPTOP TO CHARGE DIME®?
To charge your Dime®, you may use almost any USB-A to Micro-USB charging cord.
How nicely do these fit into tiny ears? Also, do they hurt in the same way as the bands on the gel bits do?
These have to be worn with the tiniest rubber fittings. In order for them to stay in my ears, I have to wear them backwards. Because the sesh is also too huge, I must either have tiny ears or have troubles with skullcandy ear buds.
CAN I USE SIRI/GOOGLE ASSISTANT/ALEXA WITH MY DIME®?
When paired to your device, you can press the button on either the LEFT or RIGHT bud 3x to activate your voice assistant feature at any time.
CAN I USE DURING MOST ACTIVITIES?
Dime® has a water resistant rating of (IPX4). This will allow them to hold up to some rain and moisture with no problems at all.
Please note that ONLY the buds have the IPX4 rating. The charging case does NOT have an IPX4 rating so you want to be a bit more careful with that.
WHEN ON A CALL OR LISTENING TO MY CONTENT, WILL I HEAR AUDIO IN ONE OR BOTH EARBUDS?
Dime® has stereo calling and streaming so you’ll always hear the caller or your media content in both ears.
Although, you do have the option to use only one earbud (left or right side) if you prefer Solo Mode in some situations.
WHICH SIDE OF DIME® IS CONSIDERED THE “PRIMARY” BUD?
The LEFT and RIGHT side earbud can be your Primary earbud, so either bud can be used in Solo Mode (one earbud listening).
WHICH VERSION OF BLUETOOTH DOES DIME® USE?
Bluetooth® version 5.0
CAN I USE DIME® WITH A PS4/XBOX ONE/SWITCH?
Xbox One: No
Switch: Yes
PS4: No
CAN I CONNECT DIME® TO A COMPUTER?
Yes, as well as to a phone, tablet, MP3 player, laptop, or anything else with a Bluetooth connection.
WHAT IS THE BLUETOOTH RANGE OF THE DIME®?
You will be able to listen up to 30+ feet (10+ meters) away from your paired device, though your connection experience may vary based on your environment.
DOES THE DIME® PAIR WITH THE SKULLCANDY APP?
Sorry, but the Dime® will not pair with the Skullcandy APP.
WHAT IS THE BENEFIT OF THE ROLE SWITCHING FEATURE AND FUNCTIONALITY?
This allows both the LEFT and RIGHT bud to act as the Primary bud, which allows more media controls and features to be activated from either side. Functions such as, play/pause, answer call/hang up call, Activate Assistant can be controlled on both the LEFT and RIGHT bud, simplifying the user experience.
This feature also allows you to utilize either the LEFT or RIGHT bud in Solo Mode, rather than being limited to just one specific side.
TELL ME ABOUT THE IMPROVED TRUE WIRELESS RE-SYNC OF YOUR EARBUDS?
This improved earbud to earbud pairing solution will not require the end user to Clear/Reset their device every time they have issues with the buds pairing together. Simply re-sync your earbuds following solution 1 above and quickly get audio streaming from both buds in no time.
WHAT IS THIS NEW LANYARD FEATURE USED FOR?
Since the charge case is so insanely small, the provided lanyard accessory is used to connect/clip your case and earbuds to your key chain, backpack, really anything you want. You’ll have no problem carrying your earbuds with you wherever you go!
DOES DIME® HAVE SOME SORT OF FAST CHARGE?
Dime® has a Micro-USB charging port and cable.
WHY DOES THE MICRO USB CHARGING CABLE LOOK DIFFERENT?
With this new design, there is no wrong way to plug the USB-A side of your cable into your power source. The non-directional plug just makes it quicker and easier to plug in since you don’t need to figure out if it’s upside down or not.
CAN I CHARGE DIME® WITH MY SKULLCANDY POWER ACCESSORIES/PC/LAPTOP?
Pretty much all USB-A to Micro-USB charging cables will work to charge your Dime®.
BATTERY LIFE AND PLAY TIME IS VERY IMPORTANT TO ME, HOW LONG DOES THE DIME®LAST?
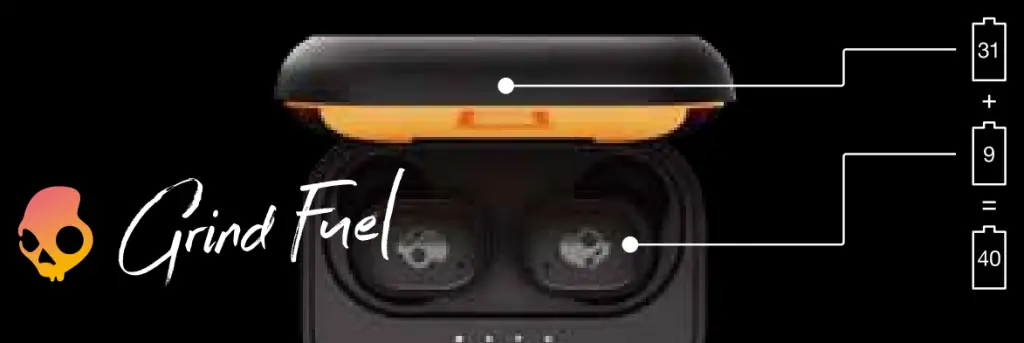
There is 3.5 hours of play time in the ear buds, and 8.5 hours in the case, allowing up to 12 Hours of total play time.
WHAT IS THE TOTAL CHARGING TIME FOR DIME®?
EARBUDS:
1 hour for the earbuds to charge to 100% inside the caseTo charge your earbuds, place them in the charging case. The earbud LEDs will be solid red while charging.
The LEDs will turn off when fully charged.
When your battery has less than 30 minutes of play time left, a voice prompt will notify you “battery low” and the LEDs will flash red every 5 seconds.
CASE:
5 hours for the case to charge to 100%To charge your case, plug in the Micro-USB charging cable and connect to a computer, wall charger, power bank or 12-volt adapter in a car.
The LED to the left of the mirco-usb port will turn RED to indicate the case is charging, and once the case has fully charged, the LED will turn Green.
BUDS NOT CHARGING IN CASE/CASE LID NOT CLOSING PROPERLY?
ISSUE: Not seeing the RED LED indicator on the buds when you’ve placed your DIME back in the case? This would let you know your earbuds are powered off and charging, so if you’re experiencing this issue here are a few helpful tips.
SOLUTION:
First ensure your case is charged up. If your charge case battery is dead your earbuds will not automatically power off and begin to charge when placed into the case.
Check to see if any debris is blocking the charging pins in the case, or on the bud
Check to see if the removable in-ear gels are placed correctly on the acoustic port, this could be keeping the buds from sitting correctly in the case
This same issue could also be interfering with your case lid when closing, if you’re having a hard time closing the lid correctly, this is an indicator that buds are not set correctly or the gels are interfering.
SOLO MODE
ISSUE: If you would like to use Dime® with only one ear bud (Solo Mode), you’re in luck! The updated technology in Dime® allows you to use either the left OR the right bud in Solo Mode. Once paired correctly, you will be able to switch seamlessly between your right and left earbud. Although, if you’re having any challenges utilizing the Role Switching capabilities, you may follow these simple steps to ensure ease of use when pairing and switching between Solo and Stereo Modes.
SOLUTION:
Please note – BOTH the LEFT and RIGHT bud for Dime® can be used in Solo Mode.
For the optimal Solo Mode functionality, first Power ON and pair your buds to your device normally or as described in our troubleshooting section. This will ensure the seamless transition between Stereo and Solo modes.
Once you’ve paired your earbuds you can simply remove either your left or right earbud from the case and it will connect to your device in Solo Mode. At any time, you can remove the other bud from the case, it will automatically sync and begin streaming audio in Stereo Mode.
Additionally, if you’re already streaming in Stereo Mode, simply place the RIGHT or LEFT bud back into the case; whichever you prefer! The remaining bud will stay paired and function with both phone calls and music.
In Solo Mode you will maintain your Play/Pause, Answer/Hang up Call and Activate Assistant functionality, but please note you will lose some of the media control functionality such as “Volume +/- “, and “Track <</>>”.
Again, if you would like to change back to Stereo Mode while in Solo Mode, simply pull the other bud from the case at any time and you will hear a tone, or the music will seamlessly begin to stream to indicate that you have automatically entered back into Stereo Mode.
PLEASE NOTE – If you’re having any trouble switching between the LEFT and RIGHT buds in Solo Mode, you may need to follow the reset solutions above to regain proper functionality.
USER MANUAL
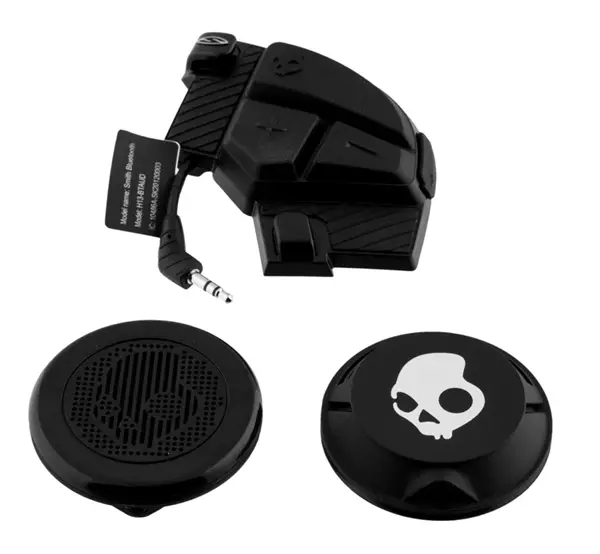
Skullcandy Smith Bluetooth
Model no:H13-BTAUD Rating: 5V 200MA
Main Unite:
This section include the photo of the product and the overview of the main unit
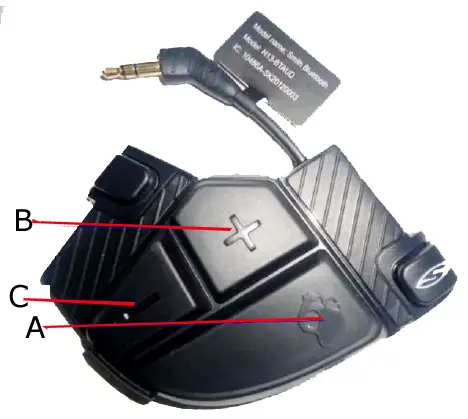
- A: Power on/Power off
Also refer to MFB (Skull Button) below mentioned - B: Volume+
Increase volume and track forward - C: Volume-
Decrease volume and track backward
To Enter Pairing Mode:
- Make sure the Smith Device is in OFF mode
- Long Press MFB (Skull Button) (refer to A point) for 5 seconds
- While in pairing mode, the LED will alternate flashing Blue/Red
In STANDBY mode Blue LED will fast flash two times every 3 secs.
To Power On:
- Make sure Smith is in OFF mode
- Long Press MFB (Skull Button) (refer to A point) for 3 seconds
- While Power On, the LED will flash Blue
- Smith will search and AUTO connect with previous paired phone for 3 seconds
- If previous phone is not available, it will enter STANDBY mode
- Can MANUALLY connect previous phone in STANDBY mode by phone operation
- Please note cannot pair a NEW phone in STANDBY mode
- To pair a NEW phone that has never been paired before, need to start Pairing Mode process.
To Power Off:
- While Smith is in “Power ON” or “STANDBY” mode
- Long Press MFB (Skull Button) (refer to A point) for 3 seconds
- If in STANDBY mode for 30 mins, Smith will automatically Power off
To Answer Phone Call, Play/Pause Music:
- Short Press MFB (Skull Button) (refer to A point)
- Music will resume after hanging up call
Volume Up:
- Short Press Volume Up Button (+)
- Will have audible tone sound when Max volume is reached
- 15 steps of volume control up
Volume Down:
- Short Press Volume Down Button (-)
- Will have audible tone sound (mute) when Min volume is reached
- 15 steps of volume control down
Track Forward:
- Long Press Volume Up Button (+)
Track Backward:
- Long Press Volume Down Button (-)
Tested Line of Sight Range of BT Connection:
- 12 meters
Battery Playback Time:
- 7 to 7.5 hours
Charging:
- Approximately 1.5 Hours
- LED will display solid Red when charging
- When Charge Full, LED will turn off
Low Battery Status Indicator:
- LED will display flashing Red
- Will have audible beeping indication every 30 seconds when battery is low
Your product contains batteries covered by the European Directive 2006/66/EC, which cannot be disposed with normal household waste.
Please inform yourself about the local rules on separate collection of batteries because correct disposal helps to prevent negative consequences for the environmental and human health.
Caution:
Risk of explosion battery is replaced by an incorrect type.
Dispose of used batteries according to the instructions
Warning: Changes or modifications to this unit not expressly approved by the party responsible for compliance could void the user’s authority to operate the equipment.
NOTE: This equipment has been tested and found to comply with the limits for a Class B digital device, pursuant to Part 15 of the FCC Rules. These limits are designed to provide reasonable protection against harmful interference in a residential installation. This equipment generates, uses and can radiate radio frequency energy and, if not installed and used in accordance with the instructions, may cause harmful interference to radio communications.
However, there is no guarantee that interference will not occur in a particular installation. If this equipment does cause harmful interference to radio or television reception, which can be determined by turning the equipment off and on, the user is encouraged to try to correct the interference by one or more of the following measures:
- Reorient or relocate the receiving antenna.
- Increase the separation between the equipment and receiver.
- Connect the equipment into an outlet on a circuit different from that to which the receiver is connected.
- Consult the dealer or an experienced radio/TV technician for help.
This device complies with Part 15 of the FCC Rules. Operation is subject to the following two
conditions :
1) this device may not cause harmful interference, and
(2) this device must accept any interference received, including interference that may cause undesired operation.
This device complies with Industry Canada licence-exempt RSS standard(s). Operation is subject to the following two conditions:
(1) this device may not causeinterference, and
(2) this device must accept any interference, including interference that may cause undesired
operation of the device.
Under Industry Canada regulations, this radio transmitter may only operate using an antenna of a type and maximum (or lesser) gain approved for the transmitter by Industry Canada. To reduce potential radio interference to other users, the antenna type and its gain should be so chosen that the equivalent is tropically radiated power (e.i.r.p.) is not more than that necessary for successful communication.
]]>USER MANUAL
Skullcandy PLYR 2
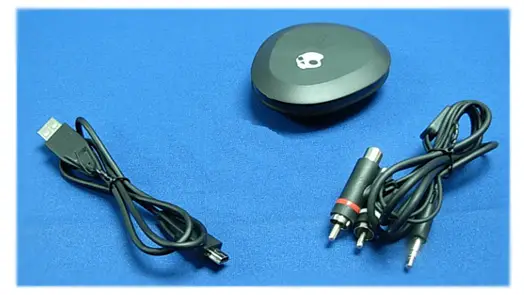
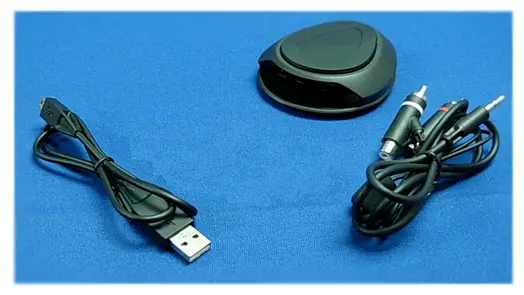
Congratulations on your purchase of the SKULLCANDY Gaming PLYR 2! Whether you’re a casual player or a pro gamer, we’d like to welcome you into the SKULLCANDY family of gaming accessories.
Introduction
The PLYR 2 is the result of countless hours of research and development by the foremost experts in the audio industry, extremely talented industrial designers, and SKULLCANDY’s own internal team of gamers. Plus, it’s tweaked with SKULLCANDY Supreme Sound, so you know your games and other media are going to sound their best.
The PLYR 2 contains a complex electronics package, so check out the rest of this instruction booklet if you have a minute. If you’re too smart for manuals, save it anyway for later reference: it contains important warranty information and a handy troubleshooting guide.
ABOUT THE PLYR 2
The PLYR 2 is a wireless headset system.
Whether you’re gaming or watching movies at home alone or with your friends, on a console or a PC, the PLYR 2 has something to offer.
For Xbox 360 and PlayStation 3 users, the PLYR 2 wirelessly combines voice communication and game surround sound. Connect the wireless transmitter to your console, and you’re good to go.
For Home Theater setups, it’s easy to get crystal-clear wireless sound for your favorite movies and TV shows. Simply run the 3.5mm to RCA connection from your TV, media playback device or stereo receiver to the GMX Stereo Transmitter wireless transmitter, sit back and enjoy. You can adjust master volume and the EQ’s from the headset and keep your neighbors off your back.
For PC and Mac gamers whose sound card has a 3.5mm jack, the GMX Stereo Transmitter can be used tolisten to your favorite games, music, videos and movies. Same deal as above, connect via 3.5mm cableor USB cable and you’re good to go.
Voice communication is supported by running our USB Chat Cable (sold separately) into the USB connection on your computer. The PLYR 2 enables your computer to offload surround sound decoding and will combine multiple audio streams thanks to its built-in USB audio input. By setting your VoIP program to use the PLYR 2 (called SKULLCANDY GMX Stereo Transmitter in your audio profiles) as the USB input/output device, full hardware mixing is enabled between voice communication, game sound, and music.
CONTROLS
With the SKULLCANDY Gaming PLYR 2, it’s easy to control your gaming or home theater audio experience.
The MASTER VOLUME control on the headset raises and lowers volume of all incoming audio feeds together. It will not raise or lower the volume of your outgoing voice communication. (The distance between your microphone and your mouth is the best way to adjust this).
The BALANCE control on the headset enables you to dial in the perfect mix of game-to- voice communication.
Important: It is possible to bring either the GAME or the VOICE volume down to 0% volume, at either end of the BALANCE control dial spectrum.
The EQ3 switch on the Headset switches between the three EQ modes: Bass Mode (best for movies and games with a lot of action), Supreme Mode (neutral tuning for no enhancements and good for music), and Precision Mode (for accurate sound in FPS games).
Mic mute can be achieved by flipping the mic to the up position, and unmuted by bringing it to the down position.
The MASTER POWER buttons on the Headset and GMX Stereo Transmitter do exactly what you might expect, but also are used for pairing by first holding down the GMX Stereo Transmitter button until it blinks white, and then doing the same with the Headset
Important: When the headset is idle (no signal detected for 5 minutes), the Headset will automatically shut down. This feature is to prevent draining the battery when no headset is connected. If you reconnect your headset within a short period of time, the unit will automatically return to the state you had it in before it was disconnected. If you reconnect after this short time, you’ll need to restart it manually.
When your Headset’s batteries are low, the amber power indicator will flash ON and OFF intermittently.
There is also an audio beep/alarm for when your batteries are low, giving you approximately 15% of power left depending on the battery’s chemistry. A SOLID AMBER button indicates adequate power.
PACKAGE CONTENTS
PLYR 2 Headset
Headset with mic, controls, wireless receiver, and embedded rechargeable battery.
GMX Stereo Transmitter
Wireless Transmitter and all connections
GMX Stereo Transmitter USB Power Cable
The PLYR 2 GMX Stereo Transmitter needs juice, so plug one end into the USB port on your console and the other into the input marked PWR on the rear of the GMX Stereo Transmitter.
3.5mm to RCA Cable
The PLYR 2 GMX Stereo Transmitter also needs an audio input, so run this from your gaming console, TV, home theater receiver or computer to the input marked input on the back.
2.5mm-to-2.5mm Xbox Live Controller cable
This cable handles the Xbox Live communication between your controller and the PLYR 2 Headset. Just connect it from the bottom of the controller to the 2.5mm input on the bottom of the Headset with a small icon of a game controller.
USB-to-USB Mini ‘B’ cable
This cable powers the PLYR 2 Headset when you want to conserve battery power or need to recharge your rechargeable battery kit (available separately). Connect it to any USB port on your PC or gaming console and the other end to the PLYR 2 headset.
SETUP
The Package Contents list should have already given you a good idea of how each cable included with the PLYR 2 fits into your system before you get started. You probably already have your PLYR 2 up and running, but just in case here are a few scenarios you may encounter.
The XBox 360 and Sony Playstation 3 come with A/V cable with Analog connections outputs for audio. Just hook up the RCA’s from the 3.5mm to RCA cable that is included to this A/V cable and you’re set. If you discarded this cable, replacements can be bought at many retailers and online retailers.
Plug the USB cable from the GMX to an available USB port on your Xbox 360 or Sony Play station 3 to power the unit.
CONNECTING AND PAIRING THE PLYR 2 GMX Stereo Transmitter AND Headset
The PLYR 2 headset and GMX Stereo Transmitter come “paired” out of the box. If the two somehow become disconnected, you can re-pair using the following instructions:
Step 1 – Make sure the GMX Stereo Transmitter and PLYR 2 headset are powered on.
Step 2 – Press and hold the Power/Pairing buttons on both Transmitter and Headset for 3 seconds until LEDs begin to flash white.
Step 3 – Once pairing is successful, Power/Pairing LEDs will stop flashing and turn solid white.
- CONNECTING A GAMING CONSOLE DIRECTLY TO A PLYR 2
- XBOX (Original) XBOX Slim, PS3, PS3 Slim
- Connect Voice Communication
- Xbox Live
You can easily mix in voice communication from Xbox Live and balance it with your game audio. For Xbox 360 users, connect the 2.5mm-to-2.5mm cable to the bottom of the 360 controller. Then connect the other end of the 2.5mm cable to the CONTROLLER port on the bottom of the PLYR 2 Headset. Ensure that the Xbox 360 Voice Preferences are set to “Play Through Headset”. This can be checked by hitting the Guide button on your Xbox 360 controller, navigate to Settings > Preferences > Voice.
PlayStation Network
Mixing in voice communication on PlayStation 3 is also possible.
In the Playstation 3 Cross Media Bar (XMB), navigate to Settings > Accessory Settings > Audio Device Settings, and make sure that the ‘SKULLCANDY GMX Stereo Transmitter’ is recognized and selected for both the microphone input and output.
You’ll also be able to set your voice level in this menu screen. Set the level so that the bar graph on the top just hits the red when you speak loudly. You can hear how you’ll sound to others if you go back to the Accessory Settings menu and enter the Voice Changer.
Once you are connected, incoming voice from the PS3 can now be balanced with game audio by using the BALANCE control on the PLYR headset.
PC Setup
Computer
Step 1 – Connect the Main (Game) Audio
Use either the USB or 3.5mm cable to connect to your PC. 3.5mm connection will only give audio, and no voice support.
Step 2 – Connect the Microphone
Setting up the PLYR 2 as a USB Input/Output Device
The second step in connecting your new PLYR 2 is to attach the USB Chat Cable to an available USB port on your PC. This will act as a conduit for your voice communications channel. Upon connection, your computer will indicate that the ‘SKULLCANDY GMX Stereo Transmitter’ has been found, installed and ready for use. The PLYR 2 is driverless and installation is automatic.
Using Windows XP
After installation, right click on the Volume icon in your system tray and open the ‘Adjust Audio
Properties’ box on your desktop. Navigate to the Voice tab, and confirm that both Voice Playback and Voice Recording are set to the ‘SKULLCANDY GMX Stereo Transmitter’. If not, change this using the drop down menu on each of these categories.
Next, click on the Playback tab, and confirm that your ‘Default Device’ is either set to your soundcard or onboard audio solution for Sound Play- back. This will enable the Skullcandy GMX Stereo Transmitter to be the default device for voice in/ out and your soundcard for game audio and give you full hardware mixing control via the BALANCE dial.
Using Windows Vista/Windows 7
Upon installation, right-click on the Volume icon in your system tray and open the Audio Devices (for Vista) or Playback Devices (for Win 7) sub- menu.
Under the Playback Tab, set your soundcard or onboard audio solution as the default playback device by right-clicking on the icon and selecting ‘Use this as my Default Playback Device’ in the pop-up menu.
If there is a green checkmark next to the currently selected default device, you will not be able to select it, since it is already selected.
Important: Windows Vista will set the SKULLCANDY GMX Stereo Transmitter as the default playback device when the PLYR 2 is first installed, which will combine voice and game sound at your PC. Follow the above instructions to reset your default playback device to a soundcard or onboard audio output. Alternatively, you may leave the default playback device set to the SKULLCANDY GMX Stereo Transmitter if you DON’T want to connect an extra audio cable and DON’T want to use the mixing feature of the MixAmp™. A single USB cable is all you’ll need for this type of configuration. Simply mix game and voice volumes using the levels in the software for your audio and voice programs.
Next, click on the Recording Tab and confirm that the SKULLCANDY GMX Stereo Transmitter is set as the default device (should display a green check mark) — this should be automatic upon installation. If not, right click on the microphone icon that is associated with the SKULLCANDY GMX Stereo Transmitter and select ‘Set as Default Device’ in the pop-up menu. You can also set your microphone recording level through this menu. Be sure to click ‘Apply’ to change the settings before you exit.
The SKULLCANDY PLYR 2 will also work with many other operating systems including Mac OSX and Unix/Linux variants.
Visit us at: www.SKULLCANDYgaming.com/support and navigate to the knowledgebase for more information.
Troubleshooting
Game audio and voice communication is heard from the PC, but the BALANCE control doesn’t seem to have any effect.
- Remember that in order to mix between two different signals, you’ll need to have TWO separate audio connections connected to the Mix- Amp™. If only the USB cable is connected, attach an audio cable from your PC’s soundcard or motherboard audio output into the 3.5mm connector. Follow the setup instructions contained in this guide (Connecting the PLYR 2 to a PC at Home).
- If two cables are already connected, make sure that the Voice Recording/Playback audio device is set to the SKULLCANDY GMX Stereo Transmitter, and the Audio default device is set to your soundcard or motherboard audio hardware. Check the aforementioned setup section for specific information about your operating system.
If the mic output seems to be spotty, full of static, or accompanied by a background hum or other interference on Xbox Live when you talk, check your connections to make sure they are in snugly. Also…
- There are a few possibilities as to why this may be occurring. The most likely culprit is the 2.5mm cable connected to your controller. Please make sure the connectors are wiped clean of any dust or residue many of these connectors might have residue left on them from the molding process and this will create a poor connection.
If you are playing on Xbox Live and your controller misfires and twitches randomly, check…
- This glitch isn’t due to the PLYR 2 itself, but an anomaly related to the wired controller for the Xbox 360 (this can occur using the standard Xbox Communicator as well). An overvoltage occurs when the mic is blown into or gets a *very* loud signal from another player on Xbox Live (such as the sounds that occur during a rhinoceros attack), that may cause the player aim to adjust slightly without input.Sometimes guns fire and grenades are thrown on their own – usually at inopportune moments, causing teammates to shun and ridicule you.
- There are a couple of workarounds to this. The first is to switch to a wireless controller, or a wireless controller with a Play and Charge cable attached if you wish. The voice comm is now wireless (even with the Play and Charge kit) alleviating the problem.
- If you’d like to continue to use a wired controller, you’ll have to lower your incoming voice level — this prevents overvoltage from reaching the controller through the Xbox 360 software layer. To do this, hit the Guide Button > Personal Settings > Voice, and lower the incoming voice “Volume” from 10 (default) down to at least 4. At level 4, you’ll still get a few anomalies with the loudest incoming sounds, but it’s really very rare (see rhinoceros attack, above). At level 3, the problems go away 100%.
- Recheck this setting every once in a while – there seems to be some kind of bug where it’ll get reset to the default 10 every so often.
Fortunately for users of the PLYR 2, you can simply dial back more voice by using the Balance control on the headset and you’ll probably need to raise the overall Volume to get back to where you were at before.
If the PLYR 2 turns on briefly when switched on, but then turns off again, check…
Battery level, according to the section earlier in this manual
If game sound is very low, check…
- Is the BALANCE control all the way to the VOICE side? If so, turn it back to the middle position and adjust from there.
If voice communication cannot be heard from Xbox Live, check…
- Is the BALANCE control shifted all the way to GAME? Dial it back to the middle position, and fine-tune it from there.
- Is the Xbox Controller connected with the 2.5mm-to-2.5mm cable? Make sure that it is properly (and fully) inserted at both ends.
Support
If you have an issue and you need further help to resolve, please contact us at http://www.SKULLCANDYgaming.com/support/
All product purchased directly from SKULLCANDY Gaming comes with an automatic 1 year warranty on defective parts or faulty workmanship. No registration is required. That being said, if you register your product with us, we will be able to provide you with even better customer service
*and* we’ll cover you shipping in both directions if a repair is needed for domestic customers.
Furthermore, if you purchased one of our products from a retailer other than SKULLCANDY Gaming, you’ll need to register it with us otherwise we’ll have no idea who you are when you call.
Register SKULLCANDY products here: http://www.SKULLCANDYgaming.com/register
What is covered
All defective parts or faulty workmanship.
What is not covered
The warranty does not cover damage caused by accident, misuse, abuse, neglect, lightning, sharks, power surges, other acts of nature/god(s), unauthorized product modification or repairs, or failure to follow the instructions outlined in this Setup Guide.
What we will do
We will repair or replace any defective parts within a reasonable amount of time and free of charge at any time within the warranty period. After service, we will ship your product back to you at our expense.
You will be responsible for shipping or transportation charges to us. We recommend that you keep the original shipping materials, as it is important that the product will not be damaged during shipping. SKULLCANDY Gaming cannot be responsible for damages incurred during shipping due to poor packing, but should this occur we hope that we can still be friends.
How to obtain SKULLCANDY Gaming warranty service
If you have any questions about your warranty coverage, need help, or you think you may need service, email the SKULLCANDY Gaming Authorized Service Center at: [email protected]. We will do everything we can to answer your questions and resolve any issues within 24 hours.
Exclusive Remedy
This Limited Warranty is fully transferable provided that the current owner furnishes the original proof of purchase. THE MAXIMUM LIABILITY OF SKULLCANDY GAMING SHALL NOT EXCEED THE ACTUAL PURCHASE PRICE PAID BY YOU FOR THE PRODUCT. IN NO EVENT SHALL SKULLCANDY GAMING BE LIABLE FOR SPECIAL, INCIDENTAL, CONSEQUENTIAL OR INDIRECT DAMAGES.
Federal Communications Commission (FCC) Statement
You are cautioned that changes or modifications not expressly approved by the part responsible for compliance could void the user’s authority to operate the equipment.
This equipment has been tested and found to comply with the limits for a Class B digital device, pursuant to part 15 of the FCC rules. These limits are designed to provide reasonable protection against harmful interference in a residential installation. This equipment generates, uses and can radiate radio frequency energy and, if not installed and used in accordance with the instructions, may cause harmful interference to radio communications. However, there is no guarantee that interference will not occur in a particular installation. If this equipment does cause harmful interference to radio or television reception, which can be determined by turning the equipment off and on, the user is encouraged to try to correct the interference by one or more of the following measures:
- Reorient or relocate the receiving antenna.
- Increase the separation between the equipment and receiver.
- Connect the equipment into an outlet on a circuit different from that to which the receiver is connected.
- Consult the dealer or an experienced radio/TV technician for help.
This device complies with Part 15 of the FCC Rules. Operation is subject to the following two conditions:
1) This device may not cause harmful interference, and
2) This device must accept any interference received, including interference that may cause undesired operation of the device.
FCC RF Radiation Exposure Statement:
This equipment complies with FCC radiation exposure limits set forth for an uncontrolled environment. End users must follow the specific operating instructions for satisfying RF exposure compliance. This transmitter must not be co-located or operating in conjunction with any other antenna or transmitter.
FCC RF Exposure requirements:
This device and its antenna(s) must not be co-located or operation in conjunction with any other
antenna or transmitter.
NOTE: THE MANUFACTURER IS NOT RESPONSIBLE FOR ANY RADIO OR TV INTERFERENCE CAUSED BY UNAUTHORIZED MODIFICATIONS TO THIS EQUIPMENT. SUCH ODIFICATIONS COULD VOID THE USER’S AUTHORITY TO OPERATE THE EQUIPMENT.
Annex
Suggested text for the notice indicating compliance with this Standard: This Class [*] digital apparatus complies with Canadian ICES-003.
RF Exposure Warning:
This equipment complies with FCC radiation exposure limits set forth for an uncontrolled environment. This equipment should be installed and operated with minimum distance 20cm between the radiator & your body. This transmitter must not be co-located or operating in conjunction with any other antenna or transmitter.
]]>USER MANUAL
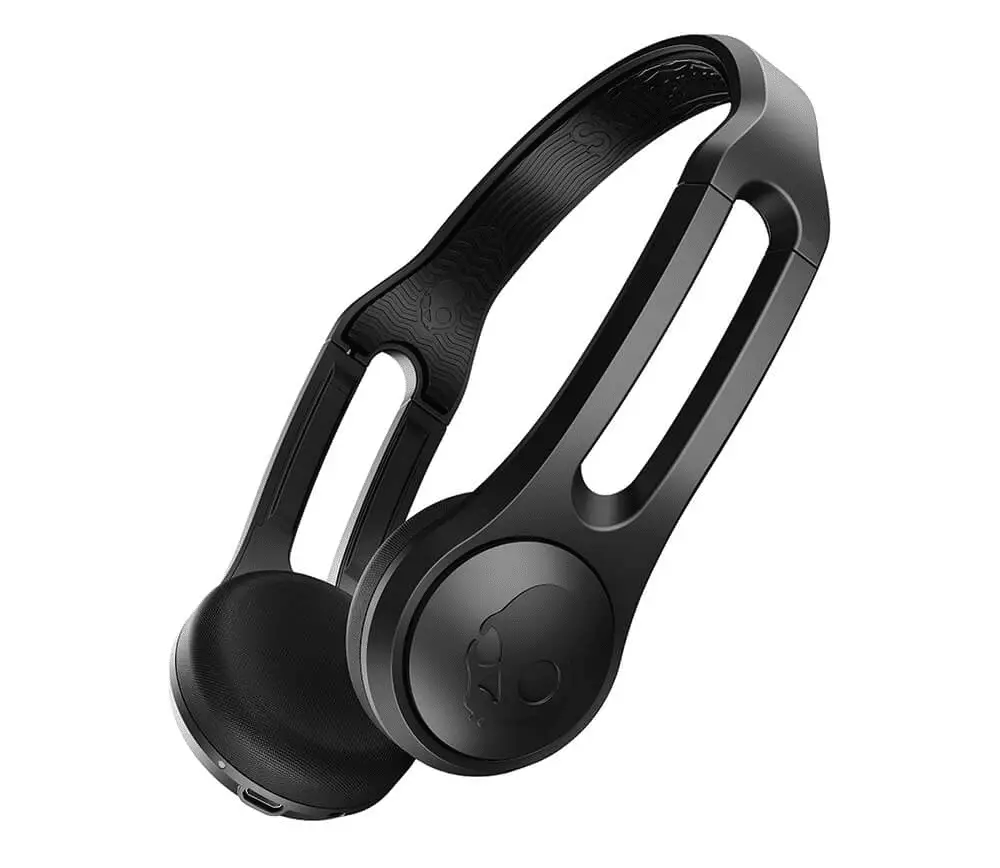
Skullcandy Icon
Pairing Mode
Pair New Device *off Mode
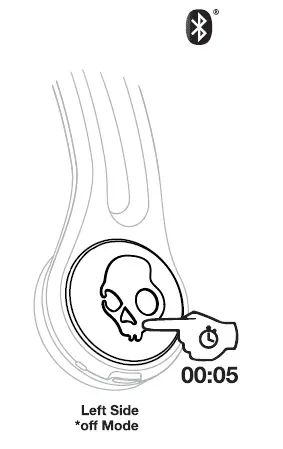
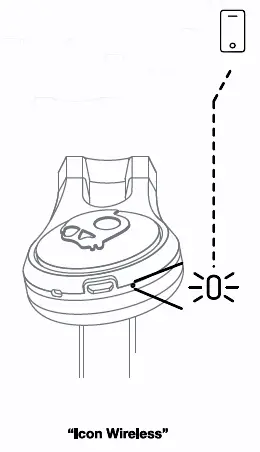
Pair New Device
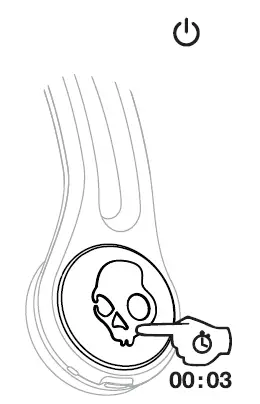
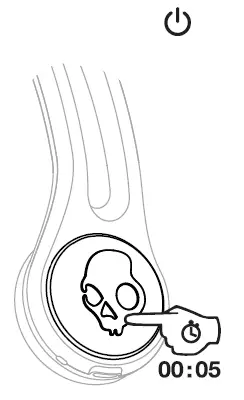
Power-On
Power- Off
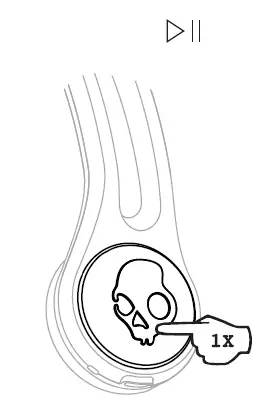
Play/Pause
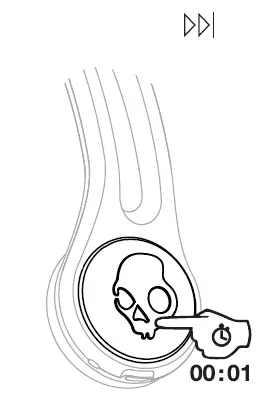
Track Forward
Answer/End
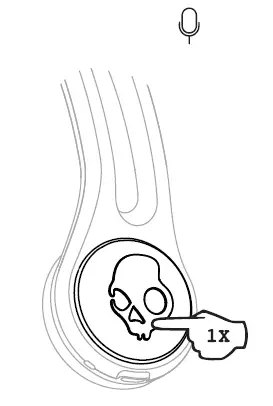
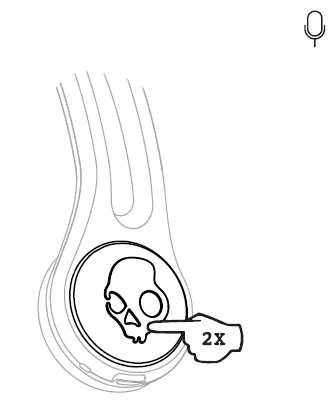
Activate Voice Assistant
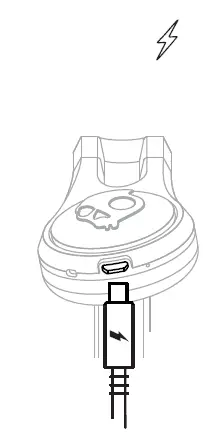
Charge
Questions Visit: www.skullcandy.com
The FCC Compliance Statement
This device complies with part 15 of the FCC Rules. Operation is subject to the following two conditions: (1) This device may not cause harmful interference, and (2) this device must accept any interference received, including interference that may cause undesired operation. This equipment has been tested and found to comply with the limits for a Class B digital device, pursuant to part 15 of the FCC Rules. These limits are designed to provide reasonable protection against harmful interference in a residential installation. This equipment generates, uses and can radiate radio frequency energy and, if not installed and used in accordance with the instructions, may cause harmful interference to radio communications. However, there is no guarantee that interference will not occur in a particular installation. If this equipment does cause harmful interference to radio or television reception, which can be determined by turning the equipment off and on, the user is encouraged to try to correct the interference by one or more of the following measures:
- Reorient or relocate the receiving antenna.
- Increase the separation between the equipment and receiver.
- Connect the equipment into an outlet on a circuit different from that to which the receiver is connected.
- Consult the dealer or an experienced radio/TV technician for help.
The user is cautioned that any changes or modifications not expressly approved by the party responsible for compliance could void the user’s authority to operate the equipment.
IC Compliance Statement
This device contains license-exempt transmitter(receiver'(s) that comply with Innovation, Science and Economic Development Canada’s licensee-exempt RSS(s). Operation is subject to the following two conditions: (1)This device may not cause interference.(2)This device must accept any interference, including interference that may cause undesired operation of the device.
This equipment complies with IC RSS-102 radiation exposure limits set forth for an uncontrolled environment. This transmitter must not be co-located or operating in conjunction with any other antenna or transmitter.
Wireless Earphone MODEL: S51BW
Skullcandy,f>,and other marks are registered trademarks of Skullcandy, Inc. All rights reserved.
Skullcandy,f>,and other marks are registered trademarks of Skullcandy, Inc. All rights reserved.
Hardware Version: 20180509 V2.1
Software Version: lcon_Wireless_8635_ 180608v29
Bluetooth function: 2402MHz – 2480MHz@ 4dBm
CONTAINS Li-ion BATTERY.
BATTERY MUST BE RECYCLED
OR DISPOSED OF PROPERLY.
Americas
Skullcandy, Inc.
6301 N Landmark Dr.
Park City, UT 84098, LI.SA
Skullcandy.corn
USER MANUAL
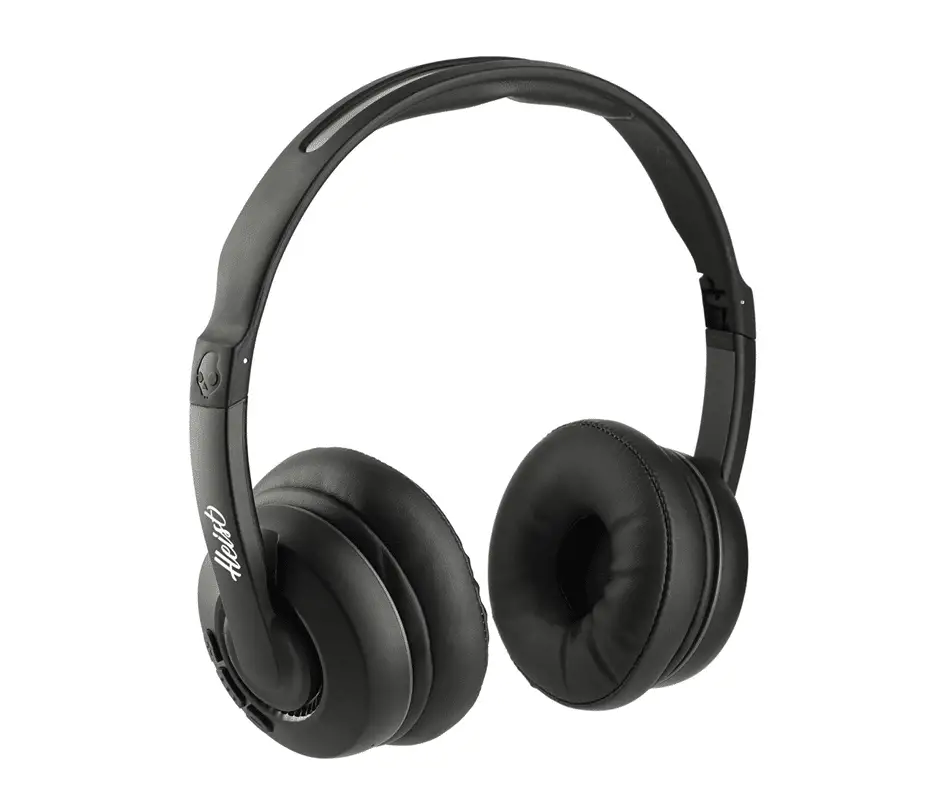
Skullcandy Cassette
Pairing Mode
“Off Mode
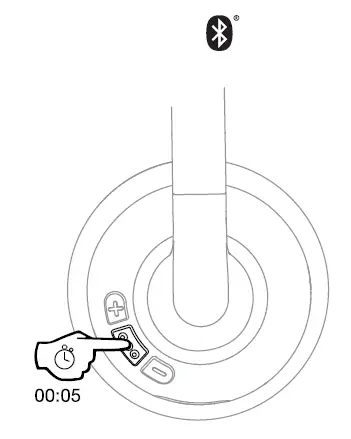
Pair New Device
“Cesaette~
Power-On
Power – Off
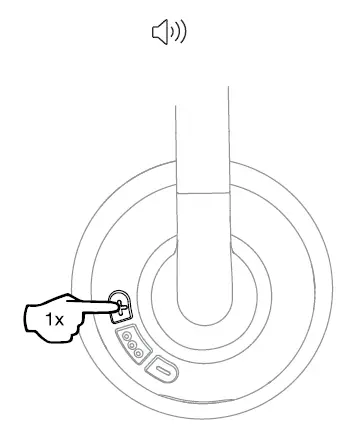
Play/Pause
Volume Up
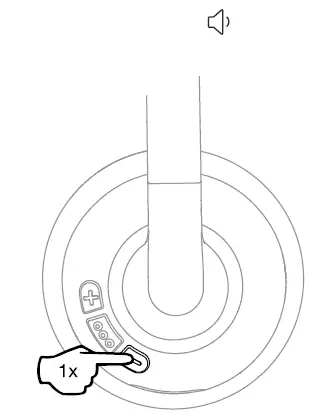
Volume Down
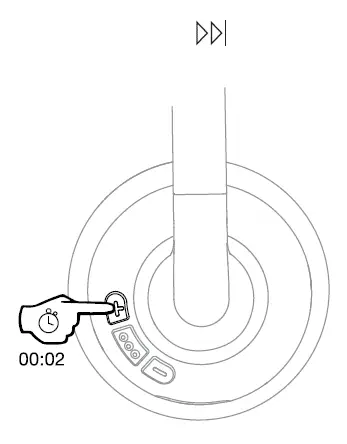
Track Forward
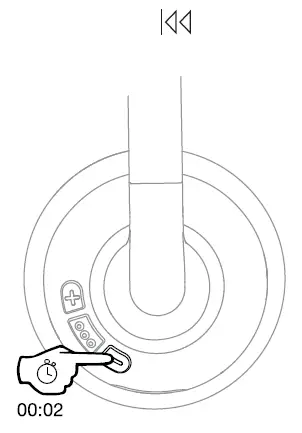
Track Back
Answer/End
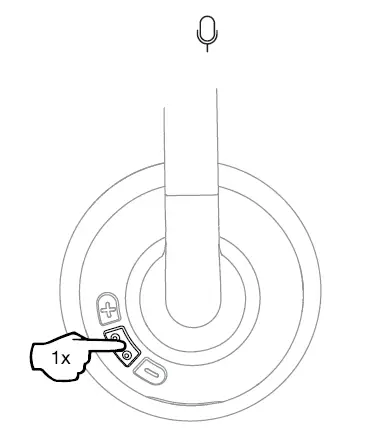
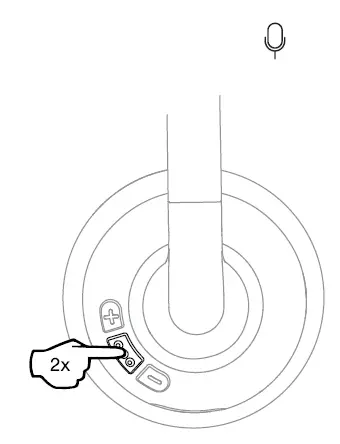
Activate Assistant
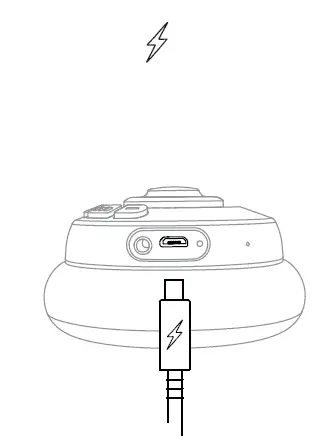
Charge
Questions Visit: www.skullcandy.com
For best quality avoid strong product In conditions above 100 degrees.
2 Year Global Warranty
United States of America and Canada Product Purchases Only Skullcandy products are backed by a 2-year warranty. If it doesn’t work the way we promised, we’ll make it right. For Guarantee Claims, Questions and Terms & Conditions visit skullcandy warranty or call us at 1-888-MYSKULL.
Product Purchases Outside The United States of America and Canada
Skullcandy products are backed by a 2-year warranty. If it doesn’t work the way we promised, we’ll make it right. For Guarantee Claims, Questions, and Terms & Conditions visit www.skullcandy.com/warranty or email us at [email protected]
Warning: To avoid hearing damage, do not listen at high volume levels.
Many electrical items can be repaired or recycled, saving natural resources and the environment. If you do not recycle, electrical equipment will end up in landfill where hazardous substances will leak out and cause soil and water contamination — harming wildlife and also human health. To remind you that old electrical equipment can be recycled, it is now marked with a crossed out wheeled bin symbol. Please do not throw any electrical equipment (including those marked with the crossed out wheeled bin symbol) in your bin.
For Wireless Product
EU/EC DECLARATION OF CONFORMITY
Hereby, Skullcandy Internation GmbH declares that the radio equipment type [Model: S5CSVV] is in compliance with Directive 2014/53/EU. The full text of the EU declaration of conformity is available at the following internet address: skullcandy.eu/product-documents
Many Local Authorities will have containers that collect batteries for recycling. Public buildings and your workplace may also have containers. If you do not recycle, batteries will end up in landfill where hazardous substances will leak out and cause soil and water contamination — harming wildlife and also human health. Batteries containing hazardous materials such as mercury (Hg), cadmium (Cd) or lead (Pb) are marked with their chemical symbols as well. This symbol means that according to local laws and regulations the battery shall be disposed of separately from household waste. When this product reaches its end of life, take it to a collection point designated by local authorities or return to purchase location for recycling or disposal.
LIMITED WARRANTY- FOR SALES IN AUSTRALIA:
Against defects for 2 year from the date of purchase. Product will be replaced or refunded at our option. At your cost, deliver product and Proof of Purchase to Skullcandy at 63 Centennial Circuit Byron Bay, 2481 NSW, Australia. Ph 02 6639 5555. Further details at www.skullcandy.com.au or contact [email protected]. Your benefits under this Skullcandy warranty are in addition to your other rights and remedies under a law in relation to this product. Our goods come with guarantees that cannot be excluded under the Australian Consumer Law. You are entitled to a replacement or refund for a major failure and for compensation for any other reasonably foreseeable loss or damage. You are also entitled to have the goods repaired or replaced if the goods fail to be of acceptable quality and the failure does not amount to a major failure.
IC Compliance statement:
This device contains license-exempt transmitter(s)/receiver(s) That comply with Innovation, Science and Economic Development Canada’s license-exempt RSS(s). Operation is subject: to the following two conditions: (1)This device may not cause interference. (2)This device must accept any interference, including interference that may causes undesired operation of the device.
IC SAR Statement
This equipment complies with ISED radiation exposure limits set forth for an uncontrolled environment. End user must follow the specific operating Instructions for satisfying RF exposure compliance. This transmitter must not De co-located or operating In conjunction with any other antenna or transmitter. The portable device la designed to meat Illa requirements for exposure to radio waves established by the ISED. These requirements set a SAR limit of 1.6 W/kg averaged over one gram of tissue. The highest SAR value reported under this standard during product certification for use when properly worn on the body.
EN CONTAINS Li-ion BATTERY
WARNING: Choking hazard – small parts. Not for Children.
Specifications
Software Version: V5.0
Hardware Version: V1.6
Bluetooth Function: 2402-2480 MHz@ <8dBm
© 2019 Skulcandy, Inc.
Skullcandy.com/patant-information
MODEL: SSCSW
FCC ID: Y22-$5CSW
IC: 10486A-S5CSW
USER GUIDE
Indy Evo Series
Download the Skullcandy App
Download the Skullcandy App
Auto Pairing Mode

Pairing Mode
Mode Coupling

Power – on

Power – off

Charge Earbuds

Charge Case

Pairing Mode

Pair New Device

Power – on
on/off
Power – on
on/off

Play Purse
Track Froward

TrackBack
Volume Up Volume +

Volume Dowen
Volume-

Answered


Activate Voice Assistant AthateVoiceAssistant Left Side or Right Side
Actver assistant vocal
3 EQ Modes
Music, Movies, and Podcast
 Change equator modes

Ambient mode
Find With Tile’ Both Earbuds *Tile App Required
Par Totem

Associer
Clear Paired Device Both Earbuds
*While On *Bluetooth Disconnected

Reset Device
Re-Sync Earbuds Both Earbuds
*While On *Bluetooth Disconnected

Re-sync eartuis file
Questions Visit: www.skullcandy.com
Americas
Skullcandy, Inc.
6301 N Landmark Dr. Park City,
UT 84098 U.S.A. Skullcandy.com
Speaker Driver: 6mm, Impedance: 16 Ohms, THD <3%©1KHZ, Voltage Regulation: 5V, Bluetoothe 5.2, Frequency Band: 2402MHz- 2480MHz, Maximum Power: <gdem, Weight: 57g.
Skullcandy and other marks are registered trademarks of Skullcandy, Inc. All rights
Maximum operating temperature 45°C. . ,
Risk of explosion if the battery is replaced by incorrect type disposal of a battery into fire or a hot oven, or mechanically crushing or cutting of a battery, that can result in an explosion; leaving a battery in an extremely high temperature surrounding environment that can result in an explosion or the leakage of flammable liquid or gas; a battery subjected to the extremely low air pressure that may result in an explosion or the leakage of flammable liquid or gas. explosion or the leakage of flammable liquid or gas.
FCC Compliance Statement This device complies with Part 15 of the FCC Rules. Operation is subject to the following two conditions: (1) this device may not cause harmful interference, and (2) this device must accept any interference received, including interference that may cause undesired operation.
Changes or modifications not expressly approved by the party responsible for compliance could void the user’s authority to operate the equipment.
This equipment has been tested and found to comply with the limits for a Class B digital device, pursuant to Part 15 of the FCC Rules. These limits are designed to provide reasonable protection against harmful interference in a residential installation. This equipment generates, uses and can radiate radio frequency energy and, if not installed and used in accordance with the instructions, may cause harmful interference to radio communications. However, there is no guarantee that interference will not occur in a particular installation. If this equipment does cause harmful interference to radio or television reception, which can be determined by turning the equipment off and on, the user is encouraged to try to correct the interference by one or more of the following measures:– Reorient or relocate the receiving antenna. — Increase the separation between the equipment and receiver. — Connect the equipment into an outlet on a circuit different from that to which the receiver is connected. — Consult the dealer or an experienced radio/TV technician for help.
ISED Compliance Statement This device contains license-exempt transmitter(s)/receiver(s) that comply with Innovation, Science, and Economic Development Canada’s license-exempt RSS(s). Operation is subject to the following two conditions: (1 )This device may not cause interference.(2)This device must accept any interference, including interference that may cause undesired operation of the device.
ISED SAR Compliance Statement This equipment complies with ISED radiation exposure limits set forth for an uncontrolled environment. End-user must follow the specific operating instructions for satisfying RF exposure compliance. This transmitter must not be co-located or operating in conjunction with any other antenna or transmitter. The portable device is designed to meet the requirements for exposure to radio waves established by the ISED. These requirements set a SAR limit of 1.6 W/kg averaged over one gram of tissue. The highest SAR value is reported under this standard during product certification for use when properly worn on the head.
 Warning: To avoid hearing damage, do not listen at high volume level.
1 YEAR GLOBAL WARRANTY
1 Year Global Limited Warranty
The United States of America and Canada Product Purchases Only Sial! candy products are backed by a 1-year limited warranty. If it doesn’t work the way we promised, we’ll make it right. For Guarantee Claims. Questions and Terms & Conditions visit www.Skullcandy.00m/warranty or call us at 1-888-MY SKULL
Product Purchases Outside The United States of America and Canada Skullcandy products are backed by a 1-year limited warranty. If it doesn’t work the way we Promised, we’ll make it right. For Guarantee Cairns, Questions, and Tarns & Conditions visit www.Skullcandy.core warranty or email us at help-eue1Aullcanc/y.com
SIMPLIFIED EU DECLARATION OF CONFORMITY Hereby, Skullcandy Internation GmbH declares that the radio equipment type [Model: S2IVVV] is in compliance with Directive 2014/53/EU.The full text of the EU declaration of conformity is available at the following internet address: Skullcandy.eu/product-documents ![]()
Contains a Li-ion battery. The battery must be EN Made in China. recycled or disposed of properly. .
Hardware Version: (Earbuds) V03 (Charge Case) V02 Software Version: (Earbuds) FW132 (Charge Case) FW V006
Indy Evo IndyXT Evo
MODEL : S1IVW S1IVWL FCC ID : Y22-S1IVW IC : 10486A-S1IVW
 Indy ANC True Wireless In-Ear Earbuds
User Manual

Noise Cancelling True Wireless Suppression du Bruit Sans Fil Veritable
 Active Noise Cancellation Blocks Out Background Noise
![]() Personal Sound by AudiodoTM
Personal Sound by AudiodoTM
![]() Up to 32 Hours Total Battery
Up to 32 Hours Total Battery
![]() Wireless Charging Case
Wireless Charging Case
 Compatible with Skullcandy App
FEATURES
4-Mic Digital Active Noise Cancellation
Personal Sound via Skullcandy App
12mm Drivers
Built-In Tile
Customizable EQ Modes via Skullcandy App
Ambient Listening Mode
Lag-Free Connection
Call, Track, and Volume Control via Touch
2-Mic Noise Reduction for Calls
Activate Assistant
CONTENTS

- True Wireless Earbuds
- Wireless Charging Case
- Stability Ear Gels (S, L)
- Ear Gels (S. M. L)
- USB-C Charging Cable
- 2-Year Warranty and User Guide
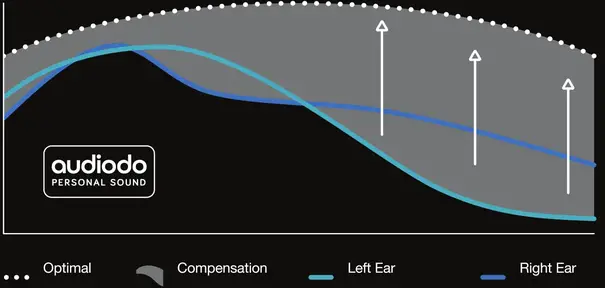
FEEL YOUR AUDIO. TUNED JUST FOR YOU.
Everyone’s hearing is different. But most headphones are all the same — they don’t adjust to your unique hearing. That’s why Skullcandy has partnered with Audiodo- to fully personalize your audio experience.
Audio technology analyzes the hearing in your left and right ear, then automatically adjusts the audio to optimal levels for your specific hearing. By taking a quick, 3-minute test on the Skullcandy App, you can start hearing what you’ve been missing. 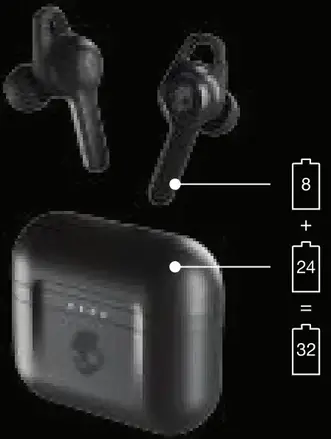
DO THIS FIRST TO PAIR:
- Remove earbuds from the package, place them in the charging case, and make sure both earbud LEDs turn red.
- Remove earbuds from the charging case.
This will automatically put them in pairing mode.
(Note: only the left bud will flash red and blue.)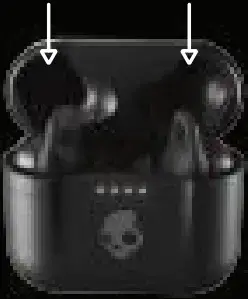
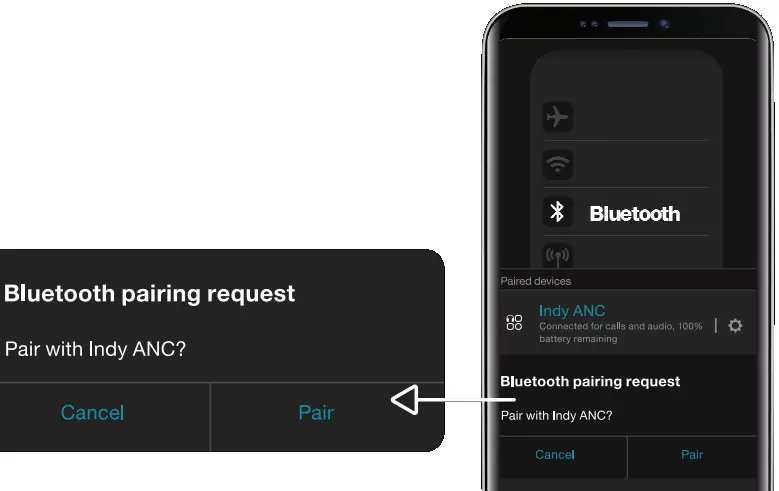
- Open your list of available Bluetooth devices and select ‘Indy ANC.” Earbud LEDs will turn blue when connected. Be sure to select “Pair” or ”08″ when you see the Bluetooth pairing request.

EASY CONTROLS:
 |
|
| Auto On – Remove buds from the case Power On – Touch and hold 4 seconds |
Auto On – Remove buds from the case Power On –Touch and hold 4 seconds |
| Auto-Off – Put buds in case Power Off – Touch and hold 6 seconds |
Auto-Off – Put buds in case Power Off – Touch and hold 6 seconds |
| TrackBack – Touch and hold 2 seconds |
TrackBack – Touch and hold 2 seconds |
| Tap once |
Tap once |
| Tap twice |
Tap twice |
| Tap twice |
Tap twice |
| Tap 3 limas |
Tap 3 limas |
| E0 Mode – Tap twice and hold 2 seconds |
EQ Mode – Tap twice and hold 2 seconds |
| Ambient Mode –Tap once and hold 2 seconds |
Ambient Mode –Tap once and hold 2 seconds |
| Clear/Reset – From off, touch and hold both buds for 10 seconds |
|
For additional features, download the Skullcandy app.
 |
 |
PAIRING HELP:
If you ever have an issue pairing your earbuds, follow these steps:
- Unpair the buds from your phone or device.
- Touch and hold the main button on each bud for 6 seconds to manually turn them both off.
- Touch and hold the main button on each bud for 10 seconds to completely reset them (this will power them on and off again).
- Place buds back in the case until both LEDs show red, and then remove them from the case. Both buds will automatically power on and the LEDs will flash blue while they sync to each other.
- A tone will indicate when the buds have synced. The LED on the left bud will flash blue and red and a voice will say “pairing” when the buds start connecting to your phone or device.
- Look for Indy ANC in your list of available Bluetooth devices. Make sure it only appears once and select It.
- Select all “Pair or “OK’ prompts that will pop up on your screen.
- Once successfully paired, a voice will say “connected” and you’ll see Indy ANC twice on your available or paired devices list.

Questions?
Skullcandy.com/support/IndyANC
Safety information inside.
Made in China.
Skullcandy and other marks are registered trademarks of Skullcandy, Inc.
All rights reserved.
The Bluetooth word mark and logos are registered trademarks owned by Bluetooth SIG, Inc, and any use of such marks by Skullcand, Inc. is under license. Contains a Li-ion battery. The battery must be recycled or disposed of properly.
This device complies with part 15 of the FCC Rules. Operation is subject to the following two conditions:
- This device may not cause harmful interference, and
- This device must accept any interference received, including interference that may cause undesired operation.
“Android” is a trademark of Google inc. “Apple” is a trademark of Apple inc.
MODEL: S2IYW S2IYWL
FCC ID: Y22-S2IYW
IC: 10486A-S2IYW
 © 2020 Skullcandy, Inc.
Skullcandy.com/patent-information 


Specifications
- DIMENSIONS: 7 x 6.88 x 3.54 inches,
- WEIGHT: 9.7 ounces,
- CONNECTION TYPE: Bluetooth/Wired,
- IMPEDANCE: 33 Ohms,
- THD: <3.0%,
- FREQUENCY RESPONSE: 20Hz-20KHz,
- MANUFACTURER: Skullcandy
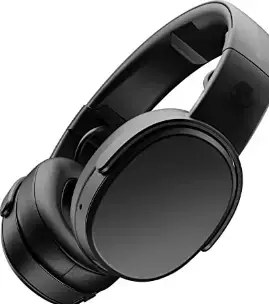
Skullcandy is famous for its budget-friendly devices. It certainly isn’t known for its luxurious products. They are made of a bit cheaper material but they are sturdy and strong. At their value, they deliver amazing sound qualities while delivering a long battery life with a wireless connection. In short, they feature Bluetooth connectivity, with adjustable sensory bass, battery life of around 40 hours, a built-in microphone, rapid charging, and controls that allow you to adjust volume and control calls and tracks.
DESIGN
The Skullcandy Crusher Wireless Over-Ear Headphones are better looking than their wired version. They are adjustable however; some users have suggested that are a little bit tighter for their head and become uncomfortable after a while. They are slightly breathable as well.
SOUND QUALITY
They have adjustable bass with haptic. They provide extremely great quality bass. They come with a bass slider which allows you to adjust the bass, which you will figure out after the first try of trial and error. However, these headphones aren’t noise-canceling headphones, however to their design, they offer some levels of noise isolation.
BATTERY LIFE
The Skullcandy Crusher Wireless headphones have a moderately good battery life with the ability to fast charge. They feature a continuous playtime of 36 hours. They take about 2.4 hours to be completely charged.
What’s in the Box?
- Skullcandy Crusher Wireless Headphones x 1
- Carrying pouch x 1
- Audio cable x 1
- USB cable x 1
- Manuals x 1
Skullcandy Crusher Wireless Headphones Controls
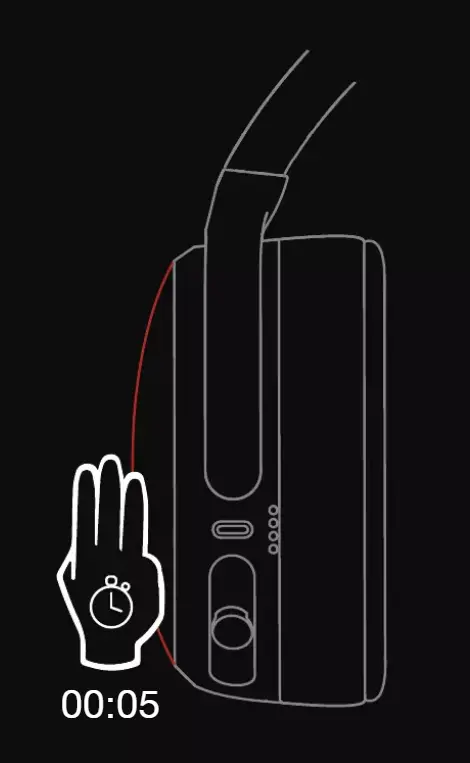
- To turn ON/OFF the headphones: Press the multifunction button for 3 seconds.
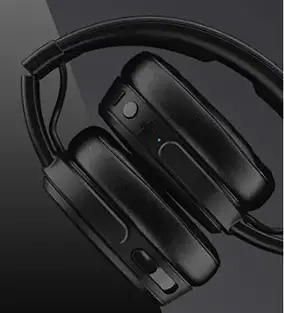
- To enter pairing mode: When the headphones are on, press and hold the 5 seconds.
When the new device will be paired, “Crush ANC”
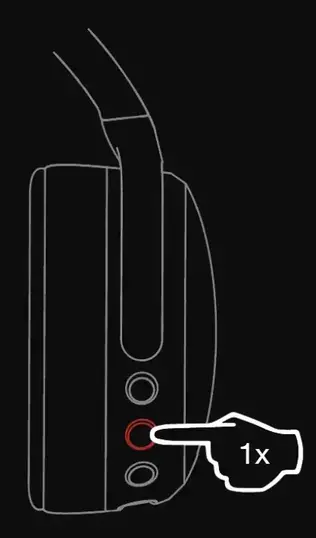
- To Play/Pause: Press the middle button on the left earcup once.
- To Increase Volume: Press the button once.
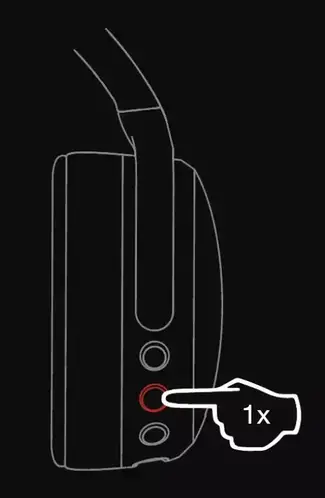
- To Decrease Volume: Press the button once.
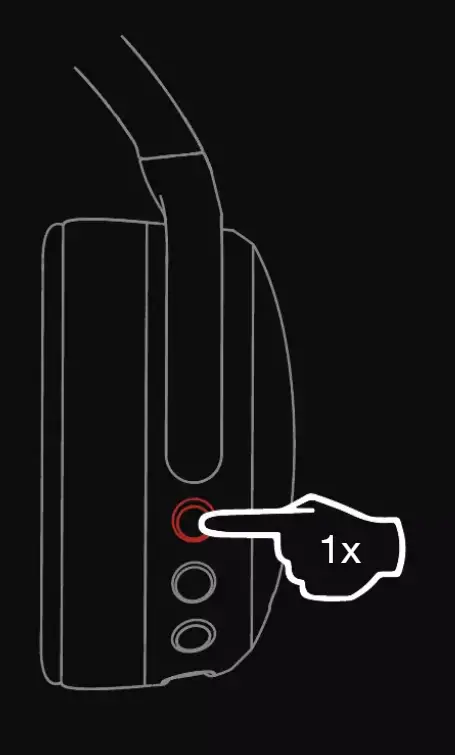
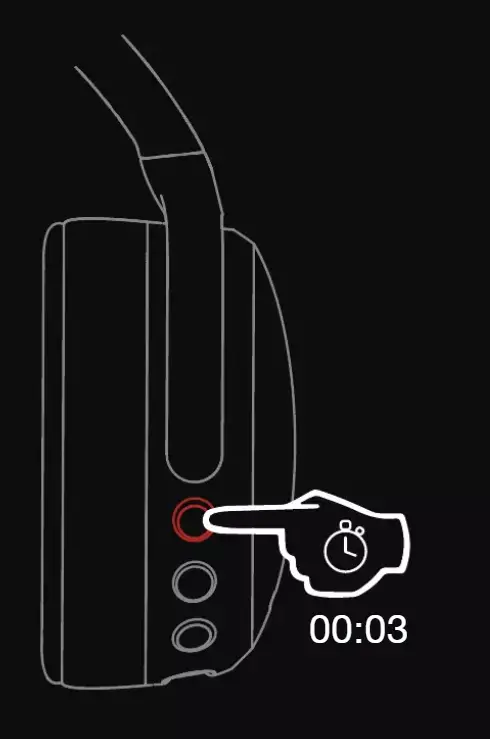
- To Forward the Track: Press and hold the button for 3 seconds.
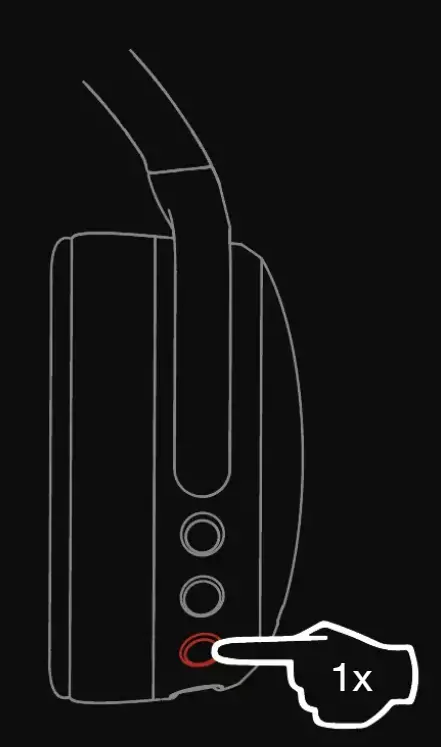
- To Go to Previous Back: Press and hold the lower button for 3 seconds.
- To Answer/End Calls: Press Once the middle button while the call is coming.
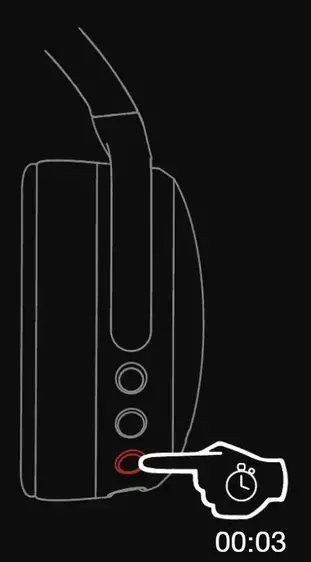
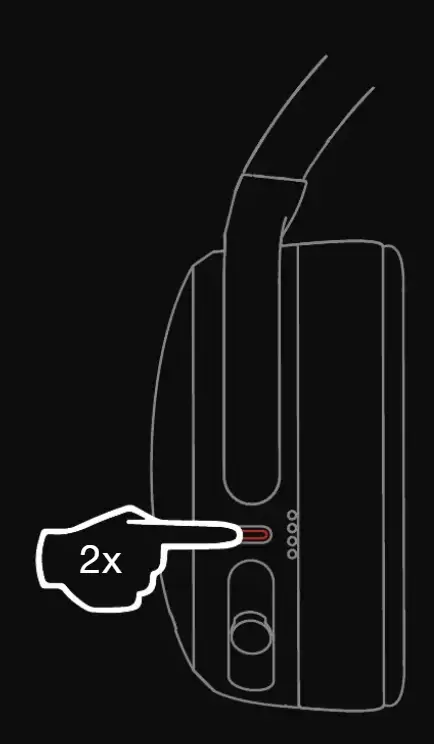
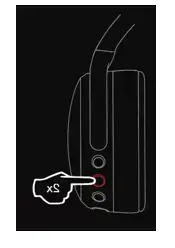
- To Activate Voice Assistant: Press twice the middle button.
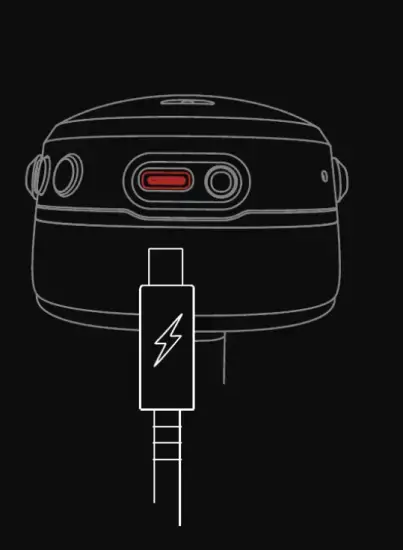
How to Charge the Headphones
Use the provided charging cable to charge headphones
How to Check the Battery Life
Press the button on the right earcup once to check the battery status. The voice prompt will announce the battery level.
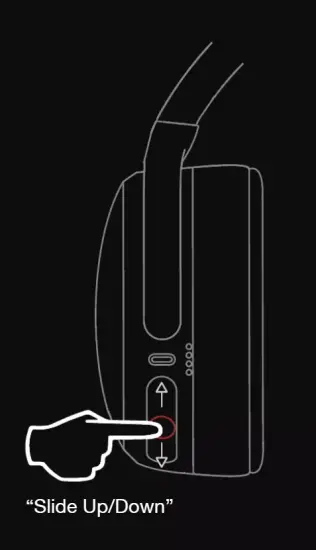
How to Adjust Haptic Bass
Slide the slider up or down the to adjust the haptic bass.
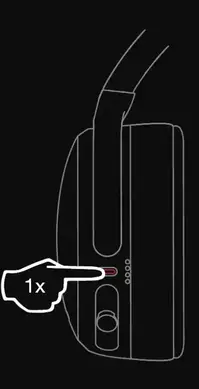
How to turn on/off the ANC Feature
Press twice the button on the right earcup to turn on the ANC. To turn it off again press the same button twice.
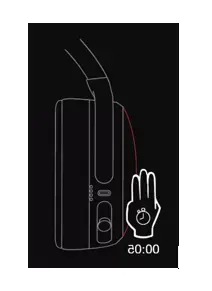
How to turn on/off the Ambient Mode
PROS
- Good Battery Life
- Foldable Headband
- Increasable Bass Response
- Comfortable Ear Cups
- Good Price
CONS
- Plastic Built
- Micro USB Charger
VERDICT
People who want one of the best noise-canceling headphones, in a budget should opt for these headphones They feature a good battery life. They may not the best headphones in the market but they surely provide the best experience at their value. They are suitable for bass lovers.
FREQUENTLY ASKED QUESTIONS
- Can you use these with a ps4?
Yes, you can use them in wired mode with the provided wire to connect to PS4. - Does the sound leak at a high volume?
No, if you are listening at safe voice levels, the sound won’t leak out, but if your listening at very high volumes, someone close to you will be able to hear the sound. - Does it come with an additional cable for wired mode?
Yes, they come with a 3.5mm Audio cable that can be used in wired mode. - Do you have to change batteries, or is everything rechargeable?
These headphones are rechargeable and can be charged using the USB cable provided with the headphones. - Are they comfortable for long use?
They are great for long-term use; however, some users have complained that they aren’t really breathable. - Are these compatible with an iPod classic?
They use Bluetooth V4.1, which means they are compatible with most devices that support Bluetooth.
CONTENTS
- True Wireless Earbuds
- Wireless Charging Case
- Ear Gels (S, M, L)
- USB-C Charging Cable
- User Guide
- Warranty information at: skullcandy.com/warranty
HANDS-FREE VOICE CONTROL FOR:
Media Player
Accepting and Rejecting Calls
Activating Device Assistant
Stay-Aware Mode
Activating Spotify
SKULL-IQ ALSO LETS YOU:
Share Audio
Customize Button Functions
Add New Features as They Become Available
SIMPLIFY YOUR LISTING
Wireless Charging
Call, Track, Volume Controls
Use Either Bud Solo
Rapid Charge: 10 min = 2 hrs
SUPREME SOUND
Personal Sound: Audio Tuned to Your Unique Hearing
Custom EQ Modes
Dual Noise Reducing Microphones
FEARLESS USE
IP55 Sweat/Water Resistant
Tile” Finding Technology
Replacement Policy
Let’s get started
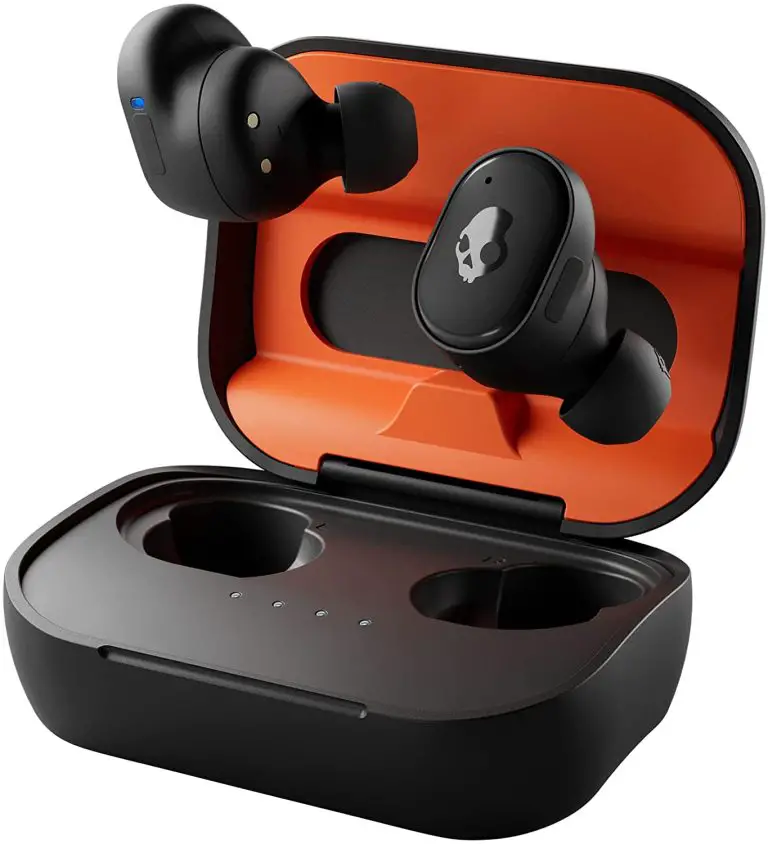
Take the earbuds out of the charging case and remove the protective stickers from the charging points.
- Place the earbuds in the charging case and leave the lid open. The LEDs will illuminate.
- Open Bluetooth settings on your device. Select Grind Fuel from the list of available devices.
- Accept any PAIR or OK prompts. Your earbuds will connect to your device. They are now ready to use.
Download the App
Personalize your earbuds through the Skullcandy App. Enable voice commands, configure settings, access user guides and update new features when they become available.
Controls
Tip: Download the Skullcandy App for easy, always-on access to this list and additional features.
 “Hey Skullcandy…”
With the Skullcandy App open, you can enjoy hands-free control of your favorite media player and other functions using just your voice.
If Spotify is your preferred media player, just say…
“Hey Skullcandy, Spotify”
Media Player Commands
 “Hey Skullcandy, Play”
 “Hey Skullcandy, Pause”
 “Hey Skullcandy, Next”
 “Hey Skullcandy, Previous”
 “Hey Skullcandy, Volume Up”
 “Hey Skullcandy, Volume Down”
Device Commands
 “Hey Skullcandy, Stay-Aware On”
 “Hey Skullcandy, Stay-Aware Off”
 “Hey Skullcandy, Assistant”
Call Mode Commands
 “Accept”
 “Reject”
Power On / Off
Remove the earbuds from the case 😮 power ON and connect. Place the Earbuds in the case and close the lid to Dower the earbuds OFF and charge.
 Play/Pause Either Earbud
 Answer/End Call Either Earbud
 Volume Up Right Earbud
 Volume Down Left Earbud
To Launch and Play Spotify
1 Second
Play Audio
Left Earbud
Share Audio Between Two Skullcandy Skull-iQ Enabled Products
3 Seconds Share Audio Right Earbud
3 Seconds Join Audio Left Earbud
1 Second Pair New Device Either Earbud
Having trouble?
Don’t return to store. Let us help. For product support, download the app or visit Skullcandy.com/Support/GrindFuel
No audio in one earbud?
Let’s re-sync your earbuds. Place them in the charging case and close the lid for 2 seconds. When removed, both earbuds should play audio. If not, return the earbuds to the case and follow the steps below.
- On your device, open Bluetooth settings and turn Bluetooth OFF.
- Remove both earbuds from the charging case. Make sure they are both powered ON.
- Press the button on both earbuds 3 times simultaneously. The LED will go through a series of pulses as they re-sync. 5 blue flashes indicate a successful sync.
- On your device, open Bluetooth settings and turn Bluetooth ON and select “Grind Fuel”.
- LEDs in both earbuds will blink blue 3 times.
A voice prompt will indicate when the earbuds are connected.
Resetting your earbuds to resolve pairing issues.
- On your device, open your Bluetooth settings and remove “Grind Fuel” from your paired devices list. Then turn Bluetooth OFF.
- Remove both earbuds from the case.
A voice prompt will indicate that your earbuds are powered ON. - Press and hold the button ONLY on the right earbud for three 3 seconds.
- A tone will indicate a successful reset, and the right earbud will flash purple three 3 times.
A voice prompt will say “ready to pair” and BOTH earbuds will begin to pulse Red/Blue. - On your device, open Bluetooth settings and turn Bluetooth ON.
Select “Grind Fuel” and accept any PAIR or OK prompts to complete pairing.
Like your new earbuds?

Please leave a review at your retailer’s web site or Skullcandy.com
This device complies with part 15 of the FCC Rules. Operation is subject to the following two conditions: (1) This device may not cause harmful interference, and (2) this device must accept any interference received, including interference that may cause undesired operation.
Safety information inside. Made in Vietnam. Skulleandy,,and other marks are registered trademarks of Skullcandy, Inc. All rights reserved. The Bluetooth® word mark and logos are registered trademarks owned by Bluetooth SIG Inc. and any use of such marks by Skulleandy, Inc. is under license. Contains Li-ion battery, Battery must be recycled or disposed of properly.
Use of the Made for Apple badge means that an accessory has been designed to connect specifically to the Apple product(s) identified in the badge, and has been certified by the developer to meet Apple performance standards. Apple is not responsible for the operation of this device or its compliance with safety and regulatory standards. Please note that the use of this accessory with an Apple product may affect wireless performance. iPad, iPad Air, iPad Pro, iPhone, and Lightning are trademarks of Apple Inc., registered in the U.S. and other countries. The trademark Phone” is used in Japan with a license from Airphone K.K.)
Americas Europe FSI U1 [er= lao VLG aD
Skullcandy, Inc. Skullcandy Europe BV Andrews House
6301 N Landmark Dr. Postbus 425 College Road
Park City, UT 84098 5500AK Veldhoven Guildford
URSW aw Nederland GU1 4QB
Skullcandy.com
Skullcandy.eu
Grind Fuel : True Black Orange
MODEL : S2GFW
FCC ID : Y22-S2GFW
IC : 10486A-S2GFW
© 2021 Skullcandy, Inc.
Skullcandy.com/patent-information

