TCL SPQ01 Mira Screen Portable Adapter Owner’s Manual
Product Overview
The portable adapter supports projection of images from devices with Lightning interface and Android devices to the smart glasses or other display devices.
Download and install the matching APP
Guidelines for First Time Use
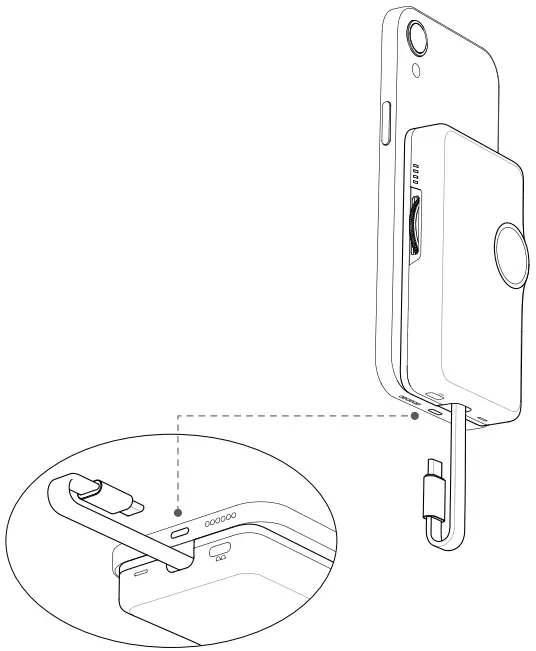
Connect to a device with Lightning interface
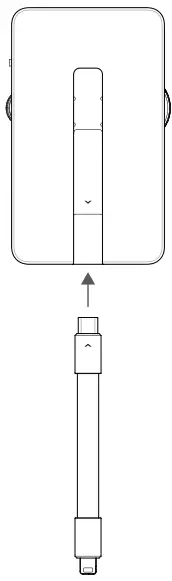
- Connect the USB-C end marked with an arrow on the transfer short line* to the transfer port.
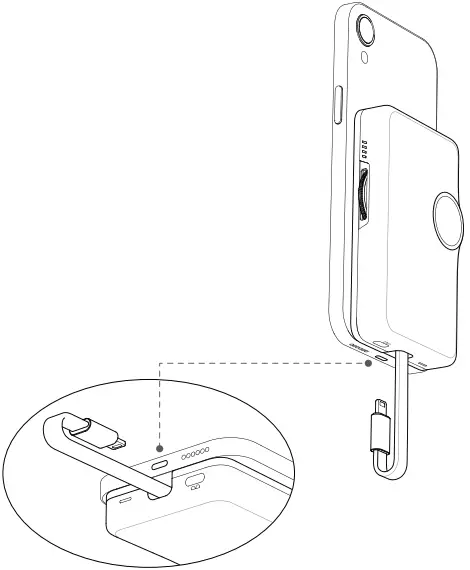
The transfer short line is an independently packaged product. - Attach the magnetic side* of the adapter to the back of the mobile phone, and connect the other end of the transfer short line to the mobile phone.
The adapter is magnetic and can be attached to the back of the mobile phone. (If the mobile phone is not magnetic or the magnetic attraction force is weakened by the mobile phone case, the magnetic coil provided in the package can be pasted on the back of the mobile phone.) - Connect the glasses to the glasses interface so that the smart glasses can display the projection screen.
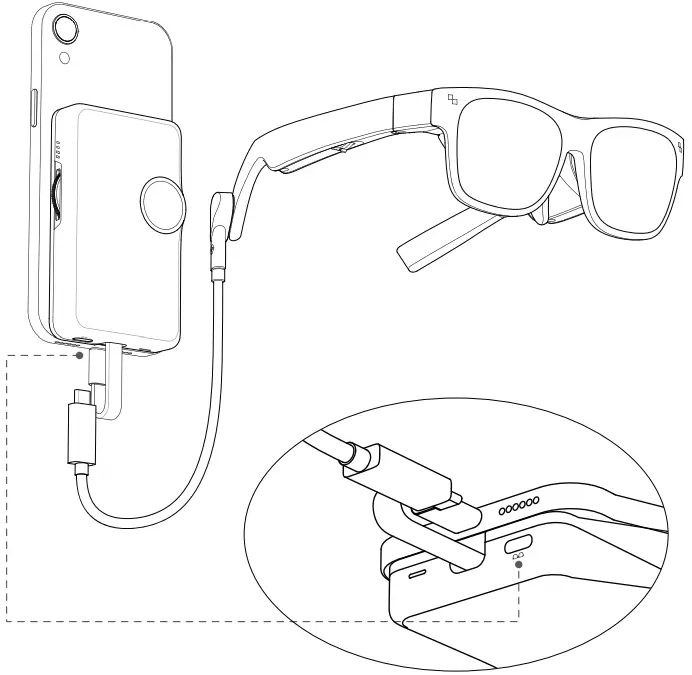
Connect to an Android device
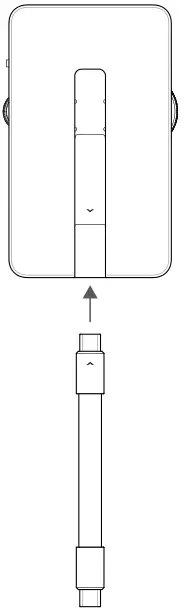
- Connect the USB-C end marked with an arrow on the transfer short line* to the transfer port.

The transfer short line is an independently packaged product. - Attach the magnetic side* of the adapter to the back of the mobile phone, and connect the other end of the transfer short line to the mobile phone.
The adapter is magnetic and can be attached to the back of the mobile phone. (If the mobile phone is not magnetic or the magnetic attraction force is weakened by the mobile phone case, the magnetic coil provided in the package can be pasted on the back of the mobile phone.) - Connect the glasses to the glasses interface.
- Open the pop-up link in the mobile phone, and download and install the matching APP (if it has been downloaded, skip this step).
- Enable the matching APP to grant relevant permission and complete related configurations. The APP homepage will display the message “projection in progress” once configurations are completed (the APP must be kept running in the background), and the smart glasses display the projection screen.
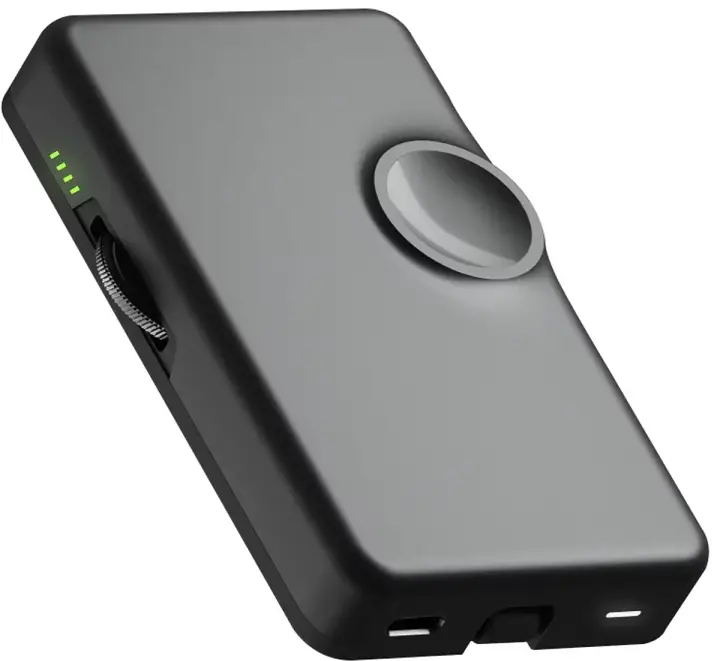
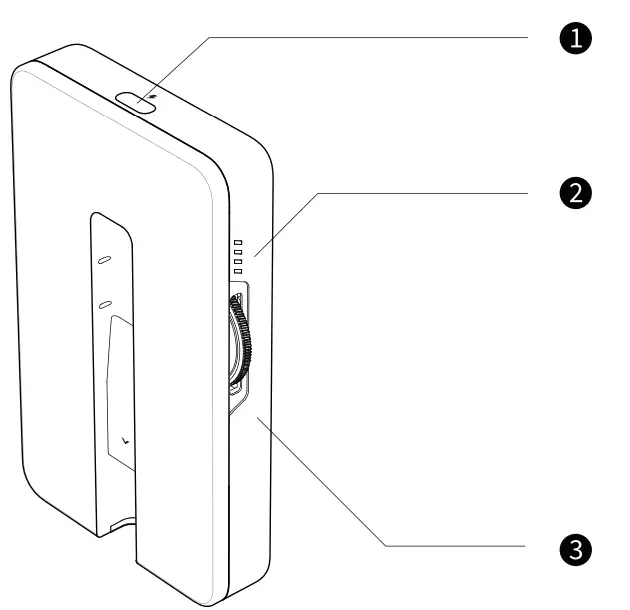
Learn about your adapter
- Charging interface (USB-C) For adapter charging
- Battery level indicator For indicating the current battery level
- Brightness control thumbwheel For adjusting the brightness of glasses screen
- Glasses speaker switch
It is used to turn on or off the glasses speaker. After the glasses speaker is turned off, the mobile phone can connect to other audio devices as per normal (you are advised to turn off the glasses speaker when using the Bluetooth headset). - Volume control thumbwheel
For adjusting the volume of glasses speaker - Power-on indicator
When the indicator is on, the adapter has been turned on; when the indicator is off, the adapter is off (the adapter is automatically turned on upon connecting to the glasses, and automatically turned off when the glasses are removed). - Transfer port
For connecting to the transfer short line - Glasses interface
For connecting to the glasses - Ring magnet
For attaching the adapter to the back of the mobile phone
FCC Statement
This device has been tested and found to comply with the limits for a Class B digital device, pursuant to Part 15 of the FCC Rules. These limits are designed to provide reasonable protectionagainst harmful interference in a residential installation. This device generates, uses and canra diate radio frequency energy and, if not installed and used in accordance with the instructions, may cause harmful interference to radio communications. However, there is no guarantee that interference will not occur in a particular installation. If this device does cause harmful interference to radio or television reception, which can be determined by turning the device off and on, the user is encouraged to try to correct the interference by one or more of the following measures:
- Reorient or relocate the receiving antenna.
- Increase the separation between the device and receiver.
- Connect the device into an outlet on a circuit different from that to which the
receiver is connected. - Consult the dealer or an experienced radio/TV technician for help
This device complies with Part 15 of the FCC Rules. Operation is subject to the following two conditions:
- this device may not cause harmful interference, and
- this device must accept any interference received, including interference that may cause undesired operation.
RF warning statement:
The device has been evaluated to meet general RF exposure requirement. The device can be usedin portable exposure condition without restriction. FCC Radiation Exposure Statement:
This equipment complies with FCC radiation exposure limits set forth for an uncon trolled environment. In order to avoid the possibility of exceeding the FCC radio frequency expo surelimits, Human proximity to the antenna shall not be lessthan 20cm(8 inches)during normal operation.
IC Statement
This device complies with (s)/receiver(s) that comply with Innovation, Science and Economic Development Canada’ slicence-exempt RSSs. Operation is subject to the following two conditions:
- This device may not cause interference; and
- This device must accept any interference, including interference that may cause undesired operation of the device.
Package contents
- Portable adapter
- Charging data cable
- Magnetic coil
- Magnetic coil locator card