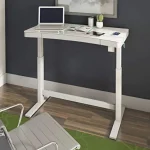
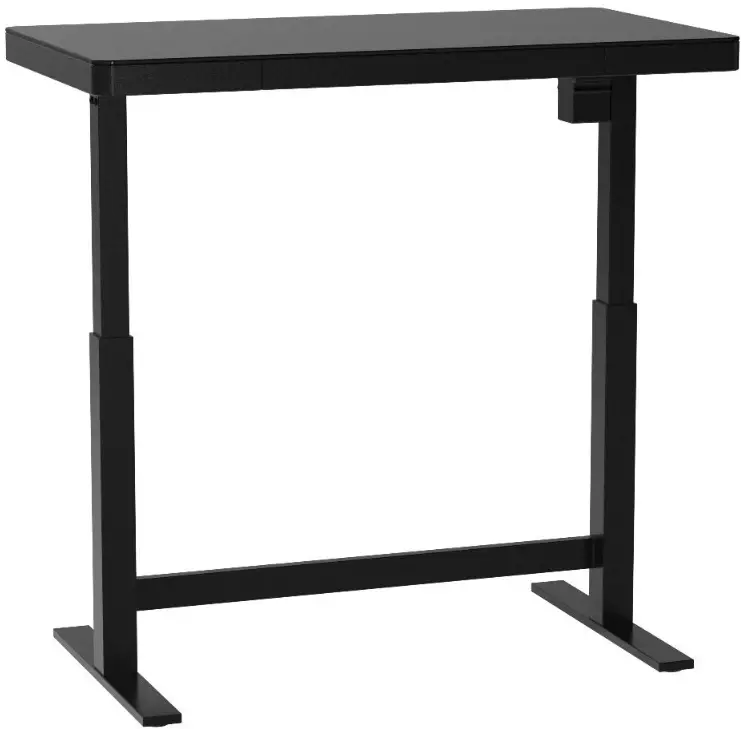
TRESANTI ODP85-55-VO09 Adjustable Height Desk
REGISTER YOUR NEW PURCHASE online!
Thank you for purchasing our product. Please take a moment to visit tsicustomerservice.com to register your new purchase:
When registering your product, be sure to sign up for our updates to receive important service information and helpful tips. We value your privacy and will never share your personal information with other organizations. The information you submit is used only for providing product-related services to you.
PRODUCT DETAILS AND NOTES
- Place of purchase
- Date of purchase
- Model #
IMPORTANT:
Retain this manual for future reference. Read Carefully.
IMPORTANT INSTRUCTIONS
When using electrical appliances, basic precautions including the following should always be taken to reduce the risk of fire, electrical shock, and injury to persons:
Warning:
Make sure the unit is turned off and unplugged before cleaning. Do not connect the power supply to a household power outlet with wet hands, as it may cause fire, electric shock or injury to the person. Do not operate this unit if the cord or plug is damaged, after a malfunction or if it has been dropped or damaged in any manner. For indoor use only.
PRODUCT SPECIFICATIONS
| Input Voltage | 100-240V |
| Output Voltage | 24V DC 2.1A |
| USB Output | 5V/2.4 A |
| C-type output | 20V/1.5A |
| Wireless charger Output | 5 W / 7.5 W / 10 W |
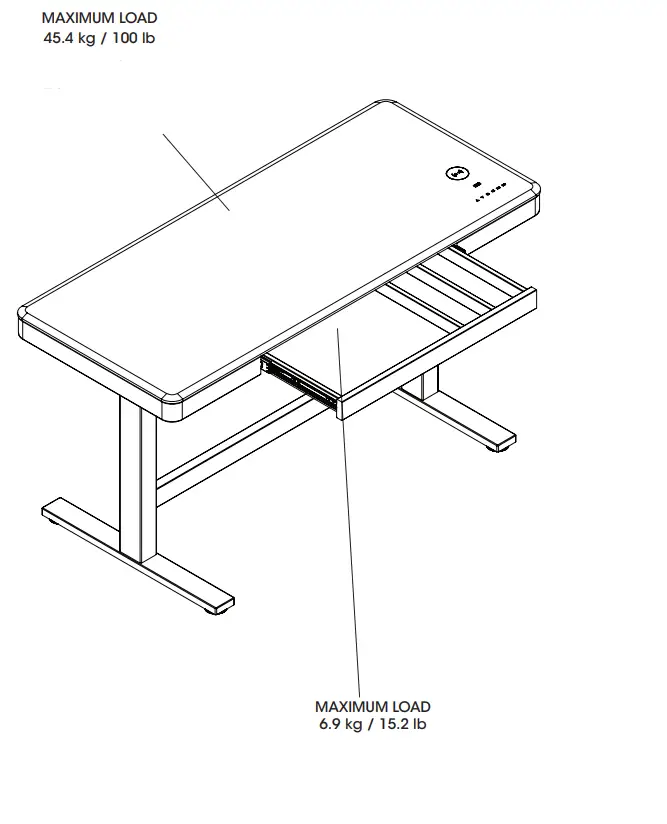
| Max Load | 45,4 kg / 100 lb |
| Load speed | 20 mm/s / 0.79 in/s / 0,79 po/s |
| Lift range | 75.4 cm-120.3 cm (29.7 in.-47.4 in.) |
SAFETY INFORMATION
Please read and understand this entire manual before attempting to assemble, operate or install the product.

WARNING
- Some steps are more easily handled with two adults.
CAUTION
- Before assembly and/or installation, carefully unwrap all parts.
- Locate and set aside the hardware kit before discarding the packaging.
- Use care when assembling your new product. Take your time and follow assembly instructions closely.
- Use the lock button to prevent the desk from being adjusted unintentionally.
HARDWARE
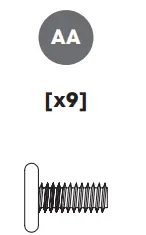
- 6.3x20mm P10556GD985-AA white P10556GD990-AA black
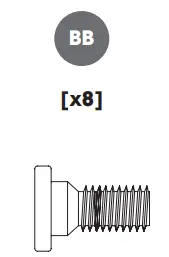
- 8x20mm white P10556GD990-BB black
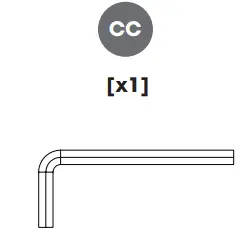
- Allen Wrench P40557-CC
ODP85
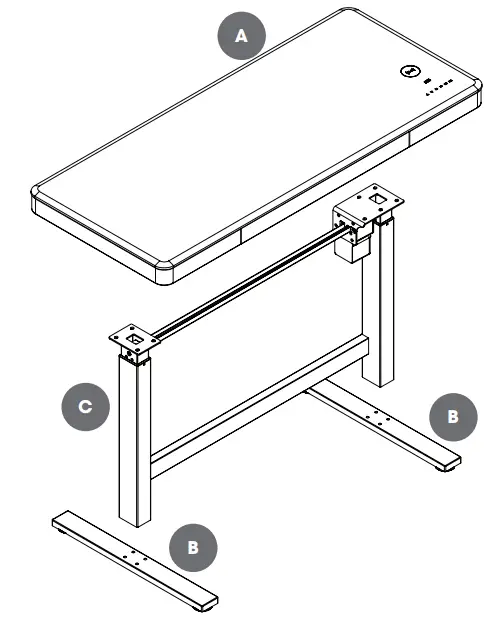
Step 1
Note: Lubricant on the inner leg may be present; this is normal to protect the internal moving parts. If excessive lubricant is present on the legs, it can be safely wiped away with a soft cloth.
Attention: Do not remove the dampening pads!
DO NOT REMOVE PADS! NE PAS ENLEVER LES PATINS! ¡NO QUITE LAS ALMOHADILLAS!
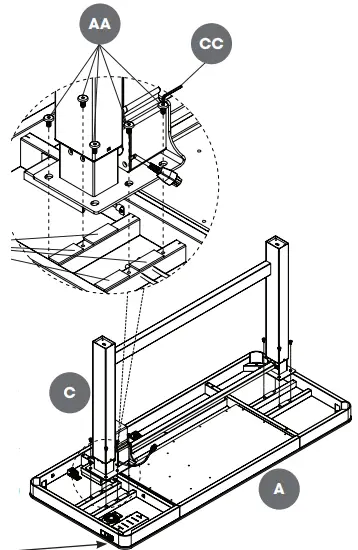
Attention: When attaching the legs, be sure to place the side with the motor on the same side as the Control Assembly Box. This will allow your desk to function properly.
Step 2
Step 3
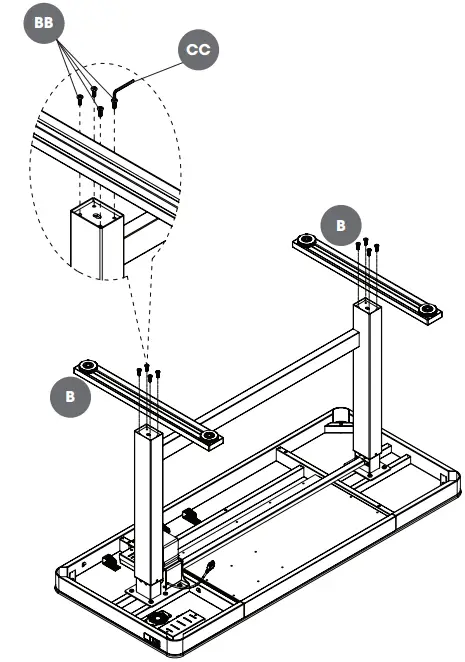
To prevent stress and/or damage to the connection pins, ensure all cords are plugged in straight, and not at an angle.
Step 4
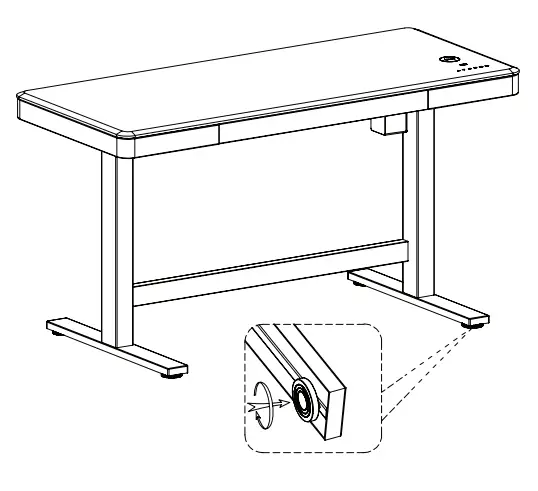
With help, turn the desk rightside up (as shown) and place in desired location.
Note: It is very important that your unit is properly leveled. After moving your unit to its final location, you may need to adjust the floor levelers.
OPERATION
Lock Button:
NOTE: It is strongly recommended to use this feature to avoid any unexpected/unintentional movement.
- Press this button to lock the touch-screen. This will prevent accidentally engaging the controls after the desired height has been set. Press the button again to unlock the touch-screen.
- To change between inches and centimeters, press and hold this Lock button for 5 seconds.
Display:
- The display will indicate the height of the desk (inches). After five seconds without input, the digital readout will automatically fade away. To change between inches and centimeters, press and hold the Lock button for 5 seconds.
- Touch and hold one of the memory buttons (H1-H3) for 3 seconds when the desk is at the desired height in order to save it as a memory preset. The desk will automatically return to the set height when the corresponding memory button is touched.
- Touch and hold the button to lower the desk and release it when it arrives at the desired height. The desk is at the lowest height setting when “bot” is displayed.
- Touch and hold the button to raise the desk and release it when it arrives at the desired height. The desk is at the highest height setting when “top” is displayed.
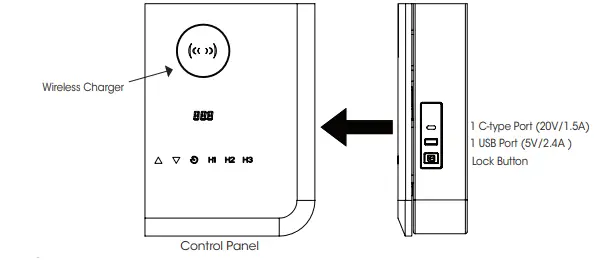
USB Port:
There is 1 USB port suitable for charging devices with 2.4A charging power requirement (or lower). The USB port will pause charging temporarily when the height of the table is being adjusted and the motor is in use.
C-type Port:
There is 1 C-type port suitable for charging devices with 1.5A charging power requirement (or lower). The C-type port will pause charging temporarily when the height of the table is being adjusted and the motor is in use.
Wireless Charger
Easy and convenient wireless charging with 5W/7.5W/10W right on your desktop. Wireless desktop charging is compatible with most major phone models such as: Apple iPhone 8 or newer, Samsung Galaxy S6 or newer, and LG G3 or newer. For compatibility confirmation please check with your phone manufacturer.
Tips for usage:
- Place phone centered on the wireless charger. If it does not connect, slide the device to alter position until the wireless charger is engaged. This often works better than picking up the device and placing it back down.
- Phone covers can affect connectivity with the wireless charger. If your device has a cover and you are unable to engage the charger, try removing the cover.
- If your phone/device is equipped with battery optimization feature, you may experience slower charging times. For more information, please check with your phone manufacturer.
- The wireless charger will not be powered while the desk is in motion. Once the desk stops, the charger will automatically regain power and begin charging again
GetActive™ Timer Button
- Touching the timer button will cause the digital readout to blink. Use the Up button to cycle through the timer settings: 00, 10, 15, 30, 45, 60, 75, 90, 105, 120. Use the Down button to cycle through the timer settings: 120, 105, 90, 75, 60, 45, 30, 15, 10, 00. Touch the timer button again to confirm and start the countdown.
- When the timer button is touched, the digital readout will display the remaining time. For example, 120, 119, 118, 117……05, 04, 03, 02, 01, 00). If the desk’s height is adjusted during the countdown, the readout will show the height and return to the timer afterward.
- When the countdown is finished, the desk will beep 5 times continuously in 3 successions and remain stationary.
FCC
Warning: Changes or modifications to this unit not expressly approved by the party responsible for compliance could void user’s authority to operate the equipment.
NOTE: This equipment has been tested and found to comply with the limits for Class B digital device, pursuant to part 15 of the FCC Rules. These limits are designed to provide reasonable protection against harmful interferencein a residential installation. This equipment generates, uses, and can radiate radio frequency energy and, if not installed and used in accordance with the instructions, may cause harmful interference to radio communications. However, there is no guarantee that interference will not occur in a particular installation. If this equipment does cause harmful interference to radio or television reception, which can be determined by turning the equipment off and on, the user is encouraged to try to correct the interference by one or more of the following measures:
- Reorient or relocate the receiving antenna.
- Increase the separation between the equipment and the receiver.
- Connect the equipment into an outlet on a circuit different from that to which the receiver is connected.
- Consult the dealer or an experienced radio/TV technician for help.
This device complies with Part 15 of the FCC Rules. Operation is subject to the following two conditions:
- This device may not cause harmful interference, and
- This device must accept any interference received, including interference that may cause undesired operation.
This Class B digital apparatus complies with Canadian ICES-003.
TROUBLESHOOTING
- The display is not in preferred measurement (inches/ centimeters)/ Factory setting needs to be changed. /Press and hold Lock button on side of desk for 5 seconds.
- Desk height adjusts unintentionally/ Lock button not engaged./ Set to the desired height, then press the lock button to lock the control panel.
- Display indicates E1/ The motor has overheated./ Unplug the power cord and re-plug after 18 minutes.
- Display indicates E2 /The top load is too heavy./ Reduce the top load to a maximum of 45.4 kg (100 lb). Unplug the power cord for 5 minutes and then plug in again.
- The motor is stuck./ Visually inspect whether there are any foreign materials or objects obstructing the motor and/or its shaft.
- Display indicates E3/ The motor is not powered./ Unplug the unit and visually inspect whether there are any loose electrical connections between the power cord and the adaptor, or from the adaptor to the motor.
- Display indicates E4/ Motor voltage is too low./ Ensure that the power adaptor is the same as supplied with the desk according to the specifications described on page 4.
- Display indicates RES/ Desk needs to be reset to accurately display height./ Press and hold UP + H3 for 8 seconds. You will hear one beep and the display will begin to flash RES. Remove hands from the buttons and desk will start to move automatically. Do not touch any buttons once this process has been initiated. The desk will return to the lowest position and “bot” will show on the display. The desk has reset and you can resume normal use
- Display indicates E12/ There has been a motor failure./ Contact customer service.
- Wireless charging compatibility issue./ Check with your phone manufacturer to ensure your device is compatible with this wireless charging station, and to ensure your phone has wireless charging capability.
If it’s compatible, here are the steps:- Try to move the location of the phone to obtain a charging connection
- Remove any USB cables or headphones
connected to the device - Ensure your phone software is up to date
- Remove phone case If this does not work, call Twin Star Home® customer service at 1.866.661.1218
- Phone is not centered and/or with cover on./ Ensure phone is centered and/or try to remove cover
- Charging takes a long time/ Phone covers can affect connectivity with the wireless charger. / Please remove the cover to determine if charging time improves.
- Battery Optimization feature./ Battery Optimization feature built into some phone models is meant to purposely slow the charging time once the device hits 80% in order to extend the overall life of the battery. This willlengthen the time to charge and is normal. For more information please check with your phone manufacturer.
- Wireless charger cuts on/off/ The wireless charger is designed to not be active when the desk is in motion./ Once the desk stops, the charger will automatically regain power and begin charging again.
CARE MAINTENANCE
- Use a soft, clean cloth that will not scratch the surface when dusting.
- Use of furniture polish is not necessary. Should you choose to use polish, test first in an inconspicuous area.
- Using solvents of any kind on your furniture may damage the finish.
- Never use water to clean your furniture as it may cause damage to the finish.
- Always use coasters under beverage glasses and flowerpots.
- Liquid spills should be removed immediately, as it may damage the furniture. Use a soft, clean cloth and blot the spill gently. Avoid rubbing.
- Always use protective pads under hot dishes and plates. Heat can cause chemical changes that may create spotting within the furniture.
We hope you enjoy your purchase for many years. Thank you for your purchase!
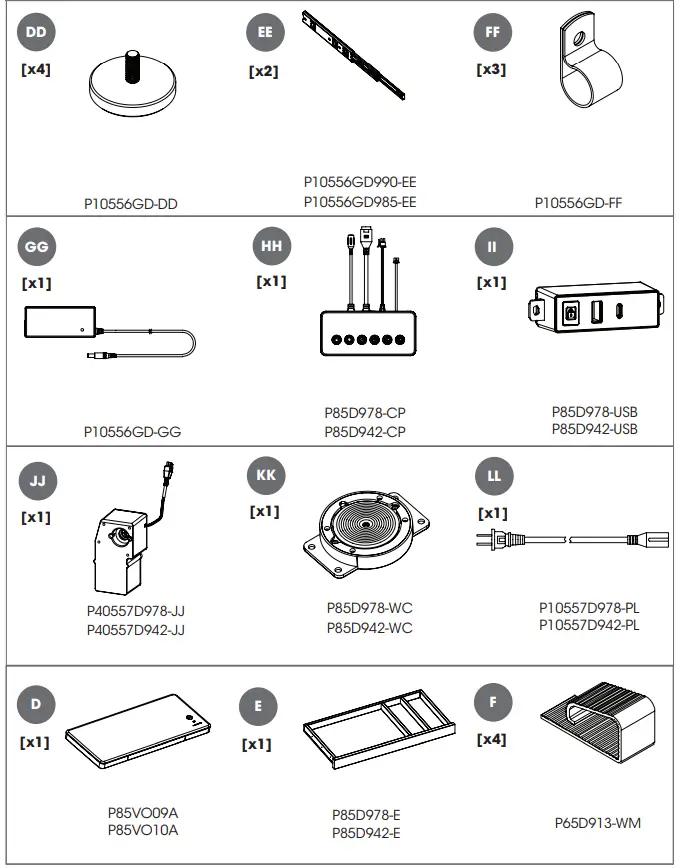
REPLACEMENT PARTS
Distributed by:
Costco Wholesale Corporation
P.O. Box 34535
Seattle, WA 98124-1535
USA
1-800-774-2678
www.costco.com