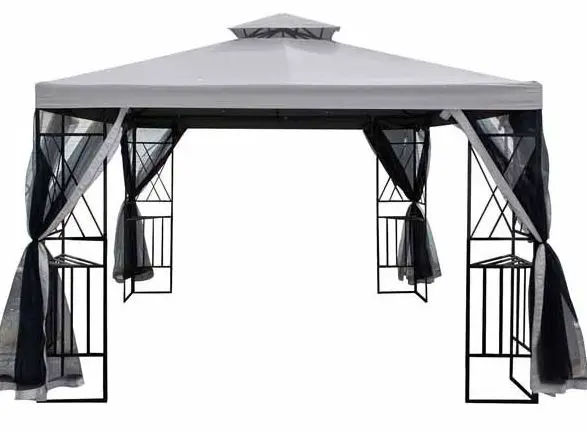
belavi 7884 Gazebo with Netting

Getting Started
Ensure all parts packaged in carton match the parts list. Remove all protective materials and place parts on a non-abrasive surface to avoid scratching. If any parts are missing or damaged, DO NOT attempt to assemble. Please contact our customer service center (Monday-Friday 9:00am – 5:00pm EST) at 1-800-599-8898.
Caution
Read all the instructions before assembly. Failure to comply with instructions may result in faulty assembly and potential injury! Assemble product on a soft, non-abrasive surface such as a grass lawn or cardboard to avoid surface scratches or damage to parts. Seek assistance to assemble bulky or heavy items. After final alignment, make sure all bolts and nuts are securely tightened.
Cleaning and Maintenance
Wash canopy with a mild solution of soap and water, rinse thoroughly. Dry completely
Warnings & Cautions
- When storing, do not re-pack your gazebo until completely dry.
- This gazebo must be assembled by two or more adults.
- The gazebo canopy must not be left attached in windy or extreme conditions.
- Loading limit of the hook is 10 lbs.
- Steel components for garden accessories and furniture are treated with rust-inhibiting paint. However, due to the nature of steel, surface oxidation (rusting) will occur if this protective coating is scratched. This is a natural process. To minimize this condition, it is recommended that care be taken when assembling and handling the product in order to prevent the paint from being scratched. If scratching or damage occurs, it is recommended that the area be touched-up immediately with rust-inhibiting paint. Surface rust can be removed easily using a very light application of common cooking oil. If surface oxidation (rusting) occurs and no measures are taken to correct it, the oxidation may start dripping onto the deck or patio, which may cause damaging stains that can be difficult to remove.
WARNING
KEEP ALL FLAME AND HEAT SOURCES AWAY FROM THIS TENT FABRIC. This tent is made with fabric that meets CPAI-84 specifications for flame resistance. It is not fire proof. The fabric will burn if left in continuous contact with any flame source. The application of any foreign substance to the tent fabric may render the flameresistant properties ineffective.
Pack contents / parts
- A Right Panel
- B Left Panel
- C Corner Canopy Rib
- D Canopy Middle Rib
- E Crossbeam
- F Crossbeam Connector
- G Corner Connector
- H Canopy Two-Tier Ribs
- I Connector
- J Main Canopy
- K Small Canopy
- L Netting Panel
- M Corner Shelf
- N Plastic Ring
- O Rope
- P M6 x 14mm Bolt
- Q M6 x 30mm Bolt
- R Stake
Hardware List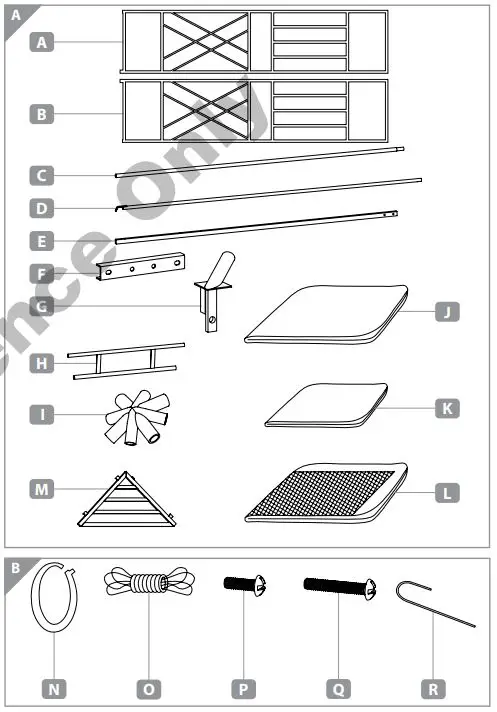
Assembly Instructions
*Do not tighten bolts down completely during this portion of assembly.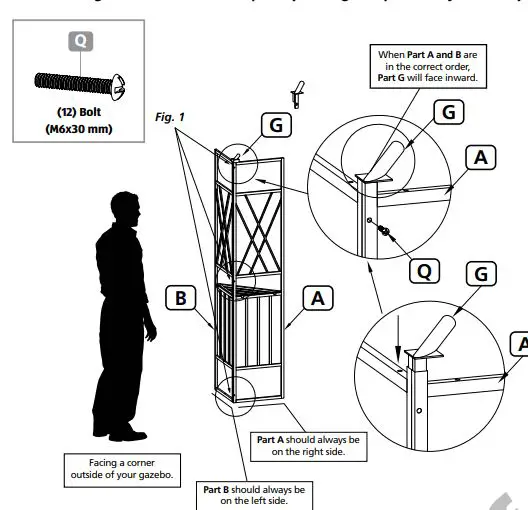
STEP 1:
Bring Right Panel (A), and Left Panel (B) together as instructed in the illustration above. Please note the correct placement of parts A and B during assembly. Insert Corner Connector (G) into the top openings of parts A and B. When parts A and B are assembled correctly, part G will face inwards, see illustration above. Insert one M6x30mm Bolt (Q) through the eyelet at the top of Right Panel (A), through Corner Connector (G), and into the bolt-threading insert found on the side of Left Panel (B), see Fig. 1. Insert one M6x30mm Bolt (Q) through the eyelets found at the center and bottom of Right Panel (A), and into the bolt-threading inserts found on the side of Left Panel (B). Follow these steps to assemble the remaining A’s, B’s, and G’s as instructed here.
STEP 2:
Insert two M6x30mm Bolts (Q) through eyelets that are furthest apart at one end of Crossbeam (E), and into the bolt-threading inserts found at the top of Right Panel (A), see Fig. 2. Insert two M6x30mm Bolts (Q) through eyelets of Crossbeam (E), and into the bolt-threading inserts found at the top of Left Panel (B).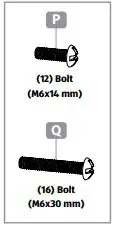 Follow these steps to connect remaining E’s to the tops of A’s and B’s. Insert three M6x14mm Bolts (P) through eyelets of Crossbeam Connector (F), and into the bolt-threading inserts found at the opposite ends of Crossbeams (E), connecting these parts to one another. Please note that one eyelet in the center of Crossbeam Connector (F) will remain unused at this stage of assembly, see Fig. 3. Follow these steps to connect all Crossbeams (E) to one another forming a square frame as illustrated above. Use the brackets found on either side of Corner Shelves (M) to secure these parts in between Left Panels (B) and Right Panels (A), see Fig. 4. Tighten all bolts left loose during assembly process.
STEP 3: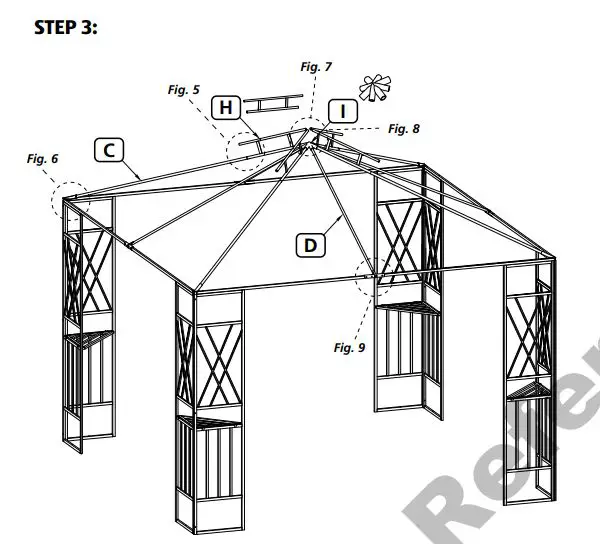
Insert smaller diameter ends of Corner Canopy Ribs (C) into openings of Canopy Two-Tier Ribs (H), see Fig. 5. Insert opposite ends of Corner Canopy Ribs (C) into openings found on Corner Connectors (G), see Fig. 6. Insert opposite ends of Canopy Two-Tier Ribs (H) into larger openings of Connector (I), see Fig. 7. Insert cylindrical ends of Canopy Middle Ribs (D) into smaller openings of Connector (I), see Fig. 8. Place opposite, hooked ends of Canopy Middle Ribs (D) over Crossbeam Connectors (F), and secure these parts together using one M6x14mm Bolts (P), see Fig. 9.
STEP 4: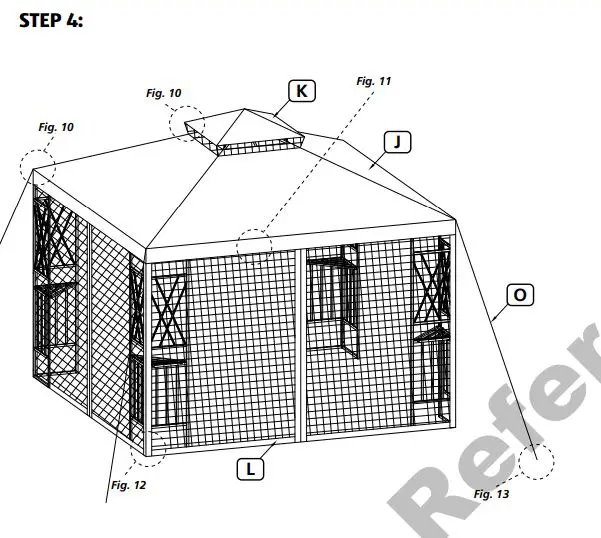
Place Small Canopy (K) over top ribs of Canopy Two-Tier Ribs (H). Open Main Canopy (J), and spread the fabric over Corner Canopy Ribs (C), and Canopy Middle Ribs (D), see Fig. 10. Pull the corners of Main Canopy (J) over each corner of the frame. Please note that getting the fourth, and final corner of the canopy over the frame will be difficult since the canopy is intended to be taut when assembly is completed. Use the Plastic Rings (N) to hang each Netting Panel (L) from Crossbeams (E), see Fig. 11. Once completed, the tops of the Netting Panels (L) should be underneath Main Canopy (J) so that the Plastic Rings (N) aren’t visible from outside the gazebo. Insert eight Stakes (R) through eyelets found at the bottoms of Left Panel (B), and Right Panel (A), see Fig. 12. Use a hammer (not included) to gently tap the Stakes (R) in place, securing the frame to the ground. Tie one end of each Rope (O) to loops found at the corners of the Main Canopy (J). Tie the opposite ends of Ropes (O) to the remaining four Stakes (R). Pull these Stakes (R) with Ropes (O) so that the rope is taut and gently hammer the stakes in the ground, see Fig. 13.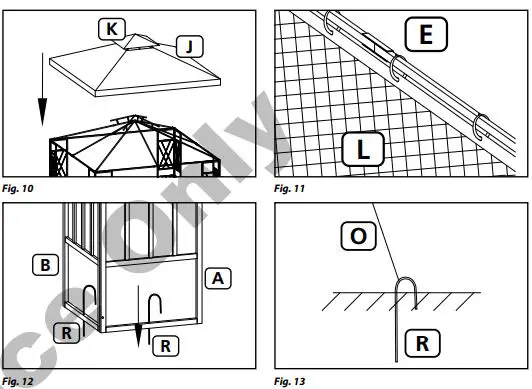
Note: In case of adverse weather conditions or strong wind, please remove the Main Canopy (J) from the gazebo. The gazebo is designed to provide shade only. Do not use this gazebo in strong wind and rain. Wind and rain can damage the gazebo and could result in injury to you and others. The canopy is not waterproof and not intended for use in the rain. Water will sit easily on top of the canopy fabric and severely damage the gazebo. Do not use or set up in rainy, windy, or stormy conditions. This product is designed for leisure use only and is not a shelter against adverse weather conditions
Tying Netting
- Elastic bands can be found in the center of each netting panel, one on either side. Run your left hand through the elastic band that has a plastic latch attached to it. Run your right hand through the elastic band on the opposite side of the netting.
- Gather the netting panel into a bundle, and hold it in place with your right hand. Keep the elastic band with latch in your left hand from being pulled into the bundle
- Bring the elastic band with latch in your left hand around the bundle counter-clockwise.

- Once the elastic band with latch has been brought around full circle, pull the latch through the other elastic band.
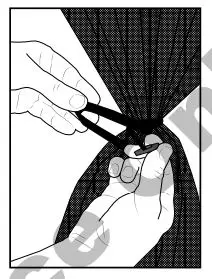
- Gently release both elastic bands. The latch placed through the second elastic band should prevent the netting panel from unwinding.