Ouvis C2
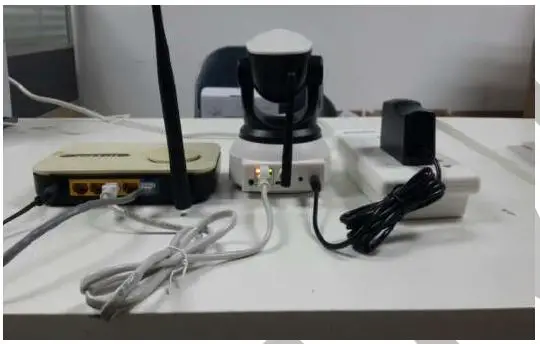
Power on the camera and connect to your router
Plug the camera into the electric power outlet, and connect one end end of the Ethernet
cable in one of the LAN ports of the router, and the other end in the Ethernet port of
the camera cable.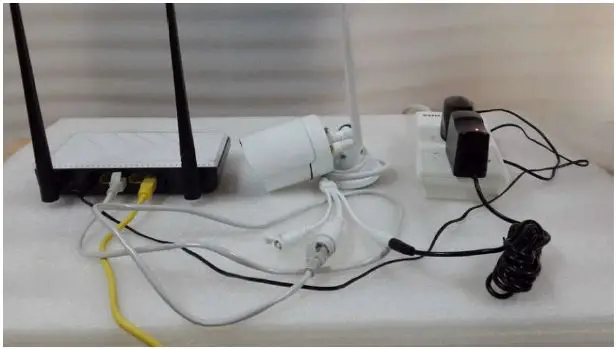
Download and install the Ouvis app:
- Scan the QR code to o download Ouvis app, or go to the Apple App Storore e or Google Play
search for the word “Ouvis” and install the Ouvis app. That looks like thie this:
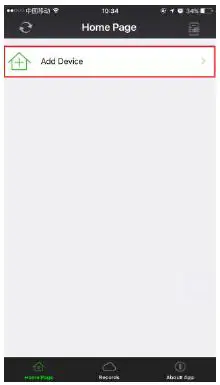
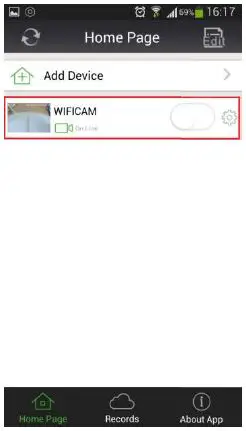
- Open the app and youou will be on the “Home Page”.
Search and add the camera
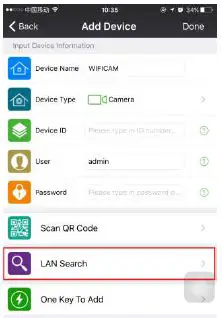
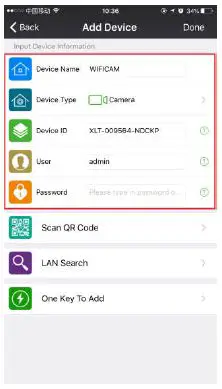
- click “Add Device” to open the Add Device” page.
- Click “LAN Search” to so search all online Ouvis cameras in LAN.
- The app will find “WIF “WIFICAM” and its Device ID #. Click on “WIFICAM”.
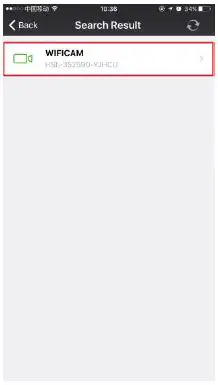
- On this page, leave everything as is. User is admin and the default type Password should remain blank (do NONOT putT put anything here), and click “Done”.
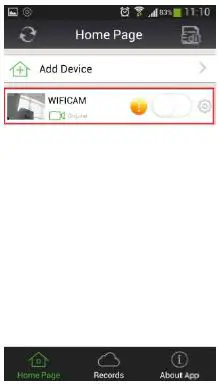
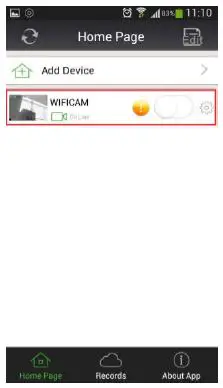
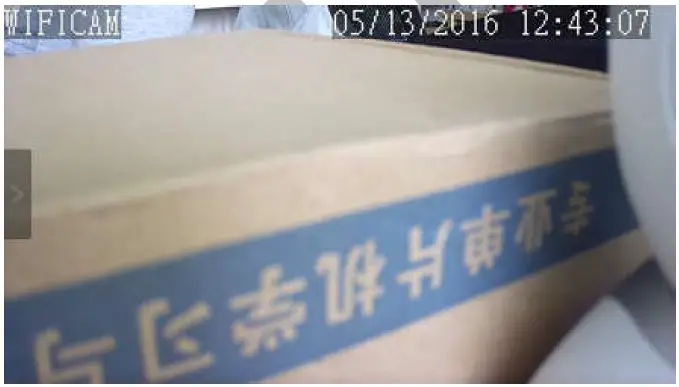
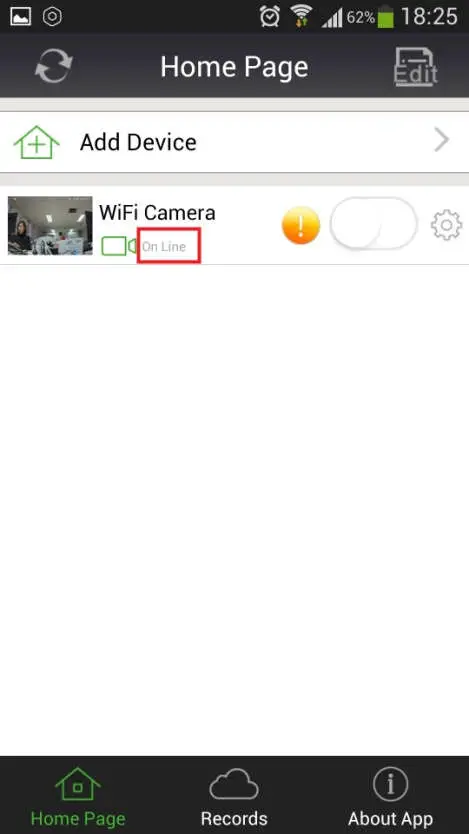
- You should now see “WIF“WIFICAM” on the “Home Page” and it will show “On Line”. Click on the picture frame to o the left of “WIFICAM ONLINE”, and you will be onon full screen and watching live video.
Configure the Wi-Fi connection of the camera
- Make sure your smartphone is on Wi-Fi (and connected to the 2.4G band of your router).
- On the Home Page, as long as “WIFICAM” is “On Line”, click on the “GEAR” icon which is located to the right of “WIFICAM”. This will now take you to the “Setting” page.
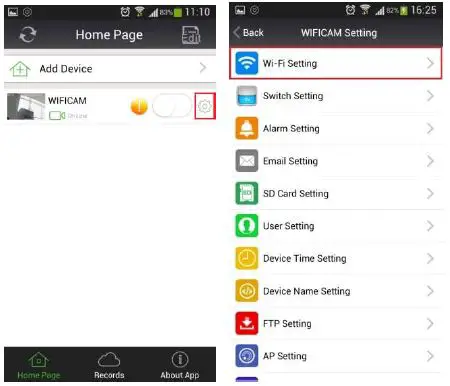
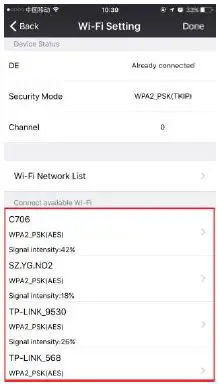
- Click on the “WI-FI Setting”, and then click “Wi-Fi Network List” to search all wireless network hotspots near you.
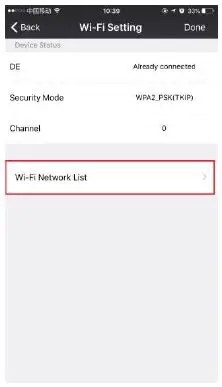
- d) From the network list, click on the same exact network that your smartphone is connected to.
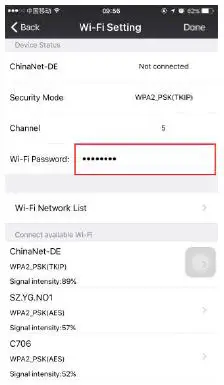
- Then you must input the correct Wi-Fi password of your Wi-Fi network, in the “Wi-Fi Password” box that opened up.
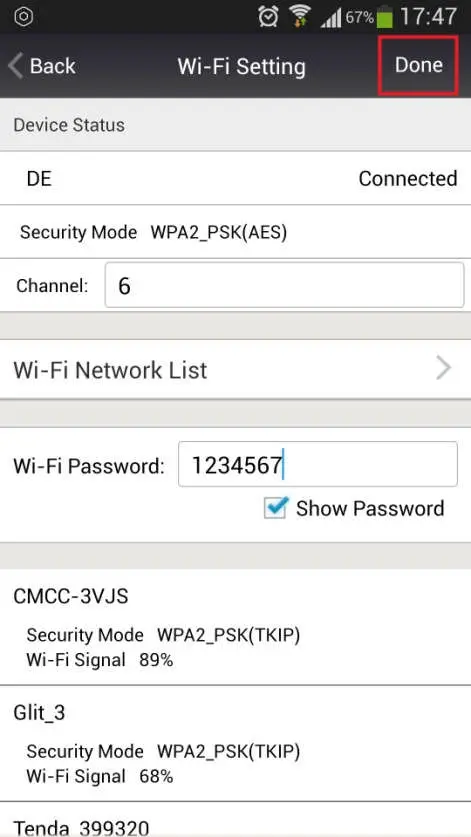
- Now, click “Done” and the camera will reboot automatically. After rebooting, remove the Ethernet cord, and on the “Home Page” it should show “WIFICAM ONLINE” and the camera will now be wireless. However, if WIFICAM does not show “On Line”, you probably entered the wrong Wi-Fi password. Connect the Ethernet cord back into the camera, and when it shows “On Line”, go back to step 4 and repeat the steps again.
Creating the camera password to ensure your privacy
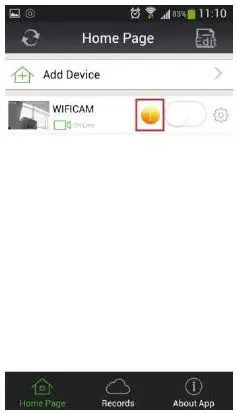
- On the “Home Page” there is a yellow warning icon to the right of the “Home Page” to remind you to create a password for your camera. Click on it and it opens the “User Setting” page.
- On this page, you can set the new Administrator password, and then click “Done” to save the new password, and the camera will reboot.
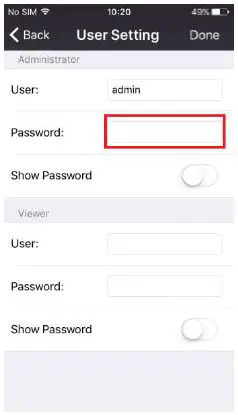
- After rebooting, it will automatically login with the new administrator password, and will now notice that the yellow warning icon does not exist anymore.
For online support and details of the functions and features of this camera, go to: ouvis.zendesk.com
Support email: [email protected]
]]>Wi-Fi Setting Troubleshooting Guideline
Please reset and re-configure the camera via wire Ethernet cord, if you don’t know how to reset the camera, refer to the demo video in the “Video Tutorials” part on the support.ouvis.online website.
Then you should check and compare to below instructions while you continuing configure the Wi-Fi connection of the camera following the installation manual.
- Before you configure the Wi-Fi connection of the camera, make sure you add the camera via wire Ethernet cord successfully. The camera should show On Line”, and when en you click on picture frame to the left of “WIFICAM”, you will be on full screen and watching live video. By swiping the screen in all directions, you will be able to move the head of the camera.
- When you input the Wi-Fi password, you must pay special attention to two points:
2.1, You must make sure you input the correct Wi-Fi password of your router, you can click the “show password” check box to show the password to confirm.
2.2, Make sure the WiFi password of your router is consists of normal characters(‘a’~’z’, ‘A’~’Z’, 0~9,’-’). Because the camera is not compatible with some router about the special characters. And your router Wi-Fi password length should not exceed 32 characters, our camera doesn’t support passwords over 32 characters currently.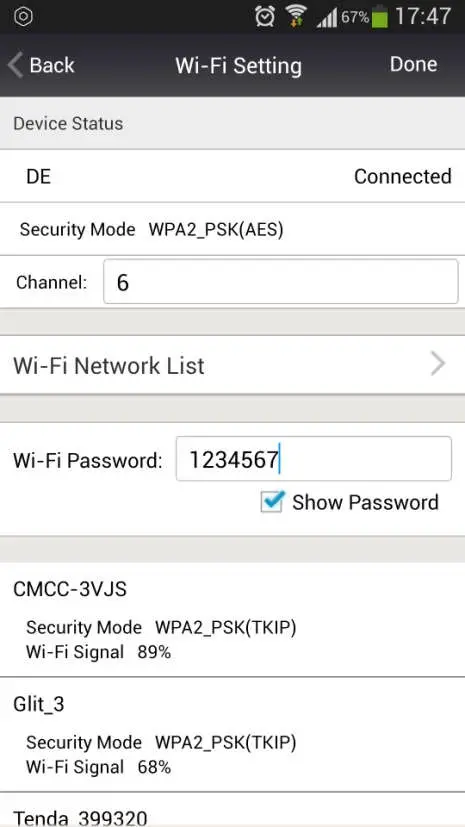
- After you input correct Wi-Fi password, DO CLICK the “Done” on the right-top of this page, only you click the “Done”, the Wi-Fi settings can take affect.
- After you click the “Done” of Wi-Fi settings page, the camera will reboot automatically, then you can click “back” to go back to the homepage, you can see the status prompt of the camera will change from “online” to “disconnect” to “connecting” now, and at the same time, the camera will shake its head and prompt voice: “welcome to use”.
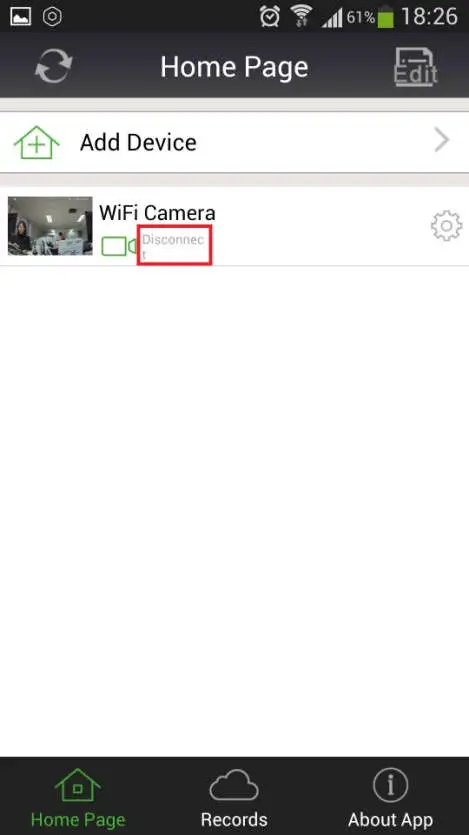

- After the camera stop shaking its head and prompt “welcome to use”, you can remove the Ethernet cord now. After you remove the Ethernet cord, you should hear a voice: “connection successful”, this voice means the camera connects to router via Wi-Fi successfully. If you don’t hear such voice, the Wi-Fi connection may fail, you should go on to point 6 below to check the environment.
- Environment check:
6.1, Wi-Fi router is mandatory to have, router must support 2.4GHZ Wi-Fi Network(The camera only support 2.4GHZ Wi-Fi network), and if your router supports 5GHZ also, the SSID of 2.4GHZ and 5GHZ should be different;
6.2, Check the Wi-Fi security mode setting of your router, it should be “WPA2” or “Auto”.
6.3, Router enables DHCP server (most of routers run DHCP server by default);
6.4, Make sure these is no such restrictions on your WiFI router or in your LAN:
-MAC address access restriction (e.g. MAC address white list or MAC blacklist)
-firewall settings to not allow device in internal network to access internet or similar settings
If there is such restrictions, you should know how to configure your WiFi router or firewall to allow the camera get IP address and access the internetIf you are not clear about this, please refer to your WiFi router manual or support.
If still have problem after checking carefully based on above instructions, please feel free to contact us, we will do our best to fix your problem
]]>