A Razer headset with no sound, poor audio, or uneven balance might be caused by dirt or debris in audio ports and on the audio jack, improperly plugged-in audio jack, hub connections, incorrect playback device levels or settings, software issues, or faulty audio drivers.
Below are the steps on how to troubleshoot a headset with no sound, poor audio, or uneven balance:
Wireless Headsets
Check the volume level and connection of your headphones and audio source. If your headphones connect via Bluetooth, ensure that the headphones and your audio source are paired and connected properly. If you are using a computer, make sure your headset is selected as the playback device in your audio settings.
3.5 mm Headsets
- Check the audio ports and audio jack for any dirt or debris that may cause the issue.
- Check if the audio jack is plugged in properly.
- For headsets with a splitter cable, ensure the connection between the splitter cable and the headset’s audio jack is secure and not loose.
- For headsets with in-line volume or headset volume controls, ensure it is not set too low.
- Ensure the system volume is not set too low or muted.
- Ensure the device is set as the default playback device.
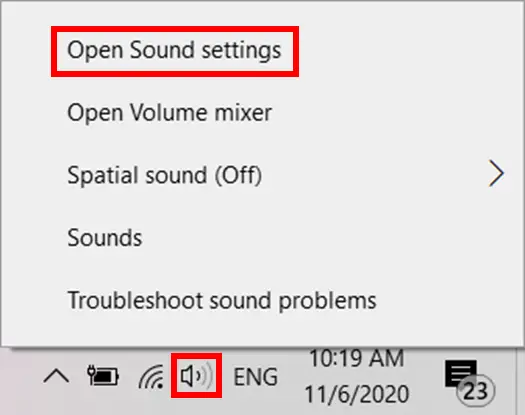
- Right-click on the speaker icon on the system tray and select “Open Sound settings”.
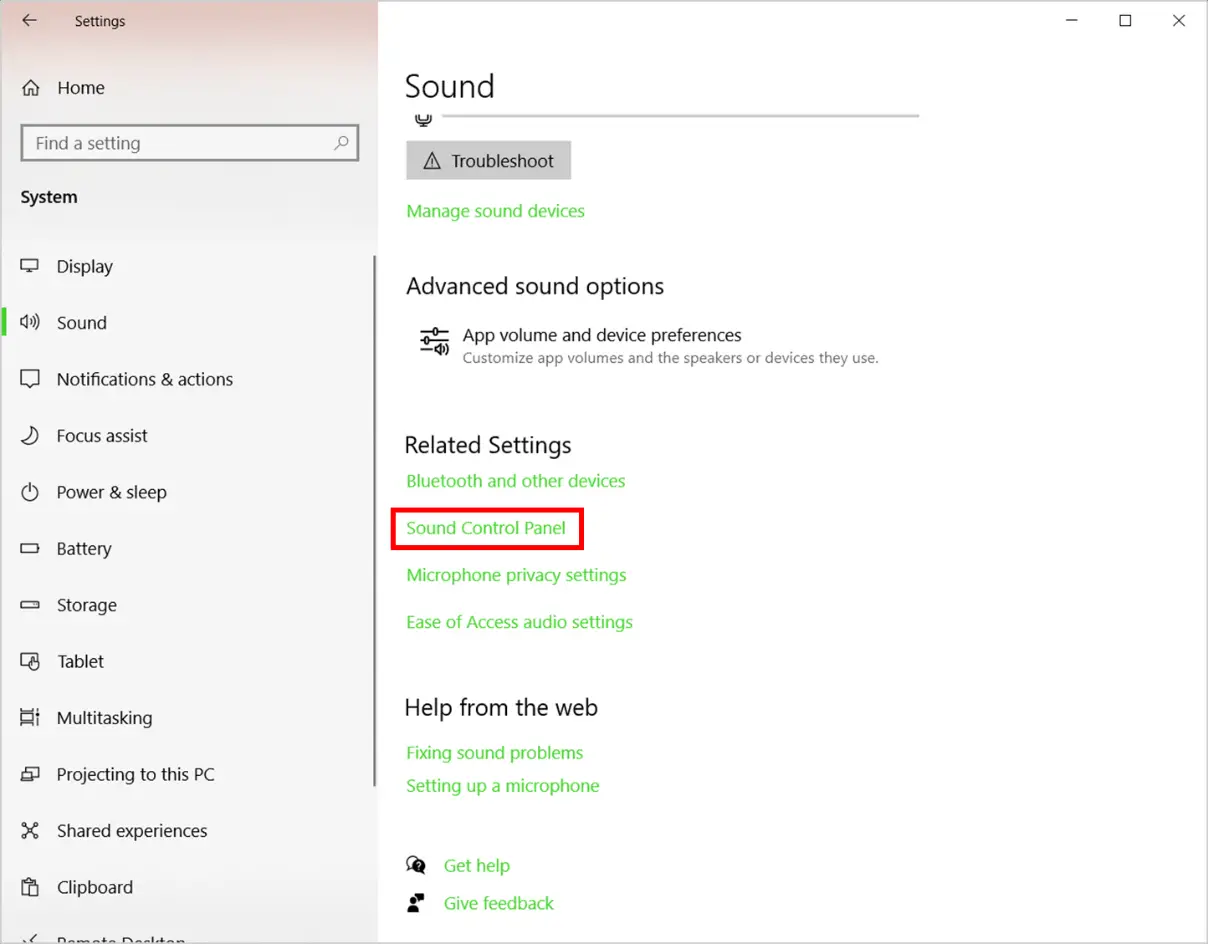
- Under “Related Settings”, click “Sound Control Panel”.
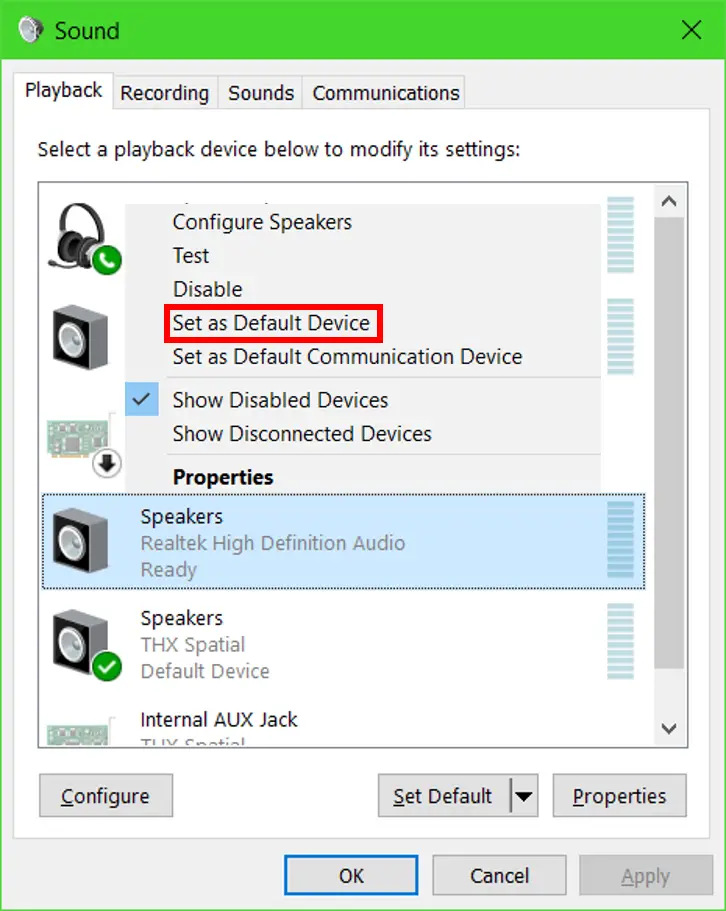
- Right-click on the system’s onboard audio playback device, for example, Realtek High Definition Audio, and select “Set as Default Device”. It is the default device if it has a green checkmark on it.

- Check the balance audio settings in Windows.
- Right-click on the speaker icon on the System tray and select “Open Sound settings”.

- Click “Sound Control Panel” under “Related Settings”.
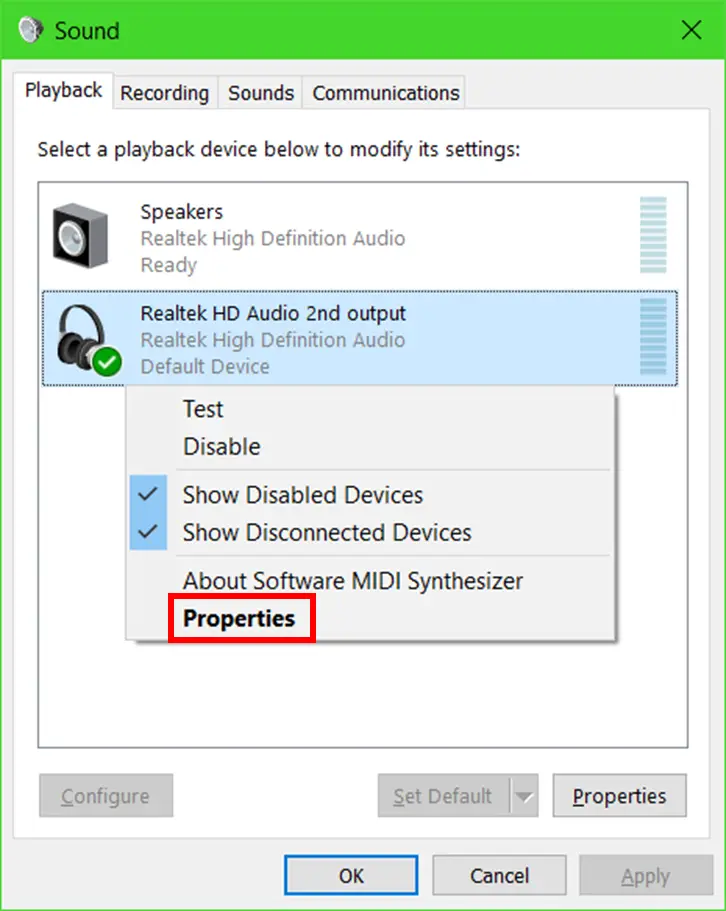
- Go to the “Playback” tab then right-click on “Realtek High Definition Audio” and select “Properties”.
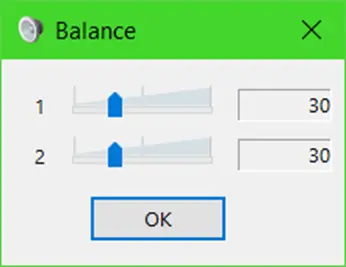
- Go to the “Levels” tab and click “Balance”.
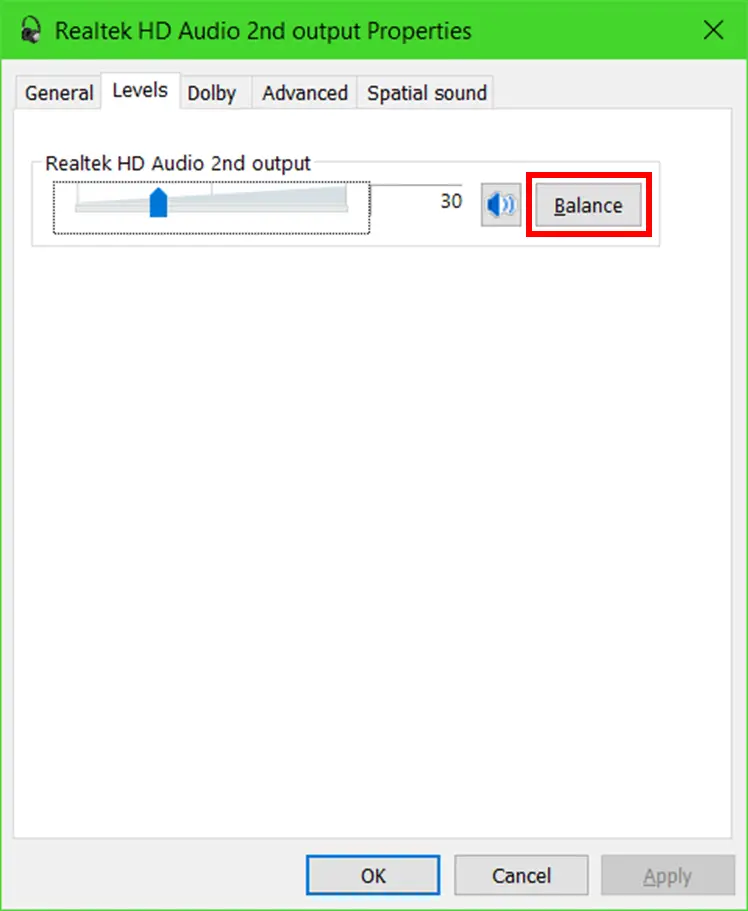
- Adjust the levels so the left and right have the same volume levels.

- Perform a test by playing any audio from the computer.
- Right-click on the speaker icon on the System tray and select “Open Sound settings”.
- Check if 7.1 Surround Sound (applicable to 7.1 Surround Sound headsets only) and/or THX Spatial software is installed on the PC.
- Disable 7.1 Surround Sound or THX Spatial. Click on the 7.1 Surround Sound icon in the system tray and click the slider to turn it on or off. Alternatively, open the 7.1 Surround Sound app and click on the “Turn ON” or “Turn OFF” button.Note: If the earpiece works once the software is disabled, reinstall the software and restart the computer.
- Reinstall the audio drivers.
- Press Windows key + S on the keyboard to open the Search bar.
- Type in “Device Manager” and hit enter.
- Expand “Audio inputs and outputs”.
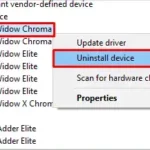
- Right-click on “Speakers (Realtek High Definition Audio)” and select “Uninstall device”.
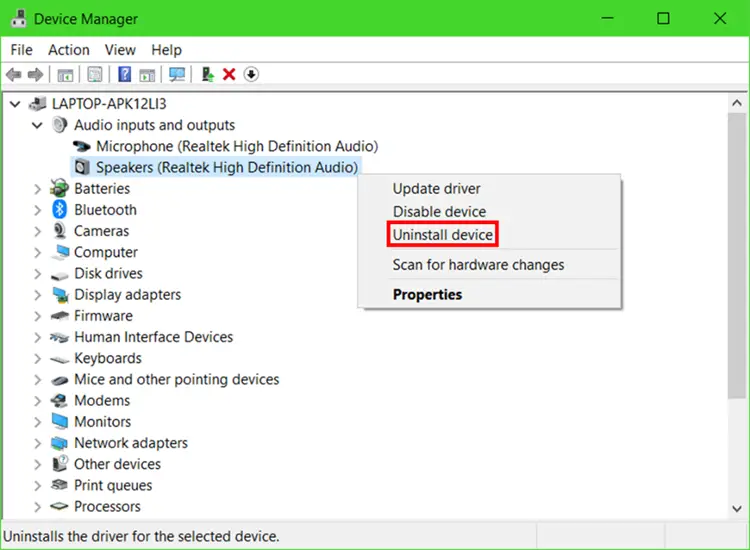
- Restart the computer to completely uninstall the drivers. The drivers are automatically installed on the computer after a restart.
- Try the headset on a different computer to further isolate the issue. If the headset is working properly on a different device, the issue could be due to a defective computer or device audio port.
USB Type Headsets
- Ensure the device is plugged in directly to a PC and not a USB hub.
- For wireless headsets, ensure it is fully charged and turned on.
- For headsets with in-line volume or headset volume controls, ensure it is not set too low.
- Make sure the headset is set as the default device.
- Right-click on the speaker icon on the system tray and select “Open Sound settings”.
- Click “Sound Control Panel” under “Related Settings”.
- Right-click on the Razer headset and select “Set as Default Device”. It is the default device if it has a green checkmark on it.
- Check system volume settings.
- Right-click on the speaker icon on the system tray and select “Open Volume mixer”.
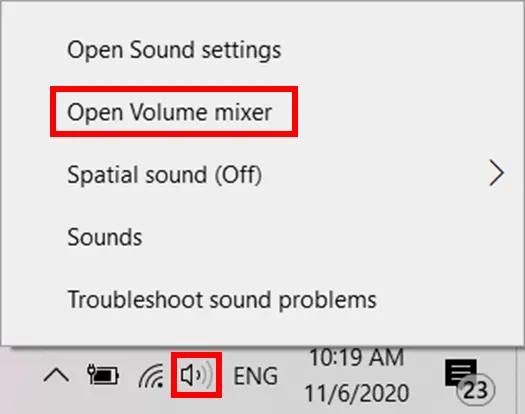
- Adjust the volume levels. Ensure they are not set to a minimum level or muted.
- Right-click on the speaker icon on the system tray and select “Open Volume mixer”.
- Check the balance audio settings in Windows.
- Right-click on the speaker icon on the System tray and select “Open Sound settings”.
- Click “Sound Control Panel” under “Related Settings”.

- Go to the “Playback” tab then right-click on “Realtek High Definition Audio” and select “Properties”.

- Go to the “Levels” tab and click “Balance”.

- Adjust the levels so the left and right have the same volume levels.
- Right-click on the speaker icon on the System tray and select “Open Sound settings”.
- Perform a test by playing any audio from the computer.
- Disable THX in Synapse 3.
- Open Synapse 3 and go to the “AUDIO” tab > “MIXER”.
- Disable THX Spatial Audio by clicking the slider. Green means on and grey means off.

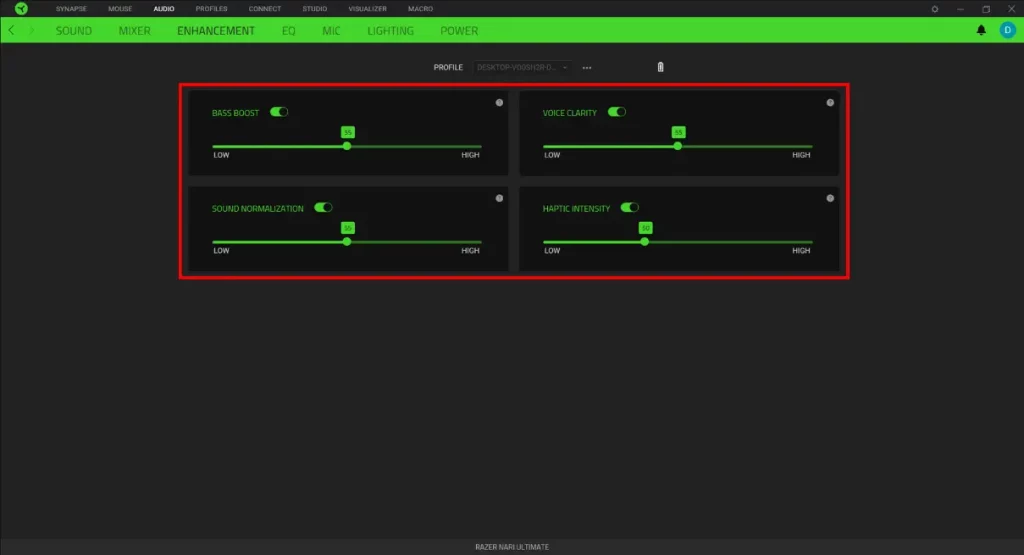
- Disable Audio Enhancements.
- Open Synapse 3, go to “AUDIO” tab > “ENHANCEMENT”.
- Disable all enhancements or adjust the levels according to your preference.
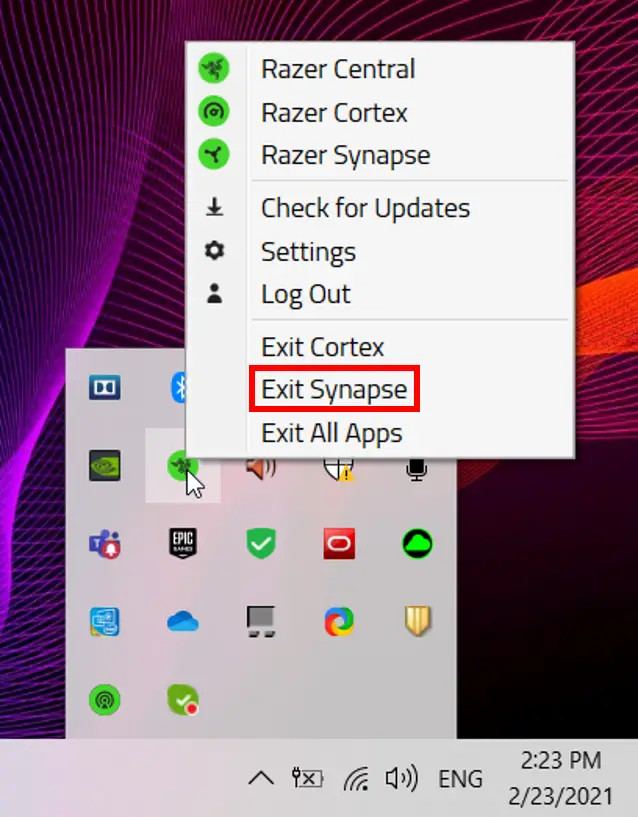
- Disable Synapse 3. Right-click the Razer Synapse icon found in the system tray then select “Exit Synapse”.
- If the headset works without Synapse, do a clean reinstall of Synapse, see How to perform a clean re-installation of Razer Synapse 3 & 2.0 on Windows.
- Uninstall headset drivers.
- Press Windows key + S on the keyboard to open the Search bar.
- Type in “Device Manager” and hit enter.
- Go to “Audio inputs and outputs”.
- Right-click on the Razer headset and select “Uninstall device”.
- Restart the computer to completely uninstall the drivers. The drivers are automatically installed on the computer after a restart.
- Try the headset on a different computer to further isolate the issue. If the headset is working properly on a different device, the issue could be due to a defective computer or device USB port.