VIVITAR DVR922HD 4k Dual-Screen Action Cam
Precautions
Please read the precautions carefully before using this video camera for proper and safe operation, to optimize its performance and extend its life.
- Before using the camera, please format the memory card, and then to insert to camera.
- Take good care of the video camera and prevent water or sand particles from entering the video camera when it is used on the beach or water, because water, sand particles, dust or component containing salt may damage the video camera.
- Keep the video camera free of dust and chemical materials. Keep it in a cool, dry and well ventilated environment. Do not keep the video camera in a high temperature, moist or dusty environment.
- Please check if the video camera operates normally before use.
- If dirt or stain is accumulated on the video camera or on its lens, use soft, clean and dry rag to wipe it away gently. If the video camera or its lens is stained with sand particles, blow them away gently. Do not use a cloth to wipe the surface. Otherwise, it may scratch the surface of video camera or its lens.
- If it is required to clean camera surface, firstly blow away the sand dust accumulated on this surface, and then wipe the camera gently with rag or tissue applicable to optical equipment. Please use the cleaning agent of video camera for wiping if necessary. Do not use organic solvent to clean the video camera.
- Do not touch the lens surface with fingers.
- Please back up the data if the memory card inside this video camera is used for the first time.
- The externally installed memory cards are manufactured from precise electronic components. Data may be lost or damaged under the following circumstances:
- Improper use of the memory card.
- The memory card is bent, dropped or scratched.
- Place it under high temperature or moist environment or expose to sunshine directly.
- Electrostatic or electromagnetic field exists around the memory card.
- This memory card is taken out or power supply is interrupted when this video camera or computer is connected to the memory card (i.e. during reading, writing and formatting).
- Touch the metal contact surface of the memory card with fingers or metal materials.
Parts of the camera
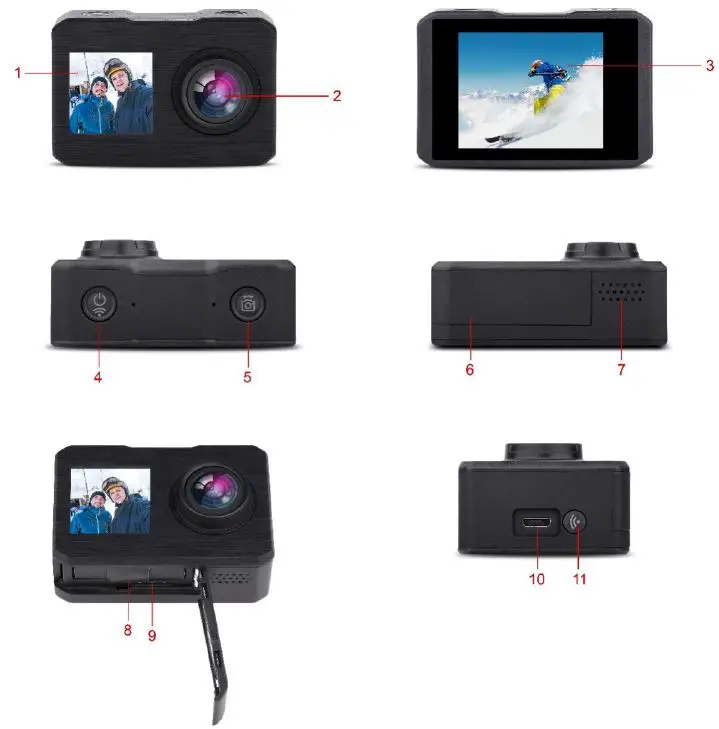
- 1.3inch screen
- lens
- 2.0inch screen
- power on off ,mode
- shutter
- battery cover
- microphone
- battery place
- Micro SD slot
- USB slot
- WIFI button
Function of camera
- Power on/off, mode
- long press about 3-6 second to power on the camera/ off the camera
- after power on, short press this button to swift between video, Photo, slow motion, playback, setting function.
- Shutter
- under video mode, short press this button to start and finish one video.
- under photo mode, short press this button to take photo.
- under the playback mode, short press this button to display video, and long-press this button to enter the delete file window.
- under the setting mode, short press this button to confirm the setting.
- WIFI button
- Under Video/photo/slow-motion mode, short press this button to swift front screen and back screen, long press this button to open the wifi function.
- Under playback mode/setting mode, short press this button can see the photo, and choose setting menu.
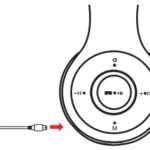
- USB slot
Connect to computer, there will be three choice coming out- USB mode, this function can be used as USB card reader, can copy the video and photo from USB disk.
- Web camera can be used as webcam.
- Connect to power source, can charge the camera.
- Micro SD slot
Support 64GB max micro SD card, please using micro SD card speed above C10, and before using the camera, please format the micro SD card.
Main function
Setting Menu
Press power on/off button to enter the setting page, press shutter button to enter the setting menu.
Press power on/off button to choose the setting menu, press wifi to enter this menu, and press shutter button to confirm the choice.
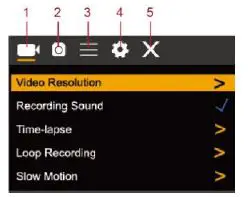
- video mode setting
- photo mode setting
- General Settings Menu
- setting menu
- exit
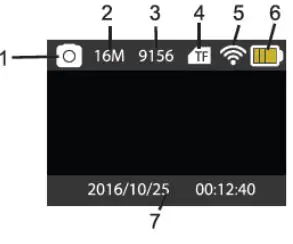
Video mode
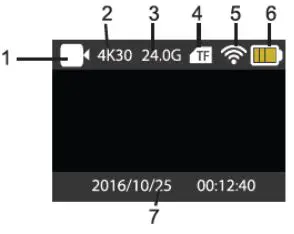
- video mode
- current video resolution
- Micro SD card memory left
- Micro SD card situation
- WIFI situation
- battery capacity left
- time and date
Photo mode
- photo mode
- current photo resolution
- photo taken quantity
- Micro SD card situation
- WIFI situation
- battery capacity
- time and date
Wifi and app
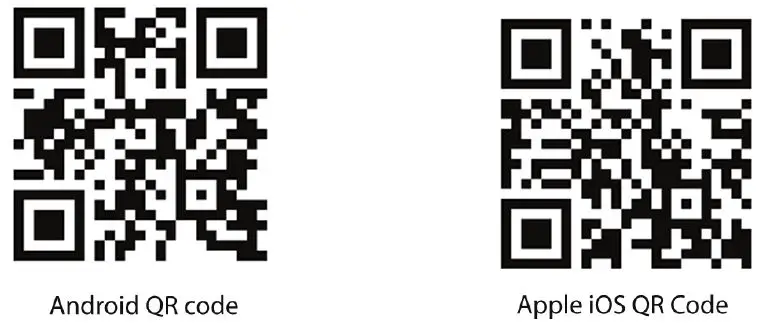
APP download
Please do google APP market or apple APP store to download “Vivitar DVR922”.
Scan bellow QR code also can download the APP.
Open WIFI
Under video/photo/slow motion mode to long press wifi button to open wifi. Camera will show window of the wifi name and password, wifi name is “DVR922HD_XXXX”, wifi password is “12345678” . Search the wifi name on your smart phone, connect the wifi name and enter password to connect the wifi and camera.
Then open the app, start to have fun on your camera.
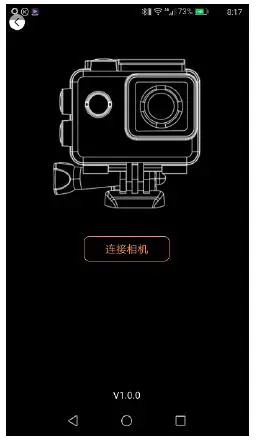
APP operation
After smart phone connect the camera, press APP to enter the APP as bellow.
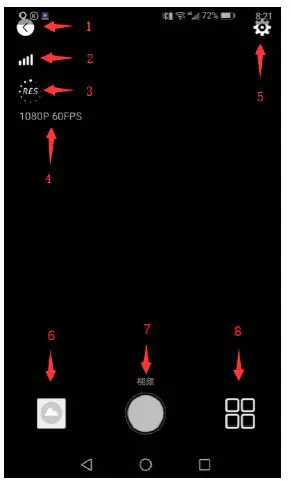
- exit
- WIFI signal
- resolution setting
- current resolution
- camera setting
- photo/video data
- shutter
- mode choose
Specification
| Function mode | Video, photo, slow motion, playback |
| LCD screen | 2.0’’ inch screen+1.3” inch screen |
| Picture
resolution |
16M(4608*3456) 12M(4000*3000), 8M(3264*2448). 5M(2592*1936),
2M(1600*1200) |
| Video resolution | 4K(3840*2160 30fps), 2.7K(30fps), 1080P(1920*1080 30fps),
1080P(1920*1080 60fps) 720P(1280*720 30fps) 720P(1280*720 60fps) 720P(1280*720 120fps) |
| Storage
medium |
Micro SD Card (Maximum supporting 64GB) |
| File format | Photo: JPG Video:MP4 |
| USB Port | USB2.0 |
| Power supply | 3.7V rechargeable lithium battery |
| Menu
language |
English etc |
| Power save | 1min/3min/5min/OFF |
| Operation
system requirements |
Windows XP/ Vista/7/8,Mac 10.8 |