VIVITAR IMP-3038 Bluetooth Smart Watch
INTRODUCTION
Thank you for purchasing the Bluetooth Smart Watch. You can use your device to track steps, distance, and calories. In order to get the best results, please read this manual first before using your device.
FEATURES
- Tracks steps, distance, calories burnt, and quality of sleep
- Heart rate and blood pressure monitor
- Time, alarm, and sedentary reminders
- Wirelessly syncs data to smartphones
- Receive incoming calls and text alerts
- Rechargeable battery with long battery life
SPECIFICATIONS
- Screen: 1.3” TFT
- Battery: 150mAh Rechargeable Lithium-Ion
- Bluetooth Version: Bluetooth 4.0
- Working Time: ~5 days
- Standby Time: ~10 days
- Compatibility: Android 4.2 and higher, iOS 8.0 and higher
PACKAGE CONTENTS
- Bluetooth Smart Watch
- User’s manual with warranty information
A QUICK LOOK
When wearing your smartwatch, make sure that the band is tight enough so that the sensor is making contact with your skin, but not so tight that it is uncomfortable.
CHARGING
To charge your activity tracker, follow the steps below: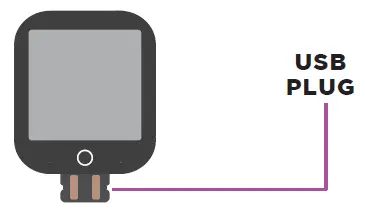
- Take the wristband off of your watch so that you can access the USB plug.
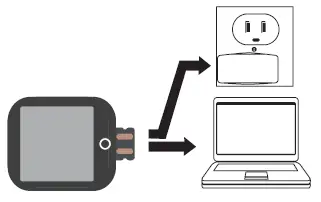
- Slide the USB plug into a USB port on your computer, or a suitable USB charging adapter.
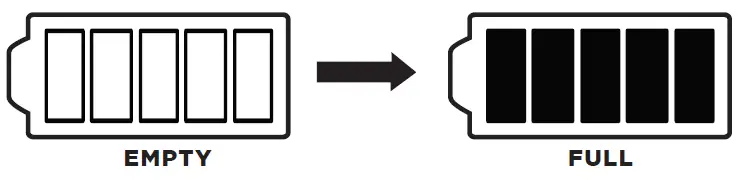
- Once fully charged, the battery status indicator on the display screen will go from empty to full.
WARNING
- When connecting to the USB port, make sure the plug is inserted correctly.
- If the charging icon does not appear, be sure the plug has not been inserted upside down.
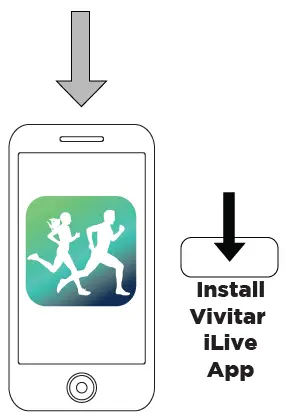
APP INSTALLATION
In order to use your smartwatch, you will first need to download the Vivitar iLive App, which is available on the Google Play Store and on the iPhone App Store.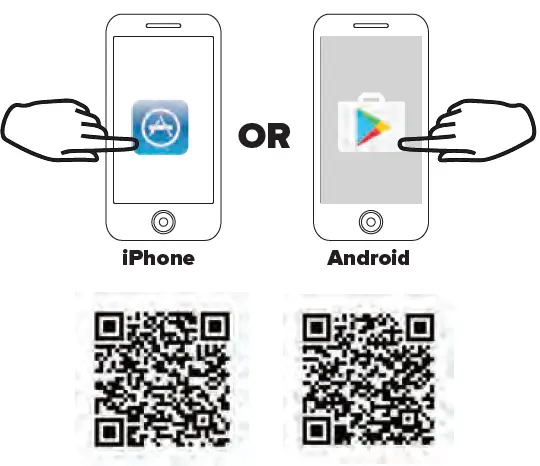
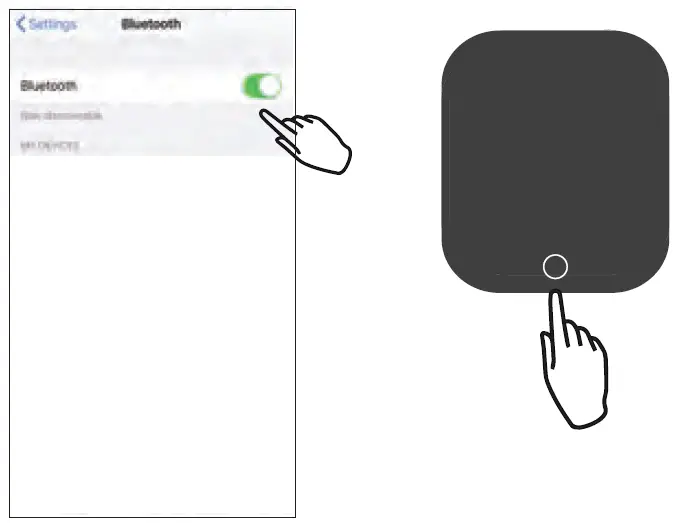
BLUETOOTH SETUP
To use your smartwatch with your smartphone, you will first need to set up a Bluetooth connection between both devices. To do so, follow the steps below:
- Go to your phone’s Bluetooth settings menu. Make sure that Bluetooth is turned ON.
- Press and hold the function button on your smartwatch for approximately 4-5 seconds to power it on.
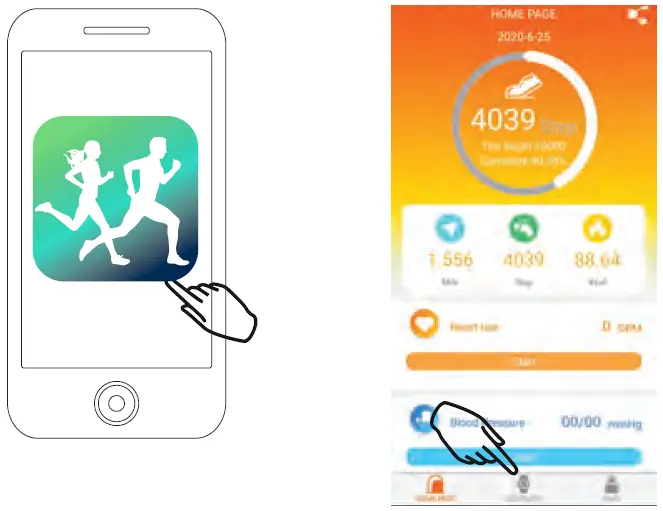
- Open the Vivitar iLive software application on your phone.
- If the app’s home page opens, press the Equipment icon to access Bluetooth pairing options.
BLUETOOTH SETUP
In the equipment menu, you will see the device connection status.
Connection:
View if your smartphone is paired with your smartwatch. If not, press here to connect.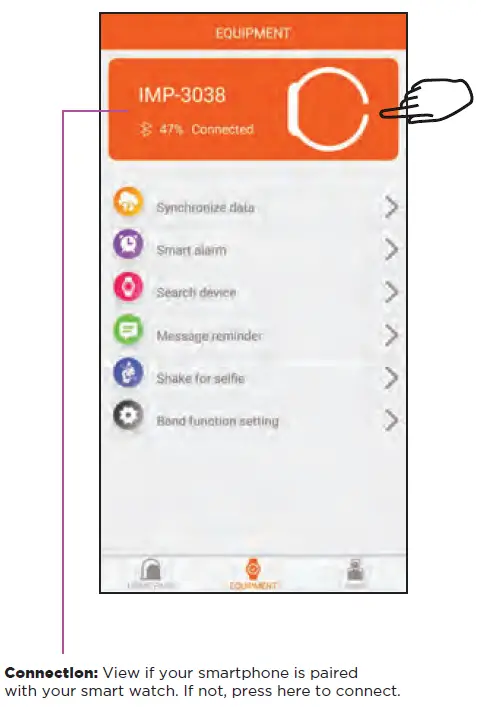
USER SETUP
In order to get the best possible results when using the Vivitar iLive app, enter your personal data before using. To do so, follow the steps below.
- Press the “Mine” icon in the lower right hand corner of the screen.
- In the user settings menu you can explore the following settings:
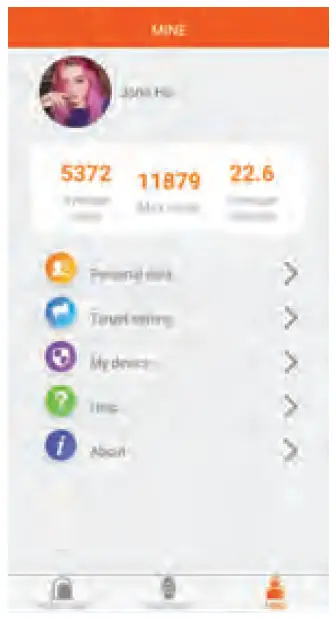
Personal Data:
Input your Name, Gender, Height, Weight, and Birth Date.
Target Settings:
Input daily steps, calorie, and mileage goals.
My Device:
View System information.
Help:
Have problems using your watch? View the available help files.
About:
See what version of your app you have installed.
ACTIVITY
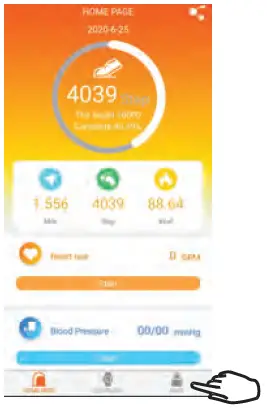
- When you open the iLive software application, the main activity panel will appear, showing your steps, miles, calories and sleep for the day.
- Press the Start icons to get heart rate, blood pressure or sleep measurements.
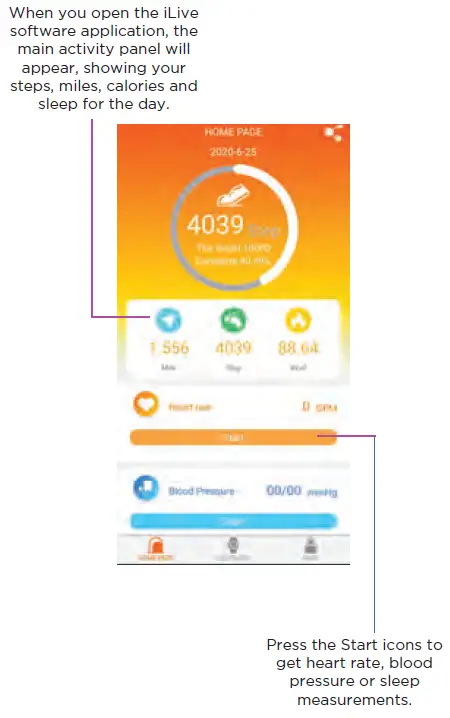
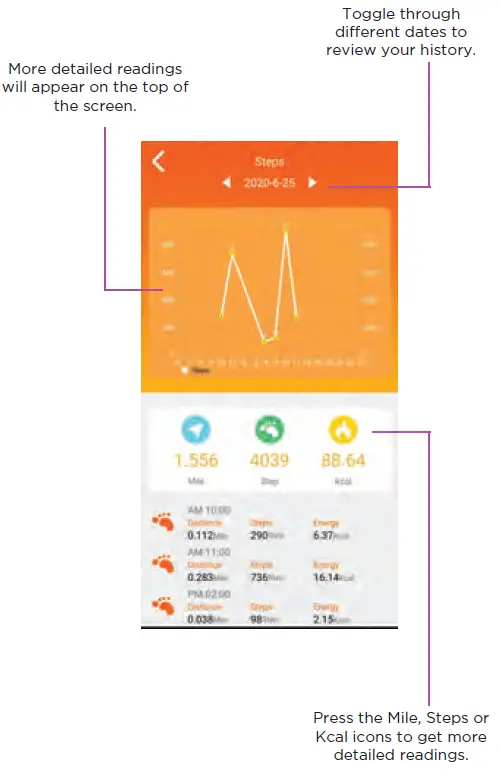
- More detailed readings will appear on the top of the screen.
- Toggle through different dates to review your history.
APP SETTINGS
For additional settings, press the “Equipment” icon.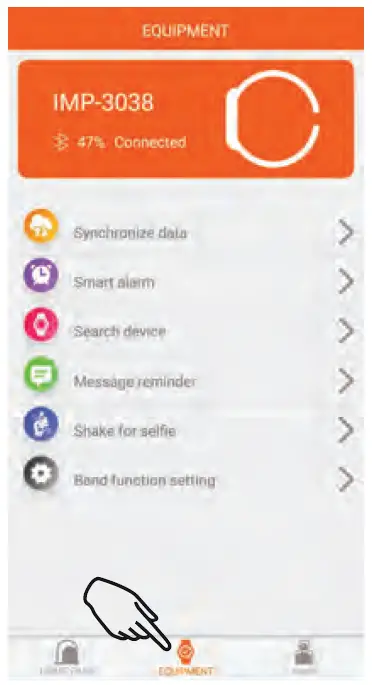
Synchronize Data:
If you have been using your smartwatch away from your phone, press this option to make sure that all new data is recorded to your app.
Smart Alarm:
Set up different alarms so that your smart watch will vibrate at different times during the day.
Search Device:
If you misplace your watch, press here and it will begin to vibrate immediately.
Message Reminder:
This allows you to choose for the smartwatch to vibrate depending on what type of message is coming in. Note that this feature may not work with full functionality on all phones.
Shake for Selfie:
Press here and your phone’s camera screen will open. Shake your watch to snap a photo.
Band Function Setting:
This allows you to set up a series of reminders to drink water and to stay active. Your watch will vibrate to help you remember your goals. Other general settings can be accessed here.
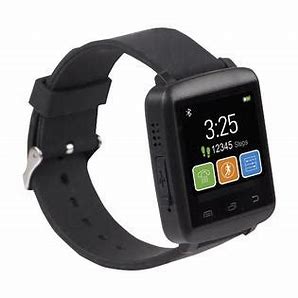
SMARTWATCH
Press and hold the function button for approximately 4-5 seconds to power on your smartwatch. Once powered on tap the function button repeatedly to toggle through the different modes. Hold the function button down to access a mode. See below for an explanation of each mode.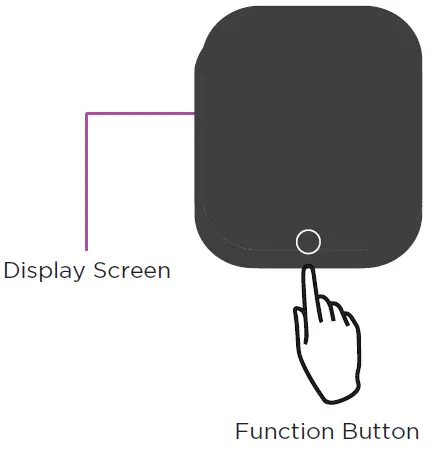
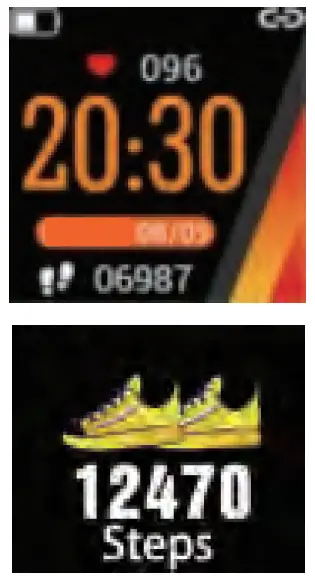
- The main Display Screen Displays the current time as well as step and heart rate measurements. Also displays the battery power and if there is a Bluetooth connection.
- Steps: Displays the number of steps you have taken.
Distance:
Displays the number of miles you have traveled.
Calories:
A fire icon appears on the screen. Displays the number of calories you have burned.
Sports Mode:
Choose among different sports (running, cycling, climbing or swimming) to measure how long you spend each day exercising.
Heart Rate:
Measures your heart rate in beats per minute.
Blood Pressure:
Measures your blood pressure.
Blood Oxygen:
Measures the amount of oxygen in your blood.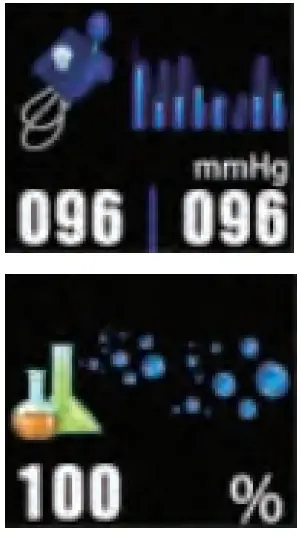
Sleep:
Monitors the quantity and quality of sleep you are getting.
Stopwatch:
A basic stopwatch tool to assist you in your workouts.
Do Not Disturb Mode:
Use the do not disturb mode when you want to sleep or be sure that your smartwatch is silenced.
FCC STATEMENT
Changes or modifications not expressly approved by the party responsible for compliance could void the user’s authority to operate the equipment. This device complies with Part 15 of the FCC Rules. Operation is subject to the following two conditions: (1) this device may not cause harmful interference, and (2) this device must accept any interference received, including interference that may cause undesired operation.
This equipment has been tested and found to comply with the limits for a Class B digital device, pursuant to Part 15 of the FCC Rules. These limits are designed to provide reasonable protection against harmful interference in a residential installation. This equipment generates, uses and can radiate radio frequency energy and, if not installed and used in accordance with the instructions, may cause harmful interference to radio communications. However, there is no guarantee that interference will not occur in a particular installation. If this equipment does cause harmful interference to radio or television reception, which can be determined by turning the equipment off and on, the user is encouraged to try to correct the interference by one or more of the following measures:
- Reorient or relocate the receiving antenna.
- Increase the separation between the equipment and receiver.
- Connect the equipment into an outlet on a circuit different from that to which the receiver is connected.
- Consult the dealer or an experienced radio/TV technician for help.
WARRANTY CARD
This warranty covers the original consumer purchaser only and is not transferable.
This warranty covers products that fail to function properly UNDER NORMAL USAGE, due to defects in material or workmanship. Your product will be repaired or replaced at no charge for parts or labor for a period of one year.
What Is Not Covered by Warranty:
Damages or malfunctions not resulting from defects in material or workmanship and damages or malfunctions from other than normal use, including but limited to, repair by unauthorized parties, tampering, modification or accident.
To Obtain Warranty Service and Troubleshooting Information:
Call 1-800-592-9541 or Visit our website at www.vivitar.com. To receive a Warranty service along with the name and address of an authorized product service center, the original consumer purchaser must contact us for problem determination and service procedures. Proof of purchase in the form of a bill of sale or receipted invoice, evidencing that the Product is within the applicable warranty period(s), MUST be presented in order to obtain the requested service. It is your responsibility to properly package and send any defective products along with a dated copy of proof of purchase, a written explanation of the problem, and a valid return address to the authorized service center at your expense. Do not include any other items or accessories with the defective product. Any products received by the authorized service center that is not covered by warranty will be returned unrepaired.