ZOSI Security Camera User Guide
Z18.5.T.1
For more information of your new system, please refer to www.zositech.com
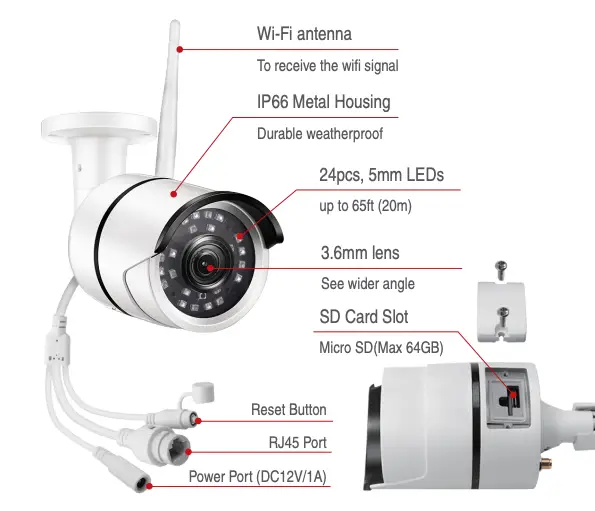
1. Camera Overview
2. Mounting Camera
2.1 Camera Connection Diagram
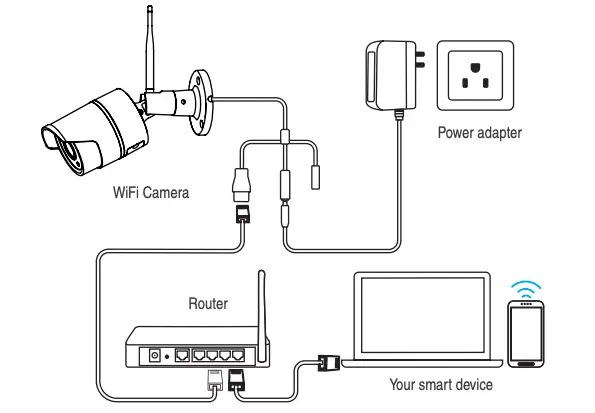
For initial setup, connect the camera to the LAN port of the router by an Ethernet cable. Then follow the steps below.
Make sure your camera and smart device are connected to the same router.
2.2 Before Installing the Camera
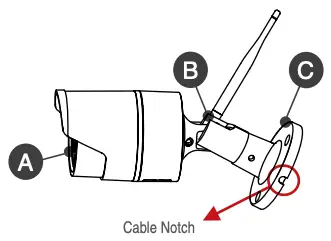 A. Light Sensor and IR LEDs
B. Adjustment Screw
C. Camera Base
- Decide whether to run the cables through the wall / ceiling (drilling required) or along the wall / ceiling.
- If you run the cables along the wall / ceiling, you must run the cable through the cable notch on the base. This will keep the camera base fasten to the surface when mounted.
2.3 To install your camera
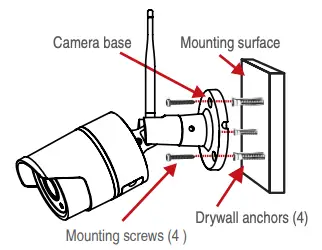 Use the included mounting template to mark holes for the screws. Drill holes for the mounting screws.
NOTE: Insert the included drywall anchors if you are installing the camera in drywall.- Connect cables as shown in the section “Connecting the Camera”
- Feed the cable through the mounting surface or cable notch and mount the camera stand to the surface using the provided screws.
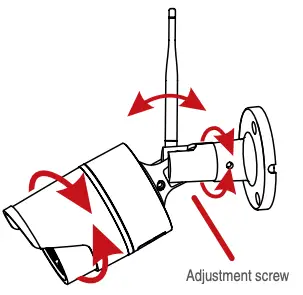
- Use a spanner (included) to loosen the adjustment screw.
- Adjust the camera position as demand.
- Tighten the adjustment screw to secure the position.
 ATTENTION
This camera includes an Auto Mechanical IR Cut Filter. When the camera changes between Day/Night viewing modes, an audible clicking noise may be heard from the camera. This clicking is normal, and indicates that the camera filter is working.
3. Personal Account Registration
The following instructions are for the Android APP; instructions for the iOS version are slightly different.
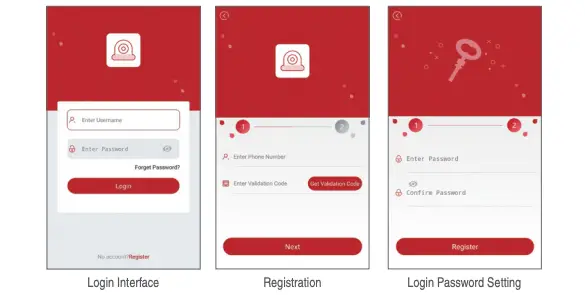
- Start and install the mobile app “Zosi Smart”, which can be downloaded by scanning the QR Code shown on the front page of this manual ).
- Click “Register now” at the bottom of the interface to register your APP account.
- Enter your e-mail address to get validation code. Click “Next” to set the account password and complete the registration process.
Note: Please login your email before registration in case you miss the validation code.
4. Add device(At the first time)
4.1 Wired Connection
A. Power the device and wait for 20 seconds to proceed with next step
B. Use a RJ45 cable connect the device to the WI-FI router, the WI-FI router is the same with your smart phone.
C. Connect your smart phone to the WI-FI network of your router
D. Open zosi smart APP, and select the APP icon in the upper right corner, as shown in the figure
F. Click the ‘[-]’ icon to scan the QR on the camera.
E. Click “ ✓ ” in the upper right corner to save the device adding
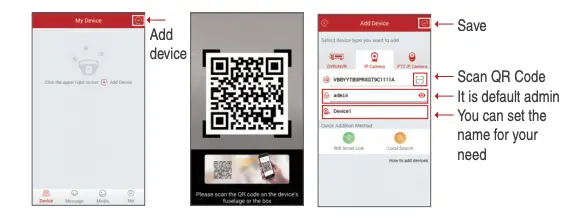
Note: if add the device unsuccessful, please hold the reset button on the camera to reset it, and then reconnect from steps A to E above, until you can see the video on your phone
Pause for 5 seconds then you can hear crisp switch voice from the switcher inside the camera, As show in the figure

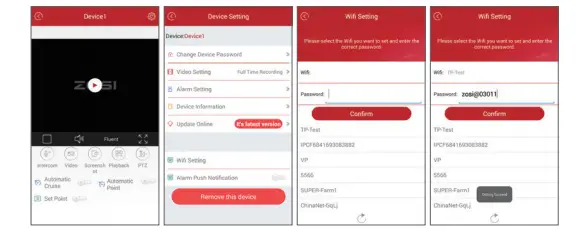
4.2 Convert Wired Connection to Wireless Connection
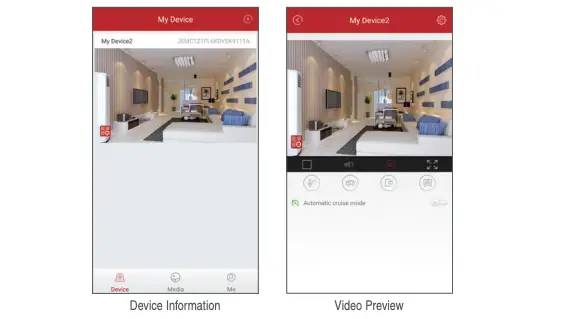
A. Search the corresponding device shown on device list and enter the real-time preview;
B. Click the “  ” button in the upper right corner to enter device settings
C. Select “Wireless Settings” to proceed with the wireless configuration;
D. Select the WiFi network which has stable and strong signal and enter the WiFi password accordingly;
E. Click “Confirm” to finish converting the wired connection to wireless connection.
5. App Function Introduction
5.1 App Information
- Change Password: modify the login password of the app;
- Check for Updates: update your app to the latest version;
- Fingerprint Login: no need to enter password if fingerprint touch function is available in your phone.
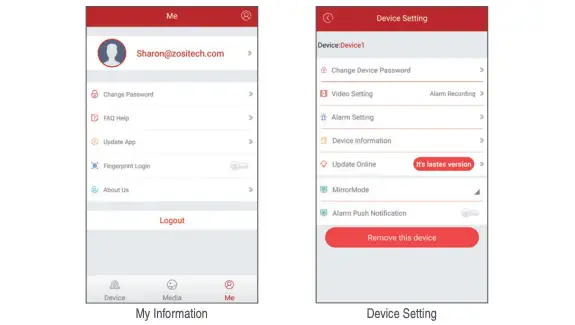
5.2 Device Information
 Share QR Code of the device;
- Video: click to start recording or stop recording;
- Screen Shot: click to start screen capture;
- Event Playback: click to view the motion detection video and other video stored by the camera;
- SD/HD: adjust sharpness of the image;
- Intercom: two-way audio (applicable for device that supports this feature).
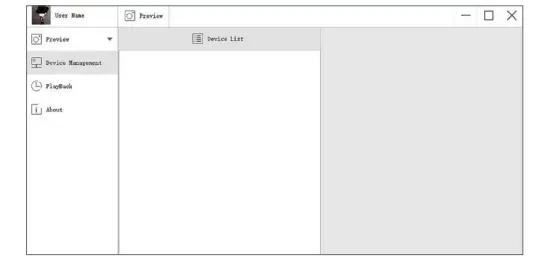
6. PC Client Remote Monitoring
The PC Client (AVSS) is applied for DVR/NVR/IPC preview with features like real-time view, device management, remote video playback and etc.
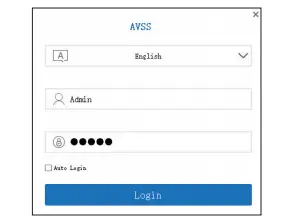
6.1 Login
Double click the icon “AVSS” to stall the PC Client. Select the language and log in.
Note: Use the default user name and password, or enter the same login information as your mobile App.
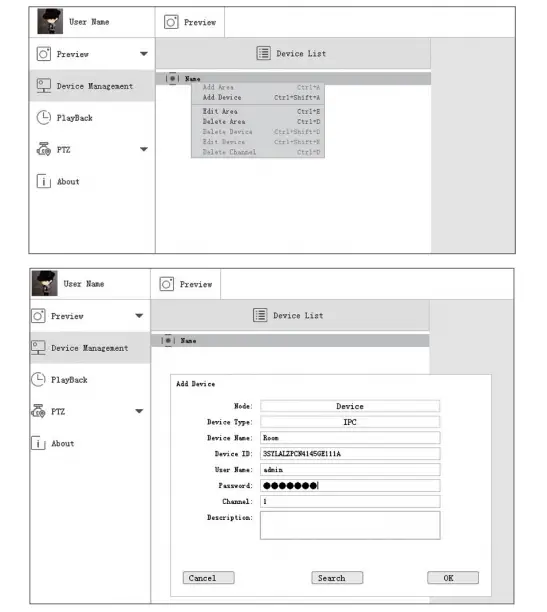
6.2 Device Management
6.2.1 Click “Device Management” to add areas and devices.
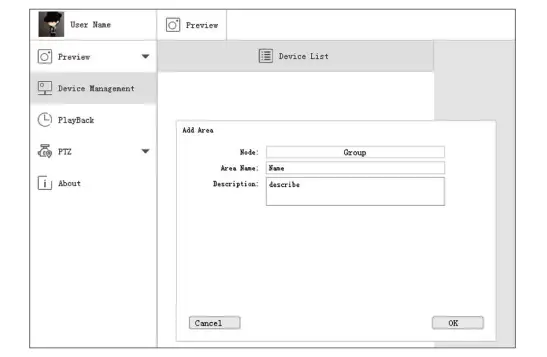
6.2.2 Add Area: Right click the blank to add area and enter the name. The Area Name is used to describe the place being monitored.
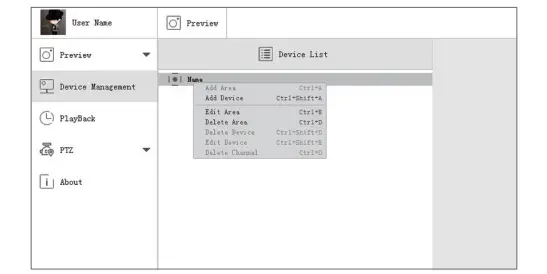
6.2.3 Add Device: Right click the Area Name to add device and change type of the device. Enter the device name, device ID, user name, device password and channel number, then click “OK” to save.
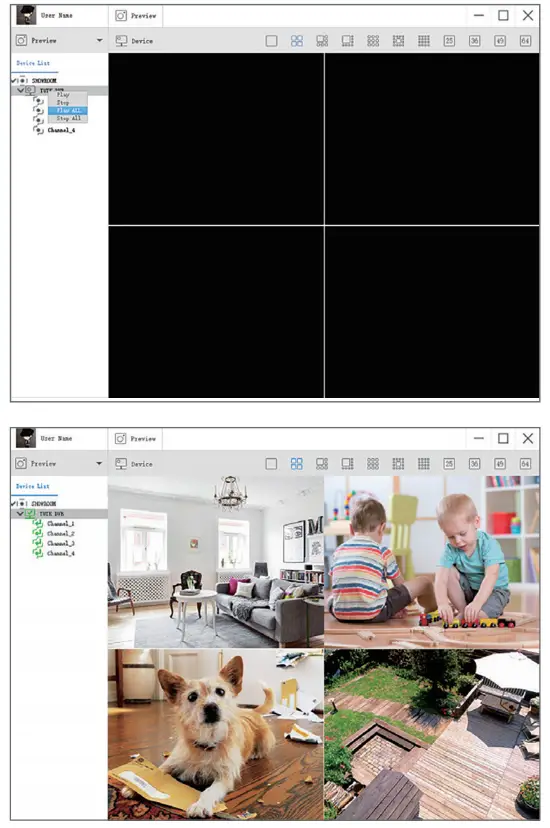
6.3 Preview
Click preview to find device list, right click device to Play All and Stop All, preview video can be displayed or stopped.
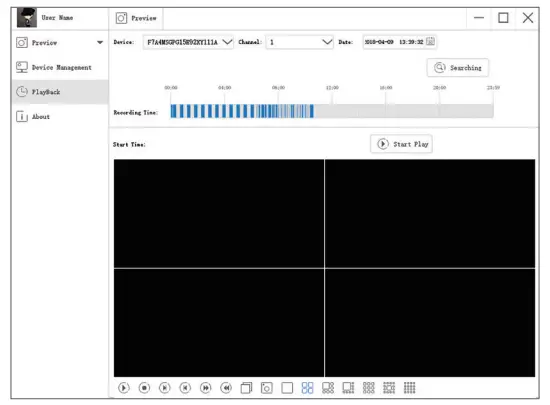
6.4 Playback
Click “PlayBack”; select device ID, channel number, date and then search to find the video. Double click record time to set the exact time and click “Start Play”.
FAQ
Why can’t I add a device using local search?
Make sure that your device is in the same LAN as your phone. If you cannot make both devices in the same LAN, manually enter the UID of your device to complete the adding.
Why is the device disconnected?
Please check:
Is your device connected to the network?
Is the router working properly?
Do you enable the feature of automatically obtaining an IP address?
Why can’t I find a video recording file?
Please check:
Is the SD card damaged?
Is the date of the search file valid?
Is the device system set at the correct time?
Can I download the instruction manual?
Yes. From zosi website
Is this a dvr or nvr, and if not nvr which model has nvr?
It is a DVR. Contact zosi if you only want nvr
Lens viewing size? Like 90 or 120?
If you meant viewing angle it is pretty wide but more likely 90 degrees.
What is the recording continuous frame rate?
30 or less fps. 1-30 on the settings but backup output is avi 7fps slow motion
Does the company offer cloud backup?
No
Does this come with everything to power the four camera’s?
This package contains 2 separate power supplies, one for the DVR and 1 (using a 4 way splitter), for the 4 cameras.
Is these wifi camera, or POE
These are hard wired cameras using cable with BNC connections. The wires are included. These are not wifi or POE.
Can you actually read a recorded license plate?
During the daytime and if the vehicle is not moving yes, the plate will be super clear. If there is movement or if the camera is operating at night in IR mode everything will be a blur. The problem with many budget 4k camera these days is frame rate… 4k resolution at 15 frames does nothing if someone dashes across your camera, all you get is a blur. If they look at the camera stand still and smile then you’ll be able to see the pores on their face. Unfortunately to get true 4k at recording at high fps it’s usually out of budget for more people.
Is this PoE or coax?
Coax
Claim is poe but photo is of coaxial connectors, not power over ethernet. why?
Coax cable is shielded and better for fast non-differential signals.
Will camera glow with red lights when night vision is on?
Yes the inferred lights will light up Red at Night when Night Vision is on.
Does the camera produce light at night?
If you look directly at the camera at night you can see the red infrared lights but that is all
Do you have to physically connect the dvr to a router or can it connect to the Internet wirelessly?
Yes you have to connect it with cat. cable. It is not wireless.
Can you hook up this system to a 4 k tv with out having any issues ?
Yes. When you first install the DVR, it will be in 1024×768 and you will need to manually change it to 4K.
Will this work without internet. But still being able to view wile not near the cameras
No
If you record in 4k, do you need a 4k monitor to play back the video?
Yes
VIDEO
![]()