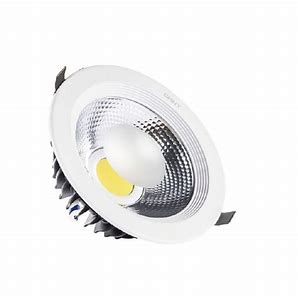
LED-DL35W LED Cob Downlight
Product Information
Certainty at The Speed of Light
LED
LED-DL35W LED-DL45W
Important Safety Instructions
- Read all instructions.
- Only use a licensed electrician for installation.
- Always ensure the power is OFF and the fitting has cooled down
before performing any maintenance, cleaning, changing the globe or
adjustment to the fitting. - Do not install any luminaire near the heat source.
- Do not exceed the nominal supply voltage or amperage
ratings. - To avoid injury or damage to the fitting, please ensure that
power leads and screws are secure before connecting the power.
Installation Instruction
Fig 1: Installation Spacing
| Power supply | 50mm | 25mm | 25mm |
|---|
Tab 1: Ceiling cutout reference table.
| Downlight dia (inch) | Ceiling Cutout (mm) |
|---|---|
| 2 | 60-65 |
| 2.5 | 68-75 |
| 3 | 90-95 |
| 3.5 | 100-110 |
| 4 | 120-130 |
| 5 | 140-150 |
| 6 | 160-170 |
| 8 | 200-210 |
| 10 | 230-260 |
NOTE: Before installation, please check the IP
label on the luminaire to choose the right place to install.
- IP20/IP40: Indoor use only, do not use in wet
or damp place. - IP44/IP54: Suitable for indoor areas including
bathrooms and covered/sheltered areas such as porches. - IP65: Suitable for outdoor areas, not suitable
for water immersion.
NOTE: Before installation, please check the
information of driver as below.
- Non-dim: Can not be used with any dimmer.
- Triac dim: Compliable with recommended TRIAC
dimmers, dimming range 8-100%. - 0/1-10V: Only work with 0/1-10V dimming
system, dimming range 8-100%. - DALI: Only work with DALI dimming system,
dimming range 8-100%.
Installation Procedure
WARNING
- Switch off before installation.
- Switch on only after complete installation and examination of
the circuit. - Professional electrician for installation and maintenance
only.
Turn off power supply before starting any installation. Read
instructions & check you have all the tools & accessories
to complete the installation correctly.
Downlight with external driver
For the product with Slide Switch of Colour Selection, please
select the light colour (CW/NW/WW) before installation.
CW NW WW
- Open a hole according to the cutout size of LED downlight.
- Use a screwdriver to open the driver terminal cover, feed the
main AC wire L. N. in terminal block respectively, then fix the
cover back. - Connect the downlight with driver, hold back the spring clip
then push the downlight into the hole. - Make sure the downlight is fixed tightly in the ceiling, turn
on the power (Fig 1).
Downlight with internal driver
For the product with Slide Switch of Colour Selection, please
select the light colour (CW/NW/WW) before installation.
- Open a hole according to the cutout size of LED downlight.
- Use a screwdriver to open the driver terminal cover on the back
of the downlight, feed the main AC wire L. N. in terminal block
respectively, then fix the cover back. - Hold back the spring clip then push the downlight into the
hole. - Make sure the downlight is fixed tightly in the ceiling, turn
on the power (Fig 1).
Warning: Product modification and improper
installation are not valid for warranty.
View Fullscreen
Certainty at The Speed of Light
LED
LED-DL35W LED-DL45W
Important Safety Instructions
Basic safety precautions should always be followed when installing, including the following: 1. Read all instructions. 2. Licensed electrician for installation only. 3. Always ensure the power is OFF and the fitting has cooled down before performing any
maintenance, cleaning, changing the globe or adjustment to the fitting. 4. Do not install any luminaire near the heat source. 5. Do not exceed the nominal supply voltage or amperage ratings. 6. To avoid injury or damage to the fitting, please ensure that power leads and screws are
secure before connecting the power.
Installation Instruction
Fig 1: Installation Spacing
Power supply
50mm
25mm
25mm
Tab 1: Ceiling cutout reference table.
Downlight dia (inch) 2
2.5
3
3.5
4
5
6
8
10
Ceiling Cutout (mm) 60-65 68-75 90-95 100-110 120-130 140-150 160-170 200-210 230-260
NOTE: Before installation, please check the IP label on the luminaire to choose the right place to install. IP20/IP40 Indoor use only, do not use in wet or damp place.
IP44/IP54
Suitable for indoor areas including bathrooms and covered/sheltered areas such as porches.
IP65
Suitable for outdoor areas, not suitable for water immersion.
NOTE: Before installation, please check the information of driver as below.
Non-dim
Can not be used with any dimmer.
Triac dim
Compliable with recommended TRIAC dimmers, dimming range 8-100%.
0/1-10V
Only work with 0/1-10V dimming system, dimming range 8-100%.
DALI
Only work with DALI dimming system, dimming range 8-100%.
Installation Procedure
WARNING
1.Switch off before installation. 2.Switch on only after complete installation and examination of the circuit. 3.Professional electrician for installation and maintenance only.
Turn Off power supply before starting any installation. Read instructions & check you have all the tools & accessories to complete the installation correctly.
Downlight with external driver
For the product with Slide Switch of Colour Selection, please select the light colour (CW/NW/WW) before installation.
CW
NW
Slide switch for
WW
colour selection
CW NW WW
1. Open a hole according
to the cutout size of led downlight.
2. Use screw-driver to open the
driver terminal cover, feed the main AC wire L. N. in terminal block respectively, then fix the cover back.
3. Connect the downlight with driver, hold back the spring clip then push the downlight into the hole.
Downlight with internal driver
For the product with Slide Switch of Colour Selection, please select the light colour (CW/ NW/WW) before installation.
4. Make sure the downlight fixed tightly in ceiling, turn on the power (Fig 1).
Light colour changeable button
1. Open a hole according
to the cutout size of led downlight.
2. Use screw-driver to open the
driver terminal cover on the back of downlight, feed the main AC wire L. N. in terminal block respectively, then fix the cover back.
3. Hold back the spring
clip then push the downlight into the hole.
4. Make sure the downlight
fixed tightly in ceiling, turn on the power (Fig 1).
Warning: Production modification and improper installation are not valid for warranty.
