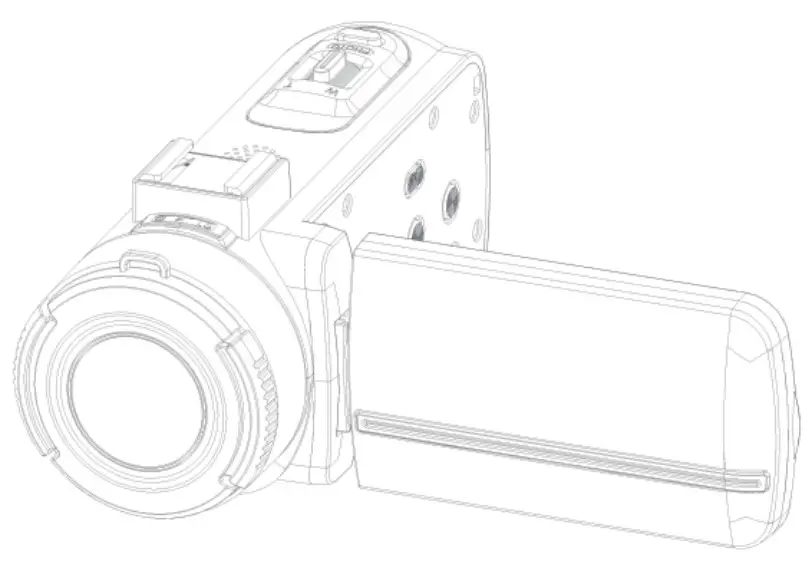
DV02V Video Camcorder
User Manual

Overview
With an 8-mega pixel sensor, this DV can record videos in H.264 format. By using H.264 technology, more footage can be filmed with limited memory storage, and high-quality images up to 8-mega pixels can also be output smoothly. With the color LCD, users can check the images on the device freely.
For a quicker and easier operation, please read the manual carefully before using it, it and keep it in a safe place for future reference.
The information covered in this user manual is based on the latest information at the time of its preparation. Due to the differences in technology development and production batches, they may differ slightly from your actual use.
Instructions
Before using this device, please insert the battery first.
When using a power adaptor (not included), open the rubber seal on the bottom of the unit and insert it into the Mini USB port to connect the power source.
If using a newly purchased memory card for recording at the first time, please ensure to format the memory card before using it.
This camera must use a brand high-speed SD card of C10 or above.
Micro SD card Instruction:
Follow the marking next to the Micro SD card slot and push the SD card into the card slot until the card is fully inserted. To remove the SD card, gently press the end of the memory card inward and the memory card will pop up.
If the memory card is in one of the following conditions, the recorded data may be damaged:
- The memory card is not used properly.
- When recording, deleting (formatting) or reading, turn off the power or remove the memory card.
Note: The memory card gets hot after long use. This situation is perfectly normal.
Quick Start Guide
Power On
Unfold the LCD, the device will be powered on automatically.
Or you can press the power button for around 2seconds to power on the DV.
Power Off
Fold the LCD, the DV will be powered off automatically.
Or you can press the power button for around 2seconds to power off the DV.
Video Recording
Press the Mode button to select different video modes, that is Normal video(Video), Slow video(Slowly), Loop video(Loop), Time-lapse video(Lapse), and press the Video button to start recording.
Photo Capturing
Press the Mode button to select different photo modes, that is Normal photo (Photo), Automatic photo(Auto) , Continuous photo(Burst), Timer photo(Timer), press the
Photo button to take a single photo.
Playback mode
Press the Mode button to navigate to playback mode
Button, Interface, LED Indicator, Function Introductions
Structure Drawing


- LCD
- External Flash mount
- Zoom
- Photo
- Charging LED Indicator
- Recording LED Indicator
- MIC Port
- Record Button
- HDMI Port
- USB Port
- MIC
- Speaker
- Power
1. Press and hold this button to power on/off the camera
2. Press this button to turn on the flash when the camera is on - Mode/OK Button
1. Press this button to enter into the selection menu of different modes,, such as Video, Photo, and Playback
2. Confirm the options in the setting menu - Menu Button
Press this button to enter/exit the setting menu - Down Button
1. Use this button to down navigate the menu
2. Use for switching between different files in playback mode - Up Button
1. Use this button to up navigate the menu
2. Use for switching between different files in playback mode - Lens
- Wristband hole
Use for mount the wristband - Screw hole
Use for mounting the device into a tripod mount - Battery
Please insert the battery before using, and make sure the battery is full for use - Battery cover
Open this battery cover to exchange the battery and SD card - Micro SD card
Please kindly insert the Micro SD card before recording
Video Mode
There are totally four different video modes, that is Normal Video(Video), Slow Video (Slowly), Loop video (Loop), and Time-lapse video (Lapse).
Press the Mode button to enter into the selection menu of different modes.
Video Recording: Press the Video button to start recording. If the camera was in photo mode, it will switch to video mode first, when you press the Video button again, it will start recording.
Video Setting
Press the Menu button to enter into the normal video setting menu when video mode There are totally three interfaces of the setting menu, Video Setting, General Setting, and Exit. You can use the Up or Down buttons to navigate, press the OK button to select and enter into different menus
Rec Resolution
To provide options to set different resolution between 4K 30FPS, 2.7K 30FPS, 1080P 60FPS, 1080P 30FPS, 720P 120FPS, 720P 60FPS, 720P 30FPS Default Setting: 4K 30FPS
Slowly
Options: 1080P 4X,1080P 2X,720P 8X,720P 4X
Video Length (For Loop recording)
Options:2min, 3min, 5min
Default Setting: 2min
Lapse
Options:0.5s,1s,2s,5s,10s,30s,60s
Default Setting:0.5s
EIS
Options: On, Off
Default Setting: Off
White Balance
Options: Auto, Sunny, Cloudy, Incandescent, Fluorescence
Default Setting: Auto
Metering Mode
Options: Average Metering, Center Metering, Spot
Metering, Matrix Metering
Default Setting: Average Metering
Sharpness
Options: Average Metering, Center Metering, Spot
Metering, Matrix Metering
Default Setting: Average Metering
Video Quality
Options: High, Middle, Low
Default Setting: Middle
ISO
Options: Auto, 100、200、400、800、1600、3200、6400
Default Setting: Auto
Time Watermark
Options: Turn on, Turn off
Default: Turn on
Rec Audio
Options: Turn on, Turn off
Default: Turn on
Photo Mode
There are totally four different video modes, that is Normal photo (Photo), Automatic photo(Auto), Continuous photo(Burst), Timer photo(Timer), and press the Photo button to take a single photo.
Press the Mode button to enter into the selection menu of different modes.
Photo Capturing: Press the Photo button to start capturing. If the camera was in video mode, it will switch to photo mode first, then press the Photo button again to take a photo.
Photo Setting
There are totally three interfaces of the setting menu, Video Setting, General Setting, and Exit. You can use the Up or Down buttons to navigate, press the OK button to select
and enter into different menus
Pixel Inset
Options:48M,30M,24M,20M,12M,8M,5M,3M
Default Setting:48M
Photo Interval
Options:3s, 10s, 15s, 20s, 30s
Default Setting:3s
Photo Frequency
Options:3P/S,5P/S,10P/S
Default Setting:3P/S
Countdown
Options:3s, 5s, 10s, 20s
Default Setting:3s
White Balance
Options: Auto, Sunny, Cloudy, Incandescent, Fluorescence
Default Setting: Auto
Exposure Setting
Options: -3,-2,-1,0,1,2,3
Default Setting: 0
Metering Mode
Options: Average Metering, Center Metering, Spot
Metering, Matrix Metering
Default Setting: Average Metering
Sharpness
Options: Average Metering, Center Metering, Spot
Metering, Matrix Metering
Default Setting: Average Metering
ISO
Options: Auto, 100、200、400、800、1600、3200、6400
Default Setting: Auto
Time Watermark
Options: Turn on, Turn off
Default: Turn on
Playback
Use the Mode button to enter into the playback interface.
Press the Record button to play or pause the video.
Use the UP or Down buttons to select the files.
Playback Setting
Press the Menu button to enter into the modes selection menu, press the UP or Down button to navigate, and the OK button to confirm the selection.
Delete: Press the menu button to delete the selected file.
General Setting
Use the Up or Down buttons to navigate, the OK button to confirm to enter into the sub-menu.
Image Rotation
Options: Turn on, Turn off
Default Setting: Turn off
Wi-Fi
Options: Turn on, Turn off
Default Setting: Turn off
Wi-Fi Information
Reset Wi-Fi
To reset the Wi-Fi information
Light Source Frequency
Options: Auto, 50Hz, 60Hz
Default Setting: Auto
LED Indicator
Options: Turn on, Turn off
Default Setting: Turn on
Auto Screen Saver
Options: Turn off, the 30S, 1Minute, 2Minutes
Default Setting: Turn off
Auto Power Off
Options: Turn off, 3Minutes, 5 Minutes, 10 Minutes
Default Setting: 3Minutes
Button Prompt
Options: High, Middle, Low, Turn Off
Default Setting: Middle
Startup Music
Options: Open, Close
Default Setting: Open
Language
Options: Simplified Chinese, Traditional Chinese, English, Japanese, Korean, Russia, German, French, Italian, Spanish, Portuguese
Time Format
Options: YYYY/MM/DD, MM/DD/YYYY, DD-MM-YYYY
Time Set
Use the OK button and UP or Down button to set the time, and press the Mode button to exit
Date Set
Use the OK button and UP or Down button to set the date, and press the Mode button to exit
Format
Format the Micro SD card will erase all the data in the card.
Device Info
To show the information of the device.
Factory Reset
All the settings will be returned back to the factory default settings.
Exit
Press the Mode button to enter into the setting menu, and press the Down button to navigate to the exit menu, press the OK button to exit.
Specification Sheet
| Model No. | DVO2V |
| LCD | 3″ IPS LCD |
| Photo Resolution | 48M,30M,24M,20M,12M,8M,5M,3M |
| Video Resolution | 4K3OFPS,2.7K3OFPS,1080P6OFPS, 1080P3OFPS,720P120FPS, 720P6OFPS, 720P3OFPS |
| Photo/ Video Format |
JPEG/AVI |
| Language | English, Chinese, German, French, Italian, Spanish, Portuguese, Dutch, Japanese, and Danish |
| Memory Card | Support Micro SD card up to 64GB |
| USB | USB 2.0 |
| DC Power Supply | Support External DC Power Supply 5V 2A |
| MIC | Built-in |
| Speaker | Built-in |
| Working Temperature | -20°to +70° |
WIFI Function
After you video recorded, you can download the video via connected the WIFI and phone by APP.
The phone APP is connected as follows:
- Open Google Market
- Search the LzxViewer APP and download
- Follow the APP steps to connect
- Warning:
When you connected to the WIFI, The video record function will not work. and Keep the minimum operating distance of 20cm between the Video Camcorder&your body.
FCC warning:
- This device complies with part 15 of the FCC Rules. Operation is subject to the following two conditions:
(1) This device may not cause harmful interference, and
(2) This device must accept any interference received, including interference that may cause undesired operation. - Changes or modifications not expressly approved by the party responsible for compliance could void the user’s authority to operate the equipment.
- This equipment has been tested and found to comply with the limits for a Class B digital device, pursuant to part 15 of the FCC Rules. These limits are designed to provide reasonable protection against harmful interference in a residential installation. This equipment generates, uses, and can radiate radio frequency energy and, if not installed and used in accordance with the instructions, may cause harmful interference to radio communications. However, there is no guarantee that interference will not occur in a particular installation. If this equipment does cause harmful interference to radio or television reception, which can be determined by turning the equipment off and on, the user is encouraged to try to correct the interference by one or more of the following measures:
—Reorient or relocate the receiving antenna.
—Increase the separation between the equipment and receiver.
—Connect the equipment into an outlet on a circuit different from that to which the receiver is connected.
—Consult the dealer or an experienced radio/TV technician for help.