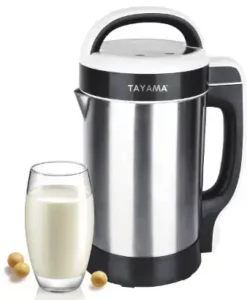
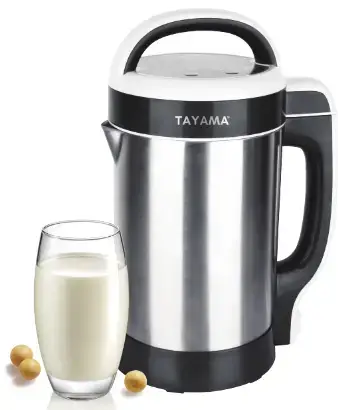
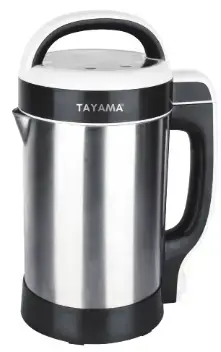
DJ 15SG Soy Milk Maker
User Manual
 Soy Milk Maker
Model: DJ-15SG
Before Use
- Check the contents of the box.
- Check if the machine and the electrical cord are in good condition.
- Remove all packaging materials.
Carefully unpack the soy milk maker and remove any packaging materials. To remove any dust that may have accumulated during packaging, wash the jar, bucket, strainer, and measuring cup. Wipe the machine with a clean, damp cloth. Dry thoroughly. Do not use harsh detergents or abrasive cleaners on any part of the soy milk maker.
CAUTION: Do not immerse the jar or machine in water or other liquid.
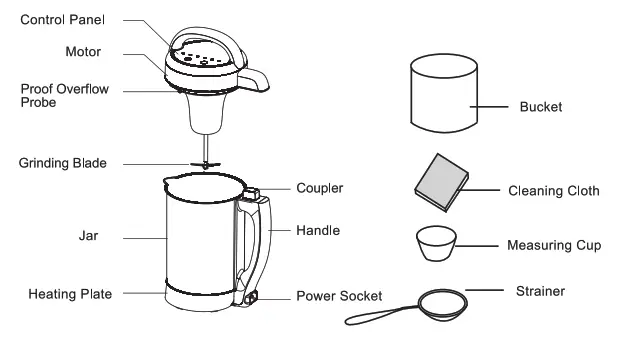
Parts List
TECHNICAL PARAMETER
| MODEL NO | RATING VOLTAGE | RATING HEATING POWER |
MOTOR POWER | RATING CAPACITY |
| DJ-15SG | AC120V/60Hz | 800W | 200W | 1.1-1.3L |
Characteristics
- Specialize design automatic Soy Milk Maker for household use only. Adopting high-quality material, excellent technology, and procedure in preserving the scent and taste of soybean milk.
- The unique blade system grinds beans finely. The unit is submerged halfway in the jar. Soy Milk Maker provides a full aroma and exquisite taste from the soybeans.
- Capable of making soybean milk with dry or wet beans, however wet beans provide a rich taste. Ready in just twenty minutes. Convenient and quick, specially made to fit the contemporary family.
Operation Guide
How to Make Soy Milk
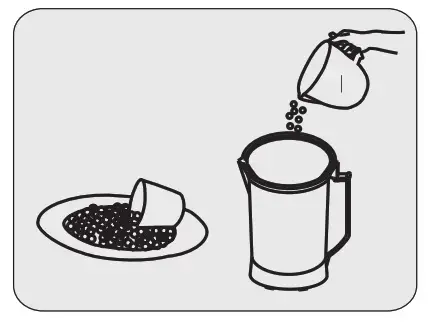
- Put 90g of dry beans or 180g of wet beans into the jar with the included measuring cup.
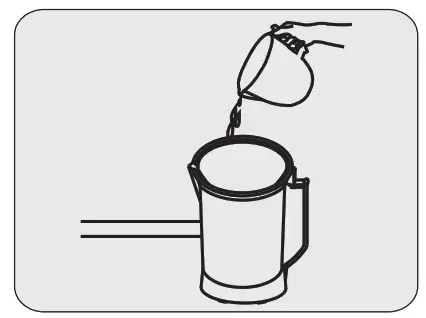
- Pour drinking water into the jar. The water level should not exceed the indicated MAX line on the jar or below the MIN line.
- Put the main machine onto the jar and plugin. Press the “Select” key. Select “Dry Beans” or Soaked Beans” and the indicator light is lit. Press “Start/Cancel” to confirm.
- The heating element will start heating. Several minutes later, the blade will begin to blend and crush the beans. After heating and blending for 20 minutes, the music/alarm wil sound, and the indicator lights will flash when the process has been completed. The soy milk is done!
How to Make Paste
- Put 90g to 120g of food into the jar with the included measuring cup.
- Pour drinking water into the jar. The water level should not exceed the indicated MAX line on the jar or below the MIN line.
- Put the main machine onto the jar and plugin. Press the “Select” key. Select “Paste· and the indicator light is lit. Press “Start/Cancel” to confirm.
- The heating element will start heating. Several minutes later, the blade will begin to blend and crush the food. After heating and blending for 20 minutes, the music/alarm will sound and the indicator lights will flash. The paste is done!
How to Make Fruit or Vegetable Juice
- Place pre-cut fruit or vegetables in the jar. Press the “Select” key to select the “Juice” function. “Juice” indicator light will be lit, press “Start/Cancel” to confirm.
- The main machine starts to work according to its program.
Note: Recommended to cut fruit or vegetable to small pieces with a size no more than 1x1x1cm. Put 2 cups of fruit or vegetable and then add drinking water.
Do not exceed the indicated MAX line on the jar or below the MIN line.
Troubleshooting
| PROBLEM | POSSIBLE CAUSES | POSSIBLE SOLUTION |
| The ingredients were not sufficiently ground. | Too many ingredients. | recommended U measurements. |
| Too little water. | Add water up to 1100 – 1300 ml range. |
|
| The soup is very watery. | Thickening ingredients are missing. | Add a cup of grains or legumes. You can also add thicker vegetables such as potatoes and zucchini. |
| The machine doesn’t work and the indicator light does not light. | The plug Is not connected properly. | Firmly connect the plug. |
| Failure to the adapter. | Contact the distributor. | |
| The lid is not connected well to the top of the appliance. | Place the lid to the jar correctly. | |
| The machine heats. but doesn’t grind. | Failure to the base. Motor damage. | Contact the distributor. |
| Too much food. | Let the machine cool down. Make sure you have the correct amount of food (up to the 1100 ml line). |
| The machine turned off without finishing the program. | The ingredients got burned and stuck to the bottom of the appliance from having too many ingredients in it or too little water. | Empty the appliance, and allow it to cool Remove the |
| stuck-on food with a soft sponge and soft cleanser. Use the correct amount of food (up to the 1100 ml line). Always use more water tha dry ingredients. Do not use previously cooked or processes ingredients. | ||
| Milk overflows | Ingredients exceed the measuring line (up to 1100 ml line). | Make sure you have the correct amount of food. |
| You used processed food. | Add only raw foods without previous processes. | |
| The machine is steaming. | Normal cooking process. |
If the machine stops working, please check these possible causes and solutions before taking the appliance to your distributor.
Cleaning and Maintenance
- After the cooking cycle has completed, remove the lid (top cover) and immediately Pour the fresh soymilk into a separate container. Fill the jar with cold water (half full) and place the motor into the jar for cooling, in order to prolong the life of the machine.
- Wash and dry thoroughly the stainless steel parts. Clean the exterior with a damp cloth.
- To ensure correct and safe handling of the appliance, always hold the handle on both pants of the machine.
- Never immerse the motor, base or entire jar in water, as there are electrical connections.
- Do not allow the control panel to get wet.
- Handwash al components. The appliance is not dishwasher safe.
- For storing away, please clean and completely dry all parts and store in a dry and well-ventilated place.
Important Safeguards
When using electrical appliances, basic safety precautions should always be followed, including:
- This appliance has been designed for use with a 120V electrical outlet. Do not use any other electrical outlet.
To prevent electric shock or damage to the machine, do not get the power cord or the cover of the machine wet. Do not use the machine if the plug or cord is damaged - Never run the machine without the appropriate water level under the permitted levels between 1100 and 1300 ml.
- During and after use, the machine parts may get hot. Do not use it again until it has cooled down. Estimated waiting time: 1 hour.
- Supervision is necessary if the machine is used by or near children.
- Unplug the cord when the machine beeps at the end of the program. Also, unplug it before lifting the lid, and when the machine is not in use.
- Do not use outdoors.
- Do not place the appliance on or near gas or electric cook-tops, or in the oven.
- Extreme caution must be used when moving an appliance containing hot contents or other hot liquids.
- If the machine malfunctions during use or is damaged, immediately unplug the cord. Do not use or attempt to repair a malfunctioning appliance!
- This appliance is for household use only.
- Do not lift the lid cover in the middle of the cooking process. This will cancel the program.
This machine is not intended to be used by persons with reduced physical, sensory or mental capabilities, or lack of experience and knowledge unless they are under the supervision of a responsible person or have been given proper instruction in using the appliance. This appliance is not intended for use by children.
Tayama Appliance USA Inc.
www.tayama-usa.com
Email: [email protected]