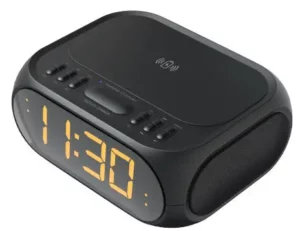
AZATOM HomeHub Q Compact FM Radio with BT Audio andamp; Wireless Charging

Safety Precautions
Read these safety instructions before using your device and store them for possible future reference.
- The device is not intended for use by persons (including children) with reduced physical or sensory capacity. Persons who have not read the manual, unless they have received explanations by a person responsible for their safety and supervision.
- Children should be monitored when using the device.
- The device should not be exposed to any moisture.
- No objects filled with liquids such as vases should be placed on the device.
- Always leave a minimum distance of 10 cm around the unit to ensure sufficient ventilation.
- Open flame sources, such as candles, should not be placed on top of the device.
- The device is intended for use only in a temperate climate.
- At full volume, prolonged listening to the portable audio device may damage the user’s hearing and cause hearing troubles (temporary or permanent deafness, hearing drone, tinnitus, and hyperacusis).
- We recommend not to listen to the portable audio device at high audio volume and no more than one hour per day at medium audio volume.
CAUTION: Danger of explosion if battery is incorrectly replaced or not replaced by the same type or equivalent. - The battery should not be exposed to excessive heat such as intense sunshine, fire or similar.
- Different types of batteries such as new and used batteries should not be mixed.
- The battery must be installed according to the polarity.
- If the battery is worn, it must be removed from the product.
- The battery must be disposed of safely. Always use the collection bins provided (check with your council) to protect the environment.
Specifications
- Rated voltage: DC 9V 2A
- Max consumption: 18W
- Radio frequency: 87.5~108MHz
- Sound power: 4W x2
- Bluetooth compatible version: 5.0
- Distance Bluetooth stays connected: 10m
- Dimensions: L194 x W148 x H75mm
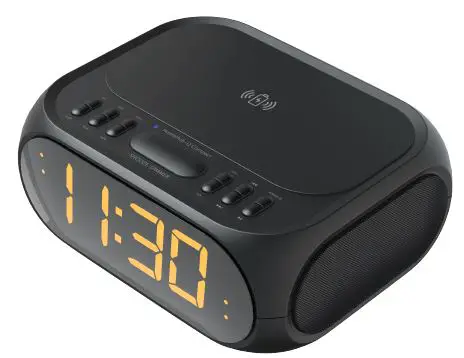
Using your HomeHub Q Compact
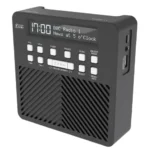
Button Breakdown:
- Power / M: Powers the unit on and off when pressed and held. Pressing once changes the mode of the unit (changing the mode will change the source of audio: Bluetooth, FM & Line-in).
- Play / Pause: Plays or pauses the audio currently playing, this does not apply when using FM mode.
- Next Track / FM Radio Tuning Forward
- Previous Track / FM Radio Tuning Backward
- Volume + Press this to increase the volume in small steps or press and hold to continuously increase the volume.
- Volume – Press this to decrease the volume in small steps or press and hold to continuously decrease the volume.
- Snooze / Dimmer: Use the Snooze button when the alarm is sounding to pause the alarm for a short period of time, When the alarm is not sounding this acts as the screen dimmer button. The screen can be set to Low, Medium and High brightness, you can cycle through these levels of brightness.
- Memory – Use this button to store FM radio stations in order of radio frequency: High to Low
- Memory + Use this button to store FM radio stations in order of radio frequency: Low to High
- Alarm 2: Use this button to set up Alarm 2
- Alarm 1: Use this button to set up Alarm 1
- Set: Adjust and set the time of the device or to store the current station manually.
- Sleep: Use this to set the sleep time for the device to stop playing after a period of time.
Powering the HomeHub Q Compact ON and OFF
When plugged into the mains, the screen will default to the 12H Time format, to change to the 24H time format press the Play / Pause button while the unit is
still in standby mode (before pressing the power button). To power on the unit and begin playing music, press the Power / M button to power the unit on. Then press again to cycle through the Modes (Audio Sources) which are FM Radio, Bluetooth and Line-In. When the unit is powered on the default Mode is FM Radio. To power off the unit, press and hold the Power / M Button.
Pairing your Bluetooth Device
Before connecting to the HomeHub Q Compact, please make sure your audio device you wish use play music from is on and ready to search for new Bluetooth devices.
Power on the Unit by pressing the Power / M button and then cycle through the modes until you have Bluetooth selected.
Once in Bluetooth mode on the HomeHub Q Compact, when you search for new Bluetooth devices on the device you wish to play music from (for example a phone or laptop) the HomeHub Q Compact will be displayed in the list of available devices to connect to.
Select the HomeHub Q Compact and pair with it on your device. To disconnect the HomeHub Q Compact from a Bluetooth device, press and hold the Next Track and Previous Track buttons at the same time. This allows others devices to connect to the HomeHub Q Compact without having to disconnect on your phone or laptop.
Using the FM Radio
Power on the Unit by pressing the Power / M button, the default mode is FM Radio. The current radio frequency will be displayed on the screen of the HomeHub Q Compact.
To start searching for your local FM radio stations, press and hold the Play / Pause button for 2 seconds until the unit starts to search the radio frequencies in your area. Once a station is found the HomeHub Q Compact will store it automatically (The HomeHub Q Compact can store up to 20 stations at once P1 to P20).
To cycle through the automatically stores stations, press the Mem + and Mem – buttons to move up and down the list of up to 20 stored stations. To search for a station manually, while in FM Mode: press either the Next Track and Previous Track buttons to move up or down the frequency once step at a time. Press and hold either Next Track and Previous Track buttons to begin scanning for stations up or down the frequency. Once you have manually found a station you’d wish to store press and hold the SET button. This will then bring up the range of P numbers (Preset Number) on the HomeHub Q Compacts screen. Cycle up and down the list of P numbers to select one you wish to use as that stations Preset number. To delete all Preset stations while in this mode press and hold the Next Track and Previous Track buttons at the same time.
Setting the Clock
When powered on for the first time or when powered on after the batteries have been removed (plugged into the mains, not turned on using the power button on the device) you will need to set the time of the HomeHub Q Compact. To do this press the SET button to cycle through the Year, Month & Date, Hours and Minutes. Once you have selected the option you wish to change, use the Next Track and Previous Track buttons to move up or down the numbers on screen. When the option you have set is correct, press the SET button again to move on to the next option and continue to set the Year, Month, Date and Time. If no button is pressed after 10 seconds once you are on the selection you wish to change, the display is default back to the current time (which will be incorrect if you have not set the time).
Setting the Alarms
With the unit in standby mode (not powered on playing music, only plugged into the mains and displaying the time) press the ALM1 button. This is display a bell icon with the number 1 inside of it. Press the ALM1 button to default the alarm tone to a BUZZ sound, while the display is flashing use the Next Track / Previous Track buttons to cycle between BUZZ or FM Radio as the alarm sound. Press the ALM1 button again to start setting the Alarm 1 volume level using the Next Track / Previous Track buttons to adjust the desired volume. Press ALM1 again to adjust the alarm mode: Monday to Friday, Saturday to Sunday or Monday to Sunday. Press ALM1 once more to confirm the settings for Alarm 1. To set up Alarm 2, simple follow the above steps using the ALM2 button instead of the ALM1 button.
Using Snooze and Sleep
To snooze the alarm when it is sounding, press the Snooze / Dimmer button. This will snooze the alarm for 30 minutes before sounding again. To wake up from the snooze feature, press the snooze button again, or press the Play / Pause button to stop the alarm. To use the sleep feature, when the unit is playing audio from any source, press
the SLEEP button to cycle through the sleep timer durations stopping on the desired duration. This will set a sleep time and put the unit into standby mode (stopping the audio playback) after the duration displayed on the screen)/
Dimming the Display
In any playback mode, press the Dimmer button to adjust the display brightness. Continuing to press the Dimmer button will cycle through Bright, Medium, and Low brightness modes.
Using the USB port for Charging
Connect your devices USB charging cable to the USB port at the rear of the unit. You can now use this to charge your device.
Using Batteries in the HomeHub Q Compact
In the battery compartment please install 2 x AAA batteries to preserve your time, date, presets and alarm settings in case of a power cut or being unplugged from the mains.
REGISTER YOUR PRODUCT ONLINE. TO LEARN MORE & REGISTER FOR OUR AZATOM WARRANTY* PLEASE
VISIT: WWW.AZATOM.COM/WARRANTY
AZATOM© 2020 ALL RIGHTS RESERVED. AZATOM® IS PART OF AZATOM GROUP LIMITED. SEE SITE FOR SAFETY INFORMATION. AZATOM® RESERVE THE RIGHT TO WITHDRAW ANY AND ALL PROMOTIONS WITHOUT NOTICE. FOR FULL WARRANTY, EXTENDED WARRANTY AND PROMOTIONAL OFFER TERMS & CONDITIONS PLEASE VISIT WWW.AZATOM.COM/TERMS-CONDITIONS. REGISTRATION REQUIRED.
