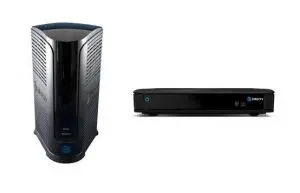
Before proceeding, please make sure your replacement Genie 2 (HS 17) server is installed and turned on. Each Genie Mini or Wireless Genie Mini client needs to paired to the main server individually.
Step 1 – Connect
Place your replacement Genie 2 server beside your non-working server. Transfer one connection at a time to the new server – except for the power cord. Plug the power cord into the replacement server, then into a power outlet.
After a few minutes, the ADD CLIENT button on the of your Genie 2 server will flash green.
Step 2 – Set up
Go to the nearest TV connected to a Genie Mini (or Wireless Genie Mini) and turn it on. If you see WIRELESS CONNECTION LOST on the screen, continue with these instructions. If not, skip to Step 3.
- Select TROUBLESHOOT (or More Information, if shown).
- Select REPEAT SETUP.
- When error code 928 is displayed on the RESET WIRELESS CONNECTION screen, enter 9-8-7-6 on your remote.
- CONNECTING TO VIDEO BRIDGE will display on screen. If the signal quality is good or excellent, select CONNECT NOW – otherwise try moving the Genie Mini client closer to the Genie 2 server. Having trouble? Call 800.388.6597.
Step 3 – Activate
Once connected you’ll see SATELLITE DISH SETUP on screen. You can activate your Genie 2 server online or by calling our automated activation line.
Heads up: You’ll only need to activate the Genie 2 with the first TV/Genie Mini client. To add additional clients, proceed to Step 4.
- Activate online: Go to directv.com/activate – make sure you’re signed in, then follow the prompts to complete.
- Activate via phone: Call our automated activation line at 800.388.6597.
Step 4 – Complete setup
Follow the guided screens to complete the Genie 2 setup. When the NEW LOCATION screen displays:
- Select ADD A NEW LOCATION
- Name the room location and select SAVE NAME
- On the COPY SETTING screen, select SKIP THIS STEP
- On the REMOTE SETUP screen, select SET UP REMOTE LATER
Step 5 – Pair additional Mini(s)
You need to pair each Genie Mini to the new server, even though the location may have been previously set up.
- Go to your next TV with a Genie Mini to pair, and turn on the TV.
- If you see WIRELESS CONNECTION LOST, follow the instructions above in Step 2 (set up).
- If not, repeat instructions in Step 4 to ADD A NEW LOCATION.
- Repeat these steps starting with Step 2 or Step 4 for each TV location.
Note: The ADD CLIENT session (indicated by the flashing button on your Genie 2 server) times out after 60 minutes. To add more clients/TVs, press the ADD CLIENT button again for more time.


