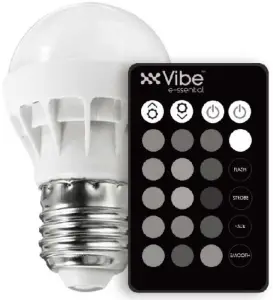

COLOR CHANGING LIGHT BULB APP-CONTROLLED
Features
- Socket Type: E26 Standard
- Voltage: AC 100-240V
- Wattage: 15W
- Light Colon RGB
- Remote Battery: CR2025 (Battery included with remote) Remove safety strip before use.
- FCC ID 2AANZBAPPBO
![]()
Download Smart Life
1: Search “Smart Life” from the Apple store or Google Play.
![]() 2: Scan the QR code from the label or user manual.
2: Scan the QR code from the label or user manual.
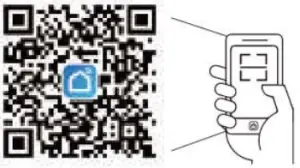
This app is compatible with Andriod 5.0 & 10S10.0 or higher
3. Log in / Register an account
Open the “Smart Life” app, sign up for a new account or log in with an existing account.
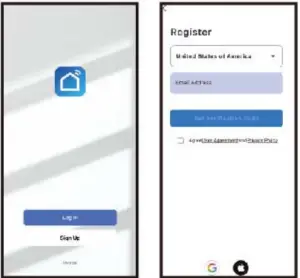 4. App Connection 1. Install and power on the LED bulb, select the home icon within the app.(Make sure you’re connected to your home wifi & your bluetooth is turned on before connecting.)
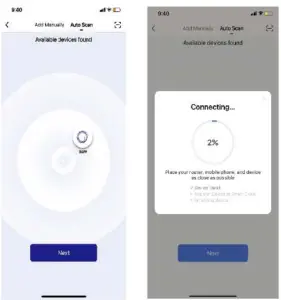
Press “+” or “Add Device”, then click the Auto Scan tab on top. if you did not turn on Bluetooth or Wi-Fi before connecting to the LED bulb, the app will ask you to turn on Bluetooth. The app will automatically search for the LED Bulb, once found, click next to connect. 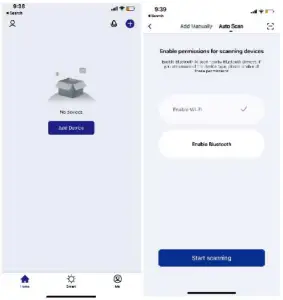
Timer Mode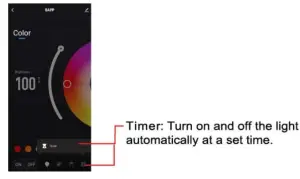
Interface Introduction
1. Color Light Mode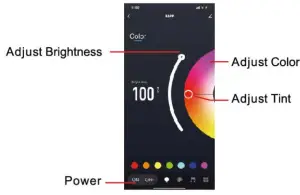
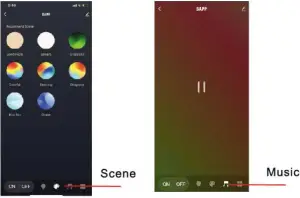
2. Scene
Choose from various scenes where the colors fade into other colors.
In order to use the bulb with another smartphone, you have to remove the device from the currently paired smartphone. Go to the product control panel/dashboard, dick the settings icon on the top right, then click remove the device. It will then be ready to pair with another smartphone. If the current pair smartphone is not available, the bulb needs to be turned on/off 3 times using the light/power switch or remote, this will allow it to pair to another smartphone.
3. Music
Colors flash and fade to the beat of the music.
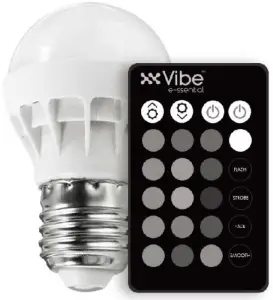
Remote Diagram 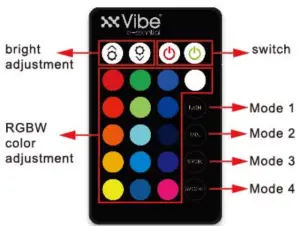
PREPARING THE REMOTE CONTROL
The battery has been pre-loaded into the battery compartment for your convenience.
When using the remote for the first time, pull out the insulation sheet.
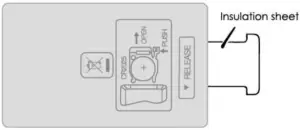 REPLACING THE BATTERY IN REMOTE
Remove the rear battery compartment door and open the battery compartment. 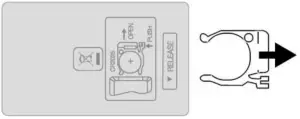
Insert a new CR2025 battery into the compartment by matching the correct polarity. Replace the battery compartment and secure the door with the screw. 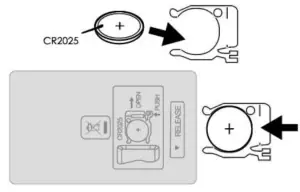
WARNING: TO AVOID BATTERY LEAKAGE 1)
Be sure to insert the battery correctly, and always follow battery manufacturers’ instructions. 2) Always remove a weak or dead battery form the product. 3) Remove the battery if the product is left unused for a long period of time.
WARNING: TO AVOID BATTERY LEAKAGE 1)
- The batteries used with this product are small parts and should be kept away from small children who still put things in their mouths. If they are swallowed, promptly see a doctor and have the doctor phone the American Association of Poison Control Centers (1-800-222-1222).
- Always purchase the correct size and grade of battery most suitable for the intended use.
- Do not mix old and new batteries, alkaline, standard (Carbon-Zinc), or rechargeable (Nickel-cadmium) batteries.
- Clean the battery contacts and those of the device prior to battery installation.
- Ensure the batteries are installed correctly with the regard to polarity(+ and -).
- Always remove batteries if consumed or if the product is to be left unused for a long time.
FCC Statement
This device complies with part 15 of the FCC Rules. Operation is subject to the following two conditions: (1) This device may not cause harmful interference, and (2) this device must accept any interference received, including interference that may cause undesired operation. Please note that changes or modifications not expressly approved by the party responsible for compliance could void the user’s authority to operate the equipment.
FCC INSTRUCTIONS FOR A CLASS B DIGITAL DEVICE OR PERIPHERAL
Note: This equipment has been tested and found to comply with the limits for a Class B digital device. pursuant to port 15 of the FCC Rules. These limits are designed to provide reasonable protection against harmful interference in a residential installation. This equipment generates. uses and can radiate radio frequency energy and, if not installed and used in accordance with the instructions, may cause harmful interference to radio communications. However, there is no guarantee that interference will not occur in a particular installation. If this equipment does cause harmful interference to radio or television reception. which can be determined by turning the equipment off and on. the user is encouraged to try to correct the interference by one or more of the following measures.
- Reorient or relocate the receiving antenna.
- Increase the separation between the equipment and receiver.
- Connect the equipment into an outlet on a circuit different from that to which the receiver is connected.
- Consult the dealer or an experienced radio/TV technician for help.
