

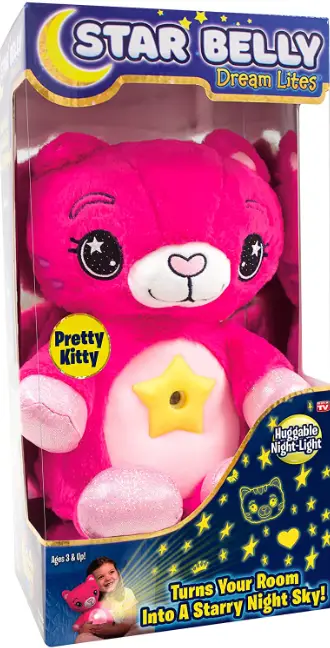
Star Belly Dream Lites Turn your Room into a starry night sky
USING THE BUTTONS:
SETUP:
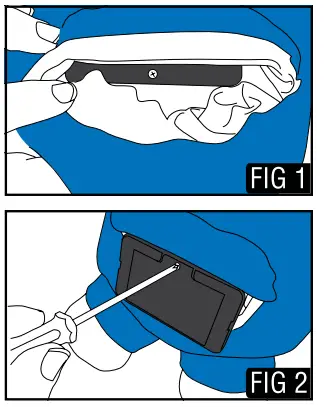
- On underside of pet, open the hook and loop pocket to expose battery compartment (FIG 1 ).
- Use a Philips head screw driver to open battery door. Remove and place aside. (FIG 2)
- Insert 3 x AAA batteries according to polarity direction, as shown (FIG 3).
- Replace battery door and tighten screw. Line up hook & loop strips and press to close (FIG 4).
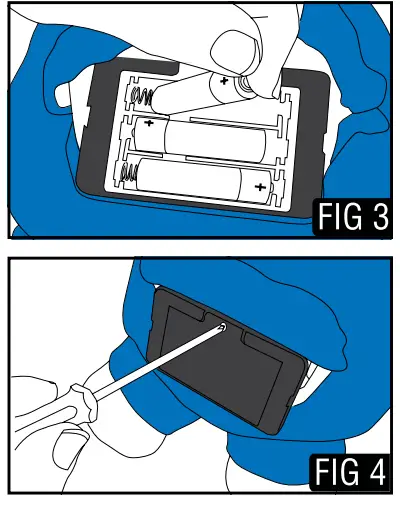
NOTE: Be sure the strips lined up evenly and are pressed flat so Star Belly Dream Lite can sit up straight without falling.
USING YOUR STAR BELLY DREAM LITES®:
Your Star Belly Dream Lites® can be used laying down or sitting up – depending on where you want the pattern to be projected.
For Best Results, we recommend a distance of 6-8 ft to ceiling/wall.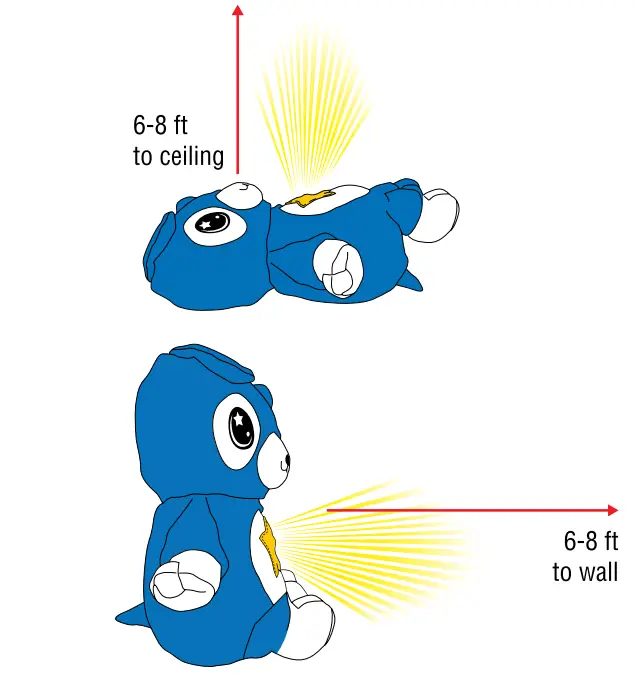
CHOOSE YOUR COLOR:
To turn on your Star Belly Dream Lites® and choose your favorite color – use the STAR ICON button.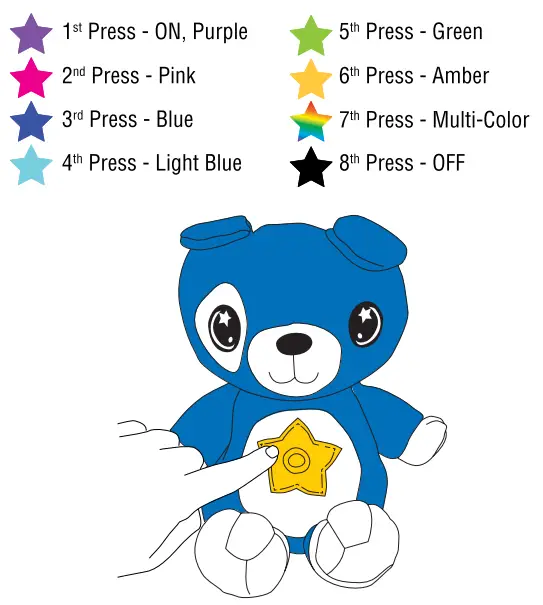
CHOOSE YOUR SPEED:
You can also choose the speed that your pattern rotates on your ceiling – slow, fast, or no rotation .
Default – Slow
- 1st Press – Fast
- 2nd Press – Still
SLEEP TIMER:
To lengthen battery light, your Star Belly Dream Lites® will turn off after 20 minutes.
CARE AND CLEANING:
When you notice the light start to dim, it is time to change the batteries. Refer to the SETUP section to replace.
If you are not going to use your Star Belly Dream Lites® for an extended period of time, remove batteries, and store in a cool, dry place.
Spot Clean ONLY with damp cloth. Let air dry.
Star Belly Dream Lites® are NOT Machine Washable.
WARNINGS
IMPORTANT: Never Stare Directly Into Light Shining through projector Doing So May cause Injury To Eyes.
Star Belly Dream Lites”‘ are NOT Machine Washable.
Adult Note: Product is not intended for use in crib. Do not leave infant unattended with product. Please retain packaging for future reference and contact information. Cut plastic attachments with scissors and discard pieces. Discard all broken toys. In an effort to continually improve our products, contents may vary slightly from that shown on package. Remove old batteries and replace with new batteries. Be sure to insert batteries correctly with adult supervision and always follow the toy and battery manufacturer’s instructions. Do not mix old and new batteries. Do not mix alkaline, standard (carbonzinc), or rechargeable (nickel-cadmium) batteries. Rechargeable batteries must be removed from toy before being recharged. Non-rechargeable batteries are not to be recharged. Rechargeable batteries are to be charged only under adult supervision. Use AAA batteries (1.5v) or equivalent only. Do not short-circuit battery terminals. Always remove weak or dead batteries from product. Remove batteries if product will be stored for an extended period of time. Replace batteries by using a Phillips screwdriver to remove the screw on the battery door. Open the door and remove the dead batteries. Be sure to insert the new batteries correctly according to(+) and(-) symbols located on the battery compartment. Reattach the battery door back into place and retighten the small Phillips screw until secure.
WARNING: Battery acid and leakage can cause personal injury and cause damage to your Dream Lite product and surrounding property. If battery leakage occurs, thoroughly wash any affected skin, making sure to keep battery acid away from eyes, ears, nose and mouth. Immediately wash any clothing or other surface that comes into contact with leaked battery acid. Leaking batteries may make “popping” sounds.
WARNING: Changes or modifications not expressly approved by the party responsible for compliance could void the user’s authority to operate the equipment.
Note: This equipment has been tested and found to comply with the limits for Class B digital device, pursuant to part 15 of the FCC Rules. These limits are designed to provide reasonable protection against harmful interference in a residential installation. This equipment generates, uses and can radiate radio frequency energy and, if not installed and used in accordance with the instructions, may cause harmful interference to radio or television reception, which can be determined by turning the equipment off and on, the user is encouraged to try to correct the interference by one or more of the following measures:
- Reorient or relocate the receiving antenna.
- Increase the separation between the equipment and the receiver.
- Connect the equipment into an outlet on a circuit different from that to which the receiver is connected.
- Consult the dealer or an experienced radio/TV technician for help.”
Customer Service Information:
888-627-7620 I [email protected]