Learning Resoures Time Tracker Mini Visual Timer User Guide

Overview

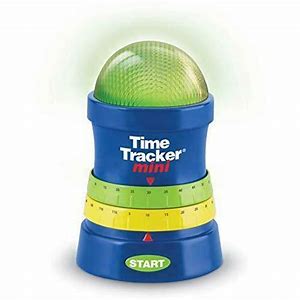
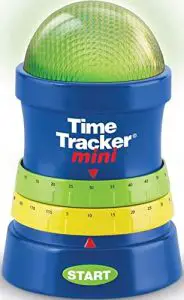
Time Tracker® Mini, the simple-to-use visual timer, is great for school, home or the workplace. Operating it is as easy as 1, 2, 3, but be sure to read this guide first for full operating instructions.
How To Operate
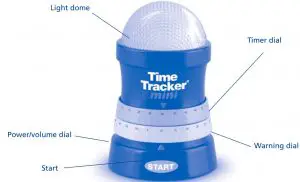
- Turn the power/volume dial to the ON position. This dial also adjusts the volume of the alarm. To mute the sound, simply keep this at the lowest setting.
- Twist the green timer dial to choose the desired duration from 5 minutes to 120 minutes, in 5-minute increments.
- Twist the yellow warning dial to set a time for the warning alert. For example, to set a warning at 25 minutes, twist the yellow warning dial to 25.
- Press the start button. The light dome will turn green and the timer will begin to count down the time.
- If you selected a “warning” time, the light dome will turn yellow and a short tone will play at that time.
- When the time has expired, the light dome will turn red and an alarm will sound, indicating that time is up.
Battery Information
Installing or Replacing Batteries
WARNING! To avoid battery leakage, please follow these instructions carefully. Failure to follow these instructions can result in battery-acid leakage that may cause burns, personal injury, and property damage.
Requires: 3 x 1.5V AAA batteries and a Phillips screwdriver
- Batteries should be installed or replaced by an adult.
- Time Tracker Mini requires three (3) AAA batteries.
- The battery compartment is located on the base of the unit.
- To install batteries, first undo the screw with a Phillips screwdriver and remove the battery compartment door. Install batteries as indicated inside the compartment.
- Replace compartment door and secure with screw.
Battery Care and Maintenance Tips
- Use three (3) AAA batteries.
- Be sure to insert batteries correctly (with adult supervision) and always follow the toy and battery manufacturer’s instructions.
- Do not mix alkaline, standard (carbon-zinc), or rechargeable (nickel cadmium) batteries.
- Do not mix new and used batteries.
- Insert batteries with the correct polarity. Positive (+) and negative (-) ends must be inserted in the correct directions as indicated inside the battery compartment.
- Do not recharge non-rechargeable batteries.
- Only charge rechargeable batteries under adult supervision.
- Remove rechargeable batteries from the toy before charging.
- Only use batteries of the same or equivalent type.
- Do not short-circuit the supply terminals.
- Always remove weak or dead batteries from the product.
- Remove batteries if product will be stored for an extended period of time.
- Store at room temperature.
- To clean, wipe the surface of the unit with a dry cloth.
- Please retain these instructions for future reference.
Your opinion matters! Visit www.LearningResources.com to write a product review or to find a store near you.
![]()
![]()
© Learning Resources, Inc., Vernon Hills, IL, US
Learning Resources Ltd., Bergen Way,
King’s Lynn, Norfolk, PE30 2JG, UK
Please retain our address for future reference.
Made in China. LRM6909-GUD