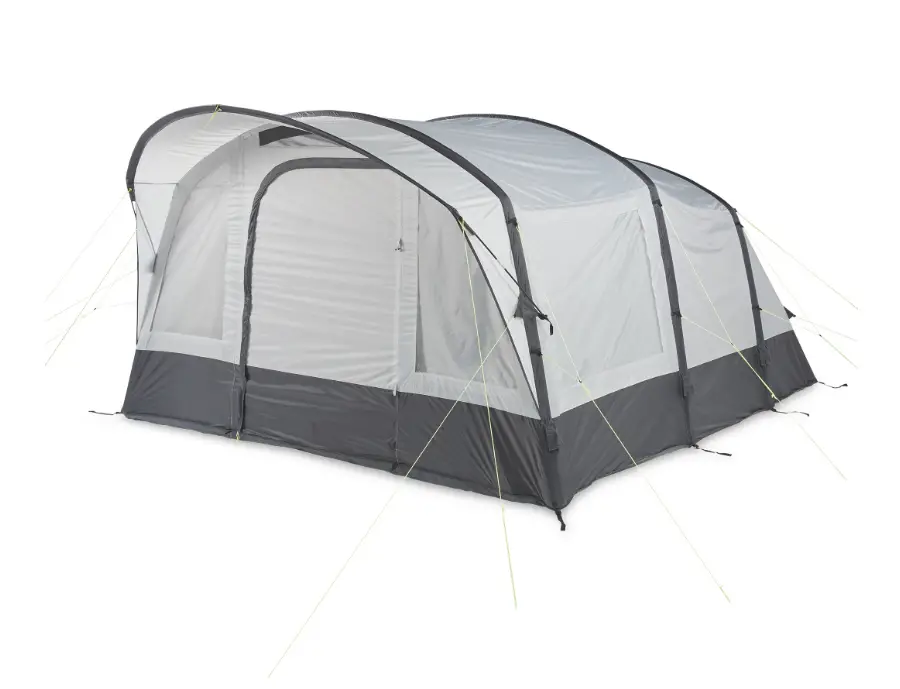
ALDI 712182471902200 Adventuridge 6 Man Air Tent
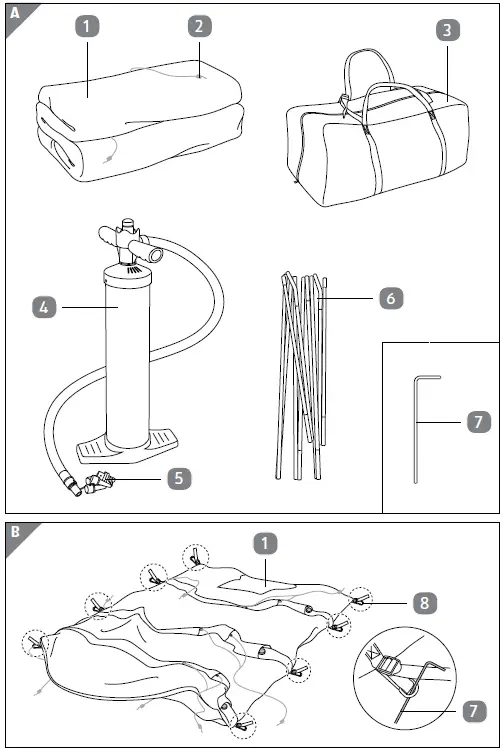
Scope of delivery

Components
- Tent
- Guy rope, ×16
- Type I, ×6
- Type II, ×8
- Type III, ×2
- Carry bag
- Air pump
- Valve adapter, ×5
- Fiberglass pole
- Tent loop, ×8
- Air valve, ×3
- Inflatable pole (middle)
- Inflatable pole (rear)
- inflatable pole (front)
- Awning
- Pole socket, ×2
- Outer tent
- Inner tent
- Hook, ×14
- Loop, ×14
Connecting elements supplied
- 7 Peg, ×28
Required tools (not included)
- 19 Hammer
General information
Reading and storing the user manual
This user manual accompanies this 6 man air tent (hereafter referred to as the „product“), and contains important information on setup and handling. Before using the product, read the user manual carefully. This particularly applies to the safety instructions. Failure to do so may result in personal injury or damage to the product. The user manual is based on the standards and rules in force in the United Kingdom and European Union (Ireland). When abroad, you must also observe country-specific guidelines and laws. Store the user manual for further use. Make sure to include this user manual when passing the product on to third parties.
Proper use
The product is exclusively designed for outdoor camping with up to 6 persons. It is only intended for private use and not suitable for commercial purposes. The product is not a children’s toy. Only use the product as described in this user manual. Any other use is considered improper and may result in damage to property or persons. The manufacturer or vendor cannot be held liable for damages or injury incurred through improper or incorrect use.
Explanation of symbols
- The following symbols are used in this user manual, on the product or on the packaging.
- This symbol provides you with useful additional information on handling and use.
Safety
Signal symbol/word definitions
The following symbols and signal words are used in this user manual.
WARNING: This signal symbol/word designates a hazard with moderate risk, which may result in death or severe injury if not avoided.
CAUTION: This signal symbol/word designates a hazard with low risk, which may result in minor or moderate injury if not avoided.
NOTICE: This signal word warns of possible damage to property.
General safety instructions
The danger of suffocation!
If the inside of the product is not adequately ventilated, there is a risk of suffocation. Children could catch themselves in the tent tarps, in the packaging wrapper or in the carry bag when playing and suffocate.
- Make sure that the ventilation windows are always open in the event of high temperatures.
- Avoid continuous exposure to sunlight to prevent the accumulation of heat inside the product.
- Do not leave children unattended in the product.
- Make sure the vents are open.
- Make sure that there is always an unobstructed path of escape out of the product. Keep the exits unobstructed.
- Do not allow children to play with the tent tarps, the packaging wrapper or carry bag.
- Do not use the product if it exhibits visible damage.
Risk of injury
Once set up, the fiberglass pole is under tension. Careless and improper handling of the pole may result in injury.
- Make sure that the tent poles do not end up in the hands of children.
- When handling the fiberglass poles, pay attention to nearby persons.
Risk of strangulation
If the guy ropes end up in the hands of children, they could strangle themselves.
- Keep the guy ropes out of the reach of children.
- Do not allow children to play with the guy ropes.
Risk of fire and burn hazard
The product consists of flammable material. It could catch fire.
- Do not set up any cooking or heating devices in the product and do not hang any lighting fixtures near the walls or roof of the product.
- Do not place any electric devices (e.g. heaters) that are switched on near or inside the product.
- Do not use any gas or other combustion devices near or inside the product.
- Keep the product away from an open fire. Do not start a fire inside the product.
- Avoid continuous exposure to sunlight to prevent the accumulation of heat inside the product.
- Keep the entrance of the product free of obstructions.
- Make sure you are aware of fire prevention precautions on the premises.
CAUTION
Risk of injury
You could trip over pegs protruding out of the ground or tensioned guy ropes. You could injure yourself in the process.
- Always insert pegs all the way in the ground.
- Take note of the guy ropes when close to the product.
- Do not leave the product unattended during set-up.
NOTICE
Risk of damage
Incorrectly setting up the product, improper handling of the product, and using the product in extreme weather conditions could damage it.
- Only use the product in mild weather conditions.
- Do not use the product in alpine or other extreme conditions, e.g. in the event of hail, flooding, a storm, extreme cold or heat.
- Do not place the product with the entrances against the wind.
- Use the guy ropes and pegs to secure the product and protect it against the wind.
- Promptly take the product down in the event of an incoming storm, thunderstorm or case of strong wind. Even if properly anchored, it may come loose.
- Do not use the product in the event of snow. The tent tarp is not designed to withstand snow loads and may rip.
- Stop using the product if the plastic parts of the product or the tent tarps are deformed, cracked, chipped or exhibit breaks, splinters or other damages.
- Do not place any objects on top of the product.
First use
Checking the product and pack contents
If you are not cautious when opening the packaging with a sharp knife or another pointed object, you may quickly damage the product.
- Be very careful when opening.
- Take the product out of the packaging.
- Check to make sure that the delivery is complete (see Fig. A).
- Check whether the product or the individual parts exhibit damage. If this is the case, do not use the product. Contact the manufacturer at the service address specified on the warranty card.
Setting up the product
If you set up the product in an unsuitable location or do not secure it sufficiently, it may be damaged.
- Set up the product on a dry, level surface on which the guy ropes can be secured.
- Make sure that there are no pointy rocks or other sharp objects on the ground beneath the product.
- Make sure that there is enough space around the product so that you can secure the product with the guy ropes.
- Do not set up the product on sloped ground.
- Do not set up the product on sandy ground. It will not be possible to securely anchor your product in sandy ground.
Risk of damage
Strong wind or a storm may pull the product out of the anchors and damage it.
- Preferably choose a wind-protected area for set-up.
- Set the product up so that the wind can blow over the product from the back of the product.
- Use the guy ropes and pegs to secure the product and protect it against the wind.
- Set up the product before a trip to familiarise yourself with the product’s construction.
- Choose an area that is large enough to accommodate not only the tent, but also ensure there is enough space to each side surrounding the tent to tie down the guy ropes to the ground.
- The net insert in the tent permits adequate ventilation and, at the same time, prevents insects from entering the product.
- The product consists of an outer 15 and an inner tent 16, which are separated by a door. The inner tent typically serves as a bedroom, while the outer tent is used as a living room/lounge.
- Select a suitable, level set-up location where you can properly secure the product by attaching the guy ropes 2 to the ground using the pegs 7 . Ensure the ground is free of stones and other sharp objects.
- Take the tent 1 , the fiberglass pole 6 as well as the pegs out of the carry bag 3 (see Fig. A).
- Spread out the tent with the dark grey underside facing downwards at the setup location (see Fig. B).
- Secure the tent on the ground by using peg 7 to secure the tent loops 8 in the ground (see Fig. B). Use a hammer 19 if necessary to drive the pegs into the ground. Make sure that the underside of the tent is tensioned and that the pegs do not protrude from the ground.
- Locate air valve 9 on the tent (see Fig. C) and make sure the lower parts of the valves are fully screwed onto the tent to prevent air from escaping while inflating. Open the locking caps of the air valves.
- Fit the correct valve adapter 5 to the air hose and insert it into the air valve on the side of the inflatable pole (middle) 10. Use the air pump 4 to inflate the inflatable pole (middle) and keep pumping until the pole feels rigid (see Fig. D). The air pump is fitted with a pressure release valve which automatically releases air from the air tubes once the pressure exceeds 7 psi. Once you have finished inflating, remove the air hose and replace the locking cap.
- Inflate the rear and front inflatable poles 11 / 12 as described above (see Fig. E and F).
- Fold apart the fiberglass poles and push the individual pole parts into each other to connect them.
- Starting from one side, slide the fiberglass pole 6 through the sleeve on the edge of the awning 13. Secure the pole in place by inserting both ends into the pole sockets 14 on each side of the awning (see Fig. G). The fibreglass pole has been set up and is under tension.
- To further secure the product in place, a total of 16 guy ropes 2 of 3 different types are provided (see Fig. H). Unravel the guy ropes and pull them away from the tent, while making sure they are tensioned. The length and rope tension of individual ropes can be adapted by the fasteners attached to some of the ropes. Secure the guy ropes at suitable spots in the ground using the pegs (see Fig. I). Use a hammer if necessary to drive the pegs into the ground.
Attaching the inner tent to the outer tent
The inner and outer tent are buttoned together upon delivery. If the outer tent 15 and the inner tent 16 are not buttoned together (e.g. after cleaning or drying), proceed as follows:
- Spread out the tent with the dark grey underside facing down.
- Take the inner tent and attach it to the outer tent by inserting the hooks 17 attached to the inner tent through the loops 18 attached to the outer tent starting from the rear and moving forward (see Fig. J). Make sure the hooks are pushed all the way through the loops and cannot slip back out.
- Attach the ground sheet to the outer tent via the sewn-in hooks as you work your way forward.
To unbutton the inner tent and the outer tent, perform the above steps in reverse order.
Taking down the product
Proceed as follows if you would like to take the tent down again:
- Remove all objects and any dirt or residues from the tent and clean it as described in the chapter “Cleaning and care”.
- Perform steps 1–10 as described in chapter “Setting up the product” in reverse order. To deflate the inflatable poles, carefully open up the entire valves, not just the locking caps, and carefully press the beams together to release the air. Never force the air out of the beams, as you might risk damaging the beams and poles.
Cleaning and care
NOTICE
Risk of damage
Improper handling of the product may result in damage to the product.
- Do not use any aggressive cleaners, sharp or metallic cleaning mutensils such as knives, hard scrapers, and the like. They could damage the surfaces.
- Never wash the product in the washing machine. It would be destroyed as a result.
- Never have the product dry cleaned.
- Only use clean water or a commercially-available tent cleaner to clean the product.
- Wipe off the product before you take it down to remove dust or build-up dirt on the surface.
- If applicable, wipe the erected tent off with a damp, soft sponge or cloth with clean water or a commercially-available tent cleaner.
- Let the inner tent 16 dry completely.
- Wipe the outer tent 15 off with a damp, soft sponge or cloth with clean water or commercially-available tent cleaner.
- Let the outer tent dry completely.
- If the inside of the outer tent or the inner tent is damp, unbutton the two tents as described in the chapter “Attaching the inner tent to the outer tent”.
- Remove the outer tent and place it with the outside on a smooth, dry, and clean surface.
- Let the inner and outer tent dry completely.
- Place the inner tent with the top side down on a smooth, dry, and clean surface.
- Wipe off the tent floor with a damp, soft sponge or cloth with clean water or commercially- available tent cleaner.
- Let all parts dry completely. You can now fold up the tent 1 for storage as described in the chapter “Storing the product”
Storing the product
NOTICE
Risk of mold
Never fold up the product when it is wet or dirty. Mold or odor may form or the material may be discolored.
- Clean the product before you fold it up as described in the chapter “Cleaning and care”.
- Take the tent 1 down as described in the chapter “Taking down the product”.
- Spread out the product with the dark grey underside facing down.
- If the outer tent 15 and the inner tent 16 are buttoned together, smooth out the outer tent and fold the corners together so that it is flush with the inner tent.
- If the outer tent and inner tent are not buttoned together, button them together as described in the chapter “Attaching the inner tent to the outer tent”.
- Fold the tent up so that it has the width of the carry bag 3 .
- Store the tent, the pegs 7, the fiberglass pole 6, air pump 4, and valve adapters 5 in the carry bag.
Technical data
- Model: AD78
- Dimensions (W × L × H): approx. 360 × 470 × 205 cm
- Packing dimensions (W × L × H): approx. 74 × 42 × 39 cm
- Material
- Tent:
- Windows:
- 185T 68D Polyester PU2000 mm UV PVC
- Weight
- Without packaging:
- approx. 17.5 kg
- With packaging:
- approx. 18.5 kg
- Article number: 712182
Disposal
Disposing of the packaging
Sort the packaging before you dispose of it. Dispose of paperboard and cardboard with the recycled paper service and wrappings with the appropriate collection service.
Disposing of the product
- Dispose of the product in accordance with the applicable laws and regulations for your country.
Great care has gone into the manufacture of this product and it should therefore provide you with years of good service when used properly. In the event of product failure within its intended use over the course of the first 1 year after date of purchase, we will remedy the problem as quickly as possible once it has been brought to our attention. In the unlikely event of such an occurrence, or if you require any information about the product, please contact us via our helpline support services, details of which are to be found both in this manual and on the product itself.
PRODUCED IN CHINA FOR
- ALDI STORES LTD. PO BOX 26, ATHERSTONE WARWICKSHIRE, CV9 2SH.
ALDI STORES (IRELAND) LTD.
- PO BOX 726, NAAS, CO. KILDARE.
- Visit us at www.aldi.com
AFTER SALES SUPPORT
- +44(0)161 447 8597
- www.streetwizeaccessories.com