alza NiteBird SL1 LED USB Light Strip

The product user guide contains product features, instructions on how to use the product, and the operating procedure. Read the user manual carefully to get the best experience and avoid unnecessary damage. Keep this manual for future reference. If you have any questions or comments about the device, please contact the customer line.
www.alza.co.uk/kontakt
+44 (0)203 514 4411
Alza.cz a.s., Jankovcova 1522/53, 170 00 Prague 7, www.alza.cz
Product Package
- Light Strip
- Smart Controller
- User Manual
- 8 Piece Adhesive Tape
LED Light Strip
Input: DC 5V, 1A
Rated Power: 5W
WiFi Frequency: 2.4GHz
Light Emitting Mode: RGB
Install the LED USB Light Strip
Please plug into TV’s 5V 1A USB port. Press the round power button of the USB controller for about 5 seconds until the Light Strip flashes blue rapidly.
Note: Here are some tips about installing 9.2ft Smart TV Backlight:
- The strip light should be placed on a clean and dry surface and secure the four corners with 8 black sticky tapes, two at each corner after installing the strip light.
- The USB controller cannot be hung down.
- If the USB controller is hanging down, it needs to be fixed in place by adhesive tape.
Upgraded Stronger 3M Adhesive
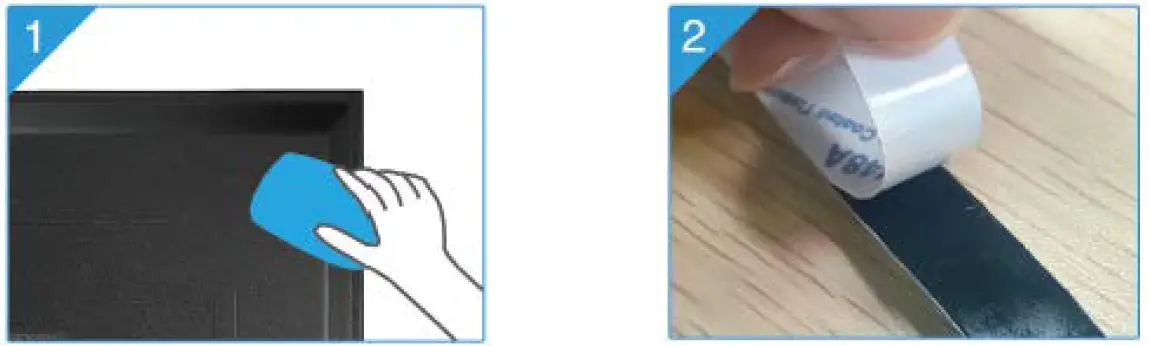 The surface should be clean, dust free and as dry as possible before installation.
- Tear adhesive tape of strip light and keep it clean.

- Make sure to press the tape firmly into place when installing, press it for 10 seconds at least.
- Fix the strip light stand in the corner via black sticky tapes so that the strip light is more stable.

- The led strip light only works when connected like this
Download the Gosund App
- Search “Gosund” and download the Gosund App on the App Store or Google Play, or scan the QR code below and install.
- Please open the “Gosund” App. Click register and type in your email address to automatically create an account, or type in your phone number to get a verification code to register an account. If you already have a Gosund account, simply click login and enter your account credentials.
- The free app “Gosund” is compatible with mobile devices that support iOs 8.0 and above or Android 4.4 and above.
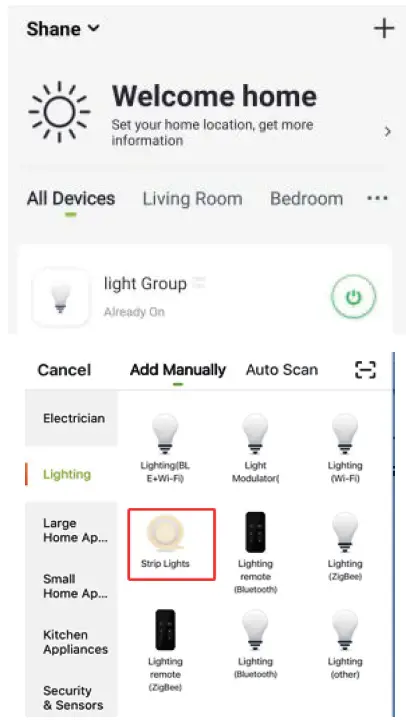
Connecting the Device with App
- Easy Mode Connection – LED Light Strip blue lights flashing quickly
- Press and hold the on/off button for more than 6 seconds until the light strip flashes quickly → Open Gosund App → Choose the “+” symbol → “Lighting” → “Strip lights”
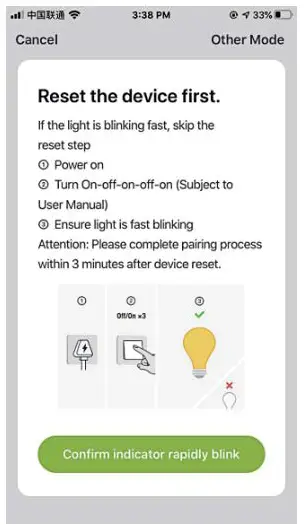
- Make sure the Light Strip is now rapidly flashing and confirm this in the app.
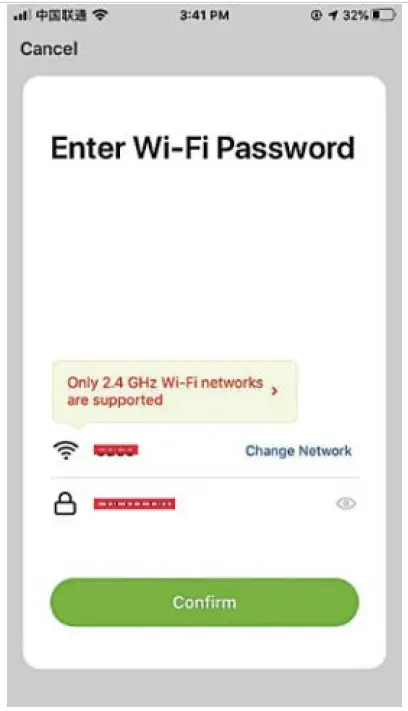
- Choose your home WiFi (make sure that the WiFi connection you choose is the same connection/WiFi you used on your phone/device, and that it is 2.4GHz, not 5GHz.)
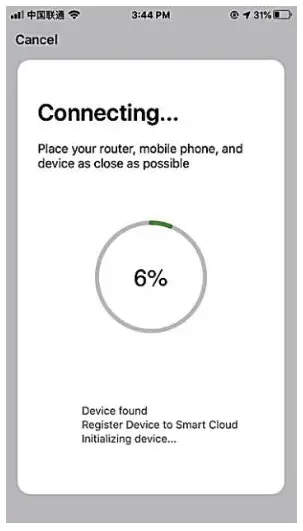
- Finally, wait for the device to successfully configure itself, then tap “Completed”.
- Press and hold the on/off button for more than 6 seconds until the light strip flashes quickly → Open Gosund App → Choose the “+” symbol → “Lighting” → “Strip lights”
- AP Mode
- Please switch to “Other Mode”, press “AP Mode”.
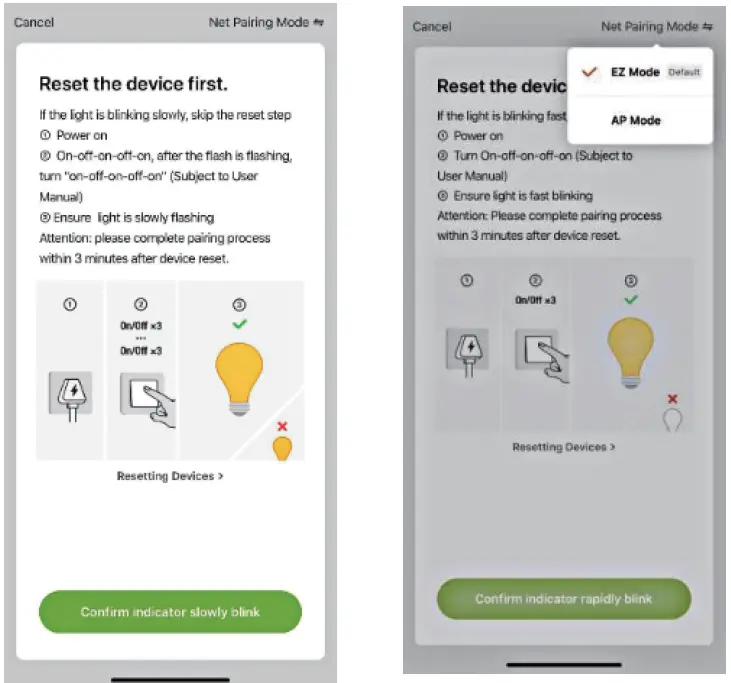
- Press and hold the on/off button until the Light Strip flashes slowly.
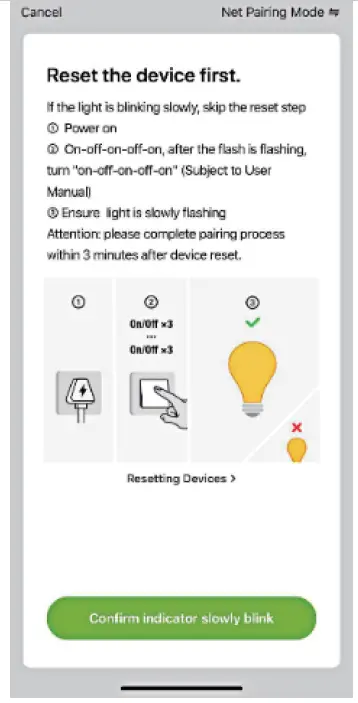
- Make sure the Light strip is flashing slowly, confirm in the app.
- Choose your 2.4G WiFi, enter your password and confirm in the app.

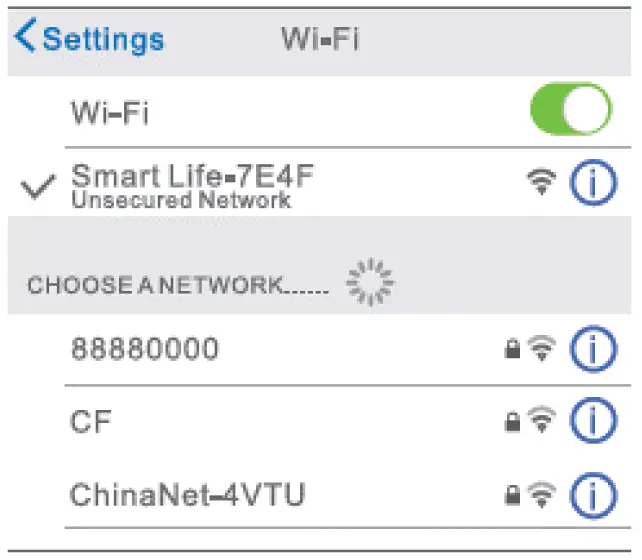
- 5. Tap “Connect now” and choose the WiFi hotspot named “Smartlife-XXX”, then go back to the Gosund application.
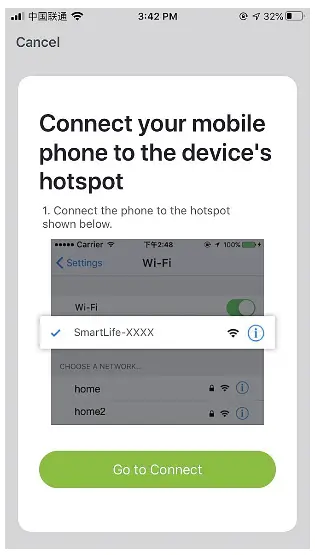
- Finally, wait for the product to successfully configure and tap “Completed”.
- Please switch to “Other Mode”, press “AP Mode”.

Note: If the connection fails in “AP Mode”, please check if your router utilizes dual-band WiFi. If it does, please enter the router management interface to split 2.4G and 5G with WiFi, and then connect 2.4G WiFi.
After connecting to the network, press the on/off button to switch to different colors, press and hold the on/off button for 2-6 seconds to power off, press the button for more than 6 seconds to restore factory settings.
Getting to Know the Gosund App
You can create certain scenes and groups on the Gosund app, it allows you to control different smart devices in different rooms at the same time.
Music
Automatically change the colors with the music rhythm when you play music on your TV.
Using Amazon Echo
Make sure your Echo dot is connected with your Amazon Alexa and you have a “Gosund” app account.
- Enable Our Skill in Alexa APP
Log into your Amazon Alexa, press “Skill” in the option bar, then search “Gosund” in the search bar. Select “Gosund” in the results and press “Enable”.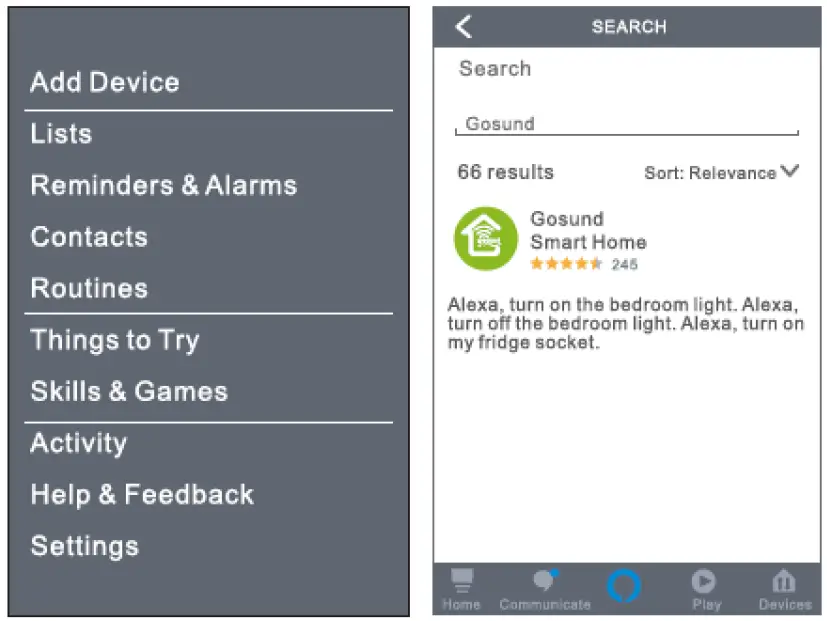
- Input your Gosund account name and password. When you set the right page, it means your Alexa account is connected with your Gosund account.
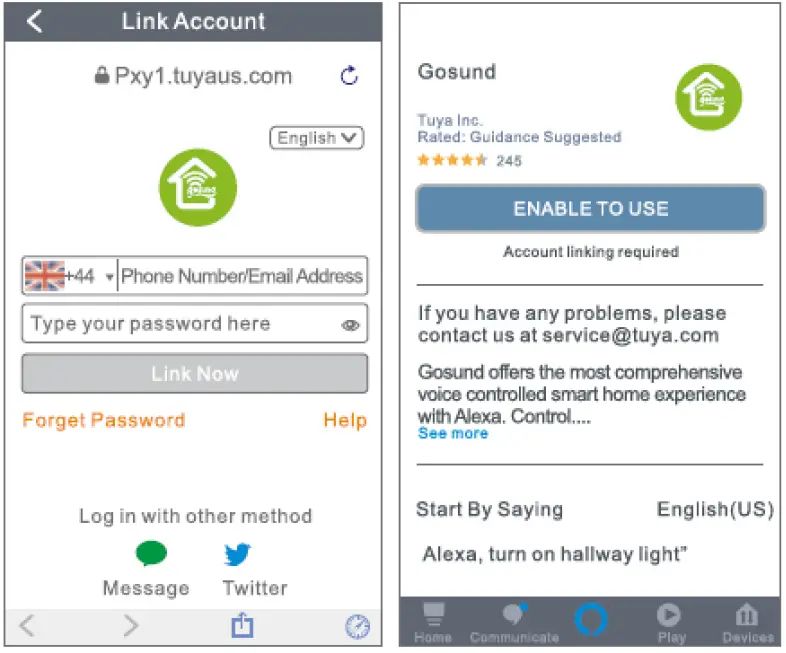
- Input your Gosund account name and password. When you set the right page, it means your Alexa account is connected with your Gosund account.
- Control Smart Light Strip by Voice
After your Alexa is linked to your Gosund app, you can control the light strip via Echo.- To discover the device, simply say “Echo (or Alexa), discover my device.” To your Echo (or Alexa). You can also say “add device” to discover the Smart Light Strip. Echo will start to search for the device that is added in the Gosund app. It will take approximately 20 seconds to show the result. Or you may click “Discover Device” on the Alexa app, it will show available devices.
Note: Echo is one of the wake-up names, the other two names are Alexa and Amazon.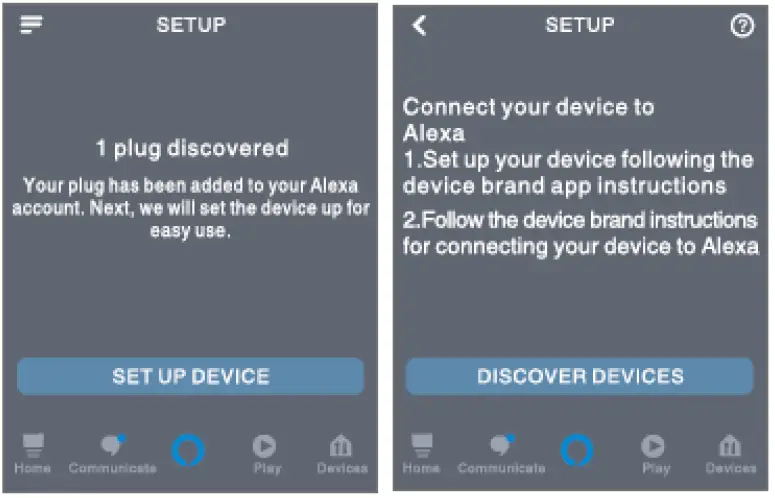
- Support Skill List
You can control devices by instructions, as shown below:
“Alexa, turn on/off (name of the smart light strip).”
“Alexa, turn on the light strip.”
“Alexa, turn off the light strip.”
Note: The name of the light strip must be consistent with the name of the lamp on the Gosund app. It is recommended that the name utilizes only easily pronounceable English words. (Amazon Echo supports only English.)
- To discover the device, simply say “Echo (or Alexa), discover my device.” To your Echo (or Alexa). You can also say “add device” to discover the Smart Light Strip. Echo will start to search for the device that is added in the Gosund app. It will take approximately 20 seconds to show the result. Or you may click “Discover Device” on the Alexa app, it will show available devices.
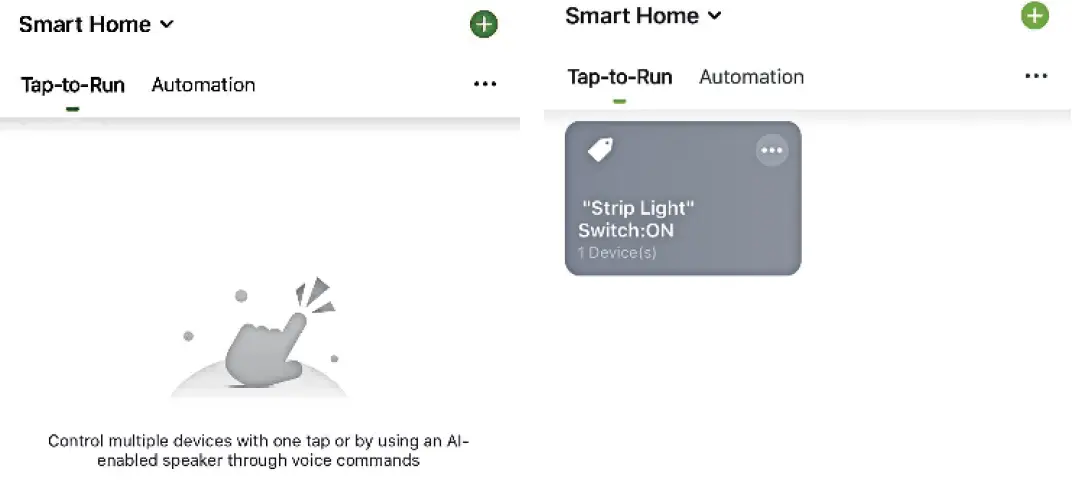
Control of Light Strip via Siri (iPhone)
1. Open the Gosund app and make sure the light strip is connected to the app.
2. Click Tap-To-Run, then click the “+” symbol in the upper right.
3. Select your scenes and device, then select the command you need. For example: Turn on.
4. After the process is complete, you can see “ON” next to the command in the interface.
5. Press “Add to Siri” in the lower right, then record your command. For example, you can say: “Open light”.
6. After completion, you can control the light strip via Siri. Say “Hi Siri, Open Light”, the light strip will be turned on.
Warranty Conditions
A new product purchased in the Alza.cz sales network is guaranteed for 2 years. If you need repair or other services during the warranty period, contact the product seller directly, you must provide the original proof of purchase with the date of purchase.
The following are considered to be a conflict with the warranty conditions, for which the claimed claim may not be recognized:
- Using the product for any purpose other than that for which the product is intended or failing to follow the instructions for maintenance, operation and service of the product.
- Damage to the product by a natural disaster, the intervention of an unauthorized person or mechanically through the fault of the buyer (eg during transport, cleaning by inappropriate means, etc.).
- Natural wear and aging of consumables or components during use (such as batteries, etc.).
- Exposure to adverse external influences, such as sunlight and other radiation or electromagnetic fields, fluid intrusion, object intrusion, mains overvoltage, electrostatic discharge voltage (including lightning), faulty supply or input voltage and inappropriate polarity of this voltage, chemical processes such as used power supplies, etc.
- If anyone has made modifications, modifications, alterations to the design or adaptation to change or extend the functions of the product compared to the purchased design or use of non-original components.
EU DECLARATION OF CONFORMITY
Importer identification data:
Alza.cz a.s.
Registered office: Jankovcova 1522/53, Holešovice, 170 00 Prague 7
IČO: 27082440
Subject of the declaration:
Name: Smart WiFi LED Light Strip
Model: SL1
The above product has been tested in accordance with the standard (s) used for demonstration in accordance with the essential requirements laid down in the Directive (s):
Directive No. 2014/53 / EU
Directive No. 2011/65 / EU as amended by 2015/863 / EU
Prague, 27.11.2020
WEEE
 This product must not be disposed of as normal household waste in accordance with the EU Directive on Waste Electrical and Electronic Equipment (WEEE – 2012/19 / EU). Instead, it shall be returned to the place of purchase or handed over to a public collection point for the recyclable waste. By ensuring this product is disposed of correctly, you will help prevent potential negative consequences for the environment and human health, which could otherwise be caused by inappropriate waste handling of this product. Contact your local authority or the nearest collection point for further details. Improper disposal of this type of waste may result in fines in accordance with national regulations.