
![]()
![]() Your Apria Sleep Therapy
Your Apria Sleep Therapy
Quick Start Guide
For the ResMed AirSense™11

https://www.apria.com/sleep-apnea
Use this QR link to our Sleep Apnea page for more information.
GET STARTED.
Reference your Apria Sleep Therapy User Guide for more details.
1. Place the device on a stable level surface.
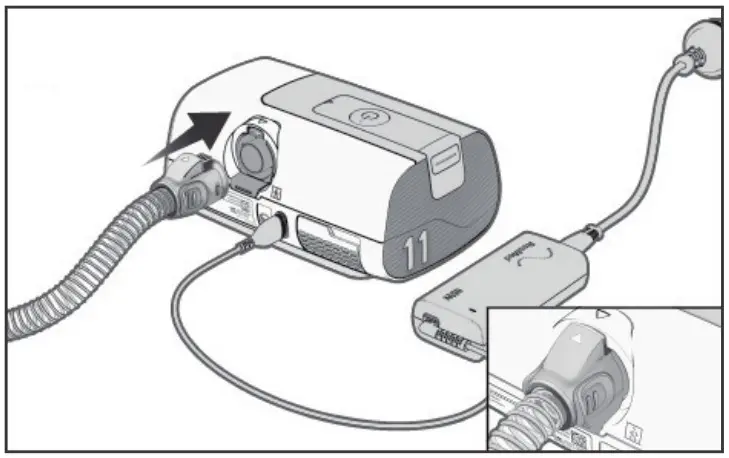
2. Connect the power cord into the power inlet at the rear of the device. Connect one end of the power cord into the AC adaptor and the other end into the power outlet. Ensure the device is set up and connected to power to enable settings to be applied wirelessly to the device, if required.
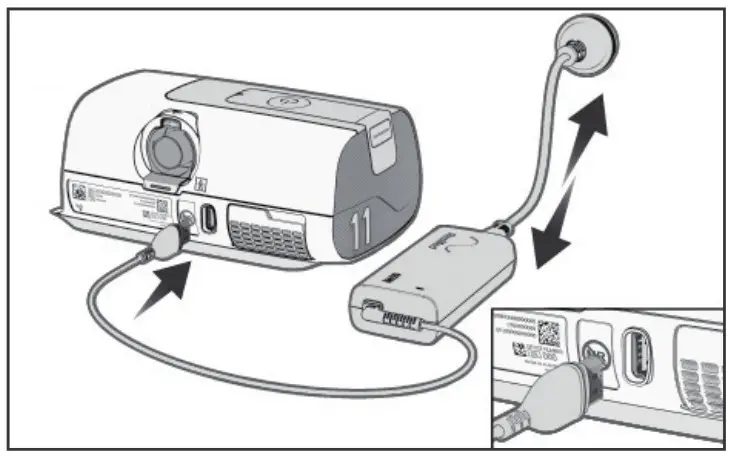
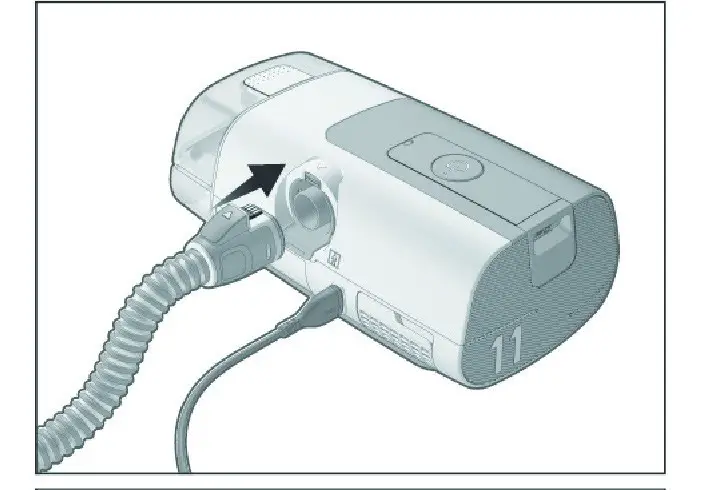
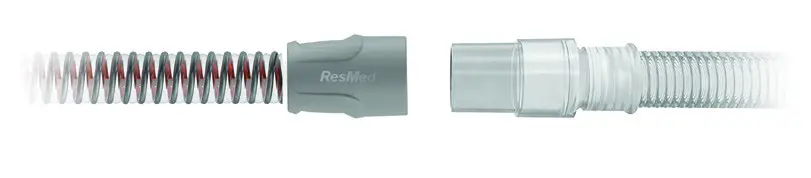
3. Connect the air tubingfirmly to the outlet connector at the rear of the device.
4. Open the humidifier tub and fill it with distilled water up to the maximum water level mark. The humidifier tub must be removed from the device before adding water. The
humidifier tub has a maximum capacity of 380 mL.

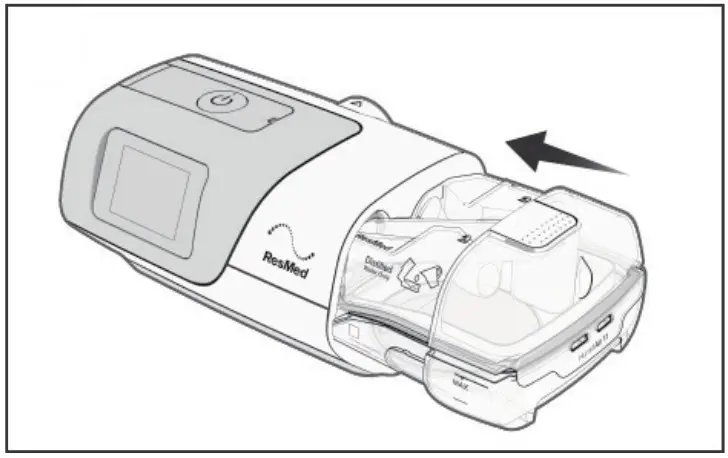
5. Close the humidifier tub and insert it into the side of the device.
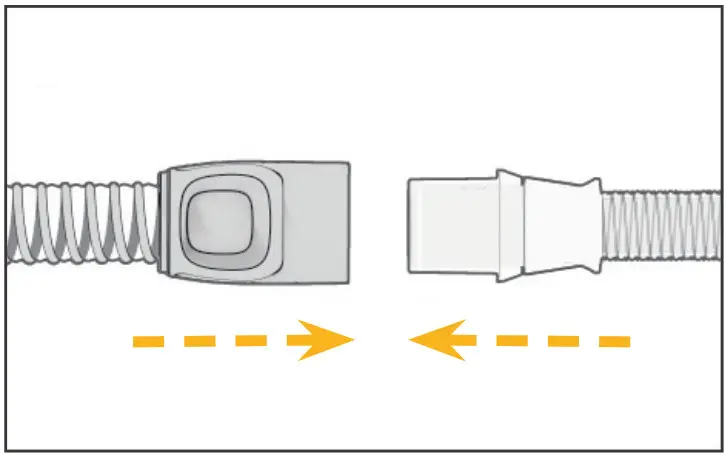
6. Connect the free end of the air tubing firmly onto the assembled mask.
7. Fit your mask. If your doctor prescribed a specific mask and size, follow the fitting instructions provided by the manufacturer. If you received a mask with multiple cushions, follow these instructions:
There is a mask cushion currently attached to the frame of your mask. This size fits most patients. Once you begin therapy, if your mask is leaking or feels uncomfortable, try removing the existing cushion and replacing it with a different size cushion. If you are between sizes, it is best to use the larger cushion. Use the Fitting Template (for nasal mask and full face mask) and/or the manufacturer’s instructions included with your mask for help.

8. Put on your mask.
9. Attach the tubing to the PAP machine.
10. Attach the tubing to your mask.
(If using prescribed oxygen, consult pages 9 and 10 in your Apria Sleep Therapy User Guide.)
11. Lie down and take four deep breaths. The machine should start automatically. If you do not hear the machine start, press the Start Therapy/Standby button. Relax and begin to take slow breaths through your nose.
12. Check for air leaks.
Small leaks are acceptable. If large leaks occur, consult your Apria Sleep Therapy User Guide.
13. Your setup is complete. You are now ready to begin your PAP therapy!
14. Make sure to follow the cleaning and maintenance instructions provided and review the recommended supply replacement schedule.
![]() If you have any questions or need help setting up your device and getting started, please call a member of Apria’s Sleep Expert team.
If you have any questions or need help setting up your device and getting started, please call a member of Apria’s Sleep Expert team.
Dial the number below and select option 4.
877.265.2426
Monday – Friday: 8 a.m. – 10 p.m. EST
Saturday and Sunday: 11 a.m. – 7:30 p.m. EST
AirSense is a trademark and/or registered trademark of the ResMed family of companies.
©2021 Apria Healthcare Group LLC
SLP-4330 08/21_v4