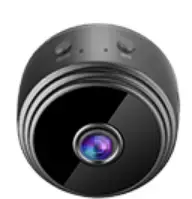
AREBI A10PLUS Mini WiFi HD Hidden Spy Camera
Download and install APP
Way 1:
Android Device by Searching “HIDVCAM” in Google App market to download and install App;
IOS Device by Searching “HIDVCAM” in App Store to download and install App;
Way 2:
Scan the QR code to download “HIDVCAM”.
Introduction of the LED indicator
WIFI mode: The green and blue light up together.
AP mode: The blue lights up and the green flashes slowly.
The network cannot be found: The blue lights up and the green is off (Reset device) The red lights up: Being charged
Button Operations:
ON/OFF: press for 2 seconds to power on; press for 3 seconds to power off MODE: Press for3 seconds to reset device( Or press “RESET” if no “MODE” )
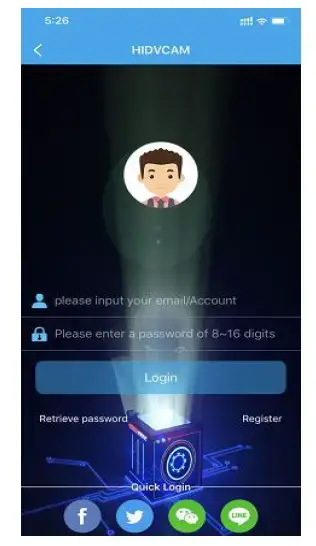
Registry and Login
- Open the APP “HIDVCAM”,
- Register your membership via WeChat FacebookTwitterLine Email.
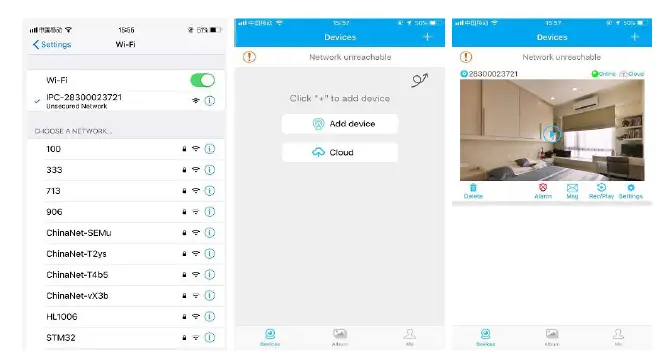
AP mode Connection
- Turn on camera: Press “ON/OFF” to turn on the camera, in 10 seconds, and the blue light brightens, the green light flashes slowly.
- Go to the WIFI setting page, then connect the Wi-Fi named“ IPC-XXXXX”.
- Open “HIDVCAM”, Refresh the device list on the APP, you can view the connected camera.
- Click device, Set a password to the device on the first use, then can view the camera on APP.

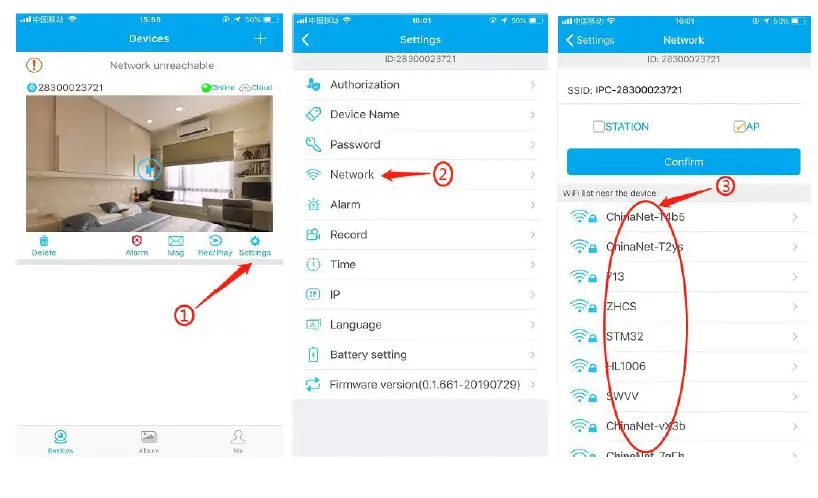
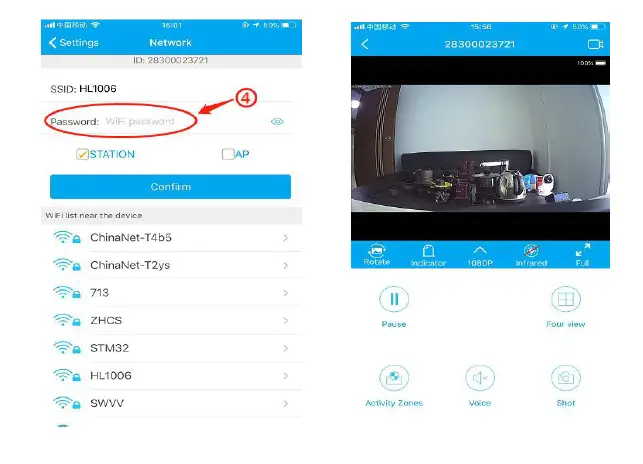
Router mode Connection (Remote viewing)
- Open app, go to the device list, click [Settings]—[Network Settings]— Choose an available WIFI from below options and input corresponding password — click OK —click OK
- After the camera connects to router, refresh the page, waiting for about 30 seconds and the camera status will become online — enter the password, can remote view the camera.
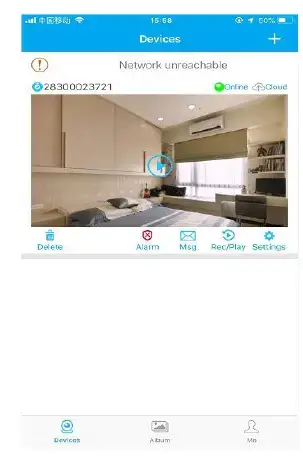
APP Function Introduction
- Device ID
- Online: Device status
- Cloud: Cloud storage
- Delete: Delete the camera
- Alarm: One-click to turn ON/OFF alarm
- Msg: Alarm message
- Rec/Play: Playback video in TF card or Cloud
- Settings
| Key Name | Function |
| 2830000xxxx | Device ID |
| Online | Device status |
| Cloud | Cloud Storage |
| Delete | Delete the camera |
| Alarm | Turn On/Off Device alarm |
| Msg | Alarm message |
| Rec/Play | Playback video in TF card or Cloud |
| Settings | Settings of the device |
| Devices | Device view page |
| Album | Where to save the camera screenshot |
| Me | APP account information |
| Rotate | Flip video |
| Indicator | Turn On/Off the Indicator of camera |
| 1080p | 720p/1080p Resolution selection |
| Infrared | Turn ON/OFF the IR of camera(night
vision) |
| Full | Full screen view video |
| Pause | Pause the video |
| Four view | 1/4 screen view video |
| Activity
Zones |
Set the motion detection area |
| Voice | monitor voice |
| Shot | Video screenshot |
| Start/Stop Real-time recording |
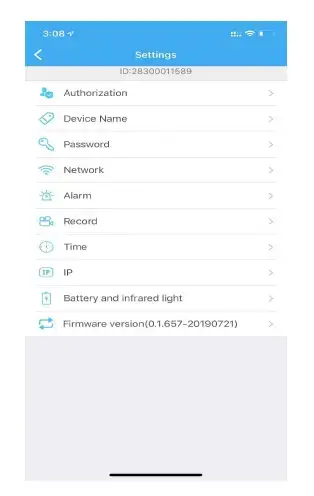
- Device Authorization: Input different users ID and shares the device to others
- Device Name: You could name the device up to yourself , such as college, farm, etc.
- Password setting: You can modify the password if required
- Network setting: Set up the device to connect to the Internet
- Alarm setting: Motion detection and alarm sound setting
- Recording settings: Set the resolution and the mode of records(Motion detection record /Regular record mode)
- Time setting: Synchronize the time between APP and Phone
- Language setting
- Static IP setting: You can set the IP address of the device
- Firmware version: Check whether the firmware is in the latest version
Cloud Storage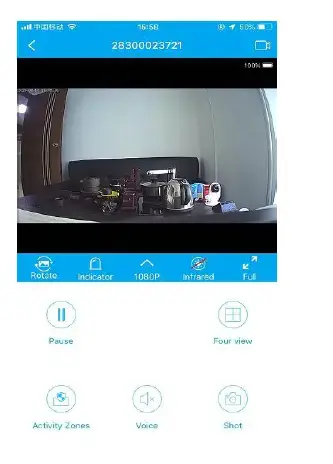
Device Share
You could share your camera to others, such as relatives, friends, colleagues, and set the user permissions of shared camera.
- Click “Settings” to enter the setting interface.
- Click on “Authorization Settings”
- Get the ID of the user who needs to share. Share users must download “HIDVCAM” and log in after installation, click the “Me” button
- After getting a user ID, input the ID on the authorization interface and click “Search”
- Pop up the authorization confirmation interface, select the permission to be shared, and click “Confirm”. Device sharing is finished successfully When authorized user information is displayed in the user list.
This device complies with Part 15 of the FCC Rules. Operation is subject to the following two conditions: (1) this device may not cause harmful interference, and (2) this device must accept any interference received, including interference that may cause undesired operation
FCC Statment
This equipment has been tested and found to comply with the limits for a Class B digital device, pursuant to Part 15 of the FCC Rules. These limits are designed to provide reasonable protection against harmful interference in a residential installation. This equipment generates, uses and can radiate radio frequency energy and, if not installed and used in accordance with the instructions, may cause harmful interference to radio communications. However, there is no guarantee that interference will not occur in a particular installation.
If this equipment does cause harmful interference to radio or television reception, which can be determined by turning the equipment off and on, the user is encouraged to try to correct the interference by one or more of the following measures:
- Reorient or relocate the receiving antenna.
- Increase the separation between the equipment and receiver.
- Connect the equipment into an outlet on a circuit different from that to which the receiver is connected.
- Consult the dealer or an experienced radio/TV technician for help.
Warning:
Changes or modifications not expressly approved by the party responsible for compliance could void the user’s authority to operate the equipment
Radiation Exposure Statement
This equipment complies with FCC radiation exposure limits set forth for an uncontrolled environment.
This equipment should be installed and operated with a minimum distance 20cm between the radiator and your body.
