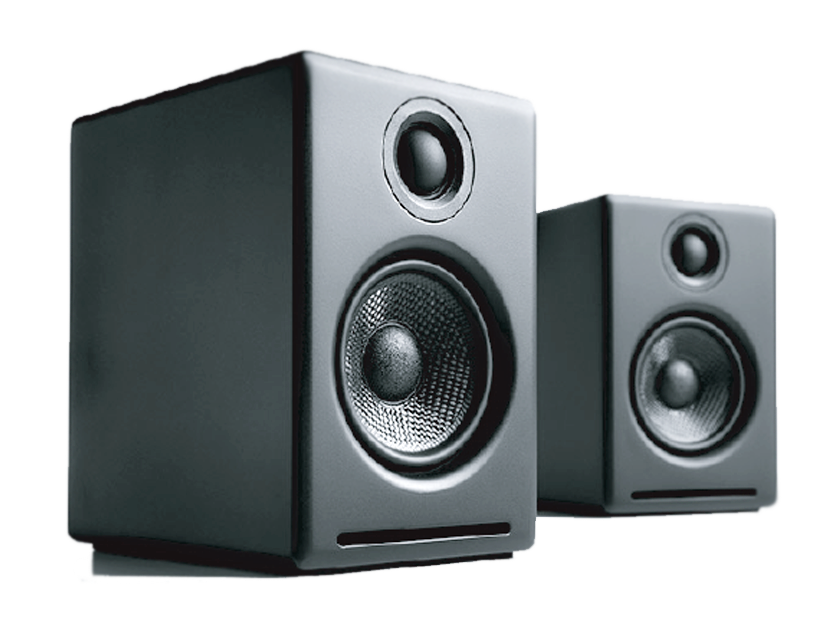
Audioengine 2+ Wireless

Premium Powered Speakers
Welcome to the Audioengine family and congratulations on your purchase of the Audioengine 2+ Wireless Music System!
The Audioengine team is dedicated to bringing you the highest-quality listening experience possible and theAudioengine2+ Wireless speakers were designed with the same attention to detail and operational simplicity as all our other products.
So we wish to sincerely thank our customers, distributors, and resellers for the inspiration to create another great Audioengine product.
What’s in the box
- A2+ Wireless powered (left:) speaker
- A2+ Wireless passive (right) speaker
- Power supply
- AC power cord
- Speaker wire (16AWG), 2 meters (~6.5 feet)
- Mini-jack audio cable, 1.5 meters (~5 feet)
- USB cable, 1.5 meters (-5 feet)
- Cloth speaker bags
- Cloth cable bag
- Quick Start guide
Features
- Built-in power amplifiers
- High-fidelity [email protected] aptX @+ extended range
- RCA and mini-jack audio inputs
- Variable preamp/subwoofer audio output
- Custom Kevlar woofers and silk tweeters
- Hand-built MDF wood cabinets
Safety Instructions
- Please read these instructions before using this product.
- Keep these instructions for future reference.
- Heed all warnings on the product and in this guide.
- Follow all instructions.
- Do not use this apparatus near water or moisture.
- Clean only with a dry cloth and as directed by the manufacturer.
- Do not block any ventilation openings. Install in accordance with the manufacturer’s instructions.
- Do not install near any heat sources, such as radiators, heat registers, stoves or other apparatus that produce heat.
- Do not defeat the safeto/ purpose of the polarized or grounding•type plug. A polarized plug has two blades with one wider than the other. A grounding-tt;pe plug has two blades and a third grounding prong. The wider blade or third prong are provided far your safety.
- Protect the power cord from being walked on or pinched, particularly at plugs, convenience receptacles, and the point where they exit from the apparatus.
- Use only attachment:; or accessories specified by the manufoeturer.
- Use only with the cart, stand, tripod, bracket or table specified by the manufoctureror sold with the apparatus. When a cart is used, use caution when moving the cart/apparatus oombination to avoid injury from tip'{)ver.
- Unplug this apparatus during lightning storms or when unused for long periods of time to prevent damage to this product.
- Refer all servicing to qualified service personnel. Servicing is required when the apparatus has been damaged in anyway such as power supply card or plug is damaged, liquid has been spilled or objects have fallen into the apparatus, the apparatus has been exposed to rain or moisture, does not operate normally, or has been dropped.
Operating Temperature Range: 32° to 104°F (0° to 40°C)

Quick Setup
- Connect the included speaker wire from the A2+ left (powered) speaker to the right (passive) speaker, observing proper wire polarity to each speaker connector.
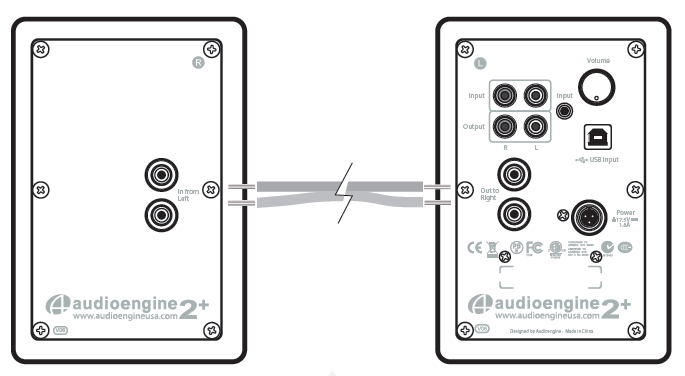

Speaker wire connection

2. Verify that the volume/power knob on the rear panel of the left speaker is in the OFF position by rotating the knob until it clicks off.
3. Connect the cable from the external power supply to the A2+ left speaker rear panel.
3. Connect the AC power cord to the other end of the power supply and plug the cord into a functioning power outlet. A light on the power supply should be illuminated.
Wireless connection
- Turn power on via the rear panel volume/power knob.
A2+ Wireless will automatically go into Bluetooth “pair mode” and the Pair button on the rear panel will start flashing. - On your device (phone, tablet, computer, etc) turn on Bluetooth and go to Bluetooth preferences.
- Select “Audioengine A2+” to pair and connect. The Pair indicator light on the A2+ rear panel should now be on solid.
- Play your music and adjust volume levels for A2+ and your device.
- To add additional devices put A2+ back into pair mode by disconnecting A2+ from your device or by pressing the Pair button on the A2+ rear panel for about 3 seconds until the pair indicator light starts flashing. Repeat steps 2-4 to connect another device.
A2+ can wirelessly connect to only one device at a time, however it will pair and remember up to six different devices.
Wired connection
- Connect an audio cable between your device and one of the inputs on the A2+ rear panel.
- Play music and adjust the volume on the speakers and your device to your desired listening levels.
USB audio connection
- Connect the included USB cable between your computer and the USB input on the rear panel of the left powered speaker.
- If using Windows, the A2+ should be recognized automatically.
For MacOS, under System Preferences/Sound/Output, select “Audioengine A2+”.
Inputs and volume settings
Multiple devices may be connected to the speakers at the same time and all inputs are open and active so it’s easy to switch between your tablet, phone, TV, or any other device.
To adjust the volume, we recommend you first set a level on A2+ and then use the volume control on your device to adjust the overall level. Volume settings are flexible and there is no right or wrong so feel free to experiment to find what works for you.
For specifications and other product info go to: http://audioengine.com
Contact support
If you have any questions please contact our customer support team: audioengine.com/support-inquiry
Break-in period
Your speakers will sound great out of the box and will get better over time. No need to do anything else but listen to them, however, we do recommend that you give them at least 40 to 50 hours break-in time before doing any critical listening.
Cleaning
We don’t recommend using any solvents or cleaners. Just wipe down the cabinets with a soft, dry cloth.
Other features
Variable audio output
The A2+ Wireless Powered Speakers include a variable full-range preamp audio output so you can connect a subwoofer. You can also stream music to other systems around your house by using our W3 wireless adapters. This output is adjustable so the volume level of this output can be controlled from the A2+ volume control.
Speaker placement
Although your A2+ Wireless speakers are very forgiving with regards to where you place them, it’s true that proper speaker location can have an impact on sound quality. Even though there are different theories on correct speaker placement, rooms and tastes are different so it’s difficult to recommend a perfect setup. We do suggest you feel free to experiment to see what works for you.
As a general rule of thumb for the best soundstage and imaging, tweeters should be at about eye-level in your most frequent listening location. For the best bass response we recommend at least 6 inches of clearance between the rear of the speakers and the wall behind them.
Here are a few more suggestions, assuming you have some flexibility regarding where you place your speakers. No need for concern if your listening space dictates the speakers’ position.
Both speakers should be equal distance from your primary listening position.
Placing the speakers at least 6 feet (l.8m) apart usually provides the best imaging.
Allow at least 6 inches of clearance between the rear of the speakers and the wall or surface behind them.
If you need to turn the speakers on their sides, position the tweeters toward the outside.
If used on a desktop for computer or multimedia speakers, the more solid the surface the better.


Warranty information
All Audioengine products have a 3-year Limited Warranty on parts and labor from date of purchase. The Limited Warranty applies only to Audioengine products purchased in the United States. Your warranty is automatic, so there is no need to register. For Limited Warranty coverage elsewhere, please contact the Audioengine dealer, reseller, or distributor in your country or region.
What is covered
All defective parts or faulty workmanship.
What is not covered
The Audioengine Limited Warranty does not cover damage caused by accident, misuse, abuse, neglect, excessive moisture, lightning, power surges, other acts of nature, unauthorized product modification or repairs, or failure to follow the instructions outlined in this guide.
What we will do
We will repair or replace any defective parts, at our option, within a reasonable amount of time and free of charge any time during the warranty period. After service, we will be responsible for shipping the product back to you at our expense.
What we ask from you
You will be responsible for shipping charges to Audioengine or to an authorized dealer. We recommend you keep the original shipping materials to prevent shipping damage if service is needed. Audioengine cannot be responsible for any damages incurred during shipping due to poor packing, so please pack well and make sure to insure your shipment.
How to obtain Audioengine warranty service
If you have any questions or feel you may need service, contact the reseller where you purchased your product. You can also visit our support portal at support.audioengineusa.com where you will find a searchable Knowledge Base, and if you don’t find an answer to your question you can easily contact us by opening a support ticket.
We will do everything we can to answer your questions and resolve any issues as quickly as possible.
Exclusive remedy
This Limited Warranty is fully transferable provided the current owner furnishes the proof of purchase and that the serial number on the product is intact. THE MAXIMUM LIABILITY OF AUDIOENGINE SHALL NOT EXCEED THE ACTUAL PURCHASE PRICE PAID BY YOU FOR THE PRODUCT. IN NO EVENT SHALL AUDIOENGINE BE LIABLE FOR SPECIAL, INCIDENTAL, CONSEQUENTIAL OR INDIRECT DAMAGES.
Product returns and refunds
We sincerely hope you get as much enjoyment from our products as we’ve had creating them. However, should you have an issue or are not satisfied with any Audioengine product for any reason contact the reseller where you purchased or contact us directly: audioengine.com/support-inquiry
About Audioengine
Audioengine designs and builds innovative audio products with all your music in mind. Great sound, simple but elegant designs, high-quality materials and truly useful features are what Audioengine is about. We sincerely hope you get as much enjoyment from our products as we’ve had creating them!
FCC Part 15 Notice
This device complies with Part 15 of the FCC Rules. Operation is subject to the following two conditions:
1) This device may not cause harmful interference.
2) This device must accept any interference received, including interference that may cause undesired operation.
Changes or modifications not expressly approved by the party responsible for compliance could void the user’s authority to operate the equipment.
This equipment has been tested and found to comply with the limits for a Class B digital device, pursuant to Part 15 of the FCC Rules. These limits are designed to provide reasonable protection against harmful interference in a residential installation.
This equipment generates, uses, and can radiate radio frequency energy and, if not installed and used in accordance with the instructions, may cause harmful interference to radio communications. However, there is no guarantee that interference will not occur in a particular installation. If this equipment does cause harmful interference to radio or television reception, which can be determined by turning the equipment off and on, the user is encouraged to try to correct the interference by one or more of the following measures:
- Reorient or relocate the receiving antenna.
- Increase the separation between the equipment and receiver.
- Connect the equipment into an outlet on a circuit different from that to which the receiver is connected.
- Consult the dealer or an experienced technician for help.
FCC Radiation Exposure Statement
This equipment complies with FCC radiation exposure limits set forth for an uncontrolled environment. This equipment should be installed and operated with minimum distance 20cm between the radiator & your body.
Information for Users on Disposal of Old Equipment [European Union]

By disposing of this product correctly, you will help to conserve the environment and human health that could otherwise be caused by inappropriate waste handling of this product. For more information about collection point and recycling of this product, please contact your household waste disposal service or the shop where you purchased the product. Penalties may be applicable for incorrect disposal of this waste, in accordance with national legislation.
[Other Countries outside the European Union]
If you wish to dispose of this product, please do so in accordance with applicable national legislation or other rules in your country for the treatment of old electrical and electronic equipment.
© 2018 Audioengine, LLC. All Rights Reserved.
Audioengine and Audioengine A2+ Wireless are trademarks of Audioengine.
The Bluetooth name and the Bluetooth trademarks are owned by Bluetooth SIG, Inc. and are used by Audioengine under license.
The aptX® mark and logos are registered trademarks of Qualcomm Technologies International, Ltd.
The Bluetooth® word mark and logos are registered trademarks owned by Bluetooth SIG, Inc.
A2+ Wireless Quick Setup
Step 1: Connect the included speaker wire from the A2+ left (powered) speaker to the right (passive) speaker, observing proper polarity to each speaker connector.

1) Use your thumb and finger to unscrew the binding post connectors on the back of each speaker.
2) Insert each speaker wire into the holes on the side of binding post connectors, making sure to connect the positive (+) terminal on the left speaker to the positive (+) terminal on the right speaker.
3) Retighten the binding posts with your fingers.
4) Verify that only the exposed portion of the speaker wire is secured firmly in each connector.
5) Make sure that none of the speaker wire strands have come in contact with an adjoining terminal.
Step 2: Verify that the volume/power knob on the rear panel of the left speaker is in the OFF position by rotating the knob until it clicks off..
Step 3: Connect the cable from the external power supply to the A2+ left speaker rear panel.
Step 4: Connect the Ac power cord to the other end of the power supply, and plug the cord into a functioning power outlet. A light on the power supply should be illuminated.
Wireless Connection
Step 1: Turn power on via the rear panel volume/power knob.
A2+ Wireless will automatically go into Bluetooth “pair mode” and the Pair button on the A2+ Wireless rear panel will start flashing.
Step 2:: On your device (phone, tablet, computer, etc), turn on Bluetooth and go to Bluetooth preferences.
Step 3: Select “Audioengine A2+” to pair and connect. The Pair indicator on the A2+ rear panel should be solid.
Step 4: Play your music and adjust volume levels on A2+ Wireless and your device.
Step 5: To add additional devices put A2+ back into pair mode by disconnecting A2+ from your device or by pressing and holding the Pair button on the A2+ Wireless rear panel until the pair indicator starts flashing. Repeat steps 2-4 to connect another device.
A2+ can wirelessly connect to only one device at a time, however it will pair with and remember up to 6 different devices.
Wired Connection
Step 1: Connect an audio cable between your device and one of the inputs on the A2+ rear panel.
Step 2: Play your music and adjust the volume on the speakers and your device to the desired listening levels.
USB Audio Connection
Step 1: Connect the included USB cable between your computer and the USB input on the rear panel of the left powered speaker.
Step 2: If using Windows, the A2+ should be recognized automatically. For MacOS, under System Preferences/Sound/Output, select “Audioengine A2+”.
A2+ Wireless Troubleshooting Tips
The following troubleshooting tips can help diagnose and correct most concerns with the A2+ Wireless. We have attempted to make this list as comprehensive as possible, so some of these may not apply to your issue, but please go through each tip.
If the power indicator on the A2+ external power supply unit is not illuminated, try these tips:
- Make sure the AC power cord is connected to the power supply unit and to a working AC power outlet.
- Check that the cable at the other end of the power supply is correctly connected to the rear panel of the left speaker.
If the power supply light is on but you are experiencing an audio-related issue with a wired connection, try these tips:
- Verify that the volume/power control on the rear panel is not turned all the way down or powered off (we recommend setting the volume to at least the 10 o’clock position)
- Check that the volume level of your audio source components or devices is not set to minimum volume or powered off.
- Check speaker wire connections from the left (powered) speaker to the right (passive) speaker. Confirm this by removing the speaker wire from on each speaker and reconnecting. Also check the speaker wire polarity by verifying that the wires are going to same terminals on both speakers.
- Check that the cables from your audio sources to the speakers are properly connected. Confirm this by unplugging the audio cables and then reconnecting.
- Decrease the volume of the input audio source and increase the volume of the speakers.
- Try using different audio input sources and/or devices to see if the problem follows.
- Try swapping your left and right speaker via the RCA left and right inputs to see if the issue remains in the same channel or follows the speaker.
- If you are using a computer with your A2+ Wireless, make sure the volume is up on your media players, internet radio, master control, device volume, etc. and the balance control is centered.
If your input source has its own EQ, please make sure the low end is at a moderate level, as having too much bass can cause distortion.
- If you are using a wireless adapter, preamp, or external DAC with these speakers, remove them (temporarily) and connect the audio input source directly to the speakers.
- Move your speakers to a different location to see if something is causing interference in the current setup. Something as simple as a wireless internet router, cordless or mobile phone, or halogen lamp near the speakers can cause interference.
A2+ Wireless troubleshooting tips – internal USB digital-to-analog converter
Try these tips if your computer is not recognizing the speaker through your computer’s USB input or the sound through USB isn’t functioning correctly.
If you are using a Windows computer, uninstall the USB driver from your computer. Then disconnect the USB cable to remove the A2+ from your computer and plug it back in to allow the USB driver to re-install automatically. You can find complete instructions from Microsoft on how to reinstall a plug-and-play device under Windows here.
If you are using a Mac, try a NVRAM/PRAM reset. This resets the system configurations for some audio and video related items and can many times help clear up problems related to audio. See Apple’s support page for information on how to do this.
A2+ Wireless troubleshooting tips – Bluetooth
- Verify that the A2+ is connected to power and that the front volume knob is turned clockwise past the detent position (you should feel a click). If you haven’t already, power-cycle your speakers by switching them off and back on.
- If your A2+ is already connected to a device via Bluetooth, the Bluetooth pair light on the back panel of the left speaker will be on and solid (note that if your A2+ has been idle and not connected to a device for more than 2 minutes, the Pair light will automatically turn off). Tap the Pair button and it should begin blinking (or pair to your A2+ using your source device, and the LED will go from off to on and solid).
- Try playing audio from more than one application on your phone/tablet, or computer.
- Check to make sure your source device (computer, tablet, phone, etc) is running the most up-to-date version of software available. For Mac OS users, be sure to check the App store to see if there’s a newer version of Mac OS you could be running.
- Try disconnecting from and forgetting the A2+ through your device’s Bluetooth settings, and re-pairing to the A2+.
- Try using a different source device with your A2+ to see if the issue follows. Also be sure to test your A2+ using the analog input as well.
- If possible, try your A2+ in a different location to see if something is causing an issue in the current setup. Something as simple as a wireless internet router, cordless or mobile phone, or halogen lamp near the speakers may be causing interference in your setup.
