AUKEY Mirror Dash Camera User Manual
Thank you for purchasing the AUKEY DRA2 Mirror Dash Camera. Please read this user manual carefully and keep it for future reference. If you need any assistance, please contact our support team with your product model number and Amazon order number.
Package Contents
- Mirror Dash Camera
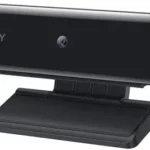
- Rear Camera with 7m / 23ft Cable
- Car Charger with 3.5m / 11.5ft USB Mini-B Cable
- Four Mounting Straps (2 + 2 spare)
- Two Screws
- Two 3M Stickers
- Six Cable Clips
- Trim Removal Tool
- User Manual
- Warranty Card
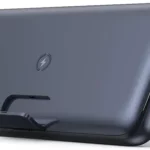
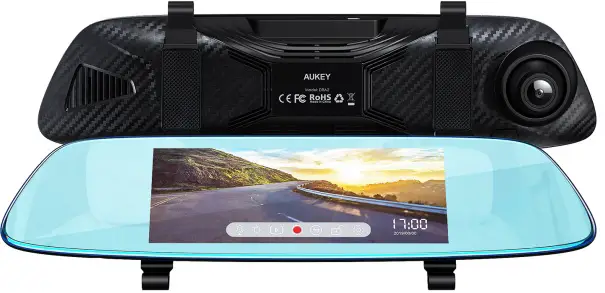
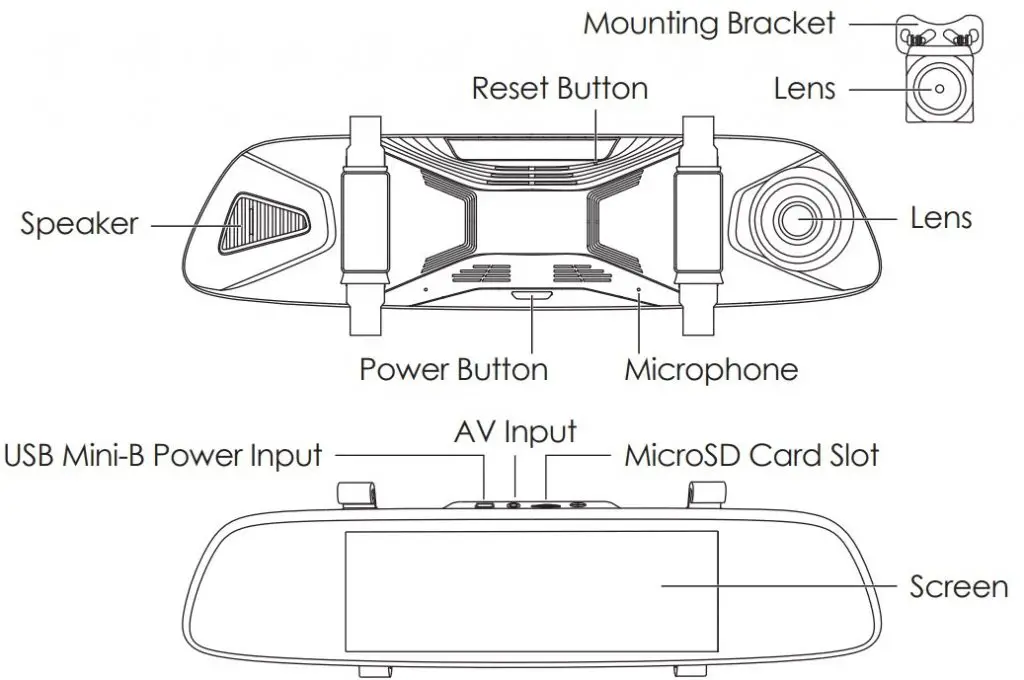
Product Diagram

Specifications
| Model | DRA2 |
| Image Sensor |
|
| CPU | MSC8336 |
| Screen | 6.8” LCD |
| Screen Resolution | 1280 x 480p |
| Angle of View |
|
| Aperture |
|
| Recording Resolutions |
|
| Video Format | MOV |
| Video Recording Modes | Loop, Motion Detection, Parking, Time-Lapse, and Emergency Recording |
| Sound Recording | On / Off |
| MicroSD Card | Class 10 or higher, 256GB Max |
| Input | DC 5V 2.5A via mini USB |
| Battery | 500mAh |
| Operating Temperature | -20°C – 70°C (-4°F – 158°F) |
| Materials | ABS, PC, glass |
| Dimensions |
|
Using a MicroSD Card
The dash camera doesn’t include internal storage and requires a microSD card (Class 10+ recommended and 256GB Max supported) to function. Use a high-quality, branded card for maximum reliability. Insert a microSD card into the mirror dash camera microSD card slot. Later, when the camera is powered on, format it (‘Format SD Card’ in dash camera ‘General Settings’) to prepare the card for first use in the dash camera. Formatting will permanently erase any data on the microSD card. For best performance, format periodically (after backing up any important files).
Testing the Dash Camera System
You may wish to connect and test the dash camera system before proper, long-term installation in your car (or other vehicle). Connect the two cables to the mirror dash camera and plug the car charger into your car 12V/24V outlet (see ‘Installing the Dash Camera System’ steps 2 & 3 below); then switch on the car ignition to power the 12V/24V outlet. The dash camera system will power on automatically. Check that both cameras are operating correctly. See ‘Using the Touchscreen Buttons’ and other sections for information on operation.
Installing the Dash Camera System
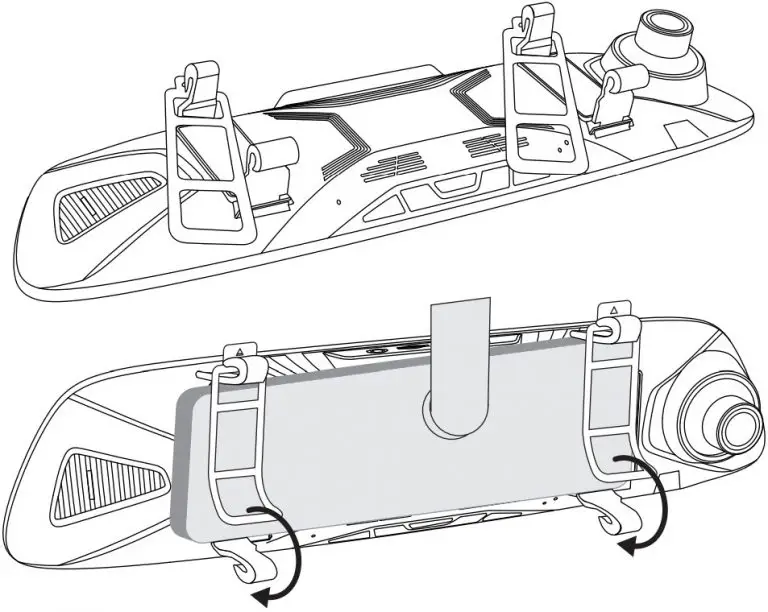
- Use two of the included mounting straps to attach the mirror dash camera to your car rear-view mirror. It should be attached with the widest part of the mirror dash camera at the bottom and the input ports on the top edge.
- Plug the car charger into your car 12V/24V outlet and connect the other end to the USB mini-B power input of the mirror dash camera.
- Plug the 7m/23ft rear camera cable into the AV input of the mirror dash camera.
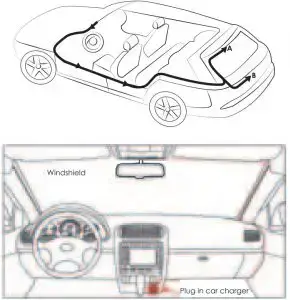
- Cable routing should be as shown in the following two diagrams. Use the cable clips to help fix the two cables conveniently and safely. A trim removal tool is included for concealment of cables behind trim and carpeting for a tidier finish. Removed trim can be left off until the cables are well-arranged in their final position and the dash camera system is operational.
- You can mount the rear camera internally or externally. External mounting generally offers a clearer image and better view point for reversing. However, it requires three small holes to be drilled in your car bodywork (two for camera mounting and one for cable routing).
External Camera Mounting:
- Detach the rear camera from the rest of the cable at the connection point on the cable 155mm/6.1” from the rear camera. Note that this slim rear camera connector defines the size of the hole you’ll need to drill later for the camera cable.
- Find a suitable camera mounting position above your license plate (central and tucked under an edge is most effective and discreet).
- Remove trim on the inside of the car behind that mounting position to check there are no obstructions for drilling and also get access for cable routing (leave the trim off for step 6).
- Confirm your rear camera mounting position. Ensure the camera is the right way up for correct picture orientation (note that the bracket is fixed to the camera back top edge). Drill the two holes for the camera bracket screws and one hole for the camera cable (use a metal drill bit for drilling through metal).
- Insert the rear camera connector & cable into the car through the hole and fix the camera securely onto the car using the camera bracket screws. Reconnect the two sections of the rear camera cable inside the car.
Internal Camera Mounting: - Install the camera inside your car next to the rear window using the 3M sticker. Ensure the camera is the right way up for correct picture orientation (note that the bracket is fixed to the camera back top edge).
- You need to hardwire the red wire of the rear camera cable to the positive wire of your reversing lights (ask a skilled person for help if you aren’t confident about doing this). This enables the screen to automatically switch to the rear camera full view when you go into reverse. If you don’t complete this step, you’ll need to switch views manually and the reversing guide lines won’t appear on-screen.
- Ensure your car is safely parked in a flat place.
- Remove trim to get access to the wiring system connections inside the trunk.
- Identify the reversing light wiring. Use a voltmeter to find the wire that’s only live (with about +12V) when your car is in reverse.
- Hardwire to this wire using a soldering or ‘military splice’ method and seal with electrical tape.
- Switch on the car ignition to power the 12V/24V outlet. The dash camera system will power on and start recording automatically. Check that both cameras are operating correctly and are positioned well for the best view. The mirror dash camera has a pivoting lens barrel and the rear camera tilts on its bracket,
Caution AUKEY is not responsible for any damage caused to or by the air bag due to incorrect placement of the device or its cables
Powering On / Off
Press and hold the power button for 3 seconds to turn the dash camera on/off. After the dash camera is turned on, short-press the power button to turn the screen on/off (recording continues). ‘Auto Screen Off’ and ‘Auto Power-Off’ in ‘General Settings’ can be used to turn the screen or the dash camera off automatically after 1 or 3 minutes.
Using the Touchscreen Buttons
![]() Audio Recording: Mute/unmute the microphone. When audio recording is on, in-car audio will be recorded during video recording
Audio Recording: Mute/unmute the microphone. When audio recording is on, in-car audio will be recorded during video recording
![]() Screen Brightness Adjustment: Choose from 5 screen brightness levels
Screen Brightness Adjustment: Choose from 5 screen brightness levels
Playback: Preview, lock/unlock, or delete recorded videos
![]() Recording: Start/stop recording. There will be a short delay to begin and end writing videos to storage
Recording: Start/stop recording. There will be a short delay to begin and end writing videos to storage
![]() Screen View Switch: Switch between 3 screen view options– dual view, front camera, and rear camera (in that order). Touch the icon or swipe horizontally across the screen
Screen View Switch: Switch between 3 screen view options– dual view, front camera, and rear camera (in that order). Touch the icon or swipe horizontally across the screen
![]() Video Protection: Lock/unlock a video in video recording mode. Protected videos won’t be overwritten by loop recording and can only be deleted if you unlock them first
Video Protection: Lock/unlock a video in video recording mode. Protected videos won’t be overwritten by loop recording and can only be deleted if you unlock them first
![]() Settings: Change video and general settings. Touch the up & down arrows to see more settings and settings options
Settings: Change video and general settings. Touch the up & down arrows to see more settings and settings options
Video Recording
- Loop Recording: Recording will begin automatically after powering on with a microSD card in the device. Each recorded file is up to 3 minutes long, with old footage being replaced when microSD card storage is full. The videos will be saved in the ‘Normal’ folder (or ‘Emergency’ folder if Emergency Recording is activated)
- Motion Detection Recording: Switch on motion detection in ‘General Settings.’ This function will start recording video when the dash camera optically detects motion in front and stop recording when motion is no longer detected. The videos will be saved in the ‘Motion Detection’ folder.
- Parking Mode: Switch on parking mode in ‘General Settings.’ The dash camera will use its internal rechargeable battery to operate even when the car ignition is turned off and power is disconnected. If any motion or vibration is physically detected by the G-sensor when parked, it will record automatically (screen off) for 10 seconds and then turn off. The videos will be saved in the ‘Emergency’ folder.
- Time-Lapse Recording: Switch on time-lapse recording in ‘Video Settings.’ This function will capture a picture per second to make a video played at 30fps. The videos will be saved in the ‘Normal’ folder.
Notes
- Motion detection recording keeps the cameras active to detect motion and start recording. It’s necessary to use a dash camera hardwire kit with output current greater than 2A for this mode
- Time-lapse recording has 12 or 24-hour recording durations. It’s necessary to use a dash camera hardwire kit with output current greater than 2A for this mode. This mode is for creating activity and time progression entertainment videos while your car is parked. It isn’t suitable for monitoring purposes while driving.
Emergency Recording
Manual File Backup
Click the lock icon to protect the current video so that it won’t be overwritten. The red recording indicator in the top left of the LCD screen will turn yellow to indicate a protected emergency recording is in progress. The videos will be saved in the ‘Emergency’ folder.
Auto File Backup
Once the G-sensor is activated by a sudden impact, the device will automatically make a recording and protect it from being overwritten. The red recording indicator in the top left of the LCD screen will turn yellow to indicate a protected emergency recording is in progress. Adjust G-sensor sensitivity in the ‘General Settings’ menu. The videos will be saved in the ‘Emergency’ folder.
File Transfer
USB File Transfer
- Connect the mirror dash camera (with card inside) to your computer using your own USB mini-B data cable. It should be recognized as a removable device.
- Find the video recording files located in the Normal, Motion Detection, and Emergency folders.
- Copy the files to your computer.
MicroSD Card File Transfer
- Shut down the device and eject the microSD card.
- Insert the microSD card into a computer microSD card slot or reader and your computer will automatically detect the microSD card.
- Find the video recording files located in the Normal, Motion Detection, and Emergency folders.
- Copy the files to your computer.
Product Care and Use
- Ensure mirror dash camera and rear camera are firmly attached before use to avoid falls.
- Keep away from liquids, extreme heat, and strong magnetic fields.
- Avoid touching the lens surfaces. They may be cleaned with a cotton swab or lens cleaning paper. If any dirt is difficult to remove, a non-abrasive glasses lens cleaner may be used. Don’t use corrosive solutions.
- Keep important videos backed up elsewhere to protect against file corruption or loss caused by any SD card issues.
- If the dash camera stops working, press and hold the reset button for 7 seconds to restart it (this won’t affect saved files).
Warranty and Customer Support
For questions, support, or warranty claims, please contact us at the address below that corresponds with your region. Please include your Amazon order number and product model number.
Amazon US orders: [email protected]
Amazon EU orders: [email protected]
Amazon CA orders: [email protected]
Amazon JP orders: [email protected]
- Please note, AUKEY can only provide after sales service for products purchased directly from AUKEY. If you have purchased from a different seller, please contact them directly for service or warranty issues.