Installation Guide
- Download Balena Etcher for your operating system.
- Download an image file from the download section on the Batocera website that matches the architecture you want to use for Batocera (x86_64 for most PCs, others for the rest).
Note: Some browsers like Chrome/Opera/Safari may take the liberty to unzip the file by themselves and poorly rename them. If the file is more than 1GB, it is already unzipped. If your download fails, use another browser. Yes, Chrome sucks, that’s a fact, use another browser. - Install and run Etcher.
- Insert a USB key or a SD card on your computer.
- In Etcher, select the image batocera-(version)-(arch)-(date).img.gz that you just downloaded, and then the target drive like on the following screenshot, and click on Flash! You don’t even need to unzip the file, Etcher will take care of it. In case verification fails, try unzipping the file and try again.
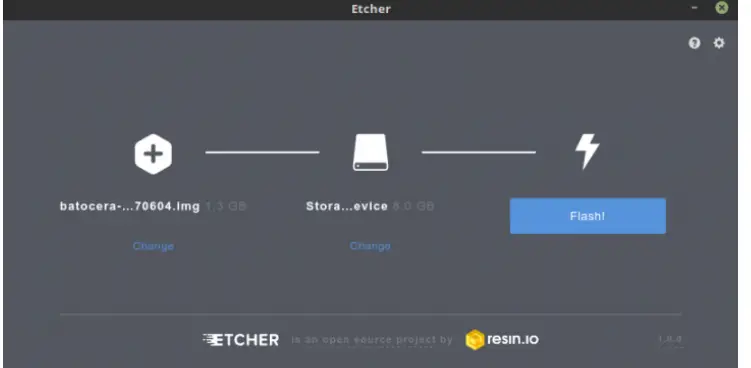
- Etcher may ask for administrator permissions (to unzip the file). Click “Yes”.
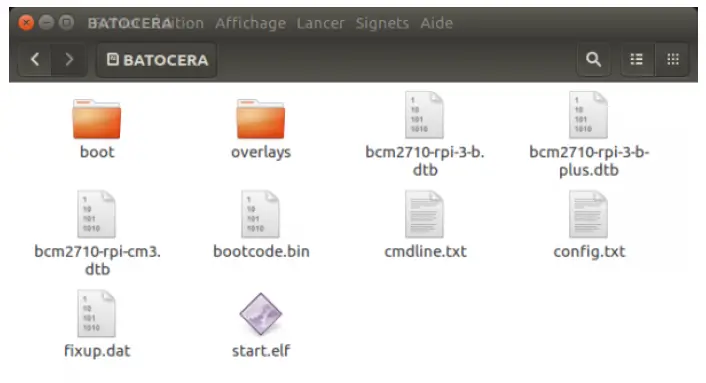
- Once finished, reinsert your USB key/SD card and check that it contains a boot folder (files differ depending on architectures).
- Shut down your computer and insert your USB key/SD card into the machine you want to boot with Batocera and turn it on.
- If on a recent PC using an x86 build, you may need to disable Secure Boot in your BIOS settings (details below).
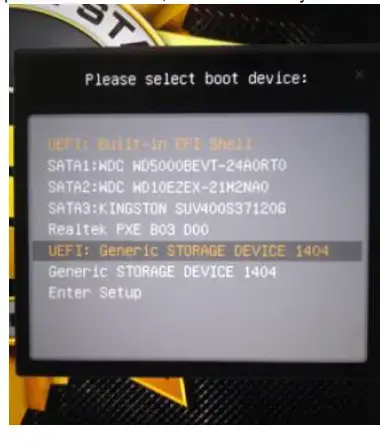
- If on a PC, you may need to enter the boot selection menu with F10 or F11 and select the Batocera drive. UEFI is preferred if available, but not necessary.
- Enjoy!
Be sure to check out how to add BIOS files required for certain emulators and how to add ROMs. Batocera’s front-end is driven by a modified version of EmulationStation (sometimes referred to as ES). Check out its overview page to learn how to navigate it!
BIOS settings (if Batocera fails to boot)
Batocera should boot fine with UEFI, if that option appears you should select that. However, sometimes Legacy (or MBR as it’s sometimes referred to) is the only option, depending on the motherboard.
Since there’s no consistency between motherboard manufacturers, no step-by-step instructions can be provided. Typical keys for entering the BIOS on boot are F12, F11, F10, Del or End. Typical keys for entering the boot selection screen are F11, F10, F9 or Del. The manual that came with your motherboard can provide further clues, or you can try exploring all the sub-menus of the BIOS yourself. To access the BIOS settings from Windows, hold the Shift key while selecting Restart and go to Troubleshoot > Advanced Options: UEFI Firmware Settings. Alternatively, go to Settings > Change PC settings > Update and Recovery > Recovery > Advanced Startup: Restart now, and then upon restarting go to Troubleshoot > Advanced Options: UEFI Firmware Settings.
Here are other known aliases BIOS’s may use for various settings:
- Secure boot a.k.a. secure keys, clear keys, secure key generation, ownership, etc. Typically in the ‘security’ category, but can also appear in the ‘boot’ or ‘authentication’ category. You will need to disable/clear this to allow other operating systems (such as Batocera) to boot.
- Legacy boot a.k.a. allow legacy ROM booting, EFI, MBR, load legacy options, show insecure targets, etc. Typically in the ‘boot settings’ category, but sometimes also has its own section. Some motherboards will force any UEFI boots to use Secure Boot with the keys for the original operating system, blocking other operating systems (such as Batocera) from booting. If this is the case for your motherboard, a typical workaround is to use/force Legacy Boot. If neither of these options work, refer to the manufacturer of your motherboard for support.
- Boot order a.k.a. boot priority, ROM order, boot options order, etc. Typically in the ‘boot’ category, but sometimes also has its own section. Not strictly required, but can make the Batocera drive the ‘default’ booting option when plugged in; ie. you won’t have to manually select the Batocera drive to boot off it of every time.
f you’d like to see a real-world example, check out this external link: https://www.tenforums.com/tutorials/85279-enable-disable-secure-boot-windows-10-pc.html
If all else fails, refer to https://wiki.batocera.org/troubleshooting#boot_issues for console output.
Mac boot order selection
To access the boot selection screen on Mac, hold the Option (Alt on ASCII keyboards) key while booting. On newer UEFI Macs, you may first need to turn Secure Boot to “No Security” and enable “Allow booting from external media” from the recovery mode (accessed by pressing and holding CMD (Win on ASCII keyboards)+R immediately after you see the Apple logo while booting).
Note: Some keyboards may require you to hold the Fn key as well!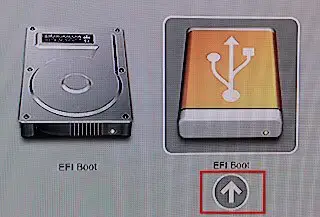
If you hold down the Ctrl key on this screen, the arrow will change to a circular one;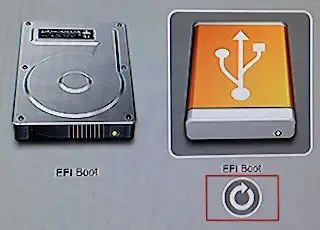
This indicates that your machine will default to booting from this device. Hold Ctrl+Return (Enter on ASCII keyboards) to confirm.
Install Batocera from Batocera
Perhaps you’d like to spread the love and install Batocera onto a machine from an already set-up USB stick? Or maybe you just want to install Batocera directly to your hard-drive. Or maybe you want to prank someone. This is for that. There are two things to know first:
Warning:
- This is not the recommended way to use Batocera. Doing this on your SBC or handheld could permanently brick it!Batocera and all of its functions work perfectly fine when booted off a USB/SD card, and speed is nearly identical. If you’d like to use your large hard-drive to store all of your ROMs/BIOS’s/saves, refer to using external storage instead.
- When Batocera is installed onto your computer’s internal hard-drive this way, all of your data will be overwritten and your computer may fail to boot. If this is your only computer, you could be put into an unrecoverable situation. Again, it is recommended to just use Batocera off a removable storage instead.
- Make sure you are connected to the internet and that your USB stick has enough free storage to download the Batocera image.
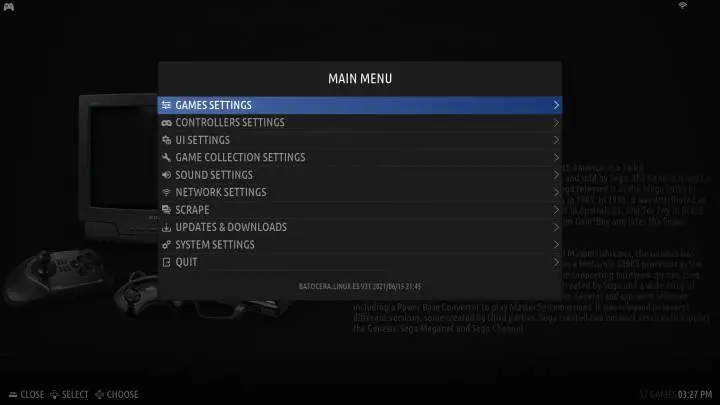
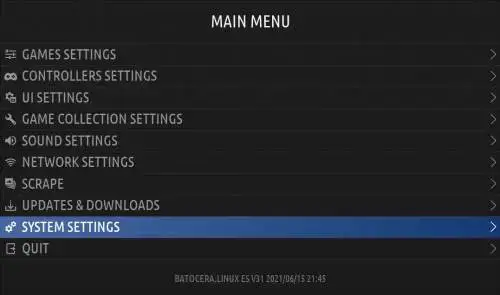
- Boot into Batocera and press [START] to open the Main Menu.
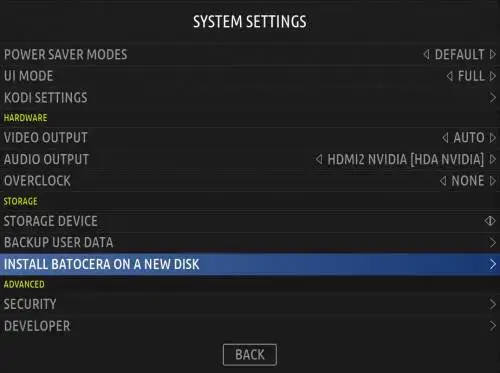
- Navigate to System Settings > Install Batocera on a New Disk.
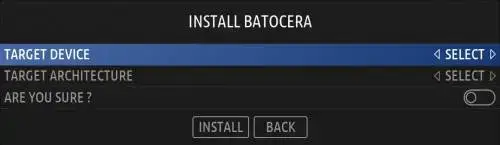
- Select the destination you’d like to install Batocera onto. Make sure it’s not the same drive you’re currently booted off of, as that will corrupt your USB stick!
- Check that you’ve selected the right drive. This is very easy to mess up and its actions are irreversible.
- Take a deep breath and check a third time. This is really important.
- Select your target architecture. It should be the same as what you selected on the download page when you first installed to your USB (most of the time, this will be X86_64).
- Make sure that you’re sure about this. Your menu should look similar to this:
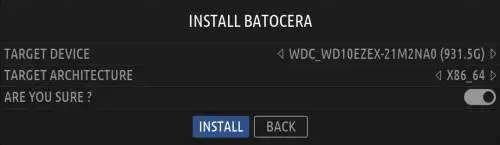
- Press INSTALL: Depending on your internet connection, it may take a while to download and install. You cannot use your Batocera system while this is happening.
This method, when successful, is identical to flashing the Batocera image using Etcher. If you have the expertise and tools required, you should instead connect your drive directly to a running computer and flash Note: Batocera using Etcher, so as to save downloading the image from the servers again.
Batocera does not install itself by copying system files over from the USB/SD card like other live distros might. It has to download, extract and install the image as a whole.
From: https://wiki.batocera.org/ Bacotocera.linux – Wiki
Permanent link: https://wiki.batocera.org/install_batocera
Last update: 2021/08/27 12:49