Broyhill 810525699 Wellsley Leather Power Reclining Sofa

SPOT CLEANING LEATHER
Blot any spills immediately; do not rub. Blot away the excess liquid with aa clean, dry, white cloth; turning the cloth trequently. Do not use common household cleaners, solvents, or dry cleaning tluids on leather furniture. These cleaners may cause damage. Do not use or place sharp objects on leather furniture. Do not place łurniture in direct sunlight and keep łurniture at least 6Ocm/2 H from heat sources to avoid fading.
IMPORTANT SAFETY INSTRUCTIONS
CAUTION: Please read all instructions carefully before starting assembly process. It is recommended to use two people when assembling and removing the backrest to and from the seat base of the furniture.
When using electrical furniture, basic precautions should always be adhered to, including the following: READ ALL INSTRUCTIONS BEFORE USING THIS FURNITURE
- DANGER: To reduce the risk of electric shock– Always unplug this furniture from the electrical outlet before cleaning.
- WARNING: To reduce the risk of burns, fire, electric shock, or injury to persons, unplug from outlet before putting on or taking off parts.
- Close supervision is necessary when this furniture is used by or near children, invalids or disabled persons.
- Use this furniture only for its intended use as described in these instructions. Do not use attachments not recommended by the manufacturer.
- Never operate this furniture if it has a damaged cord or plug; if it is not working properly, if it has been dropped or damaged, or dropped into water. Return the furniture to a service centre for examination and repair.
- Keep the cord away from heated surfaces.
WARNING: Changes or modifications to this unit not expressly approved by the party responsible for compliance could void the user’s authority to operate the equipment.
NOTE: This equipment has been tested and found to comply with the limits for a Class B digital device, pursuant to Part 15 of the FCC Rules. These limits are designed to provide reasonable protection against harmful interference in a residential installation. This equipment generates, uses and can radiate radio frequency energy and, if not installed and used in accordance with the instructions, may cause harmful interference to radio communications. However, there is no guarantee that interference will not occur in a particular instal-lation. If this equipment does cause harmful interference to radio or television reception, which can be determined by turning the equipment off and on, the user is encouraged to try to correct the interference by one or more of the following measures:
- Reorient or relocate the receiving antenna.
- Increase the separation between the equipment and receiver.
- Connect the equipment into an outlet on a circuit different from that to which the receiver is connected.
- Consult the dealer or an experienced radio/ TV technician for help.
USE AND MAINTENANCE
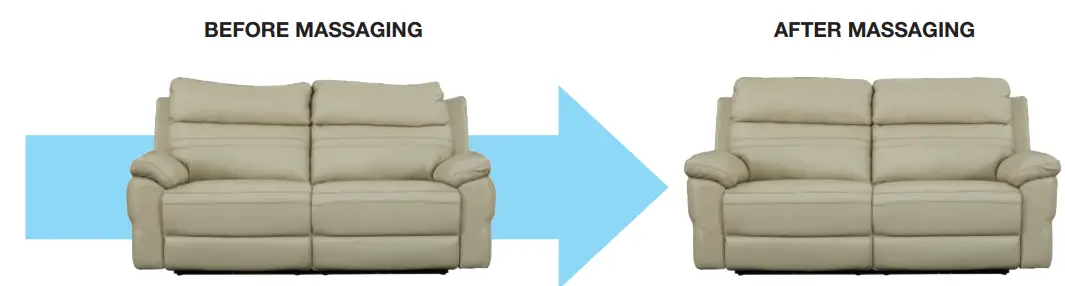
This is normal and can be easily corrected with a few simple steps. The padding should be massaged delicately and the sofa looking good year after year. See illustrations below for further explanation. The padding should not require additional maintenance, besides this normal care.
Using both hands, pat the backrest cushions, smoothing the cushion from the inside to the outside (FIG.1) Pat the backrest cushion with one hand, holding it with the other hand at the rear (FIG.2).
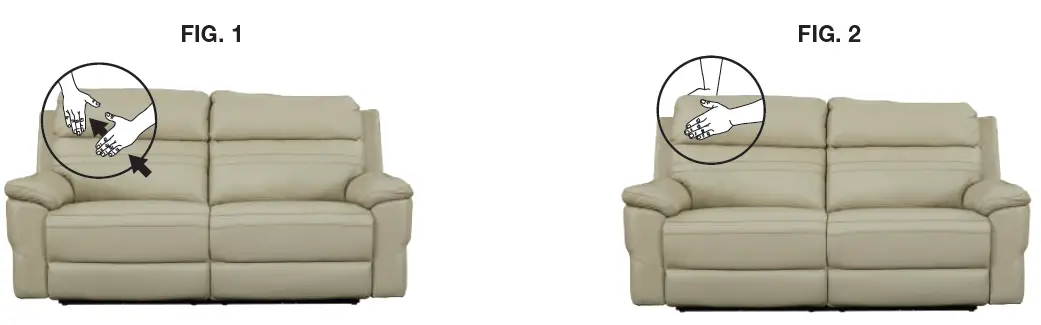
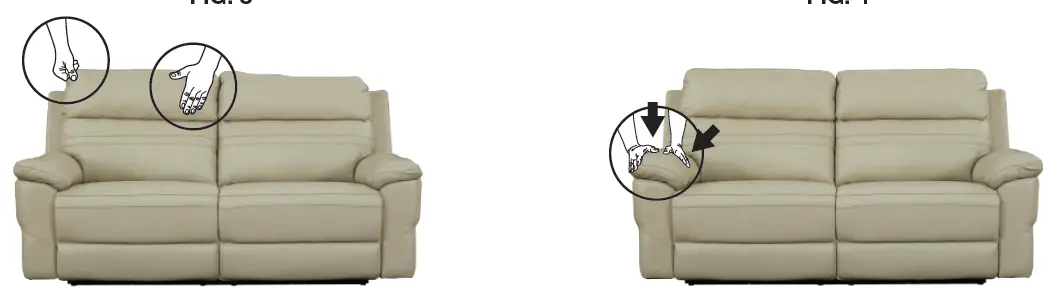
Pull the end of the cushion with one hand and pat it with the other hand (FIG. 3). After the back is complete, move to the two armrests. Pat them evenly, moving from the inside towards the outside (FIG.4).
During the first 3 months of life, foam padding tends to become softer as presure is applied, and then it stabilizes. This process is normal and allows for a more comfortable seating experience.
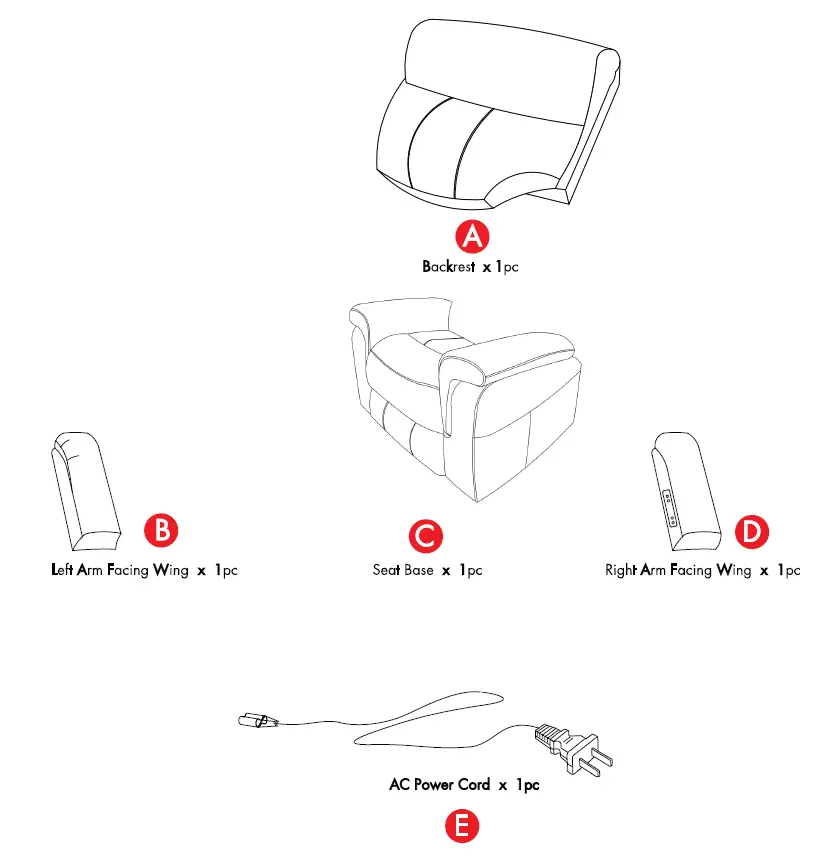
PARTS LIST
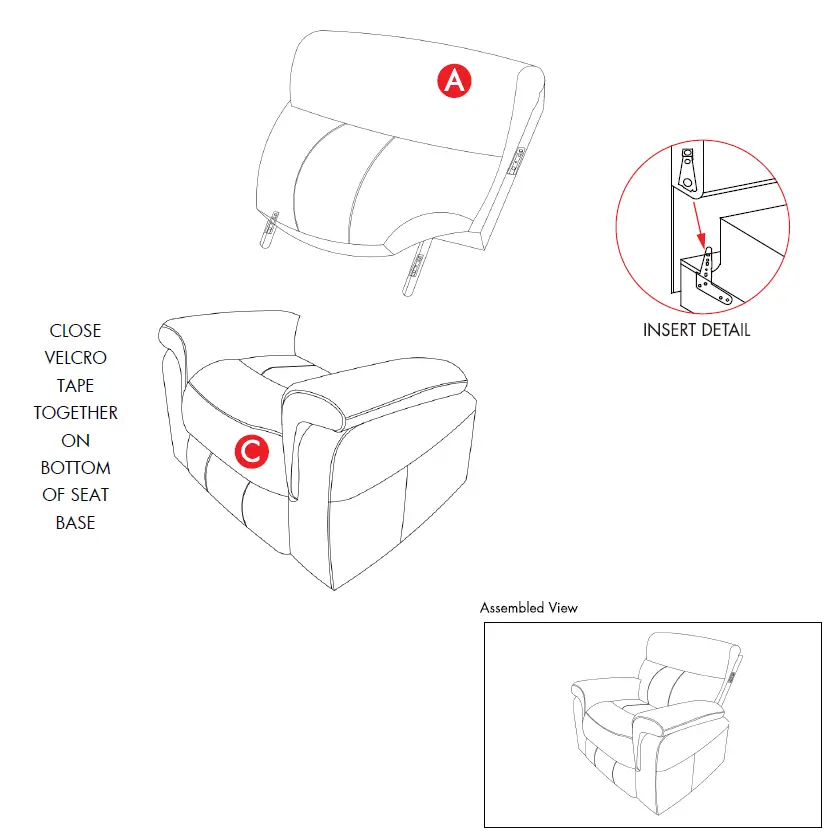
ATTACHING KD BACKREST TO SEAT
- Align the steel mechanism posts of Seat Base (C) with the metal sleeves on Backrest (A) and slide into place. Press downward firmly on both sides to lock the backrest into place.
- Attach the Velcro edge of the back panel of the backrest to the Seat Base (C)
- To remove the backrest, use a screwdriver to lift the black tab of the metal sleeve on both sides of the backrest and lift the backrest off the steel mechanism posts.
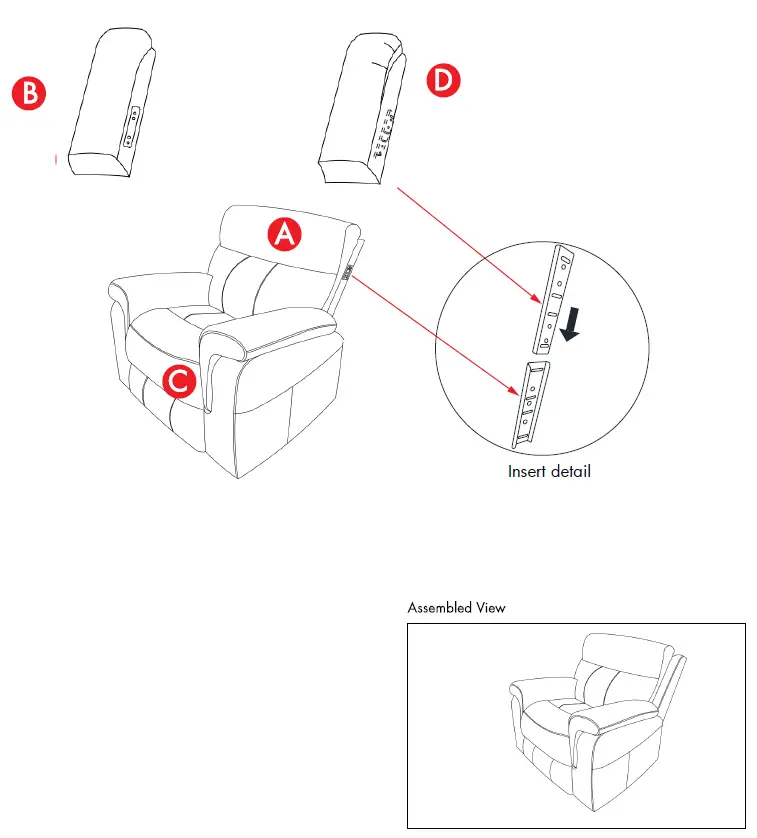
ATTACHING KD WING TO SEAT
- Carefully align the slide of left Arm Facing Wing (B) with the slide on the left of the Backrest (A) and slide into place. Press down fimly until the wing and backrest are aligned.
- Carefully align the slide of Right Arm Facing Wing (D) with the slide on the right of the Backrest (A) and slide into place. Press down firmly until the wing and backrest are aligned.
Note: Make sure the parts are connected and securely locked into position.
WIRING INSTRUCTIONS
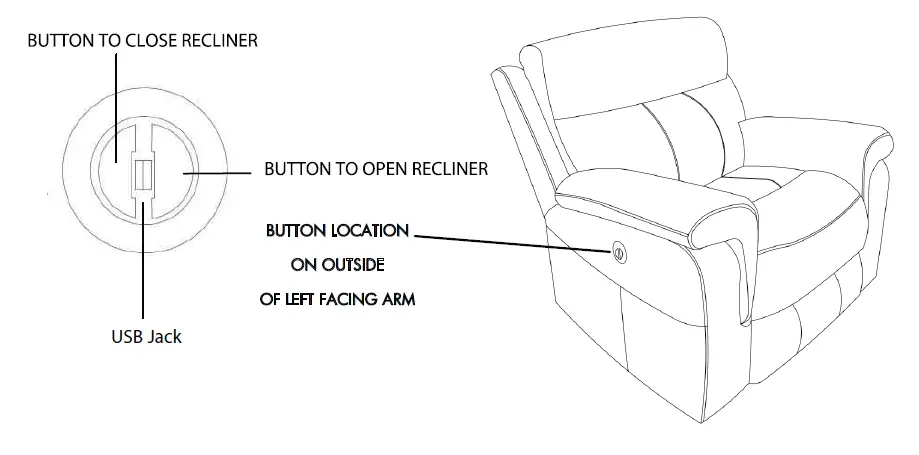
Connect AC Power Cord (E) to the Power Outlet plug found at the rear of the Let Arm Facing.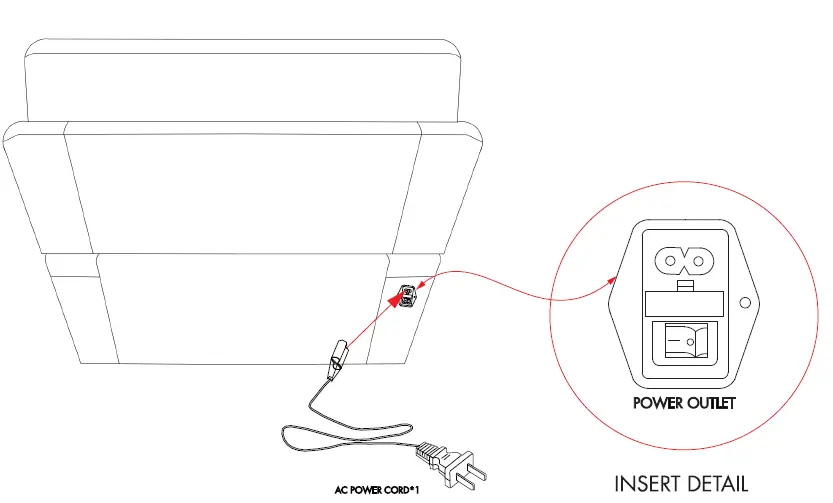
POWER BUTTON INSTRUCTION
Do not plug AC Power Cord (E) into the Power Outlet until your recliner is completely assembled and ready to use.