User Manual
4G SIM Card IP Camera Quic Setting
1. Download and install the APP Cam Hi . Make Sure Mobile with JG/4G/WIFI Network, Scan the following QR Code to download APP. Or search CamHi fromGoogle Player Storeor APP Store.

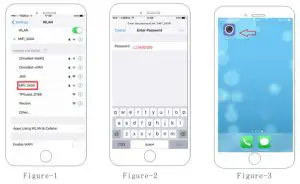
2. Connect camera with WIFI {AP hotspot itself) and make 4G card working proper1y. Firstly pull on camera with power supply, make mobile connect to camera AP hospot itself, WIFI name starts with MIFI”’ (figure 1), password is 1234567890 (figure 2). Then test 4G working properly. Make mobile test with internet, for example , open your browser to check It It can open website or not. If ok, the 40 Card working properly, if not, please check if Sim Card Is Inserted In the corTect direction or not and then restart camera.
3. Add Camera on the APP CamHi
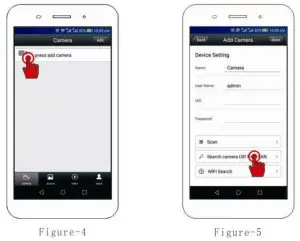
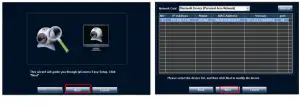
- 3.1 Open Cam Hi (figure 3),Click to add camera(figure 4), and then click “Search camera UID from LAN” (figure 5) (please note that Mobile already connect with WIFI singnalMIFI” throughcameraAPhotspotye1)
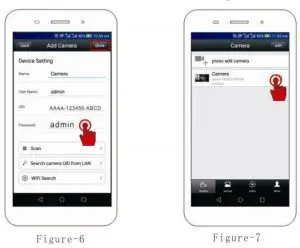
- 3.2 Surch Camera from LAN, add the UIO … -234567(flgure P6)
- 3.3 FIii in the password (Default password It admln) (figure 7)
- 3.4Cllek Ooneonthe upperright, fini1heameraaddingproeH1.
4. APP function instruction
- 4.1 View the Video After connection camera for a few seconds, camGra will connect itselfand show video automatically, then it will show status “online” Camera Status: Connecting: camera is connecting with internet, time will differ accordingly based on your network conditions. Online: Camera connects normally
- 4.2 Delete Camera Click Edit, there has options for you to choose delete camera or not
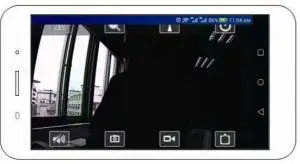
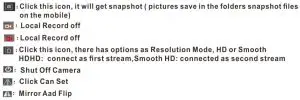
4.3 Video Interface Illustration
Video Interface illustration
Operation On The Computer
5.Connect the camera to modify the IP address
- 5.1 Pull on camera with power supply, connect the camera to router in the LAN then open the software “Search Tool”, click the “Next”, camera will show in the software itself, and camera IP address informalion as well Choose the IP address, and Click Next”.
5.2 Software will assign the IPadress based on lhe network condition in the LAN Automatically, Click ff Next”,and then double click the lP adress.
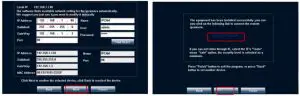
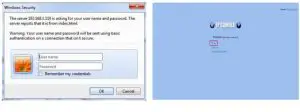
5.3 Alter click the Ip address from “Search Tools” ,Browser will remind you to fill in the Camara Uur and Panword, {User: admin, none panword) After enter Into Camera lnterface,Click the “PC View”
5.4 Enter lntoand check Malnpage of Camera.
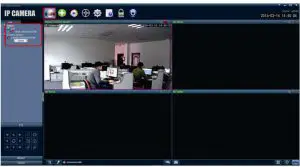
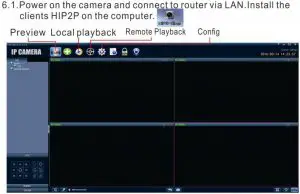
6. Computer Clients setting
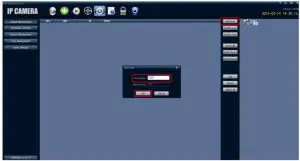
6.2 Config on the navigation bar (Remind you to input password,you can enter wrthout password ,you w1II see a new page.AddA rea, Click and rnput area name you want. Cltck OK button to find the camera you want
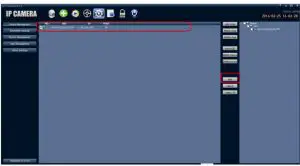
6.3 Choose all coming IP camera ,and click “ADD”butlon on the right.
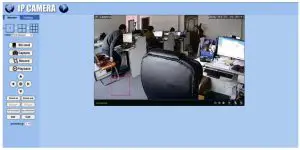
6.4 Click preview on the main page, double click the IP address on the left. You will see “Channel 01” appear and double click again to see the image on the right area. For more setting, please click system setting.