Colzer Air Purifier Instruction Manual
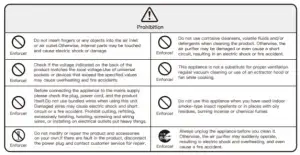
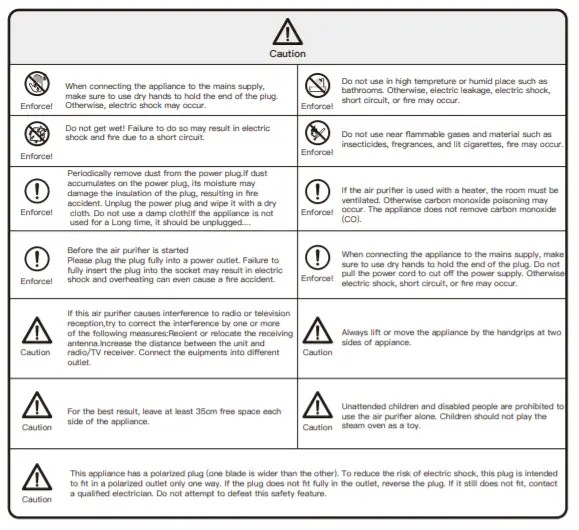
Important Safety Information
Please follow the safety precautions and read these instructions carefully before using it for the first time.
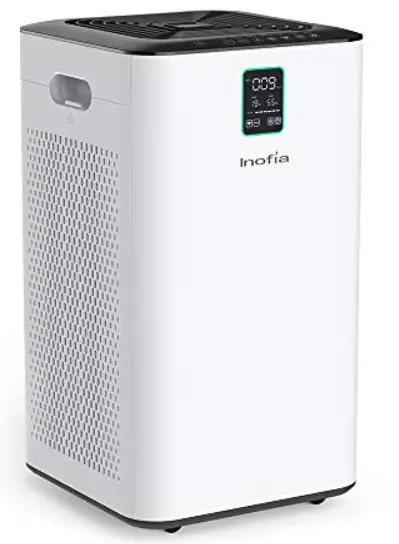
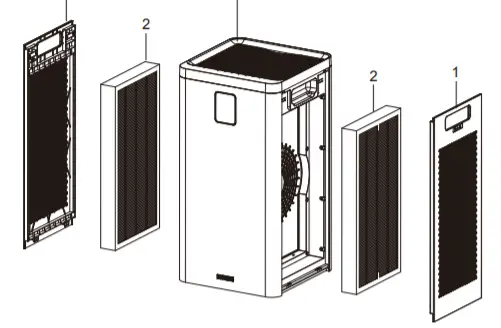
Product Parts
① Filter Cover
② Composite filter (Carbon filter+HEPA filter)
③ Main engine
In case of discrepancy between product picture and real product, the real product will prevail.
Packing List
| Item | Quantity |
| Colzer1556 | 1 set |
| Composite filter | 2 pieces (assembled in the appliance) |
| Power line | 1 piece (in accessories box) |
| Instruction Manual | 1 copy (in accessories box) |
Product Features
Integrating multiple functions
- High-efficiency Purification of PM 2.5, Smog, Pollen and Other Particulate Pollutants.
- Removal of HCHO、Toluene、Dimethylbenzene、C6H6, VOC, etc.
- 5 – Gear Wind Speed Design
- Timer Setting
- Replacement of Filter Remind
- Availability of Multiple Operation Modes, e.g. Manual, Auto and Sleep Mode
- Sensor Detection of Indoor Temperature and Humidity
- Childproof Lock Function
- Real-time Display of PM2.5 Value
Pre-filter-High Efficiency Particulate Air Filter-Modified activated carbon
Pre-filter Block the hairs, fibers, big particulate matters, scurf, etc. It can be washed regularly.
HEPA layer Efficiently filter out the particles as small as 0.01microns, e.g. PM2.5, smog, pollen, acarid and other pollutants
Improved Activated Carbon High-quality modified activated carbon and catalyst are adopted, and they are modified with special proprietary technology, and can efficiently purify methanol, benzene series, VOC and other odorous pollutants
Operation Instructions
Operation Instructions
All filters have been installed in this air purifier. Check filters are installed properly.
Check filter handle is toward you.
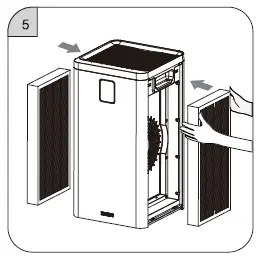
Installation of Filters
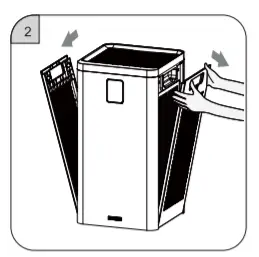
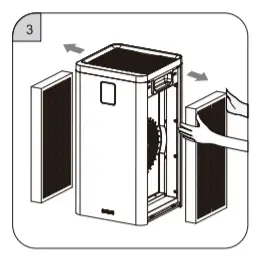
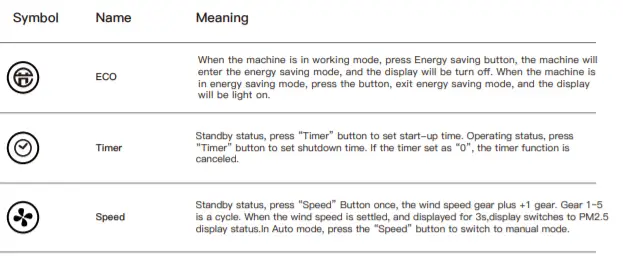
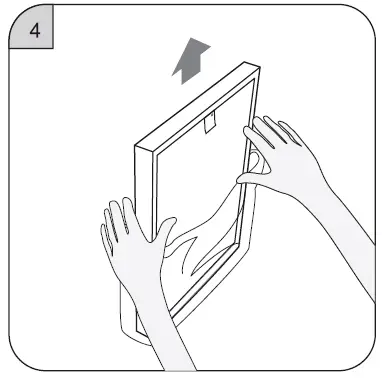
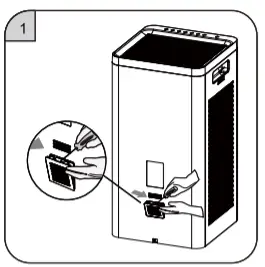
- Place your fingers on the hand clasp position of filter cover, and pull it outwards gently
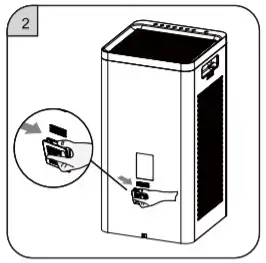
- Move upward to remove the filter cover
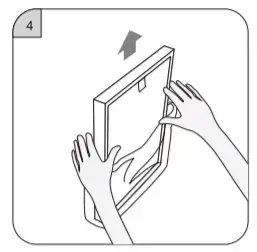
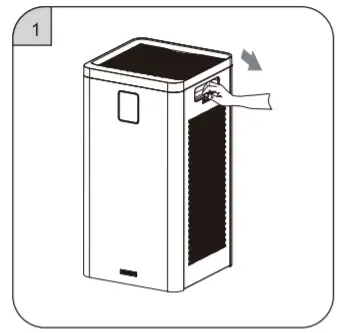
- Take out the new filters with plastic film from the appliance.

- Remove all packaging films on the filters.
Operation Instructions
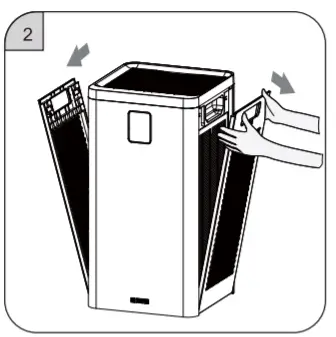
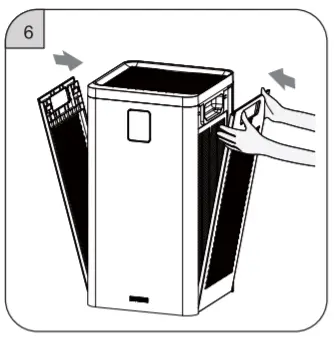
- Install the filters
- Install the filter covers
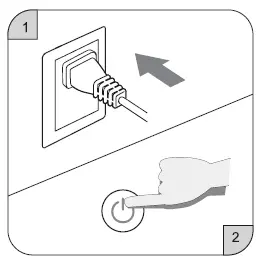
Start
① Power on the appliance, and there will have a “tinkle” sound.
② Press the power switch button to start up the appliance.
The screen will light up and the appliance start running
Display Status
Display Status
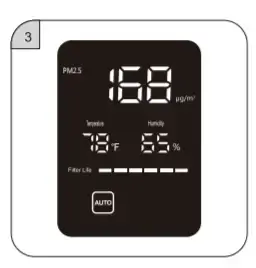
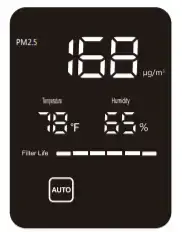
PM2.5 Value Status Wind Speed Status Timed Start-up Status
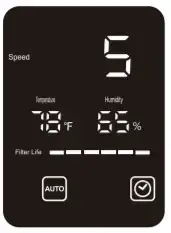
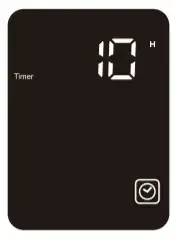
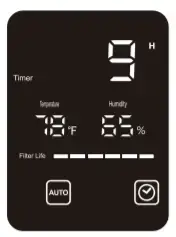
Timed Shutdown Status Minutes Shown Sleep Status
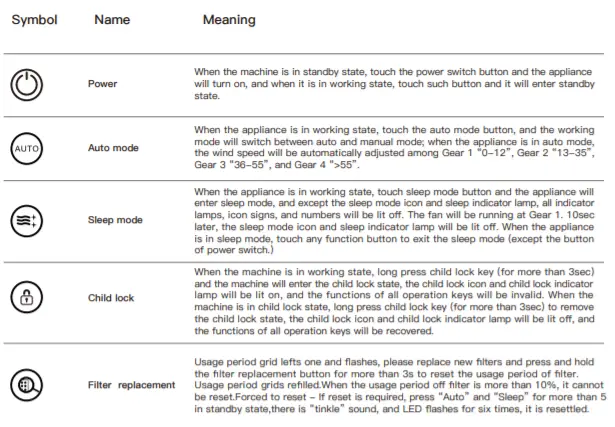
Display Symbols and Meanings
Display Symbols and Meanings

Operation of buttons

Cleaning and Maintenance

Cleaning and Maintenance
1. Cleaning of appliance body
- Wipe off the stain with soft
- The stubborn stain that cannot be wiped off easily can be wiped off with soft cloth dipped with an appropriate amount of mild
Note: Do not scratch the appliance shell with a hard object; Please read carefully and follow the Instruction Manual to clean the appliance parts.
- Cleaning and replacement of filter
- The user will be reminded of replacement of filter by built-in program; however, the service cycle of filter may be different according to the pollution degree of actual application environment, and the filter can be replaced in time according to the volume of sound and odor given off by th
Suggestions: Clean the filter at an interval of 1 month; if the operating environment is poor, increase the cleaning frequency.
- When there is dust on the surface of composite filter, remove it with dust collector, so as to extend the usage period of filter. (It is advised to clean the filter at an interval of 1 month)
| Replacement Period | Condition | |
| Composite
Filter |
The filter shall be replaced at an interval of about 6 months. | Absorb the emission amount of 3
cigarettes every day |
According to the application place and use method (e.g. the family where there are many cigarette smokers), the replacement period of filter may be shortened; in a word, please replace the filter when the filtration effect is poor
Replacement of Filters
- Put your hand on the hand clasp position of filter mesh cover, and pull it outwards gently.
- Move upward to remove the filter mesh cover.
- Take out the new filter meshes with plastic film in the machine.Take out the new filter meshes with plastic film in the machine.
- Remove all packaging films on filter meshes.
- Assemble the new filter meshes
- Assemble the filter mesh cover and reset the service life of filter mesh (details can be seen on Page 10 for operation of filter mesh service life reset key).
Replacement of Sensor (sensor should be replaced by professionals)
- Pry up the sensor cover with a straight screwdriver.

- Take down the sensor cover.
- Pull the metal handle to pull out the sensor module.
- Pull out the connecting terminal from the old sensor module and replace it with a new sensor module.
Technical Specification
| Model | Colzer1556 |
| Rated Voltage | 120V~ |
| Rated Frequency | 60Hz |
| Rated Power | 45W |
| CADR(Smoke) | 280CFM |
| CADR(Dust) | 280CFM |
| CADR(Pollen) | 280CFM |
| N.W. | 8.5kg |
| G.W. | 10.2kg |
| Product Size | 290x290x565mm |
Real-time Display of Air Quality Situation
| PM2.5 value | Air Quality | Symbol Colour | Wind Speed
Gear |
| 0-12 | Excellent |
Green |
1 |
| 13-35 | Good | Blue |
2 |
|
36-55 |
Mild pollution | Yellow | 3 |
| >55 | Heavy pollution | Red |
4 |
Warranty Description
Warranty Period and Warranty Period of Parts
Product Warranty period Warranty period of parts
- This product has passed strict quality
- Poor performance and machine fault which occurs after the warranty period expires.In case of performance and function fault under the condition of normal use within warranty period of the product, our company will be responsible for repairing it for free and for replacing it if the machine cannot be In the event of failure for the fo llowing reasons, our company will provide paid repair service:
- Machine fault caused by consumer intentionally or due to
The above table lists the common problems with this product. If you cannot find answer, please contact our after-sales service centre. - Fault that occurs when the machine is repaired in the sales service center or agent not designated by our company.
- Fault that is caused by power supply nonconformity or poor quality of power socket (irrelevant to warranty period).
- Product fault or defect caused by natural disaster..