
COX Self Installation
First wait to activate until: ___________________
*This date is when your address will have access to Cox service.
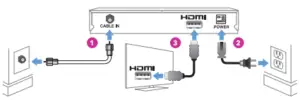
1 Connect
Your Equipment
- Connect cable box into the wall with coax cable using “cable in” on your cable box.
- Plug in the cable box using the power cord.
- Connect the cable box to the tv using the HDMI cable. The HDMI port on your cable box may have a sticker over it that you’ll need to remove.
* cable boxes may vary
2 Turn TV On and Wait
 Up to15 minutes for your TV guide to load.
Most cable boxes will display the correct time when ready.
Verify your cable box displays the TV guide. To find and view your guide: Change TV “Input” or “Source” to HDMI
3 Turn Off Cable Box
Find and press the power button on the front of your cable box.
* cable box power buttons may vary
 POWER
POWER  POWER
POWER
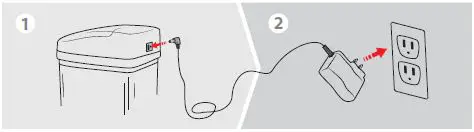
4 Activate
 Are you also installing Cox High Speed Internet or Cox Digital Telephone? Please ensure all equipment is already installed, and then activate at cox.com/activate
Activate Your Services: Your Order Number:
Call 1-877-751-2805
Note: After you activate, power on your cable box to enjoy your Cox Video Services.

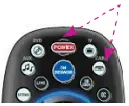
Remote Setup
Refer to the back of the remote for easy step-by-step instructions. Please use the manual included with the remote for additional support.
__________ or _________
Visit remotes.cox.com
Troubleshooting Tips
Verify that the cable box is powered on. (press cable button, then power button)
No Sound? Using Cox Remote:
- Press Cable
 , Press
  Press
Press 
- For DVRs only – Select Audio/Video, Press

2. Select Audio Digital Output or Audio Digital Out
3. Press , Select HDMI*, Press , Press 
Questions? www.cox.com/support
![]()
your friend in the digital age*
Video HD San Diego Doormat PN 520-0649 rev 7/26/13