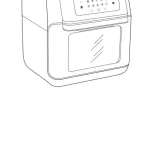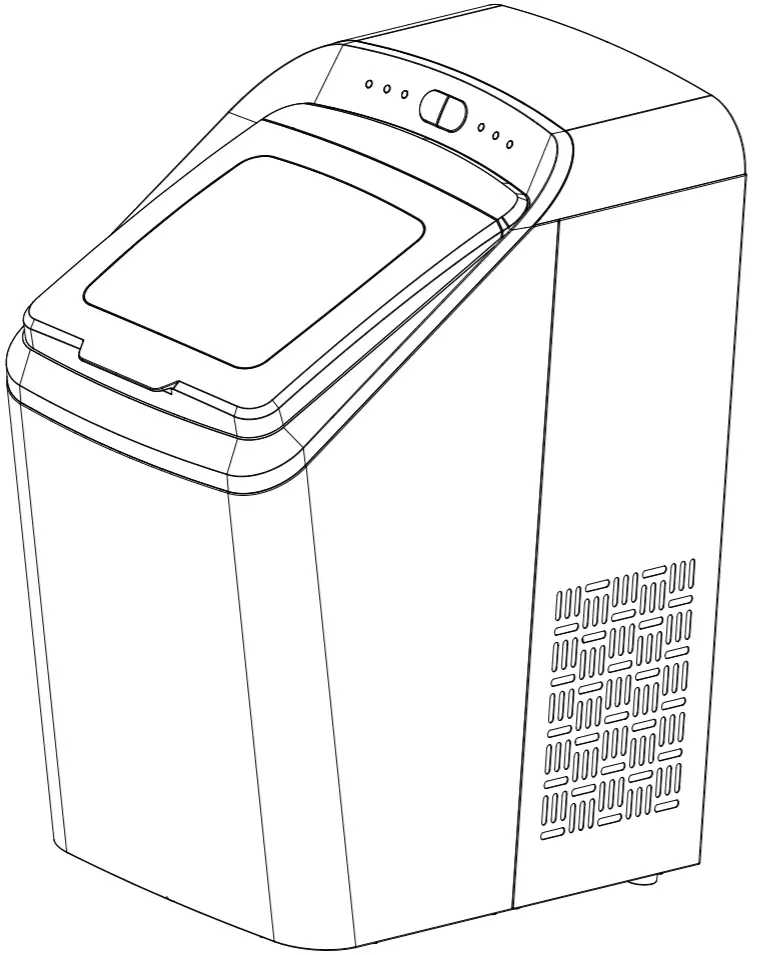
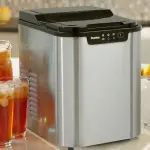
CROWNFUL IM2200-UL Compact Ice Maker
Model: IM2200-UL
Email: [email protected]
Read this manual thoroughly before using and save it for future reference
IMPORTANT SAFETY INSTRUCTIONS
- To reduce the risk of fire, explosion, electric shock, or injury when using your ice maker, follow these important safety instructions:
- Before using check that the voltage power corresponds to the one shown on the appliance nameplate.
- Do not remove any safety, warning, or product information labels from your ice maker.
- Plug the ice maker into an exclusive grounded power outlet. No other appliance shouldbe plugged into the same outlet. Be sure that the plug is fully inserted into the receptacle.
- This appliance must be grounded. It is equipped with a power cord having a grounding plug. The plug must be plugged into an outlet that is properly installed and grounded.
- Avoid the use of an extension cord because it may overheat and cause a risk of fire.
However, if it is necessary to use an extension cord: - Use only extension cord with grounding plug.
- The marked rating of an extension cord must be equal to or greater than the rating of this appliance.
- It should be positioned such that it does not drape over the counter or tabletop where it can be pulled on by children intentionally.
- Do not operate any appliance with a damage cord or plug or after the appliance malfunction or has been damaged in any manner. Return the appliance to the nearest authorized service facility for examination, repair or adjustment.
- If the supply cord is damaged, it must be replaced by the manufacturer or its service agent or a similarly qualified person in order to avoid a hazard.
- Do not let cord hang over edge of table or counter.
- Do not place on or near a hot gas or electric burner, or in a heated oven.
- Place power cord in such a way it cannot be pulled on by children or cause a tripping hazard.
- Place power cord in such a way that it is not in contact with hot surfaces.
- The use of attachment not recommended or sold by manufacturer may cause fire, electric shock or injury.
- Do not touch the evaporator when using the ice maker or making ice to avoid being suffer from frostbite.
- Do not immerse any part of the product in water.
- To disconnect, turn any control to “OFF”, then remove plug from wall outlet.
- Do not plug or unplug product with wet hands.
- Unplug the product before cleaning,maintaining and when not in use.
- Do not use with water that is microbiologically unsafe or of unknown quality.
- Do not clean your ice maker with any flammable fluids. The fumes may create a fire hazard or explosion.
- Do not overturn the ice maker. If the ice maker is overturned accidentally, make it stand steadily for 2 hours before power it on again. m
- If the ice aker is brought in from outside in wintertime, do not use for a few hours, allowing the unit to warm up to the room temperature before operating.
- Never put flammable, explosive and corrosive articles into the ice maker.
- Never use the ice maker when there is flammable gas leakage.
- Never store or use gas and other flammable articles near the ice maker to avoid any fire.
- Unplug the ice maker before moving it to avoid damaging the refrigerating system.
- Do not attempt to disassemble, repair, modify, or replace any part of your product.
- This appliance is not intended for used by persons (including children) with reduced physical, sensory or mental capabilities, or lack of experience and knowledge, unless they have been given supervision or instruction concerning use of the appliances by a person responsible for their safety.
- Children should be supervised to ensure that they do not play with the appliance.
- Close supervision is necessary when any appliance is used by or near children.
- Do not leave the appliance unattended while in use.
- Do not use outdoors.
- Do not use the appliance for other than intended use.
- Please abandon the ice maker according to local regulators as it uses flammable blowing gas and refrigerant.
- Please dispose of the appliance for its flammable refrigerant and blowing gas according to local regulations.
- WARNING: Keep ventilation openings, in the appliance enclosure or in the built-in structure, clear of obstruction.
- WARNING: Do not use mechanical devices or other means to accelerate the defrosting process, other than those recommended by the manufacturer.
- WARNING: Do not damage the refrigerant circuit.
- WARNING: Do not use electrical appliances inside the food storage compartments of the appliance, unless they are of the type recommended by the manufacturer.
- Do not store explosive substances such as aerosol cans with a flammable propellant in this appliance.
- Warning: Risk of fire/flammable materials.
- WARNING: When positioning the appliance, ensure the supply cord is not trapped or damaged.
- WARNING: Do not locate multiple portable socket-outlets or portable power supplies at the rear of the appliance.
SAVE THESE INSTRUCTIONS
HOUSEHOLD USE ONLY
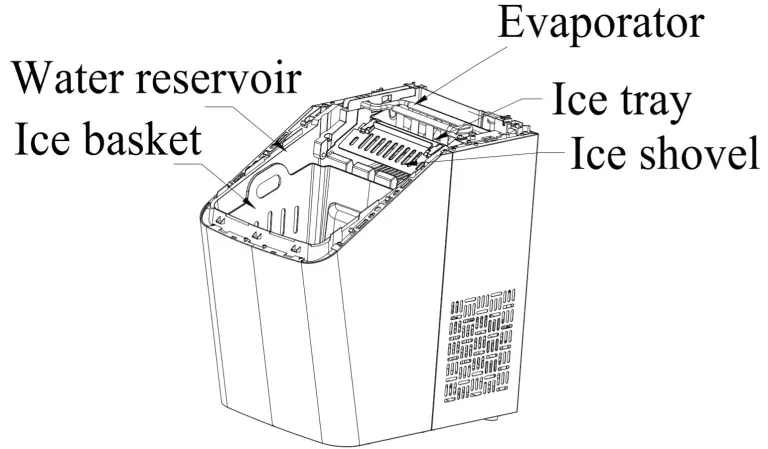
KNOW YOUR ICE MAKER

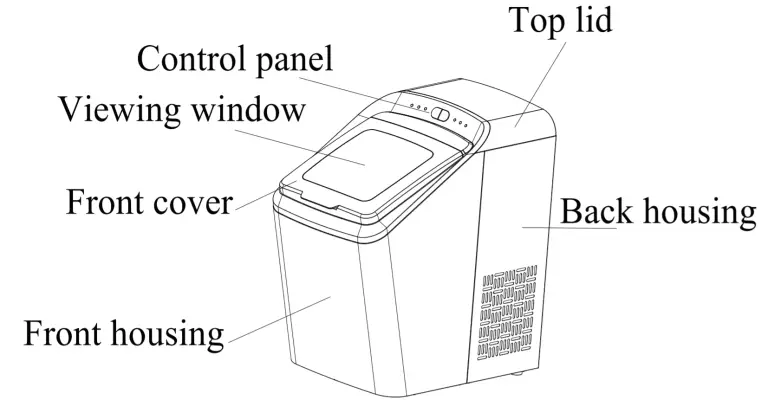
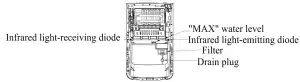
CONTROL PANEL
| Key (with indicator) | Function |
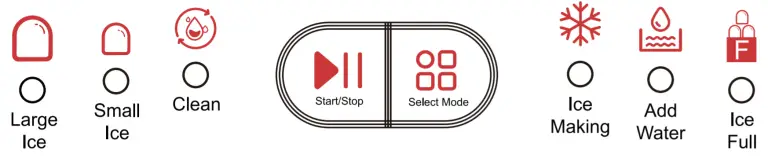 |
The indicator lights in green when select large Ice. |
 |
The indicator lights in green when select small Ice. |
 |
The indicator lights up when the appliance is cleaned. |
 |
Start or stop the appliance |
 |
Select the mode |
 |
The indicator lights in green when making ice. |
 |
The indicator lights in red when the water reservoir is lack of water. |
 |
The indicator lights in red when the ice basket is full. |
BEFORE FIRST USE
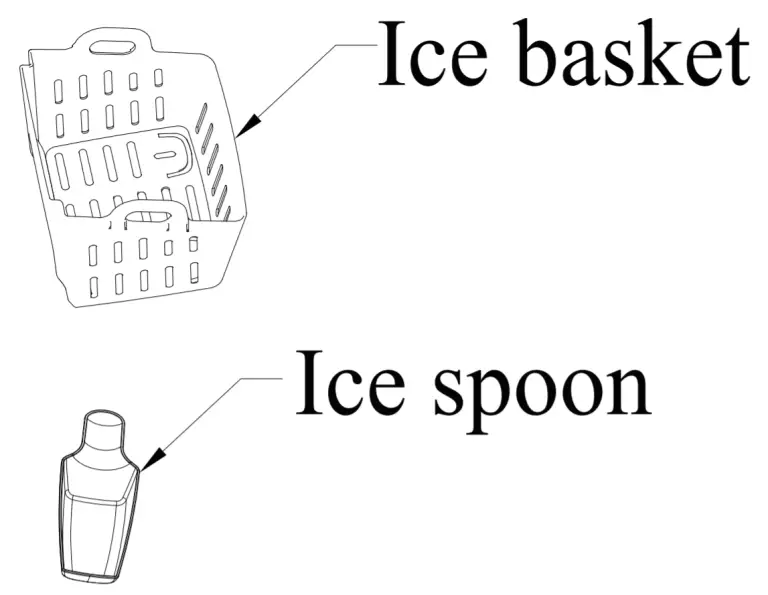
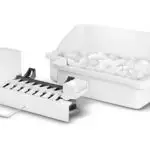
- Unpack the appliance, then check and make sure that all the accessories including ice basket and ice scoop etc. are complete. Please contact with the client service department if some accessories are missed.
- Please ensure the ice maker is level and on a stable table or platform to avoid malfunction.
- The incline angle of the ice maker cabinet should not exceed 45 ° during transportation or use. Do not turn the ice maker upside down. Doing so could cause the compressor or refrigerating system to operate incorrectly. Please allow time for the fluids in the compressor to settle after the ice maker is moved or transported. Before using the ice maker for the first time, please wait for 2 hours after the unit has been leveled and positioned in the proper place.
- The appliance must be placed on a dry and level surface with sufficient ventilation, far from heat sources such as ovens, heaters and corrosive gases.Leave an 6-inch (15cm) clearance on all sides of the ice maker for proper ventilation.
- Do not fill the water reservoir with hot water. This may damage the ice maker. It is best to fill the water reservoir with water of room temperature or lower.
- Do not use the appliance at a very cold environment (lower than 5°C).
- Clean the appliance by following the operation of “CLEANING AND MAINTENANCE” before operate.
USING YOUR ICE MAKER
- Ensure that the drain plug at the bottom of water reservoir is closed well.
- Plug the ice maker into the wall outlet, the “
 ” indicator blinks.
NOTE: Please make the ice maker be rested for 30 minutes before plug if it has been moved. - Open the top lid and remove the ice basket.
- WARNING: Fill the water reservoir with potable water only.
NOTE: Do not fill above the MAX water level mark. - Replace the ice basket and close the top lid.
- Press “
 ” key to select the ice size,”
 “means small ice while “
 ” means large ice.
 - Press the “
 ” key and the “” indicator lights solidly.
 - The ice-making cycle will last approximately 7-15 minutes, depending on the ambient temperature and water temperature.
- The ice-making cycle starts with water being pumped into the ice tray situated below the evaporator. Over the next 7-15 minutes ice forms on the evaporator. Once this has completed, the ice tray will tilt backwards and the remaining water in the ice tray is drained back into the water reservoir. The ice cubes are then dropped from the evaporator and pushed forward into the ice basket by the ice shovel. The ice tray will automatically move back into position under the evaporator and start the next cycle.
- The”
 ” indicator will light up when the ice basket is full and then the ice maker will stop the ice-making cycle automatically. Gently remove the ice from the ice basket with the ice scoop. About 5 seconds later, the ice maker will restart its ice making function automatically.
 - The “
 ” indicator will light up when the water reservoir is lack of water and the ice-making cycle will stop automatically. At that time, remove the ice basket and add water to the water reservoir, and then press “” key again to restart the ice-making cycle.
 - When you have got your desired amount of ice, stop the ice making cycle by pressing the “” key and unplug the unit from the wall outlet.
- Open the top lid and transfer the ice to a freezer.
NOTE: The ice will last in the ice maker for up to a 18 hour period, depending on the ambient temperature. - Allow the ice maker to wall up to room temperature.
- Suggest replacing the water weekly. Please empty the water reservoir if the ice maker is not used for a long time.
CLEANING AND MAINTENANCE
To keep your ice tasting fresh and your ice maker looking great, we recommend cleaning your ice maker at least once per week.
- Stop the ice-making cycle by pressing the “” key, Wait five minutes and unplug.
- If residual water is found in the ice tray, gently push the ice tray back so that all water drains into the water reservoir.
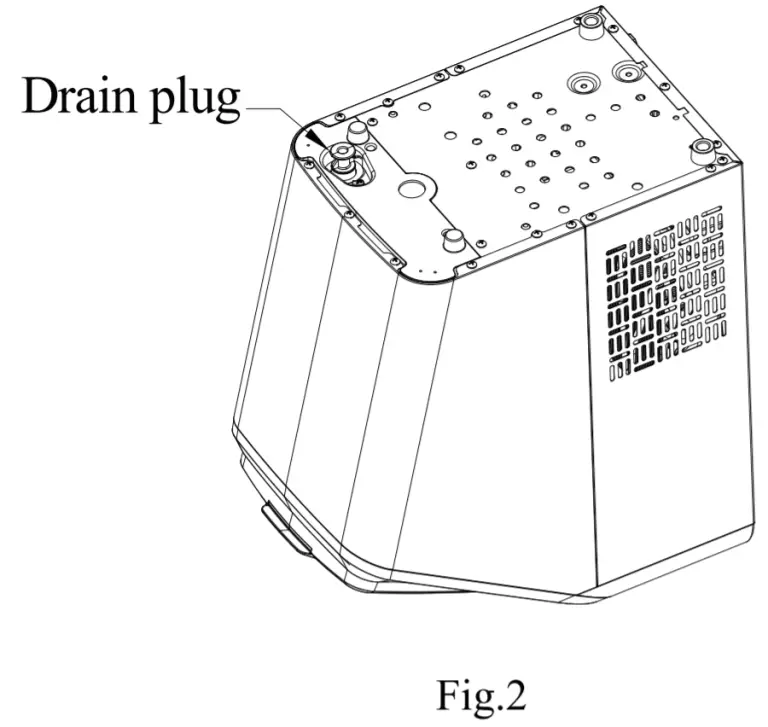
- Move the appliance forward to a place 60mm away from the working table and open the drain plug to drain out excess water (see Fig.1, Fig.2 and Fig.3).
- Check and make sure the drain plug must be closed well. Fill the water reservoir with clean water, press “” until the ‘
 ‘ indicator flashes, then press the “” key , the pump will start to pump water and keep running for 6 minutes, and it will enter into standby condition after running for 6 minutes, finally, open the drain plug and empty the water.
 - Remove the ice basket.
- Clean the ice maker interior with a soft cloth soaked with warm water and vinegar, then rinse with clean water and then drain all the water.
- Replace the drain plug well in position. Wash the ice basket and ice scoop in warm soapy water. Rinse and dry.
- Clean the exterior of the ice maker with a soft damp cloth. Use a mild dishwashing soap, if necessary.
NOTE: Do not use organic solvent, boiled water, detergent, strong acid and strong alkali etc. for cleaning. - Please empty the water reservoir and dry it for storage if the ice maker is not used for a long time.


TROUBLESHOOTING
| Problem | Possible causes | Solution |
|
|
|
|
|
|
| The ice shovel is blocked. | Please remove the ice if the ice shovel is blocked by ice, otherwise, call customer service for consultation. | |
| The ice maker stops working. | The ice tray is not in the right position. |
|
| The ice basket is full i but the “ |
The “ice full” condition can not be detected as the infrared light module is interfered by the sunlight. | Unplug the appliance and move it to a place which is not exposed to the sunlight, then plug the appliance and activate it again. |
| The ice collects together. | Making ice takes too much time. | Stop making ice and restart the ice-making cycle after the ice melts. |
| The water in the water reservoir is of too low temperature. | Fill the water reservoir with water ranges between 46.4 °F and 77°F. | |
| The ice-making cycle seems normal but no ice is produced. | The ambient temperature or water temperature is too high. | Start the ice-making cycle at a environment with an ambient temperature less than 89.6°F and fill the water reservoir with some cold water. |
| Refrigerating system leaks | Call customer service | |
| Refrigerating system blocks | Call customer service | |
| Poor ice-making result |
|
|
TECHNICAL PARAMETERS
| Model | IM2200-UL |
| Applicable climate | ST/SN/N/T |
| Class | I |
| Electrical Rating | AMP 1.8A 120V AC 60HZ |
| Rated power | 130W |
| Refrigerant/Refrigerant amount | R600a/0.0605LBS |
| Design Pressure | Upper limit: 290Psig Lower limit: 138Psig |
| Foaming agent | C5H10 |
| Net weight | 11Kg |
| Housing | SUS430 |
| Unit size ( WXDXH) | 9.69×15.75×16.93 in |
CUSTOMER SUPPORT
Should you encounter any issues or if you have any questions regarding your new product, feel free to contact our helpful Customer Support Team. Your satisfaction is our goal!
Email: [email protected]
Support Hours
Monday – Friday:
9:00 am – 5:00 pm PST
* Please have your order invoice or order number ready before contacting customer support.