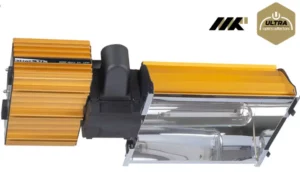

LEXPERT SERIES MKII
USER MANUAL
TECHNICAL SPECIFICATIONS
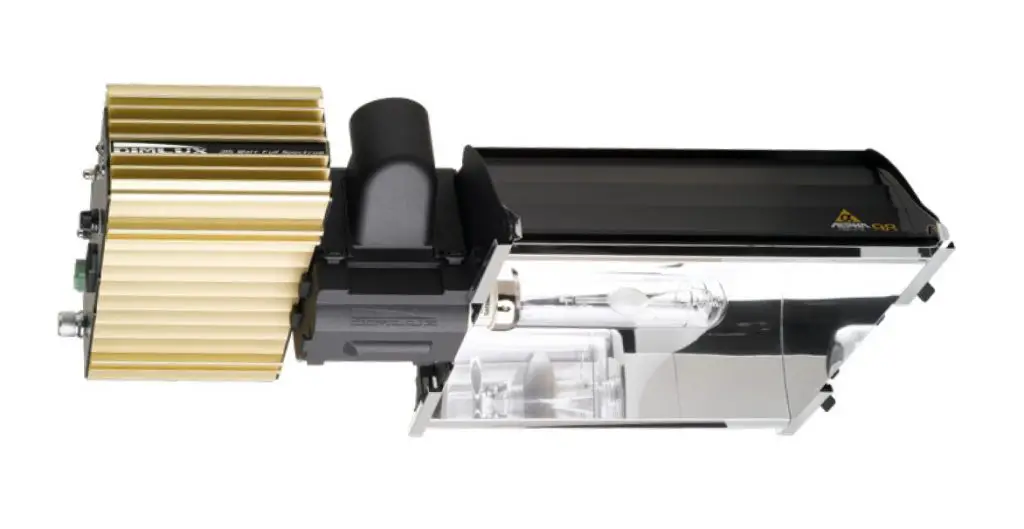
FULL-SPECTRUM 315W

- Available in 120V, 230V, 277V
- Dim levels: Soft-Off, 165W, 205W, 245W, 280W, 315W, 345W, 380W
- Power consumption at 315W is 331W, 1.4A at 230V
- Power consumption at boost 380W is 399W, 1.7A at 230V
- System PPF at 380W is 706µmol/s
- Weight 4.9kg (10.80lbs)
- Illumination surface:
- at 315W is min 0.42m² (4.52ft²), max 1m² (10.76ft²) at 380W is min 0.5m² (5.38ft²), max 1.2m² (12.91ft²)
- 50mm (2”) connection for active extraction
- Dimensions 530x275x130mm (20.8”x10.8”x5.1”)
DUAL FULL SPECTRUM 630W
- Available in 230V, 277V
- Also available in Nanotube version (under order avobe 124 fixtures)
- Dim levels: Soft-Off, 330W, 410W, 490W, 560W, 630W, 690W, 760W
- Power consumption at 630W is 662W2.7A at 230V
- Power consumption at boost 760W is 799W, 3.5A at 230V
- System PPF at 760W is 1,411µmol/s
- Illumination surface:
- at 630W is min 0.84m² (9.04ft²), max 2m² (21.52ft²) at 760W is min 1m² (10.76ft²), max. 2.4m² (25.83ft²)
- 50mm (2”) connection for active extraction
- Dimensions 675x275x130mm (26.5”x10.8”x5.1”)
- Weight 6.3kg (13.88lbs)
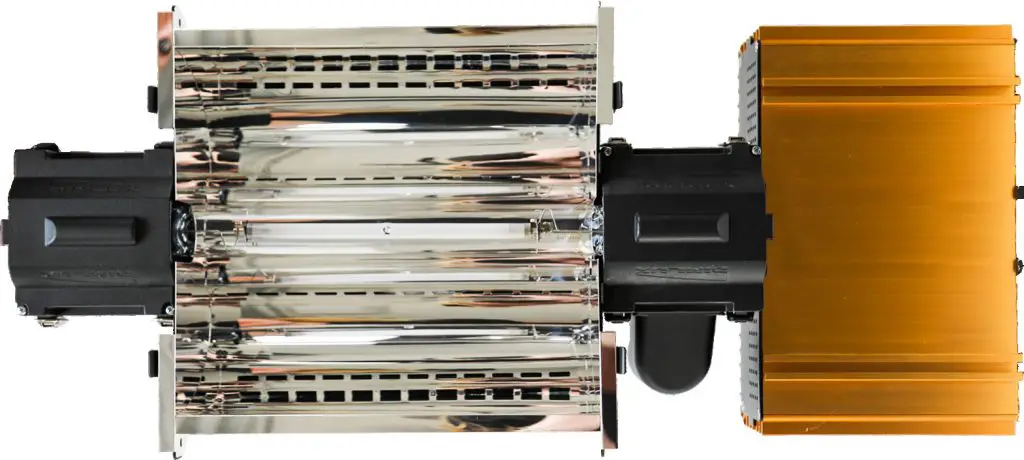
EL UHF MKII 600W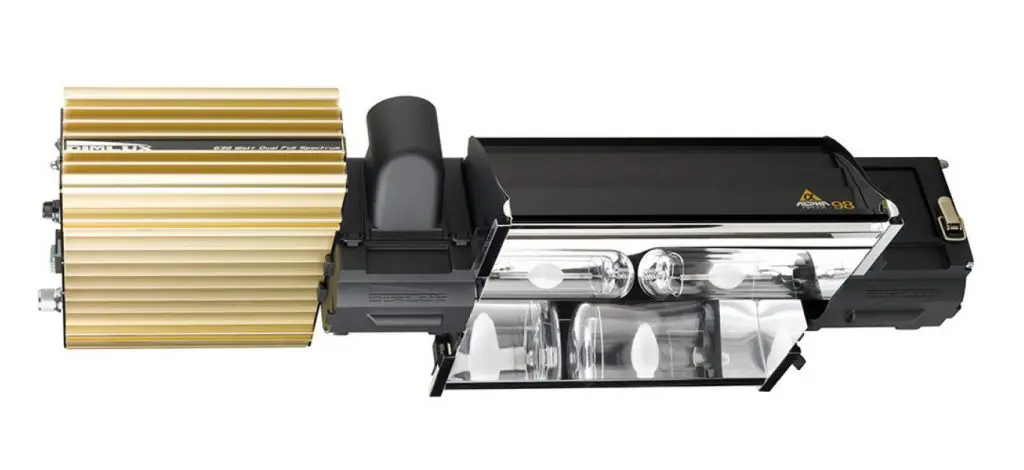
- Dim levels: Soft-Off, 320W, 390W, 460W, 530W, 600W, 645W, 720W
- Power consumption at 600W is 621W, 2.7A at 230volt
- Power consumption at boost 720W is 758W 3.27Amp at 230V
- System ppf at 720W is 1408µmol/s
- Weight: 5.1kg (11.24lbs)
- Illumination surface:
- at 600W is min. 0.78m2 (8.39ft2), max 2m2 (21.52ft2) at 720W is min. 0.95m2 (10.2ft2), max 2.4m2 (25.8ft2)
- 50mm (2”) connection for active air extraction
- Dimensions: 550mmx275mmx130mm (21.6”x10.8”x5.1”)
EL UHF MKII 1000W
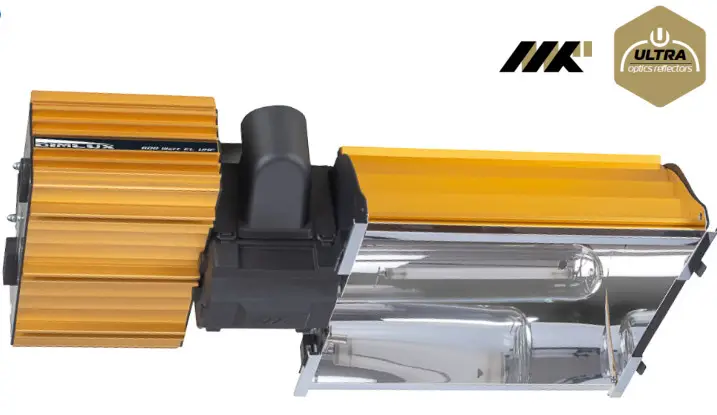
- Available in 230V, 277V
- Also available in Nanotube version
- Dim levels: Soft-Off, 600W, 700W, 800W, 900W, 1000W, 1100W, 1200W
- Power consumption at 1000W is 1035W 4.5A at 230V
- Power consumption at boost 1200W is 1242W, 5.2A at 230V
- System PPF at 1200W = 2,530 µmol/s
- Illumination surface
- at 1000W is min 1.4m² (15.06ft²), max 3.3m² (35.52ft²) at 1200W is min 1.65m² (17.76ft²), max. 4m² (43.05ft²)
- 50mm (2”) connection for active extraction
- Dimensions 625x275x130mm (26.5”x10.8”x5.1”)
- Weight 6.3kg (13.88lbs)
UNBOXING
Your Dimlux fixture box will contain the following items:
| 1x DimLux fixture + bulb 1x Interlink cable (315&600W=2.0m 630&1000W=2.5m) |
1x Power cord 2x Eyebolt and nut (M6) 1x Instruction manual |
Extra Interlink cables are available in different sizes
| 0.6 m (24 in.) 1,0 m (40 in.) 1.5 m (60 in.) 2,0 m (80 in.) |
2,5 m (100 in.) 3,5 m (140 in.) 5,0 m (200 in.) 10,0 m (400 in.) |
SUITABLE BULBS
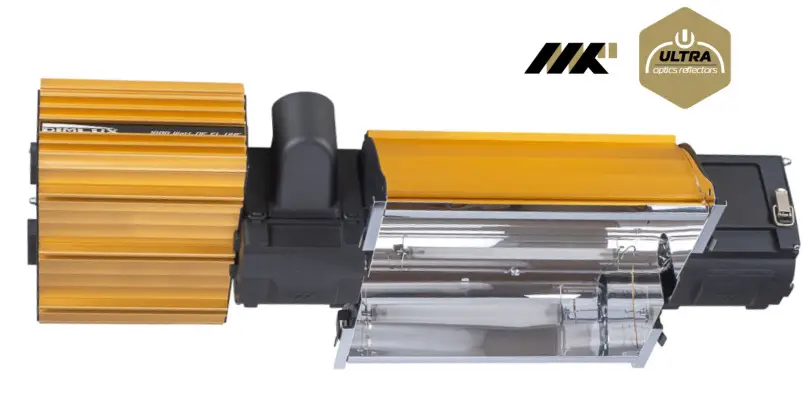 Please ensure that the bulb has been burning for at least 5 minutes before turning off the power. Short ON/OFF cycles can shorten the lifespan of the installed 315W bulb.
Dimlux Expert 315 Watt (dual)
- Dimlux Daylight 3k AGRO
- Dimlux Daylight 4k
Please ensure that only Dimlux branded 315w bulbs are used in these fixtures as any other brand is not fully compatible and may fail after a short time.
Dimlux Expert 600 watt EL UHF
- Philips Greenpower 600W EL UHF (400volt)
Dimlux Expert 1000 watt EL UHF
- Philips 1000W Philips Master Greenpower EL DE
- Dimlux 1000W PRO
- Dimlux 1000W MKII Ultra
- Horturion MH 1000 DE EL 5.5K
- DimLux HPS1000 PRO DE 2K
MOUNTING
There are indicators on the top rail of each fixture to help you mount the supplied fixing brackets in the correct place. The image below shows the locations for each different fixture.

- Ultra Optics
- 600W and 315W fixture
- 1000W and 630W fixture
INSTALLATION DIMLUX EXPERT SERIES MKII (WITHOUT MAXI CONTROLLER)
If the fixture is not connected to a Maxi Controller or another fixture, the fixture will operate in “Free running” mode. By pressing the select button you can turn the fixture on and cycle through different powers.
The presets at 600W are:
OFF, 300 watts, 360 watts, 420 watts, 480 watts, 540 watts, 600 watts, 660 watts, 720 watts
The presets at 1000W are:
OFF, 500 watts, 600 watts, 700 watts, 800 watts, 900 watts, 1000 watts, 1100 watts, 1200 watts In “Free running”, the display shows the selected power of the fixture, or OFF if the ballast is off.
INSTALLATION WITH MAXICONTROLLER
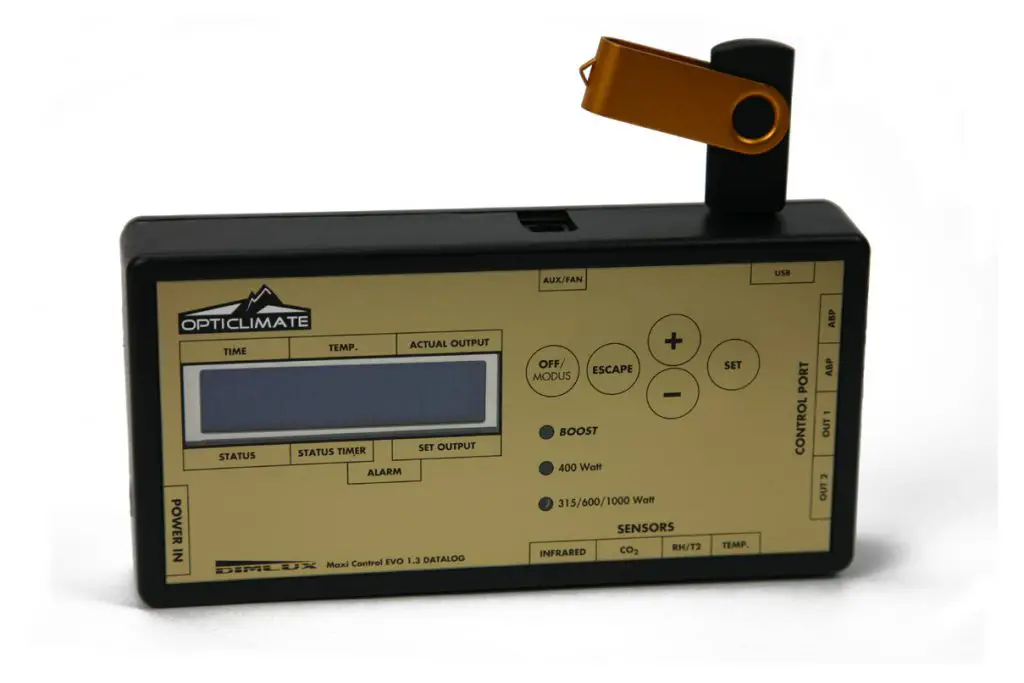
The Dimlux Expert series can be controlled with the Dimlux Maxi Controller or by using external switching gear (contactors, timers). Make sure that the contractors and timers are designed to match the load of the ballasts.
![]()
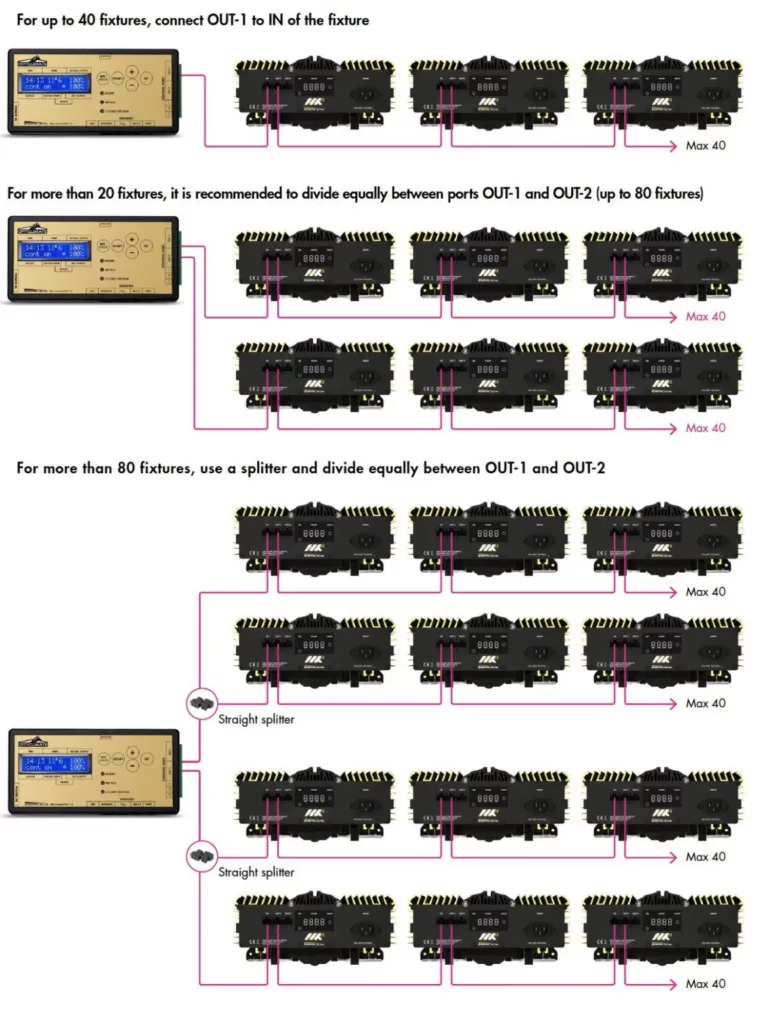
The Maxi Controller can control up to 160 Dimlux Expert fixtures at the same time. No longer needed are the switchboard, time delay timers, timers and relays (contactors). The power cables of the fixtures can be directly plugged into a power socket, after which they can be remote controlled. Light on and off times, brightness, and many more settings can be controlled with the Maxi Controller.
If a Maxi Controller is connected to the first fixture, the chain of fixtures will be in ‘analog mode’. The power output and on/off state is controlled by the Maxi Controller. The user can still overrule the off state (but not the output power) of any fixture in a chain, by pressing the button. Using the button while a chain is in ‘analog mode’ only influences that fixture and not other fixtures in the same chain.
When the Maxi Controller sends an ‘on’ signal (for example 90%), and the fixture is not manually turned off, the display will first show “analogon” for a while, after which it will just show “on”.
When the Maxi Controller sends an ‘off’ signal, or the fixture is manually turned off, the display will first show “analog off” for a while, after which it will just show “off”.
INSTALLATION
The Maxi Controller sends a signal to the fixtures to switch them on or off. There are 2 out ports on the Maxi Controller. Each port can switch up to 80 fixtures using the OEM interlink cables and splitters. Interlink cables are available in different lengths.
Please refer to the Maxi Controller manual for specific settings information.
AIR
The open reflector versions have holes in the top of the reflective portion where no direct light can shine through. By natural convection, the heat will escape through these holes and cool the lamp.
There is also a 50mm (2”) port to connect active an air removal tube to reduce the room temperature. The amount of air extracted through the 50mm (2”) connection must be 200 m3/hour (120cfm) for each lamp. This is the same for all models.
Additional 50mm tubes and T-joints can be supplied. The T-joints are available in125-50-125mm (5”-2”-5”), 150-50-150mm (6”-2”-6”), and 200-50-200mm (8”-2”-8”).
BOOST AND COOLING
Boosting light output will increase the temperature of the fixture. The fixture openings in the reflector allow the lamp to operate at its optimum temperature. Without this passive cooling, the lamp efficiency would decrease. When hot air is actively extracted, the efficiency of the lamp will slightly increase.
ULTRA OPTICS REFLECTOR
 Boosting light output will increase the temperature of the fixture. The lamp openings in the reflector allow the lamp to operate at its optimum temperature. Without this passive cooling, the lamp efficiency would decrease. When hot air is actively extracted, the efficiency of the lamp will slightly increase.
FIXTURE SPACING
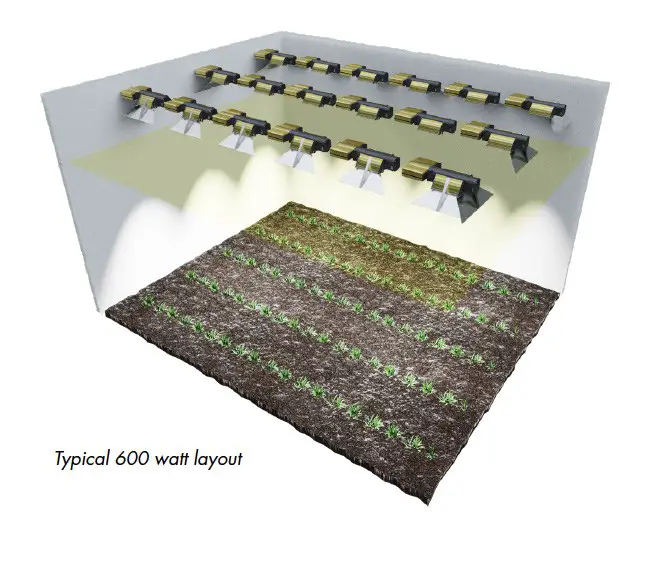
The spacing between fixtures depends on the lamp power, power setting, and type of crop. Most crops require at most 1500 µmol/m²/s of photosynthetic flux. The next table lists the minimum footprint size to obtain at most 1500 µmol/m²/s at the crops, for common power settings.
| Power | Min footprint area for 1500 pmol/m2/s | Power | Min footprint area for 1500 pmol/m2/s |
| 315W | 0.41 m2 | 720W | 0.94 m2 |
| 380W | 0.49 m2 | 1000W | 1.30 m2 |
| 600W | 0.78 m2 | 1200W | 1.56 m2 |
You can adjust these numbers for different power settings and for different desired flux at the crops, using this formula: area = power / 770 For example 0.80 m² = 720W / 770
The number 770 is estimated from the expected light output of the lamp, with reflector and wall losses are taken into account. Depending on your exact set-up, the actual number can be as low as 720, but rarely higher than 770. This formula is intended to give you the minimum area, hence we use 770.
Note that 1.3 m² is not the same as a square of 1.3 by 1.3 m. The latter is 1.3×1.3 = 1.69 m² in area.
The minimum area determines the distance between the fixtures, and therefore, the number of fixtures needed to place in a multi-fixture growing room. For the calculation of how high your fixtures should be placed, see the next section.
REFLECTOR ADJUSTMENT (ONLY FOR THE ULTRA OPTICS HYBRID 98)
The Ultra Optics Hybrid 98 reflector has adjustable side-reflectors with 2 positions, a wide position, and a deep position. The “wide” position gives an overlap in a multi- eflector setup. The footprint ratio is 0.8:1.
When the reflector is next to walls or in a square one lamp room, the adjustable side-reflector should be set to the “deep” position, which gives a footprint image is 1:1.

When the side-reflector is moved to the outer position, the reflector is in a “deep” position, when moving the side-reflector towards the lamp, the reflector is in a “wide” position.
ADD-ON REFLECTORS (WINGS)
The full fixture or separate Ultra Optics reflector can be fitted with separate wing add-on reflectors. The reflectors that are adjacent to a wall or corner can be equipped with these wings to minimize reflection losses at the wall. These wings have a hammered texture because the angle of reflection is so large that the SBCS principle is maintained. Reflectors next to a wall require one wing, reflectors in a corner can be fitted with 2 wings, and reflectors in the middle of a room require no wings. Add-on reflectors minimize wall losses and give more light to the surroundings from the illuminated grid.
The add-on reflectors are available as overlapping and nonoverlapping models. The overlapping models are used in a multi-row set-up and the nonoverlapping models are used when there is only one row of reflectors in the room.
HOW HIGH?
There is a very simple and unique way to determine the minimum height of the reflector. The rule of thumb is that the shortest distance from the reflector to crop is half the distance between the reflectors in a multi-fixture setup. It doesn’t matter if the lamp is 400 watts or 1000 watts. A 1000 watt lamp should illuminate a larger surface than a 400-watt lamp, automatically increasing the distance between reflector and crop.
A reflector hanging lower than calculated will increase hotspots and decrease uniformity. Lower is not better!

ERROR/STATUS MESSAGES and LAMP REPLACEMENT
DISPLAY INDICATION ON DIMLUX EXPERT 315W + 630W
Each Dimlux fixture has a self-diagnosis system. The display on each unit shows error and status info.
| Soft-off | On-DB | Off-Rem | On-Rem | Ignite | HVP | LVP | HTTP | Open | Short | EOL |
| F-Flash | F-On | A-Flash | A-On | 1-Strobo 2-On | 2-On | 3-On | 4-On | 5-On | 6-On | 7-On |
Status
| F-Flash | = Soft off | The ballast is off because the dim button is on soft-off. |
| F-on | = On-DB | The ballast is on, no Maxi Controller detected. |
| A-Flash | = Off remote | The ballast is off by Maxi Controller. |
| A-on | = on remote | The ballast is on by Maxi Controller. |
| 1-strobe | = Igniting | The ballast is igniting the lamp. |
Error
| 2-On | = HVP | The input voltage is too high. |
| 3-On | = LVP | The input voltage is too low. |
| 4-On | = HTP | The ballast is too hot. |
| 5-On | = Open | Open contact or lamp failure. |
| 6-On | = Short | Short in lamp circuit or lamp failure. |
| 7-On | = EOL | End-of-life. Lamp surpassed its service life. Maximum power can not be attained anymore.* |
DISPLAY INDICATION ON DIMLUX EXPERT MKII 600W + 1000W
If there is an error message, it will scroll across the display.
| LVP error low voltage protection | = Input voltage too low |
| HTTP error high-temperature protection | = The ballast is overheated |
| OCP error open contact | = Open contact or lamp is defective |
| SHORT error short circuit | = Short circuit in the lamp circuit, or lamp is defective |
| EOL error end of the live bulb | = Lamp surpassed its service life. Maximum power can not be attained anymore.* |
If there is a (mains) power failure (but the fixture is connected to other fixtures, “PSU fail” will scroll across the display. If there is an internal error in the electronics that drive the lamp, then “hid fail” will scroll across the display.
* When EOL appears, then it’s possible that the lamp will still work fine at lower powers.
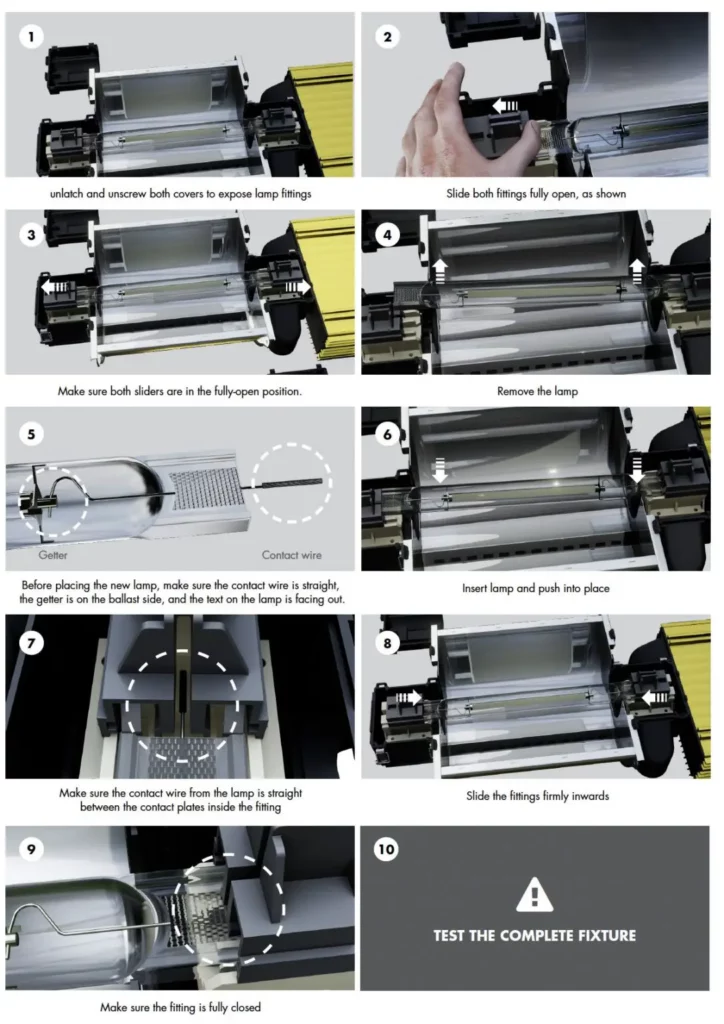
BULB REPLACEMENT
 Always wear gloves when replacing bulbs to avoid leaving any residue on the new bulb which will affect the performance
The Dimlux 315W CDM bulbs have a bayonet connector. When installing a new bulb, ensure that the two pins, one large and one small, are lined up with the holes in the socket, then push and turn to lock the bulb in place.
The 1000W DE bulb has 2 wire clamps.
The 600W Dimlux fixtures use 600W bulbs with E40 ‘screw in’ sockets. Simply unscrew the old bulb and screw in the new one, making sure that it is screwed in tight and straight to avoid any performance issues.
BULB REPLACEMENT 1000W

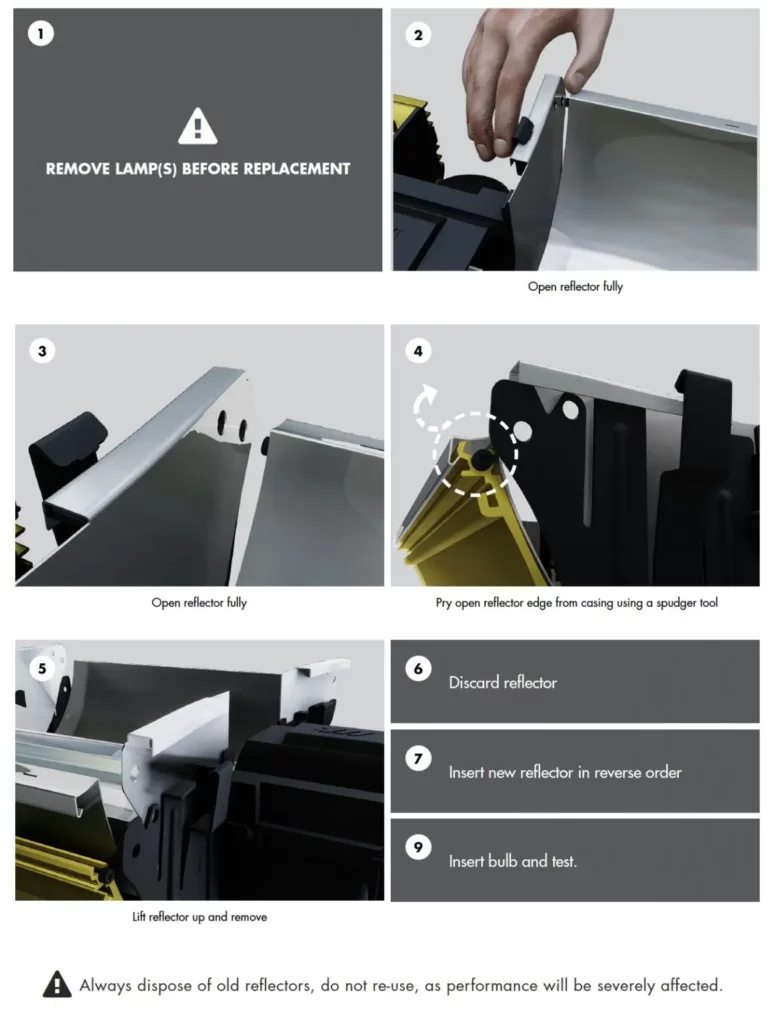
REFLECTOR REPLACEMENT
The Climate Factory GmbH
Daimlerstraße 50a
47574 Goch
Germany
www.theclimatefactory.de
[email protected]
+4928239453001
All manuals at:
