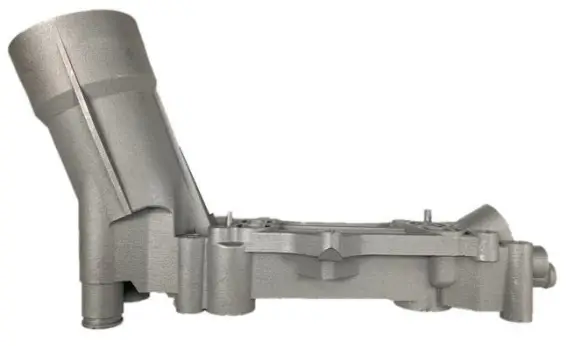
DORMAN 926-876 Oil Filter Housing Kit

REMOVAL/INSTALL INSTRUCTIONS
OIL FILTER HOUSING KIT
ATTENTION: Refer to the appropriate shop manual for your vehicle to obtain specific service procedures for this part. If you do not have a service manual or lack the skill to install this part, it is recommended that you seek the services of a qualified technician. Pay special attention to all cautions and warnings included in the shop manual. Read and follow all instructions carefully. This product is only designed to function properly on specific vehicle applications. Please verify that the vehicle requirements match the product specifications and application notes for this part.
REMOVAL/INSTALL OF OIL FILTER HOUSING KIT (926-876) Jeep Wrangler 2016–2014, Chrysler Minivan w/3.6L Engine 2016–2014, Ram Pickup w/3.6L Engine 2016–2014.
WARNING: PLEASE WEAR SAFETY GLASSES!
This upgraded housing is designed to directly replace only the failure-prone adapter. These instructions explain how to properly replace the failed housing with new gaskets and continue using the existing oil cooler, sensors and other functioning components.
Instructions
- STEP 1: Remove oil filter housing and cooler assembly from engine as per vehicle service manual.
- STEP 2: Remove both sensors from original oil filter housing.
- STEP 3: Remove oil cooler to filter housing mounting screws and remove oil cooler from original oil filter housing.
- STEP 4: Remove oil filter cap.
- STEP 5: Clean cooler and cooler gasket mating surfaces to ensure proper seal to new oil filter housing.
- STEP 6: Install provided cooler to housing gaskets into gasket grooves in oil filter housing.
- STEP 7: Install original oil cooler onto new oil filter housing.
- STEP 8: Using original cooler screws, fasten cooler to housing. Torque cooler-to-housing screws to 35 in. lbs.
- STEP 9: Coat both sensor threads with thread sealant and install both sensors onto oil filter housing.
- STEP 10: Torque both sensors to 177 in. lbs.
- STEP 11: Install provided new o ring onto front oil return port on housing. Lubricate with a light coat of oil for ease of installation.
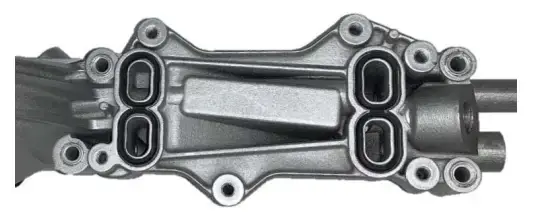
- STEP 12: Press provided new remaining seals onto new oil filter housing.
- STEP 13: Install oil filter housing onto engine block as per vehicle service manual. Torque mounting bolts to 106 in. lbs
- STEP 14: Install a new oil filter into new housing and reinstall filter cap from original housing.
- STEP 15: Add oil to crankcase to compensate for lost oil from replacing oil filter.
- STEP 16: Top off coolant level to compensate for loss of coolant during repair.
- STEP 17: Test drive vehicle to ensure there are no coolant or oil leaks.
- STEP 18: Repair is now complete.
Still need help?
- Please call our Technical Support team for assistance from our team of certified automotive experts.
- Tel: 1-800-523-2492
Disclaimer
Even though every attempt is made to ensure this information is complete and accurate, it is impossible to account for all possible circumstances or situations. Please consult with a qualified auto technician before attempting to perform any work you are not qualified to do. Automobiles can be hazardous to work on; be sure to take all necessary safety precautions. Failure to do so may result in property damage or personal injury. Certain motor vehicle standards and performance requirements may apply to your motor vehicle (such as Federal Motor Vehicle Safety Standards by the National Highway Traffic Safety Administration). Be sure that your work is performed in accordance with such standards and that you do not disable any motor vehicle safety features.
Dorman Products, Inc.
- Corporate Office and Customer Service: 1-800-523-2492
©2021 No reproduction in whole or in part without prior written approval.