
Eybond PLUGPRO03V50 Wi-Fi Plug II Pro
Installation
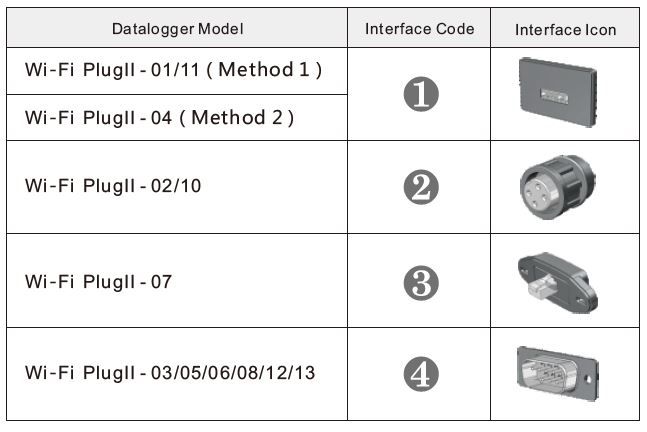
- Find the corresponding interface code on the right table, according to the model of the datalogger.
- Based on the corresponding icon, finish the installation according to the interface code.
- Confirm the status of the LED light (After step2.3, when 4 LED light keep on, showing the normal working status).

Steps
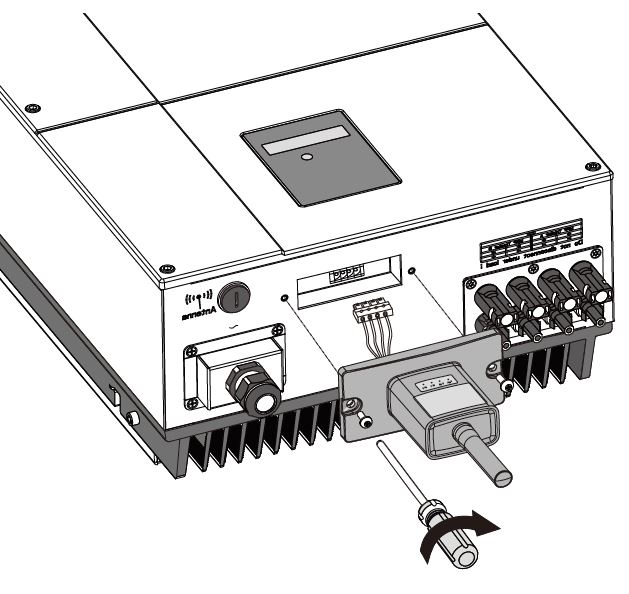
Step 1
Method 1:
- Connect the 4PIN power cable of the Wi-Fi PlugII to the inverter.
- Fasten the Wi-Fi PlugII to the inverter with the screw.
Method 2:
- Connect the 2 PIN green interface of the Wi-Fi PlugII to the RS-485 terminal of the inverter.
- Connect the 5PIN power cable of the Wi-Fi PlugII to the inverter.
- Fasten the Wi-Fi PlugII to the inverter with the screw.

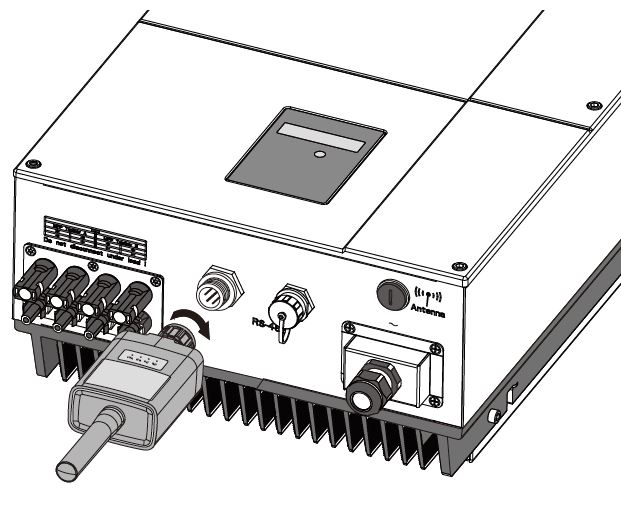
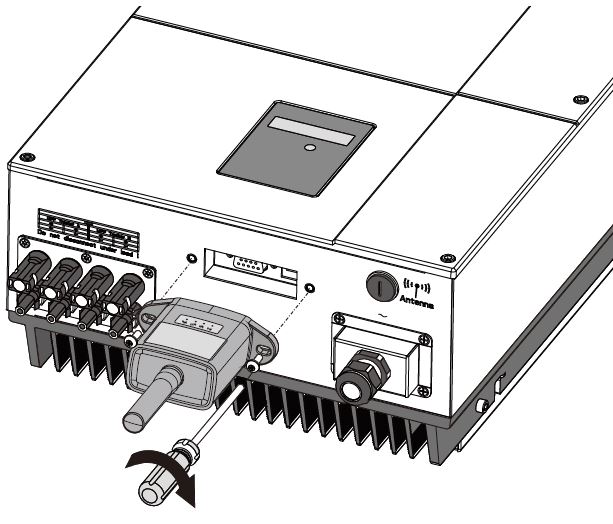
Step 2
- Align the 4-hole aviation plug of the Wi-Fi PlugII with the inverter and plug it in.
- Tighten the nut of the Wi-Fi PlugII to the inverter.

Step 3
- Align the RJ-45 crystal head of the Wi-Fi PlugII with the inverter and insert it in tightly.
- Fasten the Wi-Fi PlugII to the inverter with the screw.
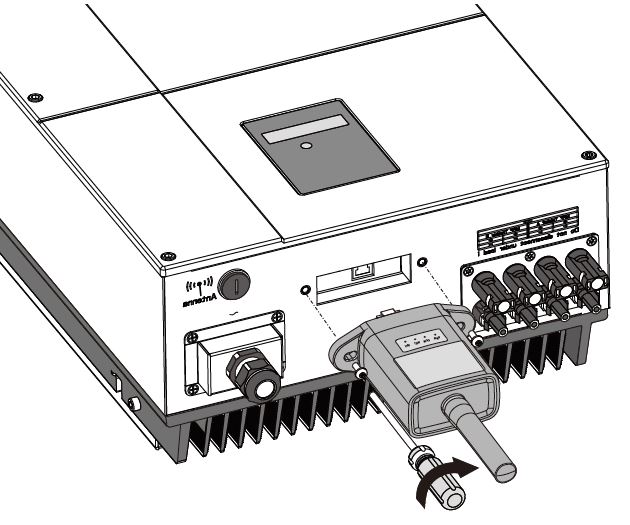

Step 4
- Align the serial port of the Wi-Fi PlugII with the inverter and plug it in tightly.
- Fasten the Wi-Fi PlugII to the inverter with the screw.

Wireless Router Connection
Download APP
- Scan the QR Code on the right side and download the APP.


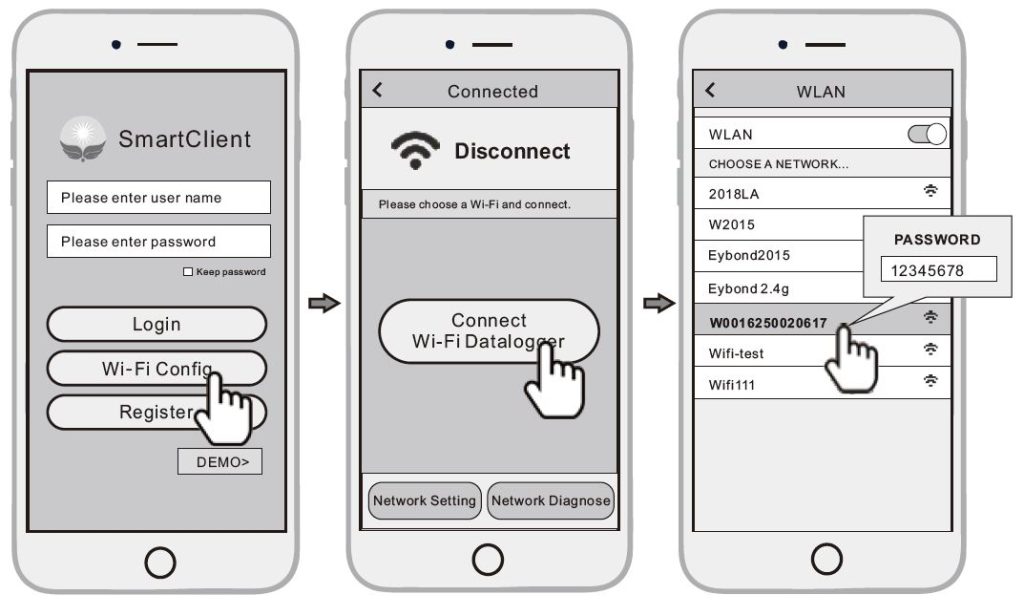
Connect Wi-Fi Datalogger
- Open the APP, and tap the Wi-Fi Config button to enter this page.
- Tap the Connect Wi-Fi Datalogger button on the Connected page (Android phone has no need for this step).
- Select the same number of Wi-Fi PlugII PN to connect. (Initial Password: 12345678)

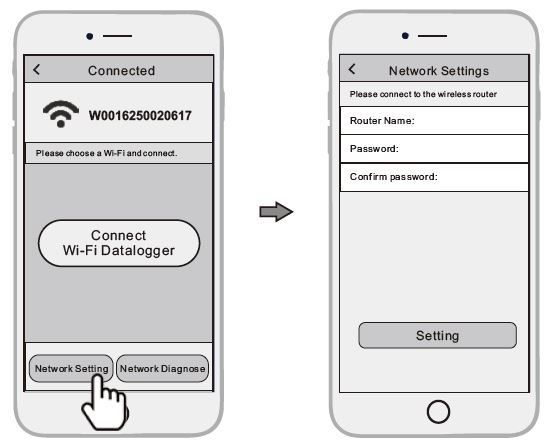
Network Setting
- After the connection completes, tap the Network Setting button.
- According to the prompts, type in the information to finish the network setting.
- Reconnect the Wi-Fi or Cellular Data which can surf the Internet instead of the Wi-Fi connected by step 2.2.

Create an Account And Plant
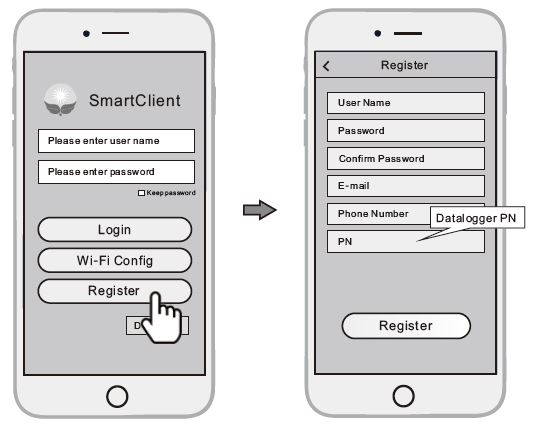
Create Account
- Open the APP, and tap the Register button to enter this page.
- According to the prompts, type in the information to create an account.

Create Plant
- Login to the account and click the list button at the bottom of the home page.
- Tap the “+” button on the top-right corner of the list page
- According to the prompts, type in the information to finish creating the plant.
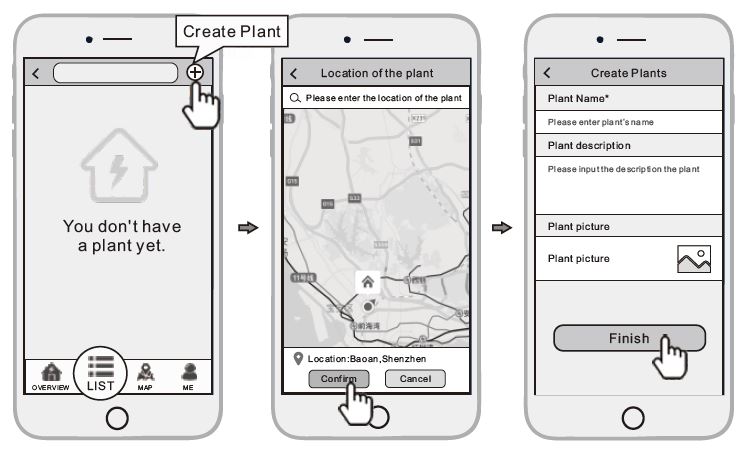

Note: One account can create multiple plants and one plant can add multiple data loggers. If you only have one data logger, you could ignore this step.
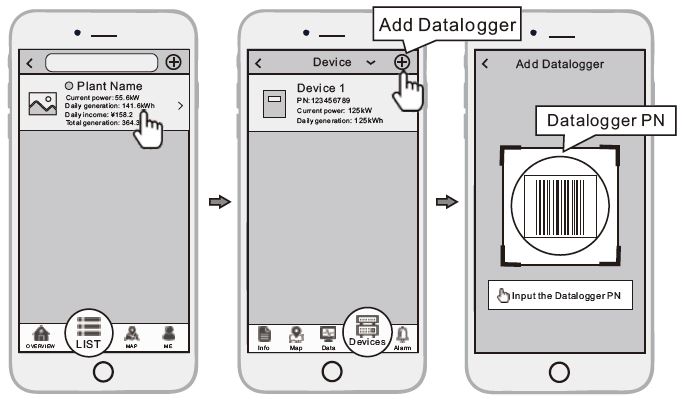
Add Multiple Dataloggers
- Tap the new plant you just created, and enter its home page.
- Click the Device button at the bottom of the home page.
- Tap the “+” button at the top-right corner to add the datalogger.
- Scan the datalogger PN on the Wi-Fi PlugII, or input it manually.

FCC STATEMENT
Warning:
This device complies with Part 15 of the FCC Rules. Operation is subject to the following two conditions: (I) this device may not cause harmful interference, and (2) this device must accept any interference received, including interference that may cause undesired operation.
changes or modifications not expressly approved by the party responsible for compliance
could void the user’s authority to operate the equipment.
NOTE: This equipment has been tested and found to comply with the limits for a Class B digital device, pursuant to Part 15 of the FCC Rules. These limits are designed to provide reasonable protection against harmful interference in a residential installation. This equipment generates, uses, and can radiate radio frequency energy and, if not installed and used in accordance with the instructions, may cause harmful interference to radio communications. However, there is no guarantee that interference will not occur in a particular installation. If this equipment does cause harmful interference to radio or television reception, which can be determined by turning the equipment off and on, the user is encouraged to try to correct the interference by one or more of the following measures:
- Reorient or relocate the receiving antenna.
- Increase the separation between the equipment and receiver.
- Connect the equipment into an outlet on a circuit different from that to which the receiver is connected.
- Consult the dealer or an experienced radio/TV technician for help.
NOTE: This device and its antenna(s) must not be co-located or operated in conjunction with any other antenna or transmitter.
RF Exposure Statement
To maintain compliance with FCC’s RF exposure guidelines, This equipment should be installed and operated with a minimum distance of 20c m from the radiator of your body. This device and its antenna(s) must not be co-located or operated in conjunction with any other antenna or transmitter