Fetch Box User Guide
Welcome
This guide will help you to connect and troubleshoot Wi-Fi on your Fetch Box.
Fetch is delivered by broadband, so as part of setting up you need to connect your Fetch Box to your modem.
You can use Wi-Fi to connect if you have reliable Wi-Fi in the room with your TV and Fetch Box.
You’ll need a Fetch Mini or Mighty (3rd Generation Fetch boxes or later) to set up Wi-Fi.
Ways to set up if you can’t use Wi-Fi
If you don’t have reliable Wi-Fi where your Fetch box is located in your home you’ll need to use a wired connection. This is also the way to connect if you have a 2nd generation Fetch
Box. You can use the Ethernet cable you got with your Fetch to connect your modem to your Fetch box directly, or if your modem and Fetch box are too far apart for the Ethernet cable to reach, use a pair of Power Line Adapters (you can purchase these from a Fetch retailer or if you got your box through Optus, you can also purchase these from them).
For more information see the Quick Start Guide that came with your Fetch box.
![]() Tips
Tips
To find out if your Wi-Fi will be able to reliably deliver the Fetch service, there’s a test you can run. You’ll need an iOS device and Airport Utility app (see Page 10 for more info).
Connect Fetch to your home Wi-Fi
You’ll need your Wi-Fi network name and password to connect. Before you start, check you can browse on a smartphone or computer connected to your Wi-Fi network (do this near your Fetch box as Wi-Fi signal can vary in your home) and if you can’t, see the tips on page 8.
To set up your Fetch box with Wi-Fi
- For everything you need to get up and running with Fetch, see the Quick Start Guide you got with your Fetch box. Here’s an overview of what you’ll need to do
1. Connect the TV antenna cable to ANTENNA port on the back of your Fetch box.
2. Plug the HDMI cable into the HDMI port on the back of your box and plug the other end into an HDMI port on your TV.
3. Plug the Fetch power supply into the wall power socket and plug the other end of the cord into the POWER port on the back of your box. Don’t turn on power yet.
4. Turn on your TV using your TV remote and find the correct Audio Visual TV Input source. For example, if you connected the HDMI cable to the HDMI2 port on your TV, you’ll need to choose “HDMI2” via your TV remote.
5. You can now turn on the wall power socket to your Fetch box. The standby or power light on the front of your box will light up blue. Your TV will then show the “Preparing System” screen to show your Fetch box is starting.
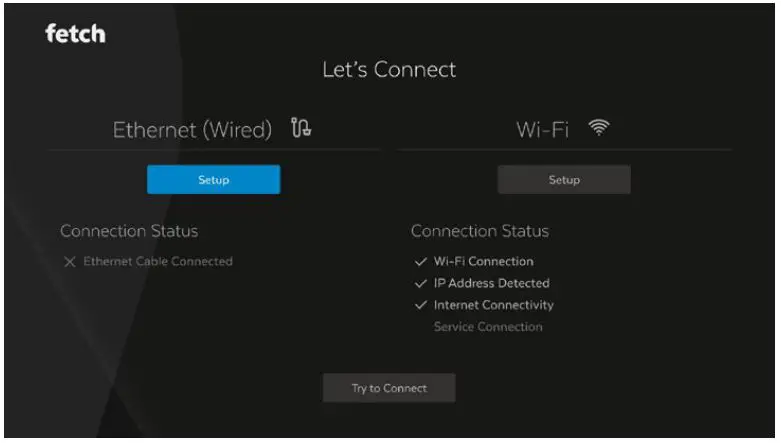
 - Your Fetch box will next check your Internet connection. If already connected via Wi-Fi or Ethernet cable, there is no need to set up Wi-Fi. You’ll skip straight to the Welcome Screen. If the Fetch box can’t connect, you’ll see a message “Set up your internet connection”.
- To set up Wi-Fi, follow the prompts and use your remote to choose the WiFi connection option.
- Select your home Wi-Fi network from the list of networks. If needed, confirm the security settings (passwords are case-sensitive).
- Your Fetch box will let you know once you’re connected and continue to start up. If prompted, enter the Activation Code for your Fetch box in the Welcome Screen and follow the on screen prompts to complete your set up.
Don’t turn off your Fetch box during any System Updates or Software Updates. These can take a few minutes and your box may restart automatically after an update.
![]() Tips
Tips
If you don’t see your Wi-Fi network, select ![]() to refresh the list. If your Wi-Fi network is hidden select
to refresh the list. If your Wi-Fi network is hidden select ![]() to add it manually (you’ll need
to add it manually (you’ll need
the network name, password, and encryption info).
To connect to Wi-Fi through Network Settings
If you’re using an Ethernet cable or Power Line Adapters at the moment to connect your Fetch box to your modem, you can switch over to connecting wirelessly to your Wi-Fi network, whenever you like (if your Wi-Fi is reliable in the room with your Fetch box).
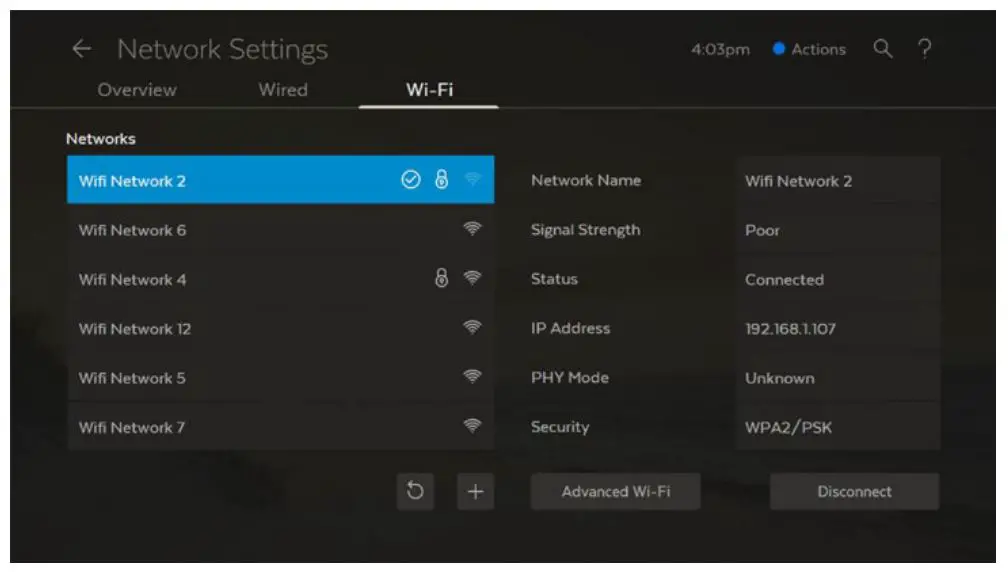
- Press
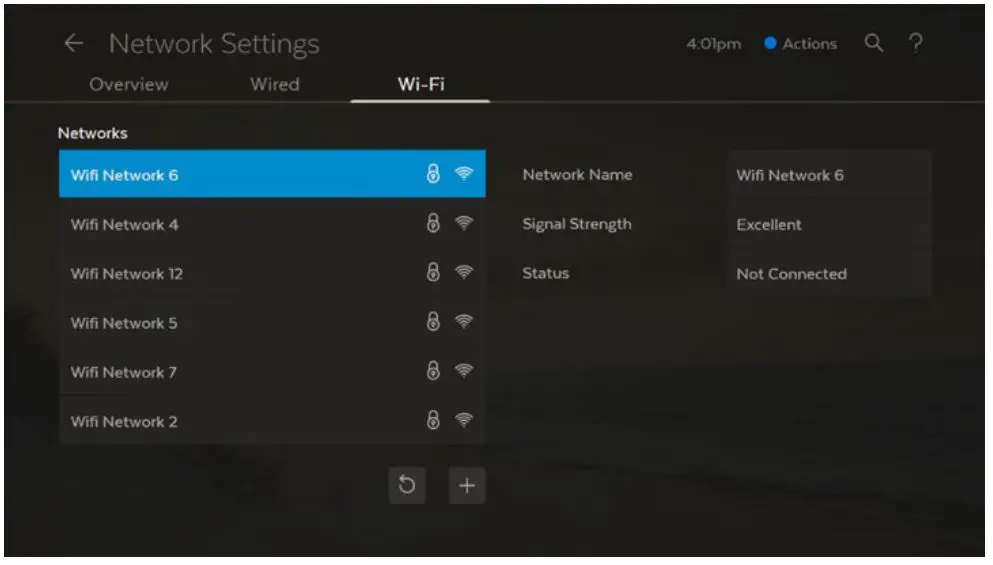
 on your remote and go to Manage > Settings > Network > Wi-Fi.
 - Now select your home Wi-Fi network from the list of networks. Enter your Wi-Fi network password. Keep in mind that passwords are case-sensitive. If you can’t connect, see the tip on the previous page and troubleshooting steps on page 10.
Keep in mind, your Fetch box will automatically use an Ethernet rather than a Wi-Fi connection, if it finds that your box has an Ethernet cable connected, as this is the most reliable way to connect.
Wi-Fi and Internet error messages
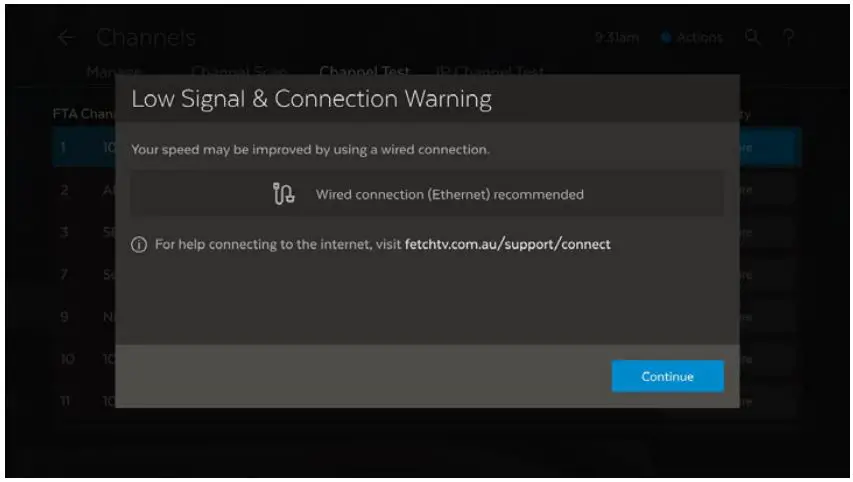
Low Signal & Connection Warning
If you get this message after connecting to Wi-Fi, see the tips for improving your Wi-Fi (Page 8).
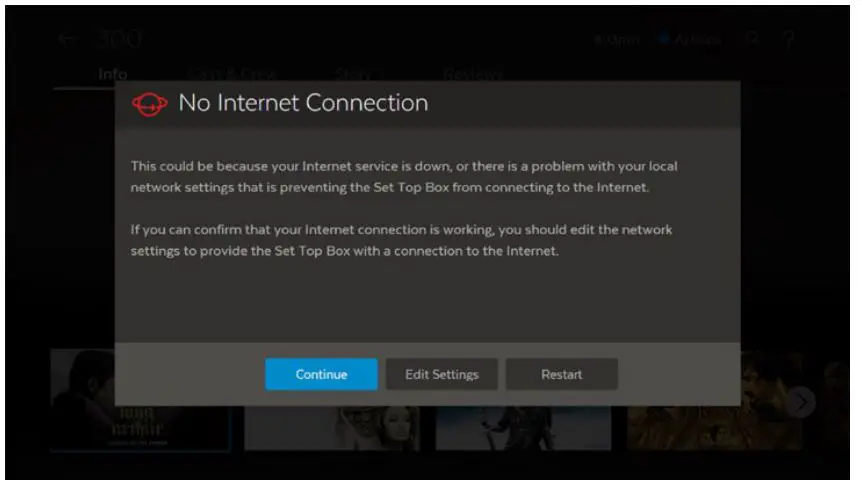
No Internet Connection
If your Fetch box has no internet connection or you can’t connect to Wi-Fi, see the troubleshooting steps on Page 10.
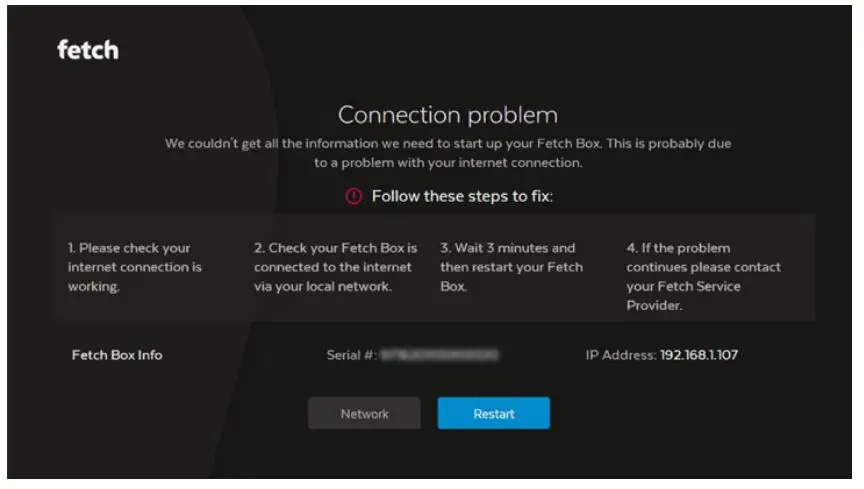
No internet connection (Fetch Box locked)
You can use your Fetch box for a few days without an internet connection, to watch Free-to-Air TV or recordings, but after that you’ll see a Box Locked or connection error message and will need to reconnect your box to the internet before you can use your Fetch box again.
To connect wirelessly to your home Wi-Fi network, choose the Network Settings then follow the on screen prompts and see from Step 2 in “To set up your Fetch box with Wi-Fi” above.
Tips to improve Wi-Fi in your home
Location of your modem
Where you place your modem and your Fetch box in your home can make a big difference to Wi-Fi signal strength, performance and reliability.
- Put your modem near to the main areas in which you use the Internet or in the middle of your home.
- If your modem is too far away from your Fetch box you may not get the best signal.
- Don’t place your modem next to a window or underground.
- Household devices like cordless phones and microwaves can interfere with Wi-Fi so make sure your modem or your Fetch box aren’t near these.
- Don’t put your Fetch box inside a heavy cupboard or metal.
- Rotating your Fetch box slightly to the left or right (30 degrees or so) or moving it away from the wall a little, can improve Wi-Fi.
Power cycle your modem
Turn your modem, router or access points off then on again.
Check your Internet Speed
Do this check as close as possible to where you’re using your Fetch box. On a computer or smartphone connected to your Wi-Fi network go to www.speedtest.net and run the test. You need at least 3 Mbps, if it’s less, turn off other devices in your home that are using the Internet and run the speed test again. If this doesn’t help, contact your broadband provider about ways to improve your Internet speed.
Disconnect other devices on your wireless network
Other devices in your home such as smart devices, gaming consoles, or computers, that are using the same Internet connection, can affect performance or interrupt your Wi-Fi. Try to disconnect these devices and see if this helps.
Try a wireless extender
If you can’t move your modem or your Fetch box to a better spot in your home, you can use a wireless range extender or booster to increase wireless coverage and range. These can be sourced from electronic retailers or online.
If there’s no improvement in Wi-Fi performance and you’re comfortable to do so, you can change some settings on your modem. This is only recommended for advanced users (Page 12). You can also try a reset of your Fetch Box (Page 13).
Can’t connect to Wi-Fi
Is your Wi-Fi network hidden?
If your Wi-Fi network is hidden, your network won’t show in the list of networks so you’ll need to add it manually.
Power cycle your Fetch Box and Modem
If you are having issues sometimes a Fetch box restart is all that’s needed. Go to Menu > Manage > Settings > Device Info > Options > Fetch Box restart. If your menu isn’t working try turning the power to the box off for 10 seconds before turning it back on. If that doesn’t help, restart your modem or router too by turning them off then on again.
Test your Wi-Fi signal strength
Check if your Wi-Fi signal is strong enough to use for your Fetch box. You’ll need an iOS device to run this test. If you have an Android device, you can search for a Wi-Fi Analyser App on Google Play. Make sure you do the test at your Fetch box. On an iOS device:
- Download the Airport Utility app from the App Store.
- Go to Airport Utility in Settings and enable Wi-Fi Scanner.
- Launch the app and select Wi-Fi Scan, then select Scan.
- Check that the signal strength (RSSI) is between -20dB and -70dB for your Wi-Fi network.
If the result is lower than -70dB, for example -75dB, then Wi-Fi won’t work reliably on your Fetch box. See the tips for improving your Wi-Fi (Page 8) or use a wired connection option (Page 3).
Disconnect and reconnect Wi-Fi
On your box, go to Menu > Manage > Settings > Network > Wi-Fi and select your Wi-Fi network. Choose Disconnect then select your Wi-Fi network to connect again.
Check your Internet speed (Page 8)
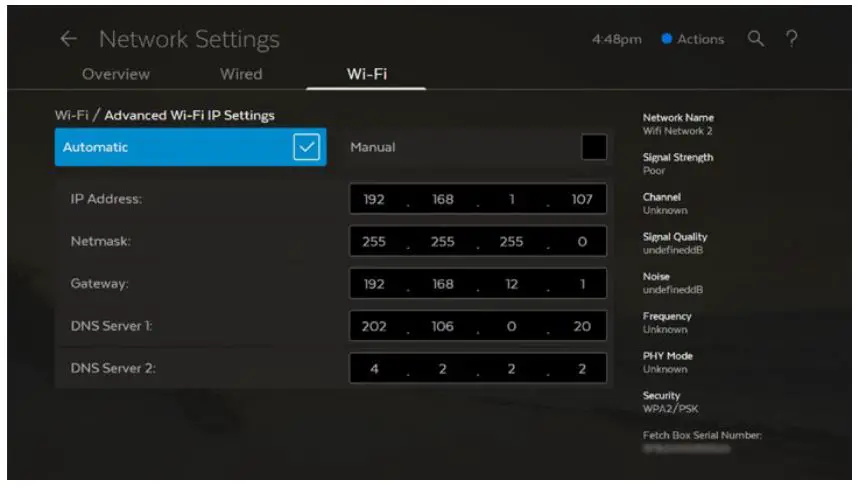
Check Wi-Fi IP settings
On your box, go to Menu > Manage > Settings > Network > Wi-Fi and select your Wi-Fi network. Now select the Advanced Wi-Fi option. For good performance the Signal Quality (RSSI) should be between -20dB and -70dB. Anything lower than – 75dB means a very low signal quality, and Wi-Fi may not work reliably. The Noise measurement should ideally be between -80dB and -100dB.
Connect your Fetch Box to modem via Ethernet cable
If you can, use an Ethernet cable to connect your Fetch box directly to your modem. Your box may restart and do a system or software update (may take a few minutes).
Try a reset of your Fetch Box (Page 13)
Advanced Wi-Fi troubleshooting
Advanced users can change wireless and network settings via the modem interface to see if this improves Wi-Fi performance. If you’re unsure how to do this, contact your modem manufacturer before changing these settings. Please note changing these settings may impact on other devices accessing the wireless network and may result in other devices not functioning. You can also try a reset of your Fetch box.
Change wireless and network settings on modem
Switch to another frequency
If your modem is using 2.4 GHz, switch to 5 GHz (or vice versa) in your modem’s interface.
Change wireless channel
There may be a channel conflict with another Wi-Fi access point. Find the channel your modem is using at Manage > Settings > Network > Wi-Fi > Advanced Wi-Fi. In your modem settings, choose another channel, making sure there’s at least a 4 channel gap.
Some routers default to having the same SSID for the 5.0 GHz and the 2.4 GHz connections, but they can be tested separately.
- 2.4 GHz frequency. If modem is using 6, try 1 or 13, or if modem is using 1, try 13.
- 5 GHz frequency (channels 36 up to 161). Try a channel from each of the following groups to see which works best:
36 40 44 48
52 56 60 64
100 104 108 112
132 136 149 140
144 153 157 161
MAC filtering
If MAC Address Filtering is turned on in your modem’s settings, add the MAC address of the Fetch Box or disable the setting. Find your MAC address at Manage > Settings > Device Info > Wi-Fi MAC.
Switch wireless security mode
In your modem’s settings, if the mode is set to WPA2-PSK, try changing to WPA-PSK (or vice versa).
Disable QoS
Quality of Service (QoS) helps manage traffic on your Wi-Fi network by prioritizing traffic, for example VOIP traffic, like Skype, may be prioritized over video downloads. Turning off QoS in your modem’s settings may help improve Wi-Fi performance.
Update your modem firmware
Check for software updates on your modem manufacturer’s website. If you’re using an older modem, you may want to replace your modem with a newer model as wireless standards change over time
Reset your Fetch box
If you have tried other troubleshooting steps and still have issues you can try a reset of your box.
- You should try a Soft Reset before a Hard Reset. It will reinstall your Fetch box interface and clear system files, but won’t touch your recordings.
- If a Soft Reset doesn’t fix the issue with your box, you can try a Hard Reset. This is a more thorough reset. However, please be aware this will clear ALL your recordings and series recordings, messages and downloads on your box.
- After a reset, you must enter your Activation Code in the Welcome Screen (and set up your Internet connection if your box doesn’t have one).
- If using a Fetch Voice Remote, after a reset of your box, you must re-pair your remote to enable Voice Control. See below for more.
To do a Soft Reset of your Fetch Box, follow these steps:
- Press
 on your remote then go to Manage > Settings > Device Info > Options
 - Select Soft Factory Reset.
If you can’t access the menu, here’s how to do a soft reset through your remote:
- Turn the power to the Fetch box off at the wall power source then turn it back on.
- When the first screen appears “Preparing System”, start pressing the colour buttons on your remote control, in order: Red > Green > Yellow > Blue
- Keep pressing these until the
 light on Mini or
  light on Mighty starts flashing or the box restarts.
When the Fetch Box restarts you’ll see the prompt to set up your Internet connection, and the Welcome Screen again. If using a Fetch Voice Remote, see below.
Hard Reset
If a Soft Reset doesn’t fix the issue with your box, you can try a Hard Reset. This is a more thorough reset and will clear ALL your recordings and series recordings, messages and downloads on your box.
To do a Hard Reset of your Fetch Box, follow these steps:
Please Note: A Hard Reset will delete all your Recordings, Series Recordings, Messages, and Downloads.
- Press on your remote then go to Manage > Settings > Device Info > Options
- Select Soft Factory Reset.
If you can’t access the menu, here’s how to do a hard reset through your remote:
- Turn the power to the Fetch box off at the wall power source then turn it back on.
- When the first screen appears “Preparing System”, start pressing the colour buttons on your remote control, in order: Blue > Yellow > Green > Red
- Keep pressing these until the light on Mini or light on Mighty starts flashing or the box restarts.
When the Fetch box restarts you’ll see the prompt to set up your Internet connection, and the Welcome Screen again. If using a Fetch Voice Remote, see below.
Re-pair the Fetch Voice Remote
If you’re using a Fetch Voice Remote with your Fetch Mighty or Mini, you’ll need to reset and re-pair the remote after you reset your box through the four colour buttons, so you can use voice control through the remote. You don’t need to do this if you reset your box through the Fetch menu.
Follow the steps below after you complete the Welcome Screen setup and your Fetch Box has finished starting up.
To re-pair the voice remote
- Point your remote at your Fetch box. Press and hold
 and
and  on the remote, until the light on the remote flashes red and green.
 - You’ll see a pairing prompt on screen and a confirmation once the remote is paired. Once paired, the light at the top of the remote will flash green on button press.
Download the Universal Remote Setup Guide from fetch.com.au/guides for more info.
![]()
© Fetch TV Pty Limited. ABN 36 130 669 500. All rights reserved. Fetch TV Pty Limited is the owner of the trade marks Fetch. The set top box and the Fetch service may only be used lawfully and in accordance with relevant terms of use of which you are notified by your service provider. You must not use the electronic program guide, or any part of it, for any purpose other than private and domestic purposes and you must not sub-licence, sell, lease, lend, upload, download, communicate or distribute it (or any part of it) to any person.
Version: December 2020