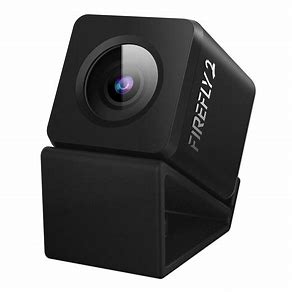

Hawkeye Firefly Micro
- 1080P 60FPS, 2.5K 30fps
- Only 31 gram
- IPX4 water splash-resistant
- Built in battery for 1 hour
- Low latency video output for FPV
- External Trigger to capture video/photo
- External Battery Voltage measurement
- FPV,Action Cam, Car, DV
Safety Guidelines:
Please read the instruction manual carefully before using the camera for the first time.
- It’s a high-precision product, do not drop or crash it.
- Do not expose the camera to strong magnetic objects, sch as magnets or electrical motors. Avoid exposing the product to strong radio waves. Strong magnetic fields may cause the products breakdown or image/audio damage.
- Never leave the products exposed to high temperatures and direct sunlight.
- In case of overheating, smoke or unpleasant smell in the process of charging, unplug your device immediately to prevent fire hazard.
- While charging , keep the product out of children’s reach. Power cable may cause children accidental suffocation or electric shock.
- Use original Firefly 8S’s batteries, to make sure the camera work/charge properly.
- Keep the device in cool, dry and dust-free places.
- Please do not throw the product or it’s battery to the garbage, find a specific recycling place for it.
Features

- Mode button.
- Power/OK button
- Mini 8P USB
- Reset Button: Press to reset the machine
- Micro SD card port
- External Key
USB pins
Battery_Detect: Detect voltage of the battery.Note: GND need to connect.
Capture video/photo: Trigger to capture, active low(>250ms)
Video: video out.
Performance and Specifications:
| Resolutions | 2.5K 30FPS/
1080P 60/30FPS/ 720P 60FPS |
|
| AV | PAL/NTSC | |
| Micro SD card | Class 10 | |
| SD card supported | 8-64G | |
| Size | MM | |
| Weight | 31 gram | |
| Battery | 600mAH | |
| Working time | About 60 minutes | |
| Charging time | About 2-3 Hours | |
| File format | *.MOV | |
| Lens | F/2.8 ,6 glasses | |
| Angle | Diagonal 160 degrees | |
| Voltage | 5V | |
| Current | 400mA |
Buttons
| Name | Functions | Description |
|
Power/ OK Button |
Power ON/OFF; Start/Stop Recording | Press Once to power on, press and hold for 3 seconds to power off;
Press once to start/stop recording after power on. |
|
Mode Button |
Toggle between 2.5K/1080P/
Photo mode |
Press and hold for 2 seconds to toggle |
| Reset Button | Reset the camera | Reset the machine to default settings. |
Video Settings:
Video Resolutions: 2.5K 30fps, 1080P 60fps, 1080P 30fps, 720p 60fps.
Video Quality: Super Fine, Fine. Note:Higher quality will consume higher current. Low quality may case mosaic.
Video Clip: Off, 1min, 3min, 5min, 10min.
Loop Video: On, Off.
External Voltage: Off,-0.9 to +0.9. Adjust the external voltage display.
Video Lapse: Off, 1 Sec, 5 Sec, 10 Sec, 30 Sec, 60 Sec.
Quick Capture: On, Off. On: Auto capture video after power on.
Sound Record: On, Off.
MIC Volume: Off, 20%, 50%, 80%, 100%.
Metering: Multi, Center, Spot.
Exposure:-2.0 to +2.0.
White Balance: Auto , Daylight, Cloudy, Fluroresc Fluoresc.1, Hawkeye, Incandesc.
ISO: Auto,ISO100, ISO 200, ISO400, ISO800,ISO1600,ISO3200.
Color: Natural, Vivid, Pale.
Effect: Normal, Sepia, B&W, Negative.
Contrast: -100 to +100.
Saturation: -100 to +100.
Sharpness: -100 to 100.
Photo Settings:
Photo Size: 12M.
Photo quality: Super Fine, Fine.
Self timer: Off, 2sec, 3sec,5sec,10sec.
Photo Burst: On, Off.
Time Lapse Photo: Off, 5sec,10sec, 30sec, 1min.
Metering: Multi, Center, Spot.
Exposure: -2.0 to +2.0.
ISO: Auto,ISO100, ISO 200, ISO400, ISO800,ISO1600,ISO3200.
Contrast: -100 to +100.
Saturation: -100 to +100.
Sharpness: -100 to 100.
Gamma: -100 to 100.
System Settings:
Beep: On, Off.
Status LED: On, Off.
Power Off: Never, 1min, 3min,5min. Auto power when there’s no operation.
Clock Settings: Set the camera’s day time.
Date Format: None, YYYY MM DD, MM DD YYYY, DD MM YYYY.
Stamp: Date+Logo, Date, Logo, Off..
Language: English, Chinese.
OSD Control: On, Off. Off: No OSD will be shown on the TV out.
TV System: NSTC,PAL.
Flicker: 50HZ, 60HZ.
Image Rotate: On ,Off.
Reset Setup: Reset the camera to default settings. Note: Set it to default settings when the camera has any problem.
Format SD-Card: Note: all the data will lose!
SD-Card INFO: Check the SD card state.
FW Version: Firmware Version.
Record videos:
Press Power/OK button for 3 seconds to power on, then press Power/OK button once to record. The videos are 3 minutes per clip, and will loop record by default, you can change it in menu.
Battery Charging:
Connect the camera to a computer or phone charger using the included USB cable. Use 1A charger, and turn off the camera when charging will increase the charging rate(Press and hold Power/OK button for 3 seconds could shutdown the camera). The Charging Status Light it will turn OFF when the battery is fully charged.
Transferring Files:
- Connect the camera to a computer via the included USB cable or card reader, and then turn on the camera.
- Double click “My Computer” and locate “Removable Disk”. Enter “Removable Disk” and you will find all photo and video files in DV folder.
Update Firmware:
- Delete all the files and folders in the SD card(suggest:8G/16G).
- Download the bin firmware to SD card .
- Put the SD card into the camera(make sure battery > 50%, or use external power).
- Power on the camera and it will update firmware automatically.
- When updating, the LED will flash.
- When the update process is finished, the LED will stop flashing.
- The camera will reboot again.
- Please check on www.CNfpv.com for new firmware updates.
FCC STATEMENT:
This equipment has been tested and found to comply with the limits for a Class B digital device, pursuant to Part 15 of the FCC Rules. These limits are designed to provide reasonable protection against harmful interference in a residential installation.
This equipment generates uses and can radiate radio frequency energy and, if not installed and used in accordance with the instructions, may cause harmful interference to radio communications. However, there is no guarantee that interference will not occur in a particular installation. If this equipment does cause harmful interference to radio or television reception, which can be determined by turning the equipment off and on, the user is encouraged to try to correct the interference by one or more of the following measures:
- Reorient or relocate the receiving antenna.
- Increase the separation between the equipment and receiver.
- Connect the equipment into an outlet on a circuit different from that to which the receiver is connected.
- Consult the dealer or an experienced radio/TV technician for help.
Changes or modifications not expressly approved by the party responsible for compliance could void the user’s authority to operate the equipment.
This device complies with part 15 of the FCC Rules. Operation is subject to the following two conditions:
- This device may not cause harmful interference, and
- this device must accept any interference received, including interference that may cause undesired operation.
NOTE:
For more information please check our Youtube/Facebook channel: Hawkeye Firefly Official