
flair espresso Flair 58 Ultimate Manual Espresso Maker User Guide
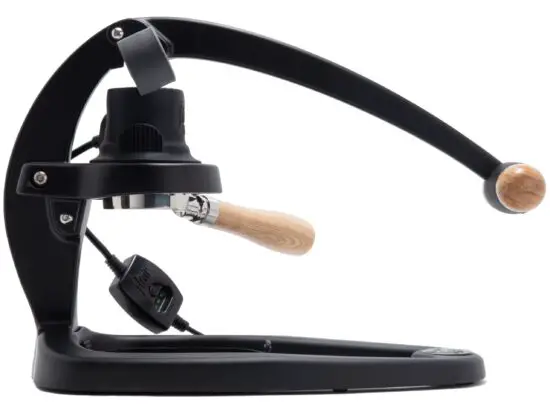
What’s Included
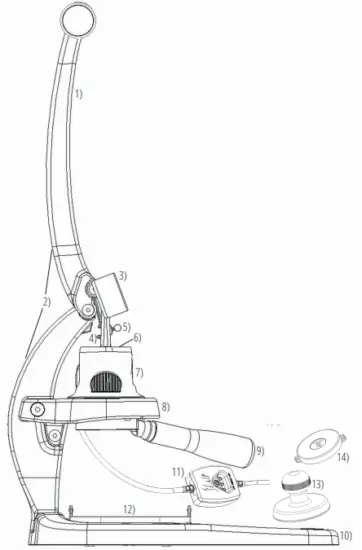
- Lever
- Lever Assembly
- Pressure Gauge
- Plunger Stem
- Lever Hook
- Plunger (in Brew Cylinder)
- Brew Cylinder
- Brew Base
- 58mm Portafilter
- Base
- Temperature Controller
- Drip Tray
- Tamper
- Preheat Cap
- Power Supply (not shown)
Getting Started With Your Flair 58
Welcome to the world of café-quality handcrafted espresso with your Flair 58! Before pulling your first shot, please follow the steps below to set-up your Flair. Also, please remember that your Flair 58 requires uniform grounds from a high-quality burr grinder.
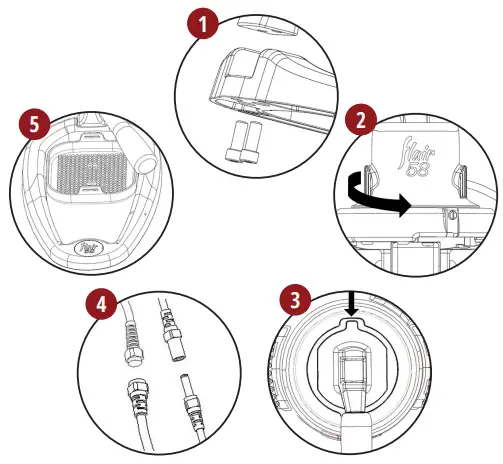
- Bolt base & lever assembly together firmly
- Remove preheat cap & install brew cylinder onto brew base. Rotate counterclockwise to lock
- Align plunger stem tabs to slots on plunger. Push stem down to seal plunger. Rotate stem to lock. Pressure gauge should be facing the front of the Flair 58
- Connect all wires for the temperature controller/power supply
- Set drip tray directly below brew base.
Using Your Temperature Controller
The Flair 58 is able to preheat* the brewing cylinder to help ensure the appropriate brewing temperature for one or multiple shots. See the diagram below to understand the various heat settings.
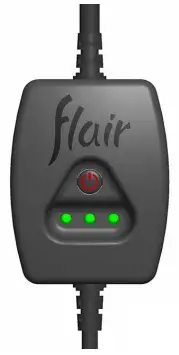
| MODE | ACTION REQUIRED | LIGHT |
| Turn ON | Press & hold button (2-3 sec) | LEFT light BLINKING |
| Brew Ready LOW Temp | Wait up to 10 minutes until | LEFT light ON |
| To Brew MEDIUM Temp | Short Press Button once | CENTER light BLINKING |
| Brew Ready MEDIUM Temp | Wait (<1 minute) until | LEFT & CENTER lights ON |
| To Brew HIGH Temp | Short Press Button once | RIGHT light BLINKING |
| Ready to Brew HIGH Temp | Wait (<1 minute) until | ALL 3 lights ON |
| Turn OFF | Press & hold button (2-3 sec) | ALL 3 light OFF |
NOTE: Without electricity, seal the brew cylinder’s bottom with the preheat cap and fill with boiling water for 45 seconds. Discard water, then repeat as needed. Remove cap and insert brew cylinder onto brew base.
Using Your Pressure Gauge
Achieving well-balanced espresso with the Flair 58 is a combination of the right grind, the right pressure, and the right brewing time.
Everything starts with the grind and dose, which creates the resistance to achieve desired pressure and brewing time. “Flair-istas” who have mastered their technique will brew between 6 and 10 BAR at a time between 30-35 seconds. Your Flair 58 comes with a pressure gauge to ensure your espresso is to your specifications at all times. Please use the chart below to help you dial-in.

Brewing Espresso With Your Flair 58
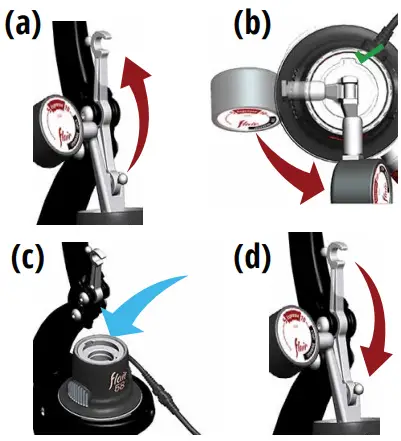
- Prepare the Flair
(a) Turn on temperature controller and set desired preheat temperature (b) Raise lever to the upright position (c) Insert portafilter for preheat by aligning it with the brew base and (d) rotating the portafilter handle counterclockwise until it is firmly in place
- Prepare the Portafilter
(a) Boil water (b) Grind 18-20 grams of freshly roasted beans with burr grinder (c) Remove portafilter from brew base, add grounds and tamp, then reinsert portafilter

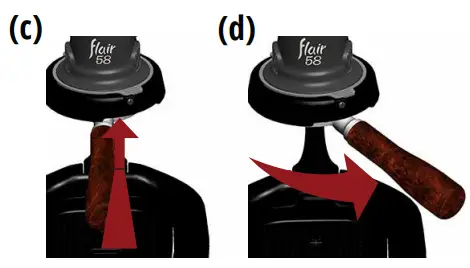
- Prepare the Brew Head
(a) Unlock and lift lever hook all the way up (b) then turn plunger stem counterclockwise until two tabs align with openings in plunger and remove stem by gently lifting (c) Pour brew water into cylinder until opening of the plunger is filled. Reinsert stem and lock back in by reversing order for removal (d) Connect lever to plunger stem engaging the lever hook
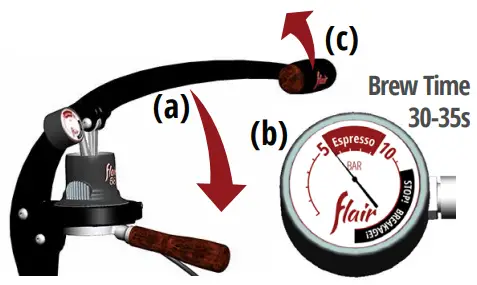
- Brew your Espresso
(a) Slowly lower lever to build pressure in the system and commence brewing (b) When first starting out, aim for a shot duration of 30-35 seconds at 6-10 BAR (c) When desired shot weight/volume is reached, or lever is fully lowered, raise the lever back to starting position
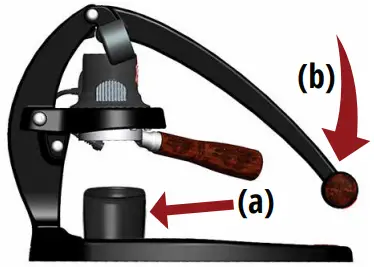
- Purge your System
(a) Place an empty cup on drip tray to catch any remaining brew water. (b) Expel remaining brew water by lowering lever all the way down to allow the remaining liquid to drain. (c) To remove the portafilter for cleaning, simply raise the lever back to the upright position and rotate the portafilter clockwise to release
Cleaning and Troubleshooting Your Flair 58
We recommend you fully clean your Flair 58, following the directions below, only at the end of the workday in commercial applications or every 5-10 shots for personal use.
- Ensure the temperature controller is off
- Disconnect brew cylinder from temperature controller
- Unhook lever from plunger stem and remove
- Rotate brew cylinder clockwise to unlock
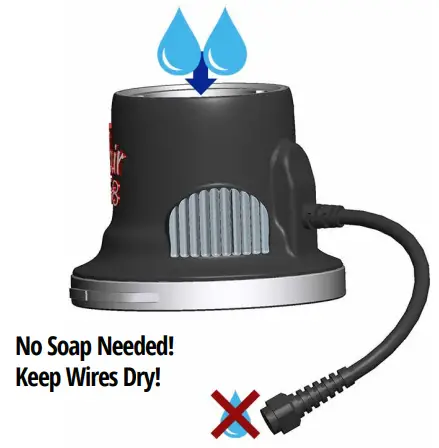
- Rinse cylinder in cool water, keeping wires dry.
Learn faster by watching our video tutorials online at:
www.flairespresso.com/learn/tutorials
For troubleshooting write to us at:
[email protected]
For warranty, upgrades and all other info, visit:
www.flairespresso.com

28 Hammond Street, Suite B
Irvine, CA, 92618 USA
© Intact Idea, All Rights Reserved
Flair is a trademark of Intact Idea, LLC. Product designed in California, USA – Made in China