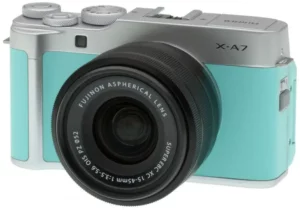
FUJFILM Digital Camera User Guide
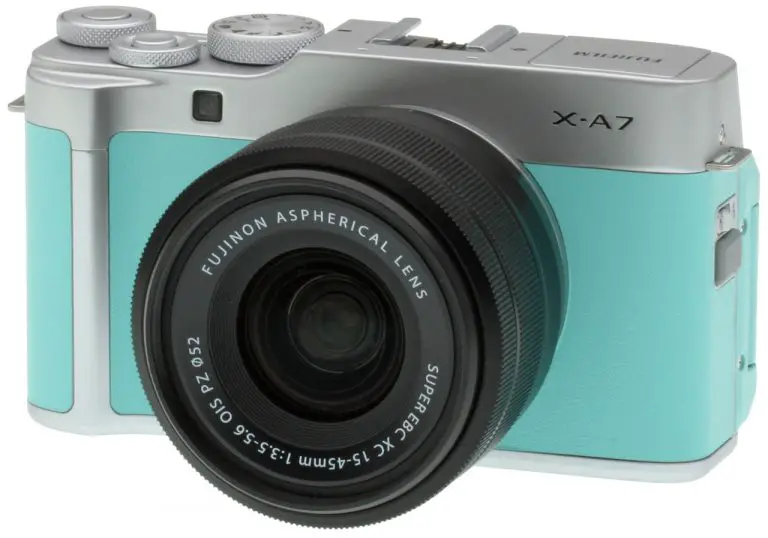
X-A7
Contents
X-47 firmware version 1.30 adds or updates the features listed below. For information on earlier versions, visit the following website.
https://fujifilm-dsc.com/en/manual/
| No. | Description | X-A7 |
See | Ver. |
| 1 | The “BATTERY LEVEL” item in the standard indicator display now defaults to  (on). (on). |
12, 161 | 1 | 1.02 |
| 2 | The TRANSFER SETTING item in the setup menu has been renamed USB MODE and now contains an option that lets the camera serve as a webcam. |
171 | 2 | 1.30 |
| 3 | A MY MENU SETTING option has been added t |
154, 174 175 | 3,
3, 4 |
1.10 |
| 4 | The camera now supports instax mini Link smart- phone printers, resulting in changes to the instax PRINTER PRINT item in the playback menu and t setup menu. |
149, 171 197, 198, 201 | 6, 8, 10 | 1.20 |
Change and Additions
Changes and additions are as follows
X-A7 Owner’s Manual: ![]() 12, 161 Vwe.1.02 Customizing the Standard Display DISP. CUSTOM SETTING
12, 161 Vwe.1.02 Customizing the Standard Display DISP. CUSTOM SETTING
Choose the items shown in the standard indicator display.
- In shooting mode, use the DISP/BACK button to display standard indicators.
- Press MENU/OK and select
 SCREEN SET-UP > DISP.CUSTOM SETTING in the
  (SET UP) tab.
 - Highlight items and press MENU/OK to select or deselect.
Item Default Item Default FRAMING GUIDELINE 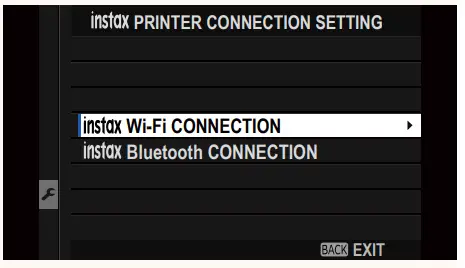
SHUTTER TYPE 
ELECTRONIC LEVEL 
FLASH 
FOCUS FRAME 
CONTINUOUS MODE 
AF DISTANCE INDICATOR 
DUAL IS MODE 
MF DISTANCE INDICATOR 
WHITE BALANCE 
HISTOGRAM 
FILM SIMULATION 
SHOOTING MODE 
DYNAMIC RANGE 
APERTURE/S-SPEED/ISO 
FRAMES REMAINING 
INFORMATION BACKGROUND 
IMAGE SIZE/QUALITY 
Expo. Comp. (Digit) 
MOVIE MODE & REC. TIME 
Expo. Comp. (Scale) 
IMAGE TRANSFER ORDER 
FOCUS MODE 
BATTERY LEVEL 
PHOTOMETRY 
- Press DISP/BACK to save
- Press DISP/BACK as needed to exit the menus and return to the shooting display.
X-47 Owner’s Manual: 171 ver.130 Ver. 1.30
Choose a mode for USB connections to computers, smartphones, and tablets.
| Option | Description |
| USB CARD READER | Pictures can be transferred when the camera is connected to a computer, smartphone, or tablet via USB. |
| USB WEBCAM | When connected to a computer via USB, the camera functions as a webcam. |
| OFF | Data transfer is disabled when the camera is connected to a computer, smartphone, or tablet via USB. |
 Select USB CARD READER for USB MODE before connecting the USB cable to transfer pictures to a computer, smartphone, or tablet (X-A7 Owner’s Manual,
  195).
195).- Select USB WEBCAM for USB MODE before connecting the camera for use as a webcam. “FUJIFILM X-A7” will be displayed when the computer detects the camera.
- The webcam feature is supported under Windows 10 (x64), macOS 10.14 (Mojave), and macOS 10.15 (Catalina).
- When USB WEBCAM is selected:
 IMAGE QUALITY SETTING and A SHOOTING SETTING cannot be adjusted,
- apart from the ON/OFF button and rear command dial (which can be used only for exposure compensation), camera controls cannot be used,
 AF/MF SETTING > PRE-AF is fixed at ON and the camera focus- es only on the subject in the center focus area,
 AF/MF SETTING > FACE/EYE DETECTION SETTING is set to FACE DETECTION ON,
- HDMI output is not available,
- audio from built-in and external microphones is not output to the connected device,
- images are not displayed in the LCD monitor, and
- the AF lamp will light if the battery is low; insert a spare battery if available.
- For more information on web conferencing, see the documentation
X-A7
Edit the items listed in the ![]() (MY MENU) tab, a personalized custom menu of frequently-used options (
(MY MENU) tab, a personalized custom menu of frequently-used options (![]() 4).
4).
X-A7
Frequently-used options can be added to “my menu” or the Q menu or assigned to the function button (Fn1) or touch function buttons (T.B. Fn1/T.B. Fn2) for direct access:
- My menu (P 4): Add frequently-used options to this custom menu, which can be viewed by pressing MENU/OK and selecting the E (“MY MENU”) tab.
- The Q menu: The Q menu is displayed by pressing the Q Use the Q menu to view or change the options selected for frequently-used menu items.
- The function button: Use the function (Fn1) button for direct access to selected
- Touch function buttons: Use the touch function buttons (B. Fn1/
Access a personalized menu of frequently-used options.
To display “my menu”, press MENU/OK in the shooting display and select the ![]() (MY MENU) tab.
(MY MENU) tab.
 The
The ![]() tab is only available if options have
tab is only available if options have
MY MENU.
MY MANU SETTING
To choose the items listed in the ![]() (MY MENU) tab:
(MY MENU) tab:
Highlight ![]() USER SETTING > MY MENU SETTING in the
USER SETTING > MY MENU SETTING in the ![]() (SET UP) tab and press MENU/OK.
(SET UP) tab and press MENU/OK. 
![]() To reorder items, select RANK ITEMS. To delete items, select REMOVE ITEMS.
To reorder items, select RANK ITEMS. To delete items, select REMOVE ITEMS.
Press the focus stick (focus lever) up or down to highlight ADD ITEMS and press MENU/OK. Options that can be added to “my menu” are highlighted in blue.

![]() Items currently in “my menu” are indicated by check marks.
Items currently in “my menu” are indicated by check marks.
Choose a position for the item and press MENU/OK. The item will be added to “my menu”.

Press MENU/OK to return to the edit display.
Repeat Steps 3 and 4 until all the desired items have been added.
![]() “My menu” can contain up to 16 items.
“My menu” can contain up to 16 items.
X-A7 Owner’s Manual: P 149, 198 instax PRINTER PRINT Ver. 1.20
Pinting Pictures
Pictures can be printed using optional instax SHARE and instax mini Link printers. The printer must first paired with the camera using D CONNECTION SETTING > instax PRINTER CONNECTION SETTING.
Instax SHARE Printers
- Turn the printer on.
- Select instax PRINTER PRINT in the playback menu, then highlight instax Wi-Fi CONNECTION and press MENU/OK.

- The camera will connect to the printer.

- Use the focus stick (focus lever) to display the picture you want to print, then press MENU/OK.

- Press DISP/BACK as needed to exit the menus and return to the shooting display.
 Pictures taken with other cameras cannot be printed.
- Pictures are cropped and printed at a size selected automatically by the printer, and consequently not all the picture appears in the printed copy.
- The displays may vary depending on the printer connected.
instax mini Link Printers
- Turn the printer on.
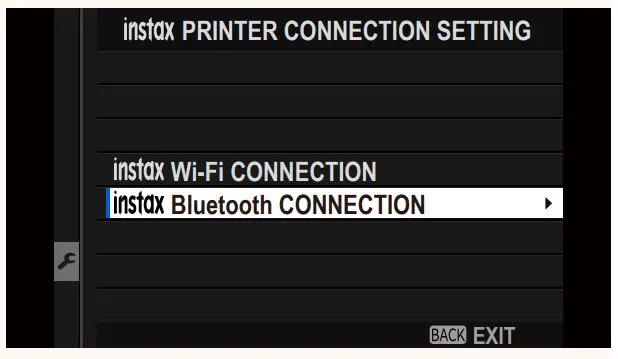
- Select instax PRINTER PRINT in the playback menu, then highlight instax Bluetooth CONNECTION andpress MENU/OK.

- The camera will connect to the printer.

- Use the focus stick (focus lever) to display the picture you want to print, then press MENU/OK.

Note :- Pictures taken with other cameras cannot be printed.
- Pictures are cropped and printed at a size selected automatically by the
- printer, and consequently not all the picture appears in the printed copy.
- The displays may vary depending on the printer connected.
- The picture will be sent to the printer and printing will start.
![]() The camera cannot connect to a smartphone while connected to an instax mini Link printer.
The camera cannot connect to a smartphone while connected to an instax mini Link printer.
X-A7 Owner’s Manual:
Adjust settings for connection to an optional instax SHARE or instax mini Link printer.
instax SHARE Printers
Select ![]() CONNECTION SETTING > instax PRINTER CONNECTION SETTING, then
CONNECTION SETTING > instax PRINTER CONNECTION SETTING, then
highlight instax Wi-Fi CONNECTION, press MENU/OK, and enter the instax SHARE printer SSID and password.

The Printer Name (SSID) and Password
The printer name (SSID) can be found on the bottom of the printer; the default password is “1111”. If you have already chosen a different password to print from a smartphone, enter that
password instead.

insta mini Link Printers
- Select
 CONNECT SETTING > instax PRINTER CONNECTION SETTING, then highlight instax Bluetooth CONNECTION and press MENU/OK.

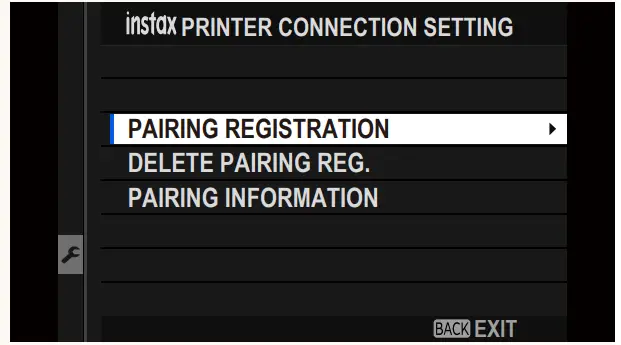
- Highlight PAIRING REGISTRATION, press MENU/OK, and then turn on the instax mini link printer on to initiate pairing.

- To delete pairing data for printers with which the camera is currently paired, select DELETE PAIRING REG.
- To view data for printers with which the camera is currently paired, select PAIRING INFORMATION.
- To complete the pairing process, press MENU/OK in the pairing
X-A7 Owner’s Manual:
Shoe-mounted flash units
- EF-X500: This clip-on flash unit has a Guide Number of 50/164 (ISO 100, m/ft.) and is powered by four AA batteries or an optional EF-BP1 battery pack.
- EF-BP1: A battery pack for shoe-mounted flash units. Takes up to 8 AA batteries.
- EF-42: This clip-on flash unit has a Guide Number of 42/137 (ISO 100, m/ft.) and supports manual and TTL flash control.
- EF-X20: This clip-on flash unit has a Guide Number of 20/65 (ISO 100, m/ft.) and supports manual and TTL flash control.
- EF-20: This clip-on flash unit has a Guide Number of 20/65 (ISO 100, m/ft.) and supports TTL flash control (manual flash control is not supported).
Grip belts - GB-001: Offers an enhanced grip.
instax SHARE printers - SP-1/SP-2/SP-3: Connect via wireless LAN to print pictures on instax film.
Smartphone printers - instax mini Link: When connected to a paired device via Bluetooth, this printer can be used to quickly and easily print pictures on instax film.
FUJIFILM Corporation
7-3, AKASAKA 9-CHOME, MINATO-KU, TOKYO 107-0052, JAPAN
https://fujifilm-x.com